How I Secure the Stratacore and Turn It Into Renewable Sand
I reach 100,000 Energy, go beneath the survey grid to secure the live Stratacore, then bring the Fluxbound Stratacore home for renewable Sand.
Updated:
Quick Answer
My Stratacore route is:
reach 100,000 Energy → open the Tech Tree and take the next factory tier → get the Secure the Stratacore objective → go beneath the survey grid → find the live Earth Strataform → limit its growth with existing Sand or a simple enclosure → damage the live core until it is neutralized → clear the expansion lock → receive the Fluxbound Stratacore → bring it back to a controlled factory area for renewable Sand
I do not wait for the Void Gun before completing the first Stratacore objective. Rockets worked for me.
I only return with the Void Gun later when I care about getting substantially more Sand from the captured Stratacore.
The Stratacore is one of the easiest late-game objectives to overcomplicate because it looks like three different problems at once.
I have just finished a large Energy push.
The game suddenly tells me further expansion is blocked.
Then I find a living structure underground that grows toward me.
My first instinct was to think I needed another research purchase before I could deal with it.
I did not.
The useful way to read this stage is much simpler:
100,000 Energy opens the next gate.
The live Strataform is the gate I must clear.
The Fluxbound Stratacore is the useful resource I keep afterward.
Once I separate those three jobs, I know when to build, when to leave the factory, and when to come back later.
I Stop Expanding Power Once 100,000 Energy Has Done Its Job
Before the Stratacore objective appears, my real target is still the 100,000 Energy peak.
I do not try to solve that requirement inside this section of the factory.
If I am still below the target, I go back to my Energy and Steam Turbine setup and fix storage, generation, Steam recycling, or whatever is keeping the Energy total from reaching the gate.
The important decision happens after I have already crossed 100,000.
At that point I stop treating more Power Bricks or another Steam Turbine as automatic progression.
I open the Tech Tree.
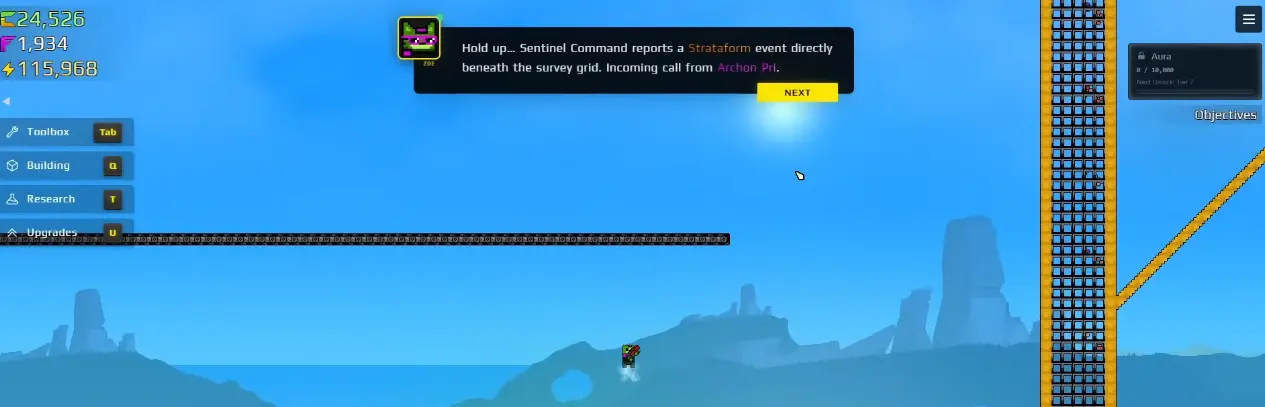
The message is specific.
A Strataform event has appeared directly beneath the survey grid.
While it remains active, further expansion is blocked.
The objective is:
Secure the Stratacore.
That tells me my next job is no longer another factory expansion.
It is an underground trip.
I Go Down Instead of Searching the Whole Map
The wording directly beneath the survey grid changes how I search.
I do not start flying across the surface looking for a distant landmark.
I go underground beneath the factory area and keep opening a route downward.
That is the first path decision that saves me time here:
factory → beneath the survey grid → deeper underground → active Strataform growth → live core.
I still collect something valuable if it is directly on my route.
But I do not turn this into a general mining trip.
If I start following Copper pockets, Red Sand, or unrelated caves farther and farther away, I am delaying the only thing that can clear the expansion lock.
The objective is not asking me to stockpile another resource.
It is asking me to find the active core.
I Read the Growing Earth Strataform as the Thing I Need to Control
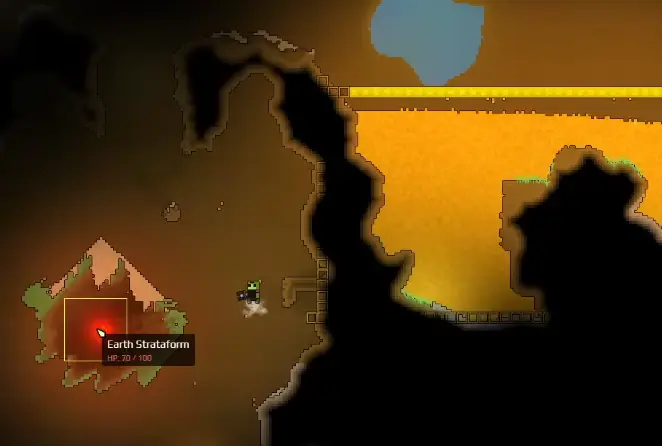
When I reach the live event, the Earth Strataform is not a passive object sitting in an empty room.
It has HP.
It grows.
And it can keep filling the space around the approach.
That is where I stop treating every new block as something I need to mine individually.
What I actually need is a stable line of access to the core.
In my run, the useful observation was that the Strataform could not grow through existing Sand.
A simple wall enclosure can also keep the active area easier to read.
So when the growth starts making the approach messy, I do not race it by destroying everything around me.
I use the terrain I already have and keep the opening small enough that I can still attack the target.
Sand Is Useful Here Because the Strataform Cannot Grow Through It
This interaction is more useful than it first looks.
Where I already had Sand, the Strataform stopped spreading through that space.
That gave me a cheap way to control the event without turning the whole cave into another construction project.
My practical sequence is:
open only enough space to reach the active growth → leave useful Sand boundaries intact → add a simple enclosure if the growth is spreading into the approach → keep one clear firing line to the live core.
I do not clear every nearby Sand block just because I have a stronger mining tool.
At this moment, some of that Sand is helping me.
That is a different decision from normal mining, where Sand is usually something I want to remove and send home.
Here, I keep it when it is acting as a boundary.
I Do Not Wait for the Void Gun to Secure the First Stratacore
The first Stratacore event does not require me to postpone progression until I have the Void Gun.
I used rockets on the live Strataform and completed the neutralization.
That distinction saves me from a bad research detour.
If my current question is:
How do I clear the Secure the Stratacore objective?
I use the tools that already work on the live core.
I do not leave the objective active just because I know a stronger late-game Sand-harvesting option exists later.
The Void Gun matters to me afterward, when I am deciding how efficiently I want to harvest the captured Stratacore.
It is not the prerequisite I wait for here.
I Know the Gate Is Finished When Expansion Is Cleared
I do not use “the growth stopped moving” as my completion signal.
I wait for the actual progression confirmation.
After neutralizing the live core, I get three important results:
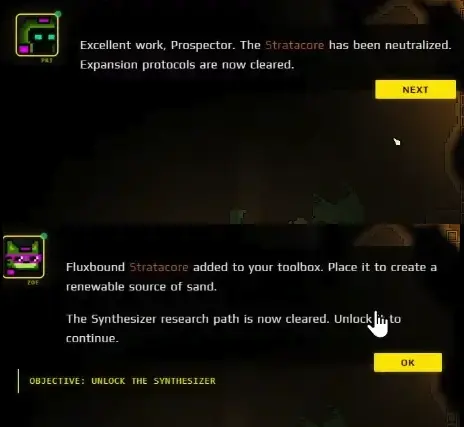
the Stratacore is neutralized
→ expansion protocols are cleared
→ a Fluxbound Stratacore is added to the toolbox.
The next research path also opens.
This is also when I stop spending time in the event chamber.
I have already earned the permanent value from it.
The next production system starts elsewhere.
When I am ready to continue into the Synthesizer and Aura chain, I move to my Aura Extraction setup instead of rebuilding that production sequence here.
I Bring the Fluxbound Stratacore Home Before I Build Around It
The reward is more useful than a one-time progression flag.
The Fluxbound Stratacore can be placed to create a renewable source of Sand.
I do not drop it into the middle of an already crowded factory just to see what happens.
I first choose a place where outward Sand growth is not going to interfere with another machine.
My first useful setup was deliberately simple:
open contained area → Fluxbound Stratacore inside → Sand has room to grow → filtered exit or collection route nearby.
The reason I build the space first is the same reason I contain a resource-producing critter before releasing it.
Renewable input is only useful when I already know where that input is allowed to go.
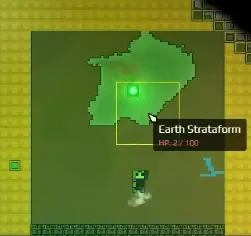
The Sand Growth I Tested Had 100 HP
Once the captured Stratacore is placed, it does not behave like a machine that drops neat Sand items onto a belt.
It grows Sand.
In my test, the growth I was shooting showed 100 HP.
That matters because it explains why this source can feel underwhelming if I expect instant bulk input.
I can stand there and shoot the growth.
I will get Sand.
But the rate is not automatically better than going out and mining a good natural deposit.
That is why I do not rebuild my entire early factory around the Stratacore the moment I unlock it.
I first decide what job I actually want it to do.
If I only need a renewable background source, slow harvesting is fine.
If I need a large Sand burst right now, I compare it against normal mining before investing more time into the setup.
I Use Digger Drones for Background Harvesting, Not Because They Are Fast
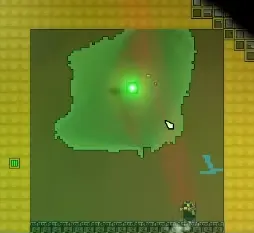
Digger Drones can attack the placed Stratacore and gradually harvest Sand.
That gives me a hands-off option.
It does not mean I suddenly have a high-throughput Sand mine.
When I tested Digger Drones on it, the output was slow enough that I could still do much better by mining the world when I needed a large amount quickly.
This gives me a clean decision.
Factory already has enough Sand → let the drones work in the background.
Factory is slowly draining Sand but not stalled → the renewable source is doing a useful job.
Factory is empty and waiting on Sand → I do not sit beside slow drones hoping they catch up.
I go mine, or I come back with a stronger harvesting tool.
I Return With the Void Gun When I Want More Sand From the Same Core
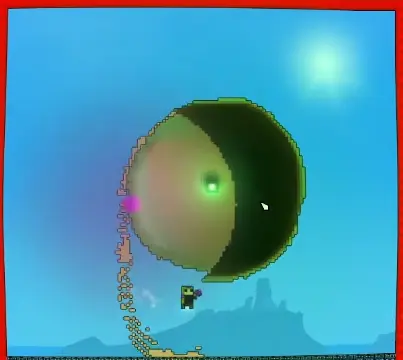
Later, the same Stratacore becomes much more attractive once I have the Void Gun supplied.
When I compared it with the slow Digger Drone setup, the Void Gun gave me noticeably more Sand from the Stratacore.
That is when the Stratacore changes from:
nice renewable backup
to:
a place I deliberately return to when I need Sand.
I still do not stand there firing the Void Gun without checking the rest of the factory.
The Gun uses Void Juice, so I make sure that resource loop is ready before I turn a Sand problem into a Void Juice problem.
If my Juice supply or Husk recycling is the real limit, I fix that in my Void Husk and Void Juice setup before using the Stratacore as a major Sand source.
I Do Not Build Around the Stratacore Until I Know Which Job I Need
The captured Stratacore can tempt me into overbuilding because “renewable Sand” sounds like something every factory should immediately revolve around.
I wait.
There are three different situations.
If my old Sand route is still keeping the factory full, I place the Stratacore somewhere safe and let it remain optional.
If Sand is slowly becoming a repeated input problem, I add a contained collection area and let Digger Drones work while I do something else.
If Sand is actively stopping production and I already have the Void Gun loop ready, I return and harvest the Stratacore aggressively.
Those are different investments.
I do not build the biggest version first.
I let the shortage tell me how much infrastructure the resource deserves.
My Stratacore Troubleshooting Order
If 100,000 Energy is not reached:
I stay with the power system.
The Stratacore is not my current problem yet.
If 100,000 Energy is complete but nothing new is happening:
I open the Tech Tree and make sure I actually took the next tier.
If Secure the Stratacore is active:
I go beneath the survey grid instead of continuing to expand the factory.
If I find the live Strataform but the approach keeps filling in:
I stop over-clearing the cave, use existing Sand as a boundary, and keep a small controlled opening to the core.
If I can damage the core:
I keep attacking it until I get the neutralization and expansion-cleared confirmation.
If the core is neutralized but I am still standing underground:
I leave.
The progression job is finished.
If the placed Fluxbound Stratacore is producing too little Sand:
I decide whether I actually need passive production or immediate throughput.
Digger Drones are fine for background collection.
World mining is still a reasonable answer when I need Sand quickly.
The Void Gun is the upgrade that makes me return when I want substantially more from the same renewable source.
The important part is that I never solve all of these states with the same response.
I do not add power after the Energy gate is already complete.
I do not keep exploring sideways after the objective tells me to go beneath the survey grid.
I do not wait for the Void Gun before securing the first live core.
And I do not assume a renewable Sand source must replace every other mining method the moment I unlock it.
That is what makes the Stratacore useful instead of turning it into another late-game distraction.