How I Automate Flowers Instead of Wetting Seeds by Hand
I automate Wet Seeds, Planter Boxes, and flower burning, then fix the real bottleneck until the line can push the 4,000-Flower Tier 4 target.
Updated:
Quick Answer
When flower production becomes my next progression gate, I stop wetting Seeds manually and build one continuous line:
Seeds from the Kinetic Press
→ automatic seed-wetting line
→ Wet Seeds
→ Wet Seed buffer
→ Planter Boxes grow Flowers
→ Pyro Dispenser clears mature Flowers
→ Gold and Amethelis leave through separate output routes
The progression target I am building toward is 4,000 Flowers for Factory Tier 4.
The Pyro Dispenser costs 2,000 Gold.
If Wet Seeds are already piling up, I do not keep expanding the wetting side. I spend my time or Gold on the stage that is actually stopping the 4,000-Flower counter from moving.
Flowers were the first Sandustry production stage where having a huge amount of input made it very easy for me to solve the wrong problem.
By this point I already had Seeds.
A lot of them.
That did not mean I had a working flower farm.
The actual route is:
produce Seeds
→ wet them reliably
→ store the Wet Seeds somewhere controlled
→ feed Planter Boxes
→ grow Flowers
→ clear the mature Flowers
→ move Gold and Amethelis out fast enough for the next cycle.
Once I started judging those as separate stages, I stopped responding to every slowdown by adding more Planter Boxes.
I Build for the 4,000-Flower Gate, Not for One Successful Flower
Growing one Flower proves that the mechanic works.
Tier 4 asks for something much larger.
My progression target is:
4,000 Flowers.
That changes what I need from the system.
I am no longer trying to manually complete one good cycle.
I need a line that can keep using Seeds while I am:
- somewhere else in the factory
- mining
- exploring
- or fixing another bottleneck
So before I open the full Seed flow, I ask whether the downstream system is actually ready.
Do I have Water?
Do I have the Planter Box?
Can I handle Wet Seeds?
Can I clear mature Flowers?
Can the output leave?
If not, I keep the unused Seeds stored instead of creating a huge prepared-material backlog too early.
The Planter Box Becomes a Priority Once Flowers Are the Gate
Once the flower stage is clearly blocking progression, the Planter Box stops being another optional research unlock.
It is the destination for my Wet Seeds.
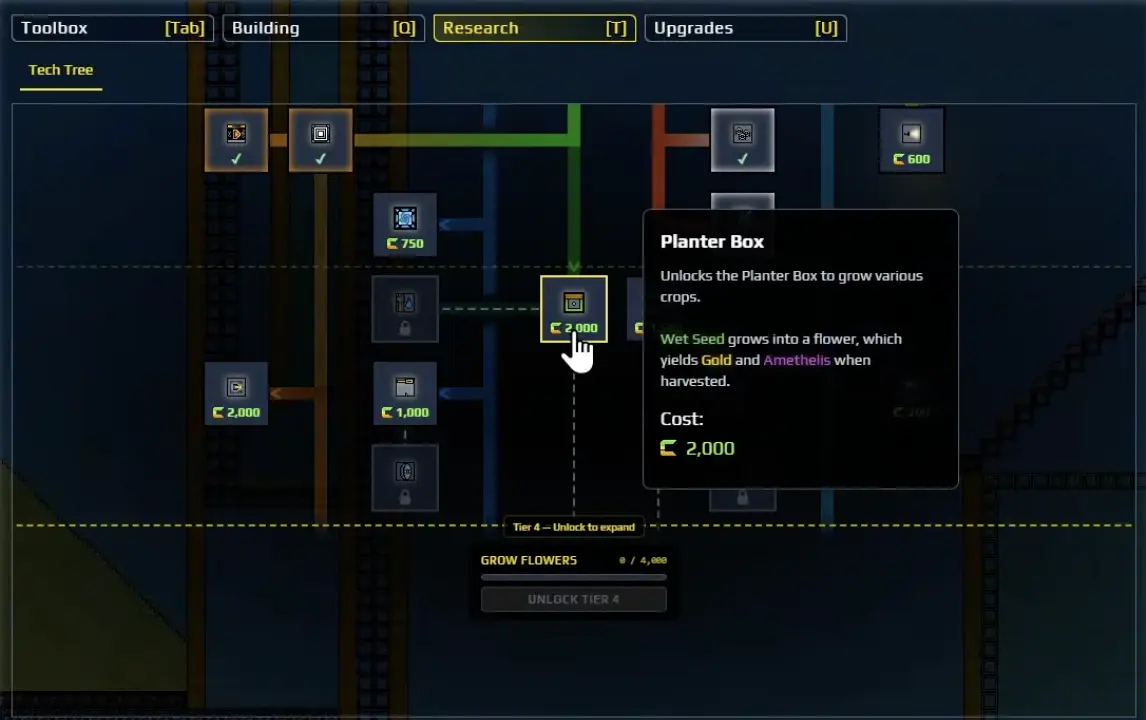
I do not immediately cover a wall with Planters.
One working section gives me much more useful information.
I need to prove:
Wet Seeds can reach the growing area
→ Flowers can complete the growth step
→ mature Flowers can be cleared
→ the resulting materials can leave.
Until that full loop works, more Planters only reproduce the same failure across a larger area.
I Automate Wet Seeds Instead of Preparing Them by Hand
The Seeds already coming from my early factory give me a natural input.
I send those Seeds into a dedicated wetting section.
The important distinction is:
Seed
versus:
Wet Seed.
I keep the incoming dry Seeds and outgoing Wet Seeds on clear routes.
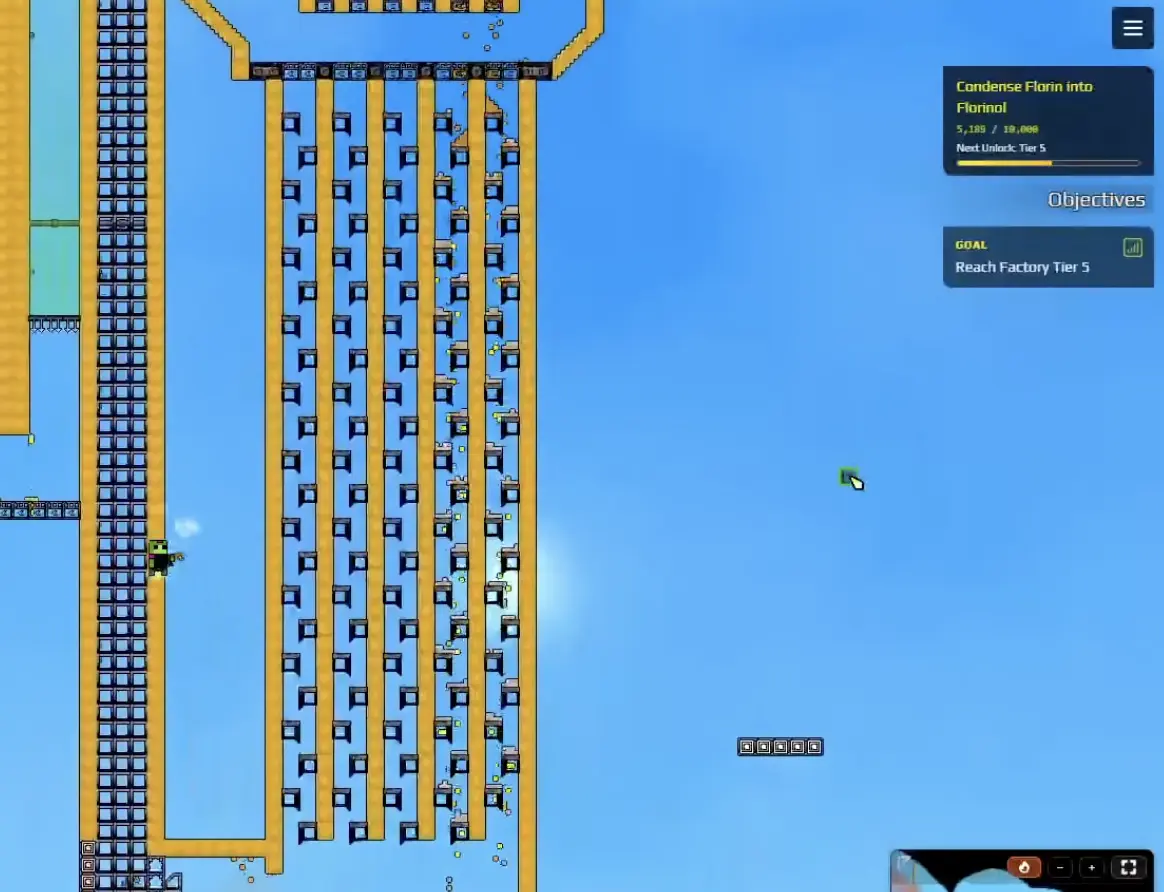
The wetting side needs reliable Water, but I do not rebuild the plumbing system inside this guide.
I branch the flower line from the working network in my Pipes, Pumps, and Water guide.
That gives me a clean troubleshooting split.
No Water reaches the wetting section
→ Water problem.
Water is present but Seeds are not moving correctly
→ material-routing problem.
Wet Seeds are already piling up
→ the wetting system works and something downstream is slower.
That last case is the one I watch most carefully.
I Keep a Wet Seed Buffer Instead of Forcing Every Stage to Run at Once
My wetting system can be ready before the full flower burner is.
I am fine with that.
I give Wet Seeds a dedicated place to wait.
That lets me keep preparing input without dropping it into unfinished Planter and burning sections.
The buffer also tells me something useful.
If Wet Seeds keep accumulating:
I already have enough prepared input.
I do not need to improve the wetting section.
I need to look farther down the chain.
The only thing I insist on is a clear exit from the buffer when the Planter section becomes ready.
I do not want prepared Seeds disappearing into a generic storage pile that I later have to dig apart.
When Wet Seeds Are Waiting, 2,000 Gold Can Be the Real Bottleneck
This was one of the clearest examples of solving the wrong problem in my factory.
I already had:
Seeds
and:
Wet Seeds
and:
storage.
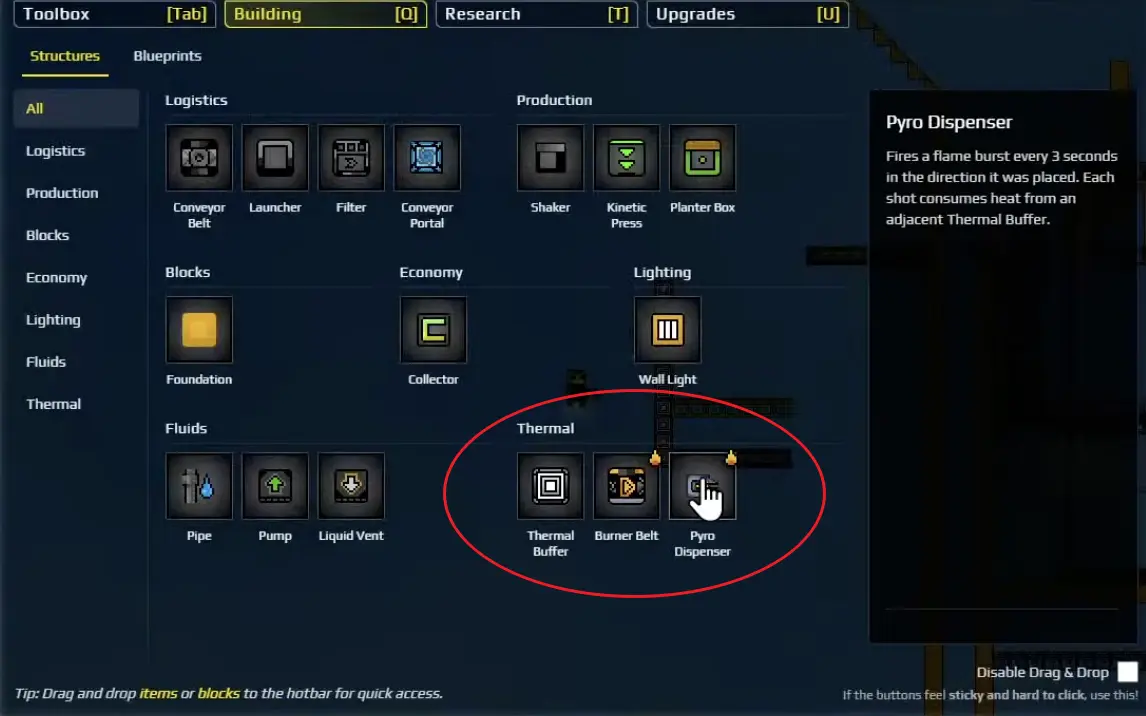
But the automated flower-clearing setup I wanted still depended on the Pyro Dispenser.
The research costs:
2,000 Gold.
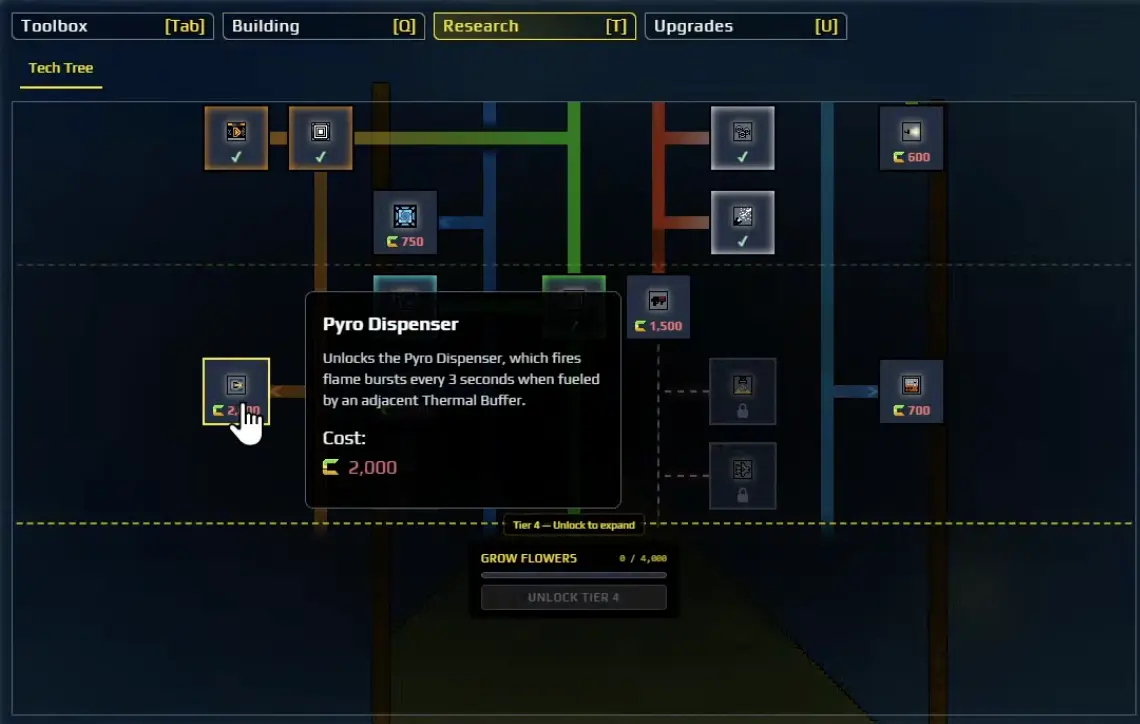
At that point, expanding the Seed line is wasted effort.
The input already exists.
What I need is Gold.
So I go back to the part of the factory that can earn the missing currency.
The rule I keep is:
When the next machine is the gate, I earn the machine instead of scaling material that is already backed up.
I did make one deliberate exception.
At one point I bought the Gun before the Pyro Dispenser because exploration itself was limiting the resources and routes I could reach.
That delayed flower automation.
I was fine with it.
I do not follow a rigid research order when another purchase removes the bigger immediate blocker.
The Pyro Dispenser Belongs to the Flower-Clearing Side
I keep the flower line mentally split into two halves.
The preparation and growth side is:
Seed
→ Water
→ Wet Seed
→ Planter Box
→ Flower.
The Pyro Dispenser belongs after that.
Its job in my automated setup is to clear the mature Flowers so the cycle can continue and the useful output can leave.
That distinction gives me four very different failure states.
Not enough Wet Seeds
→ inspect the wetting line.
Wet Seeds arrive but the growing section stalls
→ inspect the Planters.
Mature Flowers are sitting without clearing
→ inspect the Pyro side.
Flowers clear but material remains trapped underneath
→ inspect output.
I do not try to fix all four with another Planter.
I Build One Small Flower Burner Before I Scale
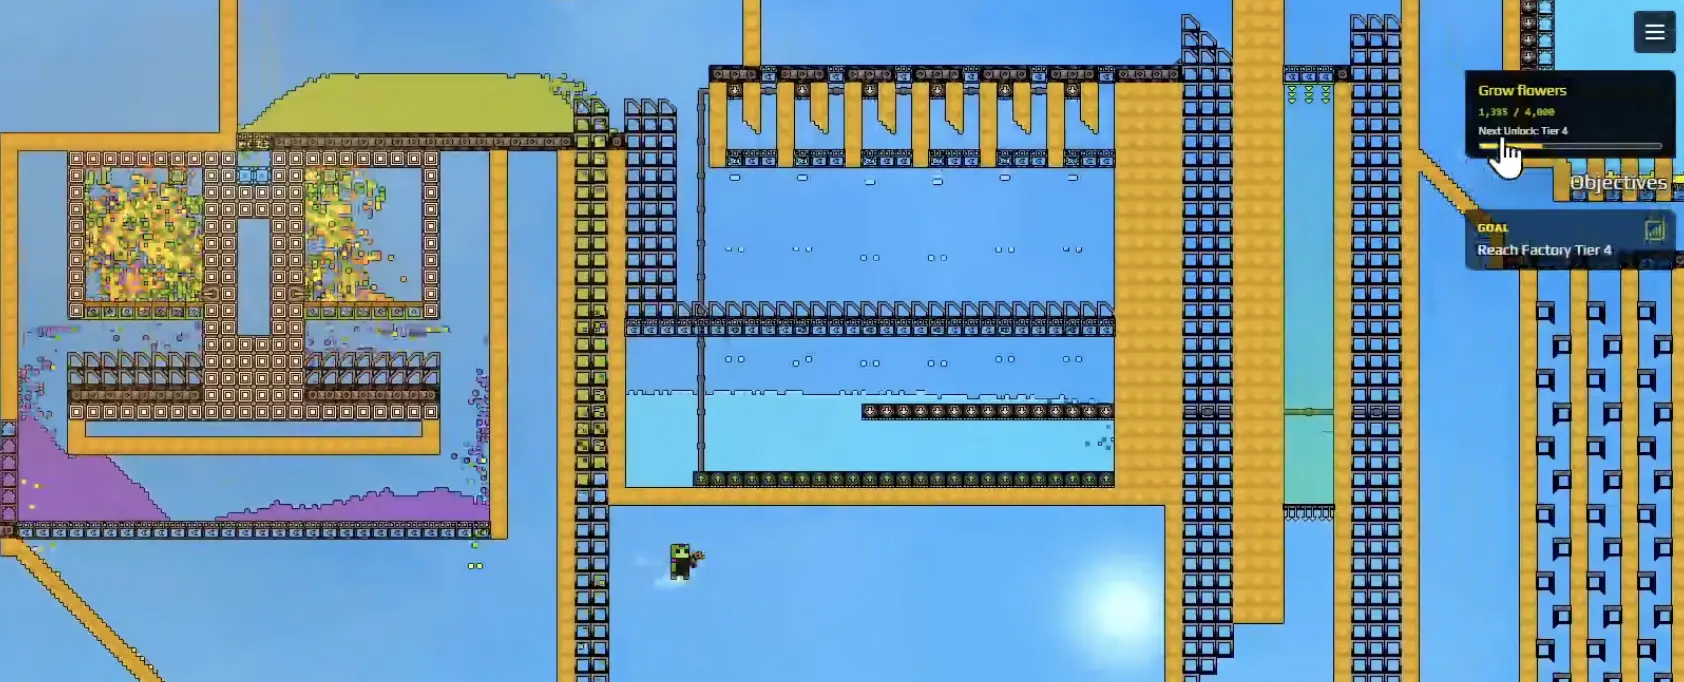
The first useful flower burner I build is compact enough that I can understand it from one screen.
My working layout is based around:
Wet Seed input
→ Planter Boxes
→ Pyro Dispenser
→ Thermal Buffers
→ output route below.
I care less about copying the exact geometry than about keeping each job visible.
If Wet Seeds stop before the Planters, I can see it.
If mature Flowers remain in place, I can see it.
If output is building up underneath, I can see it.
That is much easier to debug than a large farm built before I understand the first module.
I Build the Output Route Before I Release the Wet Seed Backlog
I put the collection route under the growing section before I open the full Wet Seed supply.
Once the Flowers begin cycling, useful material starts coming out.
I do not want to be deciding where it should go while it is already falling into the floor of the factory.
I separate the two outputs I care about:
Gold
→ send toward the economy/storage side.
Amethelis
→ send to its own clean route or storage.
I do not continue the Amethelis chemistry here.
Once Amethelis leaves this system cleanly, this page has done its job.
Its later conversion into Florin and Florinol belongs in my Florin and Florinol guide.
Thermal Buffers Help Me Keep the Burning Section Stable
The Pyro side needs heat.
I do not want every useful bit of heat disappearing immediately, so I use Thermal Buffers around the hot section.
The important word for me is:
enough.
I do not fill every possible tile with heat storage.
If the burner already keeps cycling without manual rescue, more Thermal Buffers are not automatically useful.
At that point I look at the next bottleneck.
I Use Conveyor Portals Only When the Layout Actually Needs Them
The flower burner can become physically awkward.
I want heat infrastructure around the Pyro section.
I also need Wet Seeds entering and output leaving.
Sometimes those routes want the same space.
That is where Conveyor Portals can help.
They let me move material across the flower section without cutting an ugly path through the heat layout.
I do not treat them as mandatory.
If a normal belt gives me a clean route, I use the normal belt.
I use the Portal when it makes the production states easier to see and prevents the heat section from turning into a routing mess.
I Test One Small Batch Before Releasing Everything
I never dump the whole Wet Seed buffer into a brand-new flower setup.
I release a small batch first.
I want to watch:
Wet Seeds enter
→ Flowers grow
→ the Pyro section clears them
→ Gold and Amethelis leave.
Only after that full loop works do I open the larger input supply.
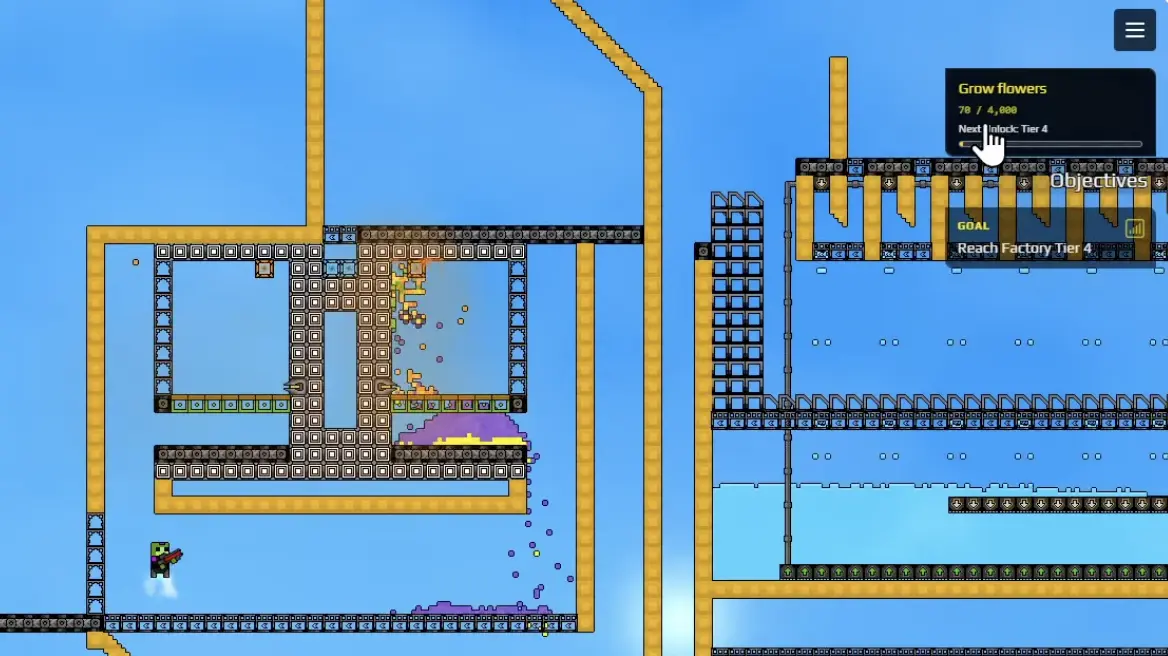
My First Working Line Reached 68 Flowers
The first clear checkpoint I got from the completed setup was:
68 Flowers grown.
At the same time, Gold and Amethelis were already coming out.
That number mattered because it proved the progression counter was actually moving through the automated system.
It did not mean I immediately needed to duplicate the farm.
I let the existing section keep running.
Later, the same basic setup had pushed the counter to roughly:
500 Flowers.
That was more useful evidence than the first 68.
A single successful batch can hide a fragile design.
Reaching roughly 500 without rebuilding the entire section told me the line could sustain production once the routing was correct.
My question changed from:
How many more Planters can I fit?
to:
Is the current farm still moving toward 4,000 fast enough?
If yes, I leave it alone.
If Progress Slows, I Check the Exit Before Adding Planters
One slowdown I hit was not caused by too little growing capacity.
The output simply was not leaving quickly enough.
If I add another Planter to a congested exit, I make the problem worse.
So before scaling the farm I inspect:
- whether output has a clean route away
- whether Gold is being separated correctly
- whether Amethelis has somewhere to go
- whether a Filter is blocking the wrong material
- whether a Conveyor Portal points where I expect
- whether I need a Launcher to clear the route faster
Once I fix output throughput, the existing growing section can become faster without adding a single Planter.
That is why I separate:
flower-growing capacity
from:
flower-output capacity.
I Only Scale When the Existing Farm Is Truly Too Slow for 4,000
The final Tier 4 target is large enough that I still care about throughput.
But I do not automatically interpret “4,000 is a big number” as “build the biggest farm possible.”
I watch what the current system is doing.
If:
Wet Seeds are always available
and:
the Planters keep cycling
and:
Flowers clear automatically
and:
output leaves cleanly
but the counter still moves too slowly for the pace I want,
then I have evidence that I need more flower capacity.
That is when I duplicate or expand the working section.
Not before.
If one of those four conditions is false, I fix that bottleneck first.
I Stop Expanding Once the Line Can Reach Tier 4 Without Me
The goal is not to make flowers the centerpiece of the whole factory.
The goal is to build a system capable of reaching:
4,000 Flowers
without me manually feeding and clearing every cycle.
Once the line can do that, I go work on other problems and let it run.
Eventually the flower requirement completes and Factory Tier 4 becomes available.
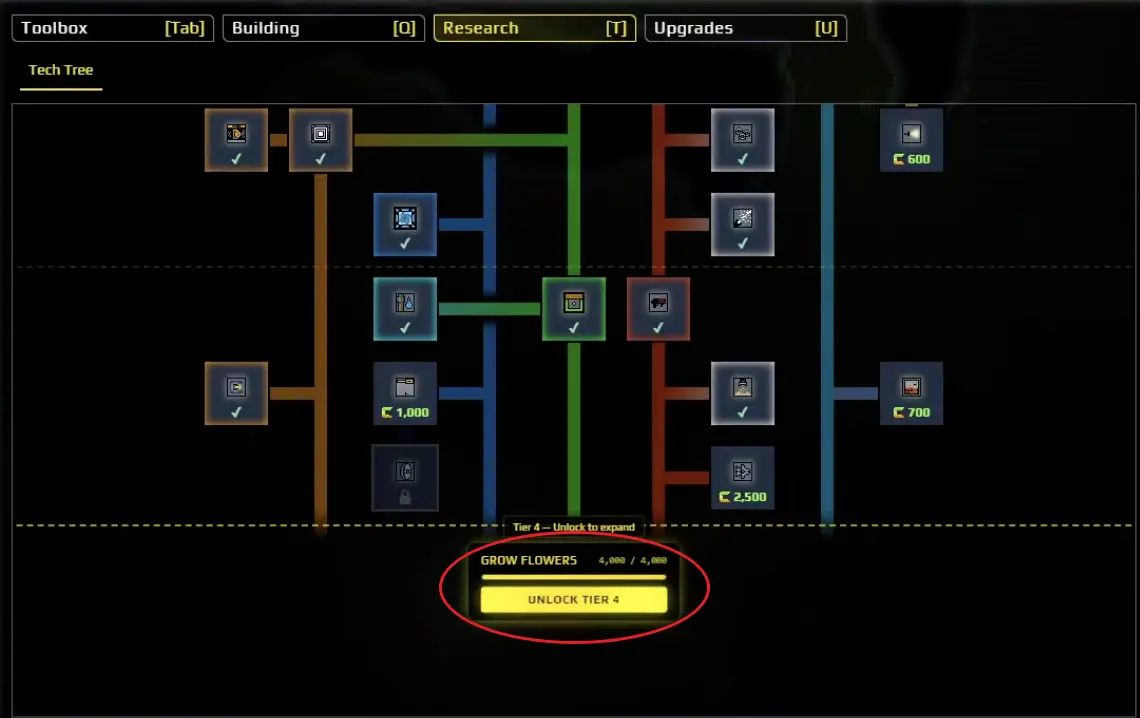
That is my stopping point.
The Amethelis output remains useful after Tier 4.
The Wet Seed farm remains useful.
The Gold remains useful.
But I no longer treat “make the flower section bigger” as the default next move.
The Flower Route I Keep in My Head
My working order is:
save the Seeds until the downstream system is ready
→ unlock the Planter Box
→ connect the flower section to reliable Water
→ automate Seed → Wet Seed
→ buffer the Wet Seeds
→ save 2,000 Gold for the Pyro Dispenser
→ build one compact flower burner
→ prepare Gold and Amethelis output routes
→ test one full batch
→ watch the counter move from a working small setup
→ fix output before adding more Planters
→ scale only if the working farm is genuinely too slow
→ reach 4,000 Flowers and open Tier 4.
The mistake I avoid is assuming that more input or more Planters automatically means faster progression.
I look for the first stage that cannot keep up.
That is the one I change.