How I Build Batteries and Steam Turbines Without Losing Water
I turn Copper into Power Bricks, connect Florinol and Steam power, recycle depleted Steam, and scale only after one turbine cell works.
Updated:
Quick Answer
Once Tier 5 makes 100,000 Energy my next progression target, I build the electrical side in this order:
produce Florinol
→ get Copper
→ Smelter: Copper → Liquid Copper
→ fill a Copper Mold
→ Copper Mold becomes a Power Brick
→ charge Power Bricks from a Florinol Battery with an Energy Siphon or from a Steam Turbine
→ connect the power setup
→ recycle depleted Steam instead of venting it into the sky
The Steam Turbine trap is Water loss.
Steam that passes through a Turbine becomes depleted Steam. If I let it escape upward, it disappears instead of returning as rain.
For a sustained setup, I condense it back into Water and send that Water through the heat loop again.
Once I have actually reached 100,000 Energy, I stop expanding power just for progression and check the Tech Tree for the next objective.
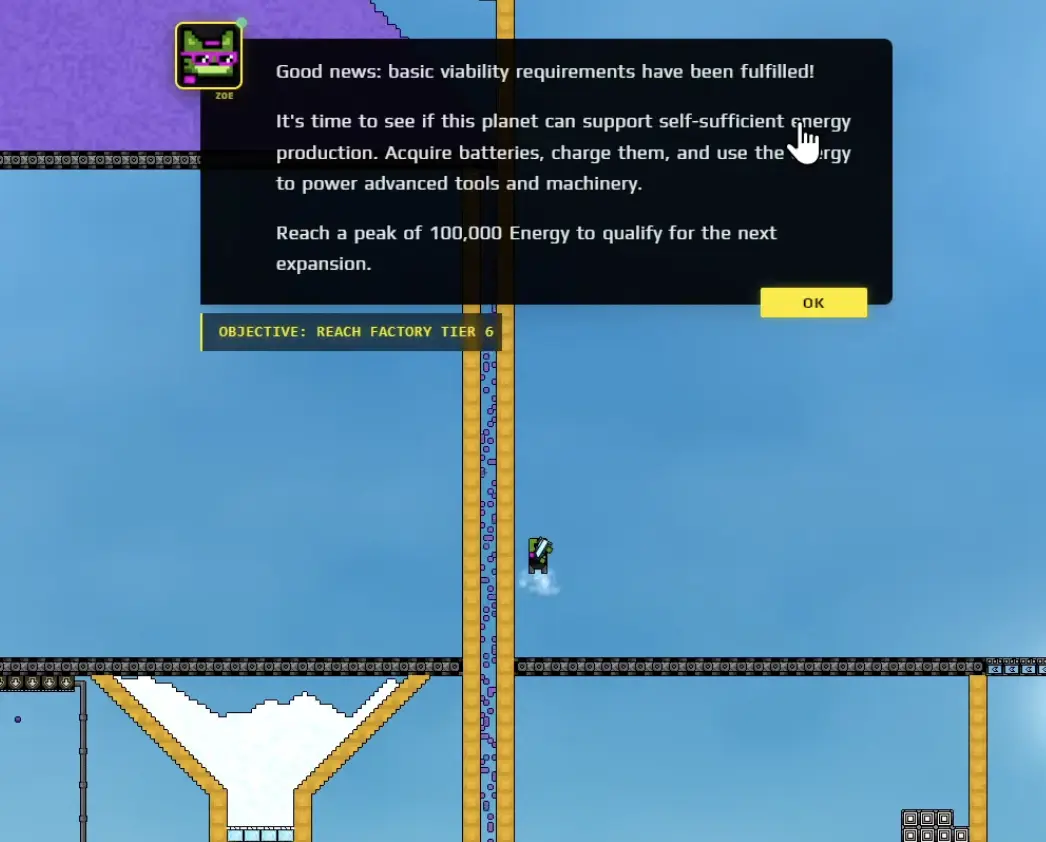
Tier 5 is where I stop treating Energy as something I only need in short bursts for a tool.
The progression target jumps to:
reach a peak of 100,000 Energy.
That changes how I spend.
Before this point, another convenience research node can look tempting.
Once the 100,000 target appears, I care much more about the pieces that let me:
store Energy
→ move Energy
→ generate Energy continuously.
I already want Florinol production stable before reaching this point. The complete Amethelis → Florin → Florinol conversion stays in my Florin and Florinol guide.
Once Florinol is stable, I stop troubleshooting the chemistry chain and focus on storage, generation, connections, and Steam recycling.
I Do Not Build a Giant Battery Before I Understand the Power Brick
The Copper battery setup looked much more complicated to me until I understood what the actual storage block was.
I start with Copper.
Copper goes through a Smelter and becomes Liquid Copper.
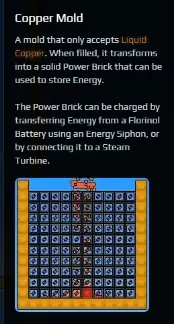
Then the important building is the Copper Mold.
The Copper Mold:
only accepts Liquid Copper
and, once filled:
transforms into a solid Power Brick.
That distinction is useful when nothing seems to charge.
If the Mold is still waiting for Copper, I do not troubleshoot the Steam Turbine.
I first ask:
Is Copper reaching the Smelter?
→ Is Liquid Copper coming out?
→ Is the Liquid Copper actually entering the Mold?
→ Has the Mold finished turning into a Power Brick?
Only after that do I have a storage block that belongs in the Energy system.
I Smelt Copper Near the Battery When the Route Is Long
Copper can come from well below the main factory.
I do not automatically drag Liquid Copper across half the map just because that is technically possible.
In one larger setup, I brought the solid Copper toward the intended battery area and smelted it near the Molds.
That gave me a clearer split:
long material route
→ Copper
short liquid route
→ Liquid Copper into Copper Molds.
I prefer that when the battery bank is far away from where Copper first enters the factory.
It also means that if I see Copper arriving but the Power Bricks are not forming, the problem is contained in a small section:
Smelter → Liquid Copper → Mold.
I do not need to inspect the entire factory.
I Fill One Power Brick Before I Scale the Battery Bank
It is very easy to draw a huge battery wall immediately.
I avoid that.
My first goal is to get one complete Power Brick section working.
I want to see:
Copper arrives
→ Smelter produces Liquid Copper
→ Mold fills
→ Power Brick forms
→ Energy can enter it.
Only then do I repeat the design.

If one cell fails, I have one failure to inspect instead of thirty copies of the same mistake.
A Power Brick Has Two Useful Charging Routes
Once a Copper Mold has become a Power Brick, I have two main ways to feed Energy into it.
The first route is:
Florinol Battery
→ Energy Siphon
→ Power Brick.
The second is:
Steam Turbine
→ Power Brick.
I use Florinol to prove that storage works, then add Steam generation when I need sustained output toward 100,000 Energy.
I Buy Electrical Research When It Solves the Active Problem
Once my Power Bricks are ready and I am serious about scaling Energy, the research I care about is:
Steam Turbine
Energy Siphon
Energy Connector.
I do not buy those just because Tier 5 made the icons visible.
I buy them when:
- I have somewhere to store Energy
- Florinol is already available
- Copper processing is working
- and the active objective is asking me to increase Energy
If I still cannot make Florinol or Power Bricks, I fix that first instead of spending Gold on electrical pieces with nowhere useful to connect.
The Steam Turbine Works, but Open-Air Steam Costs Me Water
The Steam Turbine itself is simple in principle:
Steam passes through the Turbine
→ Energy is generated.
The Turbine then needs to feed that Energy into storage.
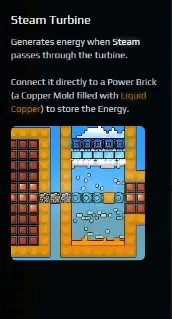
After crossing the Turbine, Steam becomes depleted Steam.
If I let it travel upward into open sky, it does not return as rain. It disappears, so a generator can look healthy while every cycle slowly removes Water from the factory.
For a tiny temporary generator, I can accept some inefficiency.
For a system I expect to push toward 100,000 Energy, I do not want to keep refilling Water manually.
That is when I close the loop.
I Prove One Closed Steam Cell Before I Copy It
The useful cycle is:
Water
→ heat it with Lava
→ Steam
→ Steam Turbine
→ depleted Steam
→ Condenser
→ Water
→ back through the heat section.
The Condenser is what closes the loop.
I also use a Snow Maker to keep the Condenser operating.
The Snow Maker itself consumes some Water and Energy, so this is not free power. The value is reclaiming the main Water flow instead of throwing depleted Steam into the sky.
I build one small cell where I can see the whole route, then connect the Turbine to the Power Brick side.
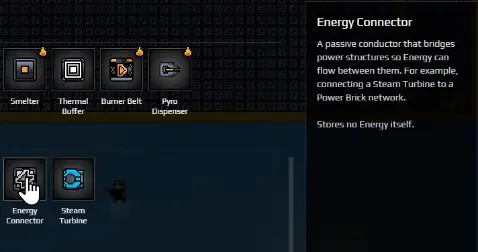
The Energy Connector matters because the generator and storage need to belong to the same useful system.
A Turbine can be visibly running and still fail to solve my Energy problem if the power side is not connected correctly. I only copy the cell after that connection works.
If Depleted Steam Does Not Recycle, I Trace the Return Path
A Steam cell can look almost finished while still wasting Water.
The Lava can be there.
Water can be there.
Steam can cross the Turbine.
And the design can still fail because the depleted Steam is not actually reaching a working Condenser.
When that happens, I do not add another Turbine.
I trace the return side.
I check:
Is the Snow Maker operating?
→ Is Snow reaching the Condenser?
→ Is depleted Steam reaching the active Condenser area?
→ Does the recovered Water have a path downward?
At one point depleted Steam was simply sitting in the cell. The idea was right; the geometry was wrong. I adjusted the return path until it actually moved through the Condenser.
The checkpoint I care about is not:
I placed every required building.
It is:
Water came back.
Once the layout is right, I can watch Steam cross the Turbine, reach the Condenser, return as Water, and fall back into the heated area while Energy moves toward storage.
That is when I stop redesigning the basic cell and treat further expansion as a capacity problem.
I Keep Lava and Water From Mixing Outside the Intended Cell
There is another reason I keep the Steam setup compact.
Loose Lava and Water are extremely annoying when they reach the wrong part of the factory.
If Lava escapes into the main Water area, I can turn a small turbine mistake into a much larger cleanup problem.
So I do not casually open the Steam cell while fluids are moving.
If I need to move something, I first think about where:
- Lava can fall
- Water can escape
- Steam can expand
before deleting the wall that currently contains them.
If the basic Water supply itself is unstable, I fix that in my Pipes, Pumps, and Water guide before blaming the Turbine.
I Scale After One Cell Can Recharge the Battery
A single correct Steam cell already gives me a much better baseline than a large broken plant.
Once the loop was working and additional Turbines were online, the stored electricity had climbed to nearly 50,000.

Against the 100,000-Energy target, that is a useful halfway checkpoint. My next question is not:
Do I need a completely different power system?
It is:
Can I expand the working system without starving it of Copper, Water, heat, or storage?
High-Power Tools Show Me Why Storage Still Matters
The 100,000 target is not just a decorative number.
Electricity can disappear very quickly once I start using the expensive tools that this stage unlocks.
In one mining run, the Laser burned through around 10,000 electricity extremely quickly.
A storage total that looks enormous beside the factory can feel small once I start spending it underground.
I therefore separate two goals:
progression storage
→ reach the required Energy peak
and:
usable reserve
→ have enough Energy left that tools do not shut the whole system down after a short burst.
I may still improve recharge after touching the target, but now I am solving tool usage rather than a higher progression requirement.
I Scale Storage and Generation for Different Reasons
When the Energy number is low, I do not automatically add both more Power Bricks and more Turbines.
I look at what the current system is doing.
If the Power Bricks fill completely while the Turbines still have capacity to generate more:
→ I need more storage.
If I have a large bank of empty Power Bricks:
→ more storage is not the problem.
→ I need more generation.
If Steam production is weak:
→ I inspect heat and Water.
If Steam is plentiful but depleted Steam disappears:
→ I fix recycling.
If the Turbines are working but stored Energy stays flat:
→ I inspect the Energy connection.
My Energy Troubleshooting Order
When the system stops behaving, I work from storage backward through generation.
Do I have completed Power Bricks?
If not, I check:
Copper → Smelter → Liquid Copper → Copper Mold.
If Power Bricks exist but are not charging:
Is the Energy source connected?
If I am using Florinol:
Is Energy actually transferring through the Energy Siphon?
If I am using Steam:
Is Steam crossing the Turbine?
If the Turbine works but Water keeps disappearing:
Where is the depleted Steam going?
If depleted Steam exists but does not recycle:
Is the Condenser active and correctly positioned?
If Water returns but Energy production is still too slow:
only then do I add more working Steam cells.
That order keeps me from solving a Water problem with more Copper or solving a storage problem with another Condenser.
I Stop Scaling for Progression Once I Reach 100,000 Energy
Reaching 100,000 Energy changes the question I am asking.
Before the target:
Is my power system producing and storing enough Energy?
After the target:
What is the next progression gate?
I can still improve recharge capacity because high-power tools can consume Energy quickly.
But I no longer add Power Bricks or Steam Turbines just to make the progression number larger.
Once the 100,000-Energy requirement is complete, I open the Tech Tree and continue with my Tier 6–7 progression route.
If the next objective sends me away from the factory, I leave the working power system alone and follow that objective instead.
That stopping rule keeps Tier 5 Energy from becoming an endless rebuild: prove storage, prove generation, prove recycling, scale to the objective, then move on.