How I Make Void Juice, Recycle Void Husk, and Keep the Void Chain Moving
I turn Void Seeds into Void Petals, split them between Red Sand and Moonhop, make Fluxite and Void Juice, then recycle Void Husk with Voidgrazers.
Updated:

Quick Answer
My Void route is:
Void Rift → Void Seeds → plant the Seeds → break the growth for Void Petals
Then I split the Petals by what I actually need:
Void Petals + Red Sand → Void Bloom → Flux Emanator → Fluxite
or:
Void Petals + Moonhop → Void Juice
When I use Void Juice in a Void tool, it becomes Void Husk. I keep Voidgrazers beside that liquid system so they can eat the Husk and return it to Void Juice.
The biggest mistake I made was scaling the easy part. When Void Seeds or Petals are already waiting, I do not add another Rift. I check Red Sand, Moonhop, the Flux Emanator, or the Voidgrazer recycle loop instead.
The Void chain looks complicated the first time because several materials appear close together, but they are not all doing the same job.
The part that made it click for me was separating the chain into two branches.
One branch exists because I want Fluxite.
The other exists because I want Void Juice.
Once I stopped treating every Void material as one giant purple production line, the bottlenecks became much easier to read.
I also stopped trying to maximize every stage.
The Void Rift can give me more Seeds than I know what to do with. My real limits have usually been the materials that meet the Petals later: Red Sand and Moonhop.
I Open the Void Branch, Then Stop Thinking About the Old Florinol Gate
I first care about the Void Rift after the Orb research opens the Void branch.
At that point I am already past the question of how to unlock Tier 5. If that transition is still blocked, I go back through the Tier 5 unlock steps instead of trying to solve it with Void production.
Once the Void Rift research is actually available, I buy it because it gives me a renewable source of the material that starts this entire branch.
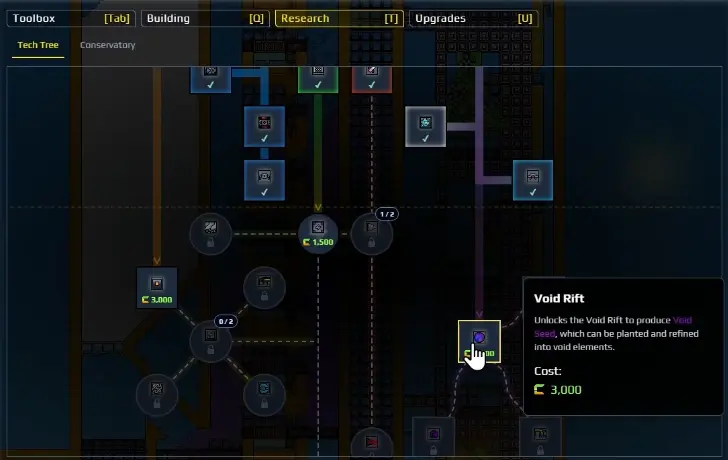
That is the first buying decision I make here:
If I need Void materials and the Rift is available, I buy the Rift before convenience upgrades that do not feed this chain.
I do not need a giant setup around it yet.
I only need enough space to see what the Seeds become and where the next real bottleneck appears.
I Treat the Void Rift as a Seed Source, Not as the Whole Factory
The Void Rift drops Void Seeds.
I route those Seeds into a small planting section instead of building a huge buffer first.
In one of my working setups I split the Rift output into two directions because I knew I eventually wanted two Petal consumers.
That was already more than enough input.
I was not short on Seeds.
I was short on what came later.
This is where I use the first simple accumulation test.
If Void Seeds keep piling up:
the Rift is not my bottleneck.
Adding another Rift would only make the pile larger.
I leave the source alone and inspect the planting, Petal clearing, or the material waiting at the mixer.
I Plant Void Seeds, Then Clear the Growth for Void Petals
I put the Void Seeds into Planter Boxes.
The important output for me is not the planted block itself.
I want the Void Petals that come from clearing the resulting growth.
I can break that growth and collect the Petals, then route those Petals toward the two branches that actually matter.
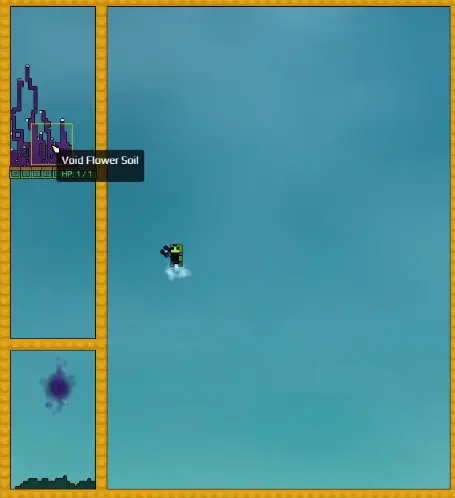
I do not overbuild this section either.
A small Petal section can already outrun my Red Sand supply.
If Petals are sitting there with nothing to react with, more Planter Boxes do not solve anything.
That is a resource problem farther down the line.
I Send Petals to Red Sand When Fluxite Is the Current Goal
The first branch I build is usually the one that pays for more progression and upgrades:
Void Petals + Red Sand → Void Bloom.

That distinction matters because Red Sand has been one of my real late-game limits.
I have reached the point where I had:
- plenty of Void Seeds
- plenty of Void Petals
- a working Rift
- and no reason to make more of any of them
because the Red Sand side had run dry. In that run, one or two Redweavers still did not keep up with what I wanted from the Red Sand branch.
When that happens, I leave the factory.
I either mine more Red Sand or use the Redweavers I have already captured.
If I need another Redweaver, I use the same capture routine I use for other useful creatures in my Critters and Corraller setup.
For this factory, I only care about the production consequence:
No Red Sand means no useful reason to keep scaling the Fluxite branch.
I Put Void Bloom Into the Flux Emanator for Fluxite
Once Void Bloom is forming reliably, I route it into the Flux Emanator.
That is the point where the Red Sand branch becomes useful to me as a repeatable Fluxite source.

This is also where I decide whether more production is worth buying.
If the Flux Emanator is receiving Void Bloom and Fluxite output is healthy, I do not add more Void machinery just because I have spare Gold.
I spend that Fluxite where it removes a current blocker.
When mining speed or a tool upgrade is what limits me, that upgrade is more useful than another Rift feeding an already-backed-up line.
If Fluxite is not increasing, I check the chain in this order:
Are Void Petals reaching Red Sand?
→ Is Void Bloom actually forming?
→ Can the Void Bloom reach the Flux Emanator?
→ Can the Fluxite output clear?
I do not begin by adding more Seeds.
I Send the Other Petal Branch to Moonhop for Void Juice
The second Petal branch uses Moonhop.
Void Petals + Moonhop → Void Juice.

This branch taught me a different scaling rule.
I do not need to produce as much Void Juice as possible.
I need enough to keep the tool I am currently using supplied.
The two tested consumers I care about are the Void Gun and the Artifact Locator.
If I am not using either one heavily yet, I do not divert the entire Void factory into Juice.
If I am spending Juice faster than the system can replace it, then I know exactly what to investigate:
Moonhop input → Petal supply → Juice storage → Husk recycling.
That is much more useful than adding another generic buffer.
I Give Void Juice Its Own Contained Fluid Area
Once I start producing enough Void Juice to use regularly, I move it into a dedicated area.
I do not want it mixed into an unrelated liquid network.
I use Pumps, Pipes, and Liquid Vents to move it from the production side to the place where I keep my Voidgrazers and use my Void tools.
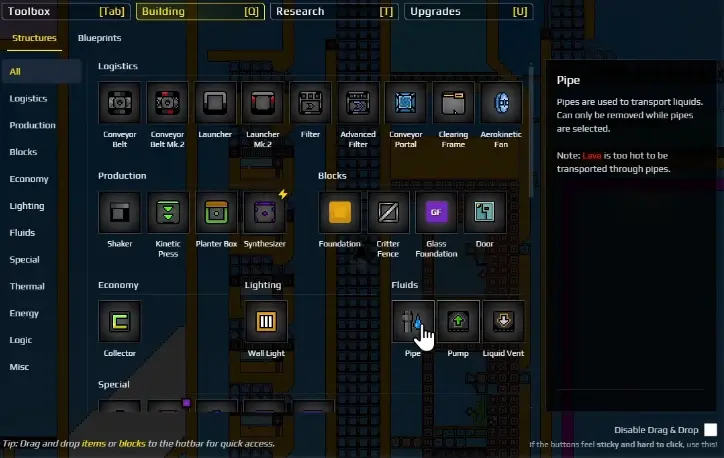
I do not redesign the whole fluid network for this one resource.
The important decision here is local:
I move Void Juice to the consumer and the recycler instead of dragging the whole Void chain across the factory.
That keeps the section small enough that I can see when Juice is disappearing, Husk is accumulating, or a Grazer is not reaching the material.
I Expect Used Void Juice to Become Void Husk
This is the point that confused me most the first time.
Void Juice is not simply gone when I use it.
When I feed it into a Void tool, it turns into Void Husk.
The conversion is visible when I use Juice in the Void Gun or Locator.
That means a pile of Husk is not automatically waste.
It is the return side of the loop.
This gives me a very useful diagnostic.
If Void Juice disappears and Husk appears:
the consumer is working.
If the Husk then stays there forever:
the recycle side is the problem.
I Use Voidgrazers to Turn Void Husk Back Into Void Juice
The Voidgrazer closes the loop.
It eats Void Husk and returns Void Juice.
That changes how I judge Juice production.
I do not need to replace every unit I spend with fresh Moonhop forever.
I want the recycle loop doing as much of that work as it can.
If Husk is piling up, I check whether the Voidgrazers can actually reach it.
If the grazers are working but my Juice reserve still keeps falling, then I look upstream for more Moonhop and fresh Juice production.
If I do not have a Voidgrazer yet, I go get one instead of designing a permanent Husk storage system. Once I bring it home, I place it where the Husk actually collects.
Red Sand and Moonhop Are the Inputs That Make Me Leave the Factory
The easiest part of this chain for me to overproduce is the beginning.
The Rift keeps supplying Seeds.
Seeds become Petals.
Then I look at a mountain of Petals and feel like the factory should be productive.
That can be completely misleading.
I have had a Void section with excess Seeds while I had already used all of my Red Sand and still needed more Moonhop.
At that point, standing beside the Rift does nothing.
My route becomes:
check which Petal branch is empty → identify the missing outside material → leave the factory → collect Red Sand or Moonhop → return → restart only that branch.
That is one of the clearest cases where going backward in the chain is the wrong move.
The Rift is already doing its job.
I go outward, not upstream.
I Do Not Chase Full Automation Before the Scarce Inputs Are Stable
In my 0.5.4 run, I could automate most of the Void chain, but Red Sand collection was still the awkward part.
A Digger Drone can work on Redweaver-produced Red Sand, but the geometry changes as it digs.
Once the drone breaks through and shoots past the useful material, it can stop doing the job I placed it for.
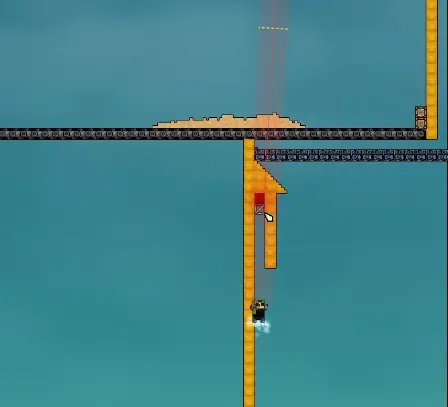
That is why I do not judge this setup by whether every single step can run forever without me.
I judge it by whether the expensive and repetitive parts keep moving while I am elsewhere.
The practical win is:
Rift keeps producing → Seeds keep reaching the Petal section → Petals wait safely → Red Sand and Moonhop can be added when available → Fluxite and Juice leave through their own branches → Husk recycles through Voidgrazers.
If Red Sand still needs attention, I accept that as the current manual edge instead of redesigning the entire factory around a fragile trick.
My Void Troubleshooting Order
When the Void chain looks busy but I am not getting the material I want, I start with the target.
If I need Fluxite, I trace:
Void Petals → Red Sand → Void Bloom → Flux Emanator → Fluxite output.
If I need Void Juice, I trace:
Void Petals → Moonhop → Void Juice storage → tool consumption → Void Husk → Voidgrazer recycling.
Then I use the pile itself as evidence.
Void Seeds piling up → I already have enough Rift output.
Void Petals piling up → Red Sand or Moonhop is probably missing or too slow.
Void Bloom piling up → I inspect the Flux Emanator or its output.
Void Juice disappearing with Husk appearing → the tool is consuming Juice normally.
Void Husk piling up → I inspect Voidgrazer access and the recycle area.
Nothing is piling up anywhere → only then do I consider whether I actually need more upstream production.
That order keeps me from solving the wrong problem.
The Void chain becomes much easier once every material has one clear job:
Seeds create Petals.
Red Sand turns Petals toward Fluxite.
Moonhop turns Petals toward Void Juice.
Void tools turn Juice into Husk.
Voidgrazers turn Husk back into Juice.
Once I can see which of those transitions has stopped, I know whether to build, buy, leave the factory, or simply let the working system run.