STALKER 2 Cost of Hope: All 12 Unique Weapon Locations
Find all 12 Cost of Hope unique weapons, compare the best guns, and avoid missing faction rewards, Justice, Luftgarde, Rifled Barrel and Maximum.
Updated:
Quick Answer
There are 12 unique weapons tied to Cost of Hope:
Justice, Clapper, Warszawa, Leichtfuchs, Guardian, Mriya, AKM-9B, Luftgarde, Freedom’s Bounty, Stranger’s Rifle, Rifled Barrel, and Maximum.
I cannot keep all 12 on one normal faction route.
My practical maximum is:
Mavka / Freedom → 9/12
Zulu / Duty → 8/12
If I care more about combat strength than filling the collection, the uniques I prioritize most are Maximum, Guardian, and Freedom’s Bounty. Maximum is especially useful because I can obtain it regardless of faction.
If I want both faction weapon sets, I keep a manual save before the permanent Mavka/Zulu split in The Destructive Power of the Mind.
All 12 Cost of Hope Unique Weapons
| Unique weapon | How I get it | Route |
|---|---|---|
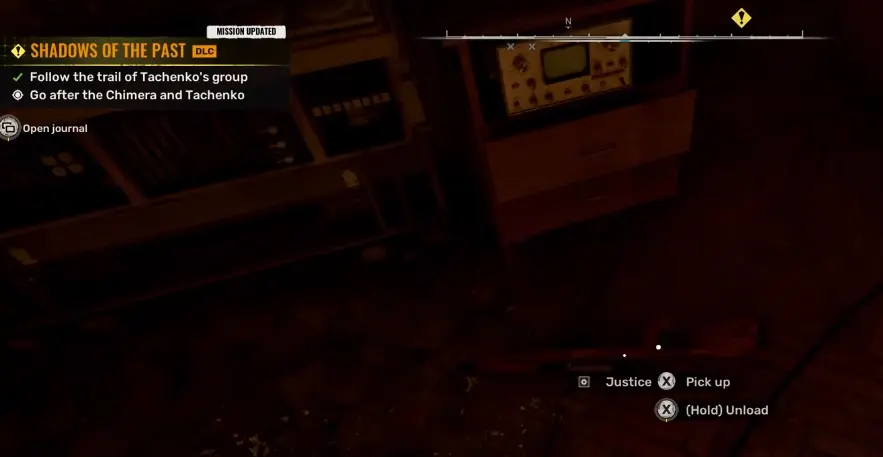
| Justice | Loot General Tachenko during Shadows of the Past | Either |
| Clapper | Follow Mavka during The Destructive Power of the Mind | Mavka |
| Warszawa | Follow Zulu during The Destructive Power of the Mind | Zulu |
| Leichtfuchs | Loot Myklukha during Status Quo | Mavka |
| Guardian | Mavka-side reward during The Price of a Miracle | Mavka |
| Mriya | Zulu-side reward after The Price of a Miracle | Zulu |
| AKM-9B | Safe near the SWYD-West checkpoint | Either |
| Luftgarde | Return through the Distant Mirage route with Water Drop | Either |
| Freedom’s Bounty | Complete Territory War for Freedom | Mavka |
| Stranger’s Rifle | Complete Territory War for Duty | Zulu |
| Rifled Barrel | Open Otter’s chest during The Forgotten | Either |
| Maximum | Search Module IB at the CNPP | Either |
Five of these are available regardless of which faction I eventually support:
- Justice
- AKM-9B
- Luftgarde
- Rifled Barrel
- Maximum
The others are tied to the Mavka/Freedom or Zulu/Duty progression.
That distinction matters more to me than the numerical order of the list because I can revisit many world pickups, but I cannot simply return later and collect the opposite faction reward.
Best Cost of Hope Unique Weapons: My Tier List
I rank these by how much value I get from actually carrying them through Cost of Hope, not by how rare they are or how difficult they are to collect.
A weapon can therefore be important for completion without being something I would rebuild my entire loadout around.
| Tier | Weapons | Why I put them here |
|---|---|---|
| S | Maximum, Guardian, Freedom’s Bounty | These are the uniques I am most willing to plan a loadout or faction route around |
| A | Clapper, Warszawa, Mriya, Leichtfuchs | Strong faction rewards that can fill a real combat role rather than only a collection slot |
| B | Justice, AKM-9B, Luftgarde, Rifled Barrel, Stranger’s Rifle | Worth collecting, but I do not delay progression or choose a faction solely for them |
This is not a ranking of which weapon is hardest to obtain.
For example, Justice is much easier to permanently miss than Maximum, but that does not automatically make it the weapon I would rather use.
Best Overall: Maximum
If I only want one Cost of Hope unique that works without committing to either faction, I prioritize:
Maximum
It is a unique SVU-MK S-3 and fills my long-range slot extremely well.
The biggest advantage for collection planning is that it is also faction-independent.
I do not have to choose Mavka or Zulu to get it.
The downside is timing: Maximum is a late pickup because I need access to the CNPP and Module IB.
Best Shotgun: Guardian
On the Mavka route, the weapon I care about most is:
Guardian
Guardian is based on the Saiga D-12, which makes it the Mavka reward I am most interested in for close-range mutant fights.
That matters in Cost of Hope because many of the expensive encounters happen in facilities, tunnels and other spaces where fast follow-up shotgun damage is more useful to me than another long-range rifle.
If I am choosing Mavka partly for weapons, Guardian is the biggest reason.
Best Assault Rifle Reward: Freedom’s Bounty
For a general-purpose rifle, I value:
Freedom’s Bounty
It is based on the Kharod, so I get a strong all-purpose platform without having to build the rest of the loadout around a specialized niche.
The important catch is that I do not receive it immediately from the main ending.
It comes through Territory War afterward.
I therefore do not assume my Freedom weapon collection is finished when the main Cost of Hope storyline ends.
Clapper Is the Early Mavka Weapon I Actually Use
Clapper is based on the M860 Cracker.
It is not the weapon I would choose over Guardian once both are available, but it arrives earlier and gives me a useful close-range option during the part of the campaign where indoor fights still make up a large share of the danger.
That makes it more useful to me than a collection-only reward that arrives after I already have a complete endgame loadout.
Mavka Has the Stronger Weapon Collection for Me
If I judge the faction split only by weapons, I prefer:
Mavka / Freedom
That route gives me:
- Clapper
- Leichtfuchs
- Guardian
- Freedom’s Bounty
while Zulu gives:
- Warszawa
- Mriya
- Stranger’s Rifle
Mavka also has the numerical advantage because Leichtfuchs has no Zulu-side counterpart.
I still do not choose the faction solely from a tier list if I care about the story outcome.
I keep a branch save and see both instead.
Why I Cannot Get All 12 in One Playthrough
Three major points in Cost of Hope give one weapon or its faction counterpart.
| Decision point | Mavka / Freedom | Zulu / Duty |
|---|---|---|
| The Destructive Power of the Mind | Clapper | Warszawa |
| The Price of a Miracle | Guardian | Mriya |
| Territory War | Freedom’s Bounty | Stranger’s Rifle |
Mavka’s later route also includes:
Leichtfuchs
with no equivalent extra weapon on Zulu’s side.
That gives me:
Mavka / Freedom: 9 of 12
Zulu / Duty: 8 of 12
If I finish the campaign and wonder where the other three or four guns are, I do not search the map for them.
They belong to the branch I did not play.
1. Justice — Loot Tachenko Before Leaving
Justice comes from General Tachenko during:
Shadows of the Past
This is one of the weapons I treat as genuinely missable.
I do not rely on it appearing automatically in my inventory.
After the confrontation, I check Tachenko and the ground around him before following the next objective.
Justice uses 7.62x54 ammunition.
If I intend to equip it immediately, I check my remaining ammunition before selling or stashing the caliber simply because my previous rifle did not use it.
For the complete mission rather than the weapon pickup, I use the Shadows of the Past Walkthrough.
2–3. Clapper or Warszawa
The first faction weapon pair comes during:
The Destructive Power of the Mind
My choice determines the reward:
Mavka → Clapper
Zulu → Warszawa
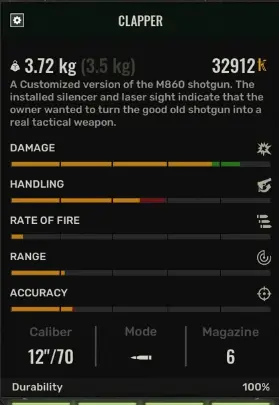
I do not expect to find the other weapon hidden somewhere inside X16 afterward.
The branch itself is what determines the reward.
If I care about both, I use the manual save rather than compromising the route I actually want just to add another gun to one stash.
4. Leichtfuchs — Mavka Only
Leichtfuchs is exclusive to the Mavka/Freedom route.
I obtain it from Myklukha during:
Status Quo
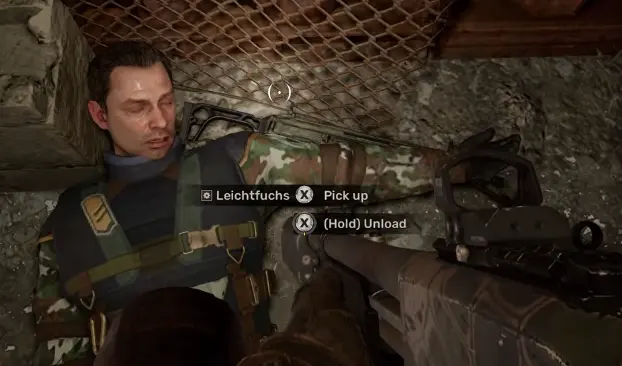
This is another pickup I do not assume will be transferred automatically.
The surrounding fight can become chaotic enough that the natural instinct is to follow the next objective as soon as it ends.
I check the body first.
5–6. Guardian or Mriya
The next major faction pair comes from:
The Price of a Miracle
Mavka’s side gives:
Guardian
Zulu’s side gives:
Mriya

Guardian is the weapon I value more highly for combat because it gives my Mavka route a very strong close-range option.
The acquisition timing also differs.
I make sure I finish the relevant faction interaction rather than rushing straight through the final confrontation and assuming the weapon will appear later.
For Reactor 4 and the X19 sequence itself, I use the CNPP and X19 Walkthrough.
7. AKM-9B — SWYD-West Checkpoint Safe
AKM-9B is available regardless of faction.
I find it in a safe near the:
SWYD-West checkpoint
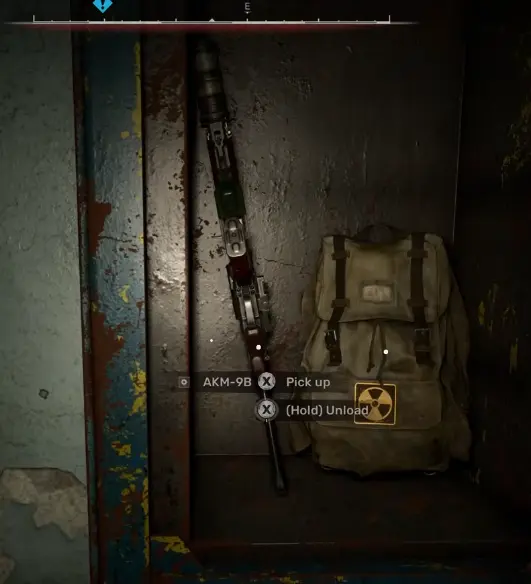
The safe code is:
3456
Because this is a world pickup, I do not rush across the entire map just to collect it early.
When my current route already passes through the area, I take the detour and remove it from the checklist.
8. Luftgarde — Keep a Water Drop
Luftgarde is the unique most likely to make me regret selling an artifact.
The route requires:
Water Drop
I can obtain Water Drop naturally during progression, but it is also something I might sell before realizing it has another use.
If I already sold the first one, I can obtain another Water Drop and return.
With the artifact available, I go back toward the area connected to Distant Mirage and descend through the underground route.
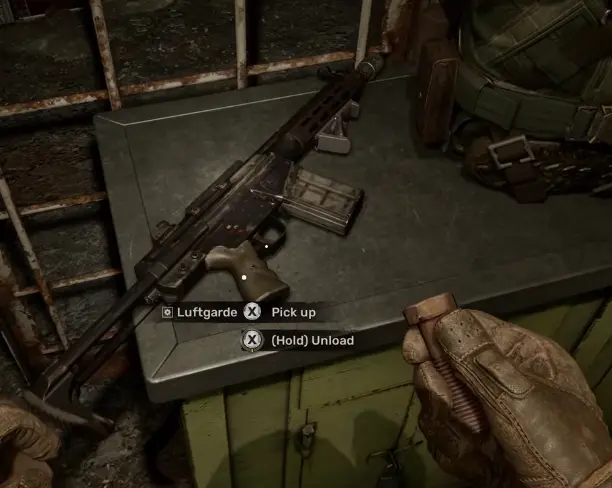
This is one of the few Cost of Hope items I deliberately preserve for future utility rather than coupons.
9–10. Freedom’s Bounty or Stranger’s Rifle
The third faction weapon pair comes from:
Territory War
The reward follows the faction route I kept:
Mavka / Freedom → Freedom’s Bounty
Zulu / Duty → Stranger’s Rifle
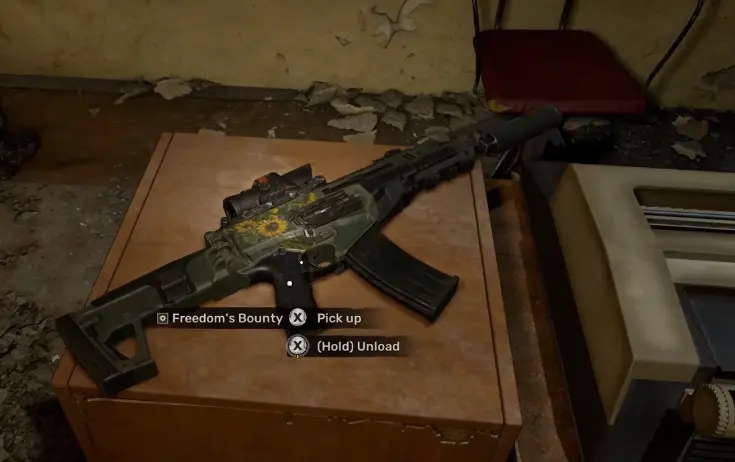
I make a manual save before starting Territory War.
This is also why I do not stop tracking unique weapons when the main ending finishes.
Freedom’s Bounty and Stranger’s Rifle come later.
11. Rifled Barrel — The Forgotten
Rifled Barrel is tied to the side quest:
The Forgotten
The route begins with an interaction down in a hole, then uses a picture to advance the trail.
I eventually head toward the:
ventilation stack
and find the unique inside:
Otter’s chest
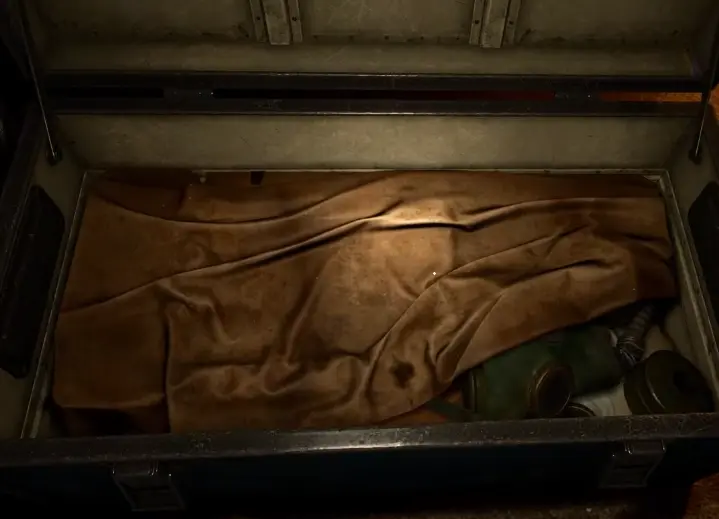
There is a portal involved near the later approach.
I follow that route rather than trying to brute-force a direct climb toward the destination.
I prefer finishing The Forgotten while it is active instead of assuming every part of the side quest will remain equally convenient after major story transitions.
12. Maximum — Module IB at the CNPP
Maximum is my highest-priority route-independent unique.
I find it at the:
CNPP
inside the:
Module IB building
It is in the Monolith stash area near the desk and safe.
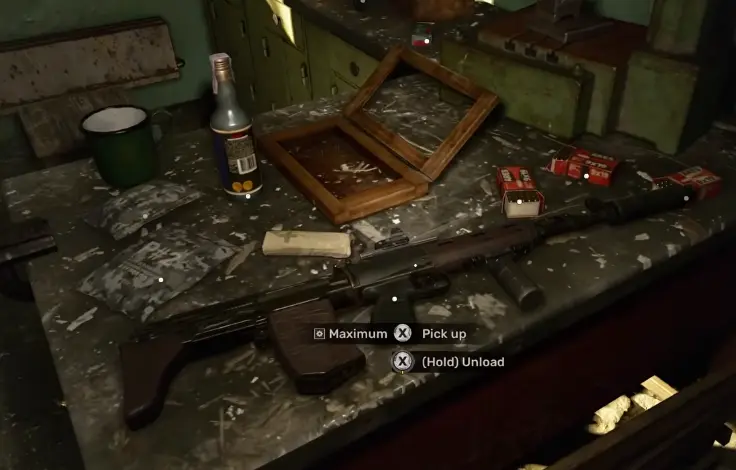
I do not try to force access to the CNPP early just for this weapon.
The campaign eventually takes me there naturally.
That is when the pickup becomes efficient.
Because Maximum does not depend on Mavka or Zulu, I make sure I collect it on whichever final save I intend to keep.
Which Cost of Hope Weapons Are Missable?
I worry about three different kinds of misses.
Mission drops
The two I check most carefully are:
- Justice
- Leichtfuchs
Both can be lost simply because the fight ends and I leave before checking the important body or ground pickup.
Faction-exclusive weapons
These depend on the campaign route:
Mavka / Freedom
- Clapper
- Leichtfuchs
- Guardian
- Freedom’s Bounty
Zulu / Duty
- Warszawa
- Mriya
- Stranger’s Rifle
I solve that problem with a branch save rather than a map search.
World and side-quest pickups
I have more flexibility with:
- AKM-9B
- Luftgarde
- Rifled Barrel
- Maximum
They still have specific requirements, but choosing the opposite faction does not remove them from the run.
Best Weapons If I Choose Mavka / Freedom
If I already know I am playing Mavka’s route, the faction weapons I care about most are:
- Guardian
- Freedom’s Bounty
- Leichtfuchs
- Clapper
I also make sure I collect Maximum, because it is available on either route and gives me a strong long-range option alongside the Freedom rewards.
That produces a much more balanced collection than focusing only on the number of uniques.
Best Weapons If I Choose Zulu / Duty
Zulu’s route gives me:
- Mriya
- Warszawa
- Stranger’s Rifle
I again add Maximum to the priority list because faction choice does not affect it.
Zulu gives me fewer total Cost of Hope uniques because there is no counterpart to Leichtfuchs, but that does not prevent me from collecting the five route-independent weapons.
My Efficient Collection Order
I do not cross the Zone collecting these in numerical order.
I take them when the campaign already makes the route convenient.
My normal sequence is:
Justice
→ Clapper or Warszawa
→ Leichtfuchs if I chose Mavka
→ AKM-9B when I am near SWYD-West
→ Luftgarde once I have Water Drop
→ Freedom’s Bounty or Stranger’s Rifle during Territory War
→ Rifled Barrel during The Forgotten
→ Maximum when I reach the CNPP
→ Guardian or Mriya during the final faction progression
The exact timing can shift depending on when I complete optional content.
What does not change is the priority:
mission drops and faction rewards first
revisitable world pickups when the route already brings me nearby
Cost of Hope Uniques vs Update 2.0 Weapons
I keep the Cost of Hope unique collection separate from the standard weapons introduced by Update 2.0.
Weapons such as:
- ARev
- GP3A
- SKP
- Fora
are normal weapon platforms added with the wider update.
They are not additional entries in this 12-weapon named Cost of Hope collection.
That is why I do not count a trader-bought Update 2.0 rifle as a replacement for a faction reward or a missed unique.
What I Check Before Leaving a Mission Area
When I have just defeated or sided with an important character, I pause before following the next long-distance objective.
I check:
- the named character’s body;
- the ground around the encounter;
- my inventory;
- nearby containers;
- the new PDA objective.
That habit matters most for weapons like Justice and Leichtfuchs.
A world pickup such as Maximum can wait until I reach its location.
A weapon sitting on the ground at the end of a mission can disappear from my collection because I walked away thirty seconds too early.