How to Get Termite Armor and Splinter Cannon in Grounded 2
Get all three Termite Armor pieces and the Splinter Cannon, find the O.G.R.R. Termite King, and use the set's blocking and ranged bonuses.
Updated:
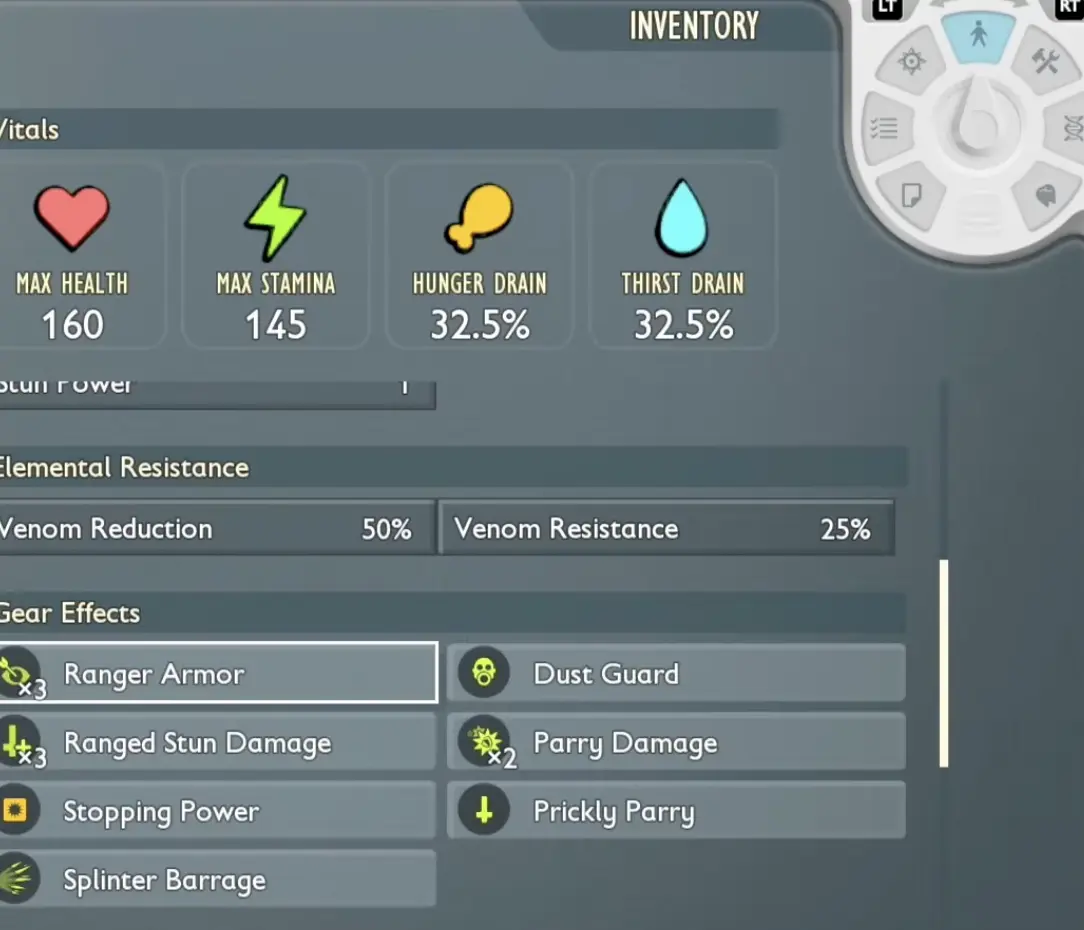
Quick Answer
Find the O.G.R.R. Termite King inside the Woodpile Termite Nest to obtain Termite King Carapaces. Analyze its Carapace to unlock the Termite Half-Plate and Splinter Cannon. Analyze Termite Chompers for the Tricorne and Termite Parts for the Boots.
The complete Tier IV armor set requires 4 Termite King Carapaces. Crafting the Splinter Cannon as well raises that requirement to 7.
The armor combines Dust Guard, Parry Damage, and Stopping Power. Use perfect blocks to improve ranged stun, then follow up with the Splinter Cannon at close range.
Rot and Ruin Public Test Build 0.6.0
The Termite equipment is built around a different kind of combat rhythm from ordinary ranged armor. Instead of standing back and firing continuously, it rewards you for defending against an attack, creating stun pressure, and using the Splinter Cannon while the enemy is vulnerable.
There are three Tier IV armor pieces: Termite Tricorne, Termite Half-Plate, and Termite Boots. The Splinter Cannon is a separate Tier IV weapon that fires multiple Wooden Splinter projectiles at close range.
Getting everything requires fighting the O.G.R.R. Termite King, but ordinary Termites provide much of the remaining material. The King is the main bottleneck because the chest armor and cannon both consume its Carapace.
The sensible first purchase depends on your current loadout. If you want a new ranged weapon, the cannon costs fewer Carapaces than the chest armor. If you already have a strong ranged weapon and want the complete Termite set, save the King’s materials for the Half-Plate instead.
Where to Find the O.G.R.R. Termite King
The O.G.R.R. Termite King is inside the Woodpile Termite Nest, near the northern Fire Pit in Brookhollow Park.
Enter the Woodpile with an Ant Buggy capable of chewing through the entrance obstruction. The Black Soldier Ant Buggy is a reliable choice for this trip.
Follow the nest into its large central chamber, where you can recognize the Sacrificial Pit opening and the enormous discarded glove. From there, continue toward the rear passages leading to the King’s chamber.
The full Woodpile and Termite Nest route covers the entrance, central landmarks, and other branches.
For the King, watch for a cracked rock blocking a side passage. You need an explosive to remove it.
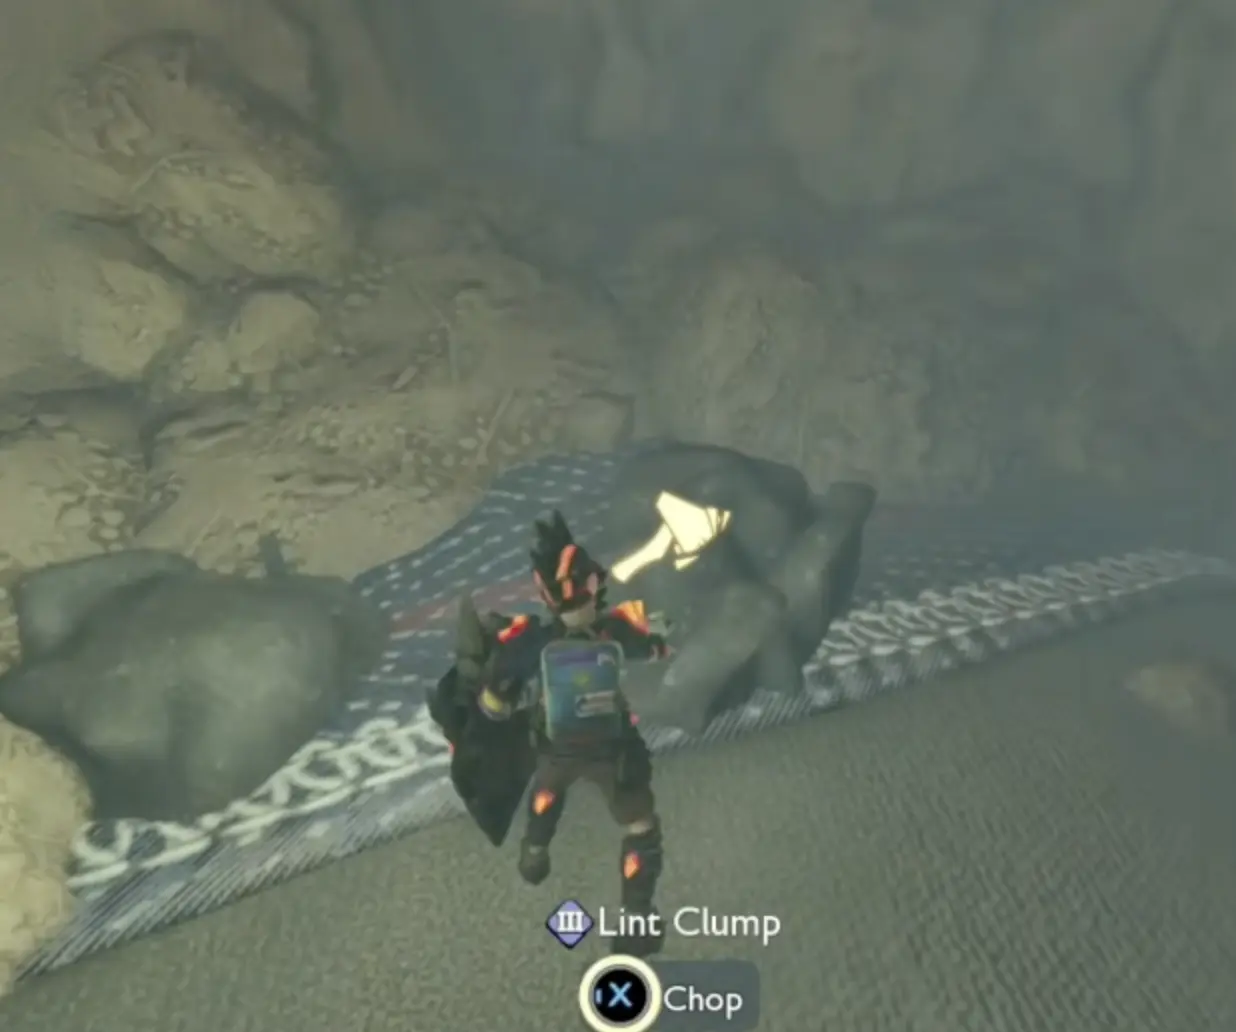
After destroying the rock, follow the passage to the King’s chamber.
The King is much tougher than an ordinary Termite Soldier. It moves quickly, attacks aggressively, and can launch splinters toward you. Its O.G.R.R. properties also make it important to check the enemy’s current attributes before relying on a particular elemental weapon.
How to Fight the Termite King
A Stabbing-focused weapon is useful against Termites, although the King’s O.G.R.R. variation can affect which additional damage types perform best.
Do not commit to a single elemental weapon without checking the enemy. Use Peep to inspect its properties, then adjust your damage type where possible.
The fight is easier when you:
- Keep enough distance to recognize its next attack.
- Move around the King instead of allowing it to corner you.
- Block or dodge its melee combinations before counterattacking.
- Watch for the ranged splinter attack.
- Move clear when the King is defeated, since its death can produce an explosive effect.
Repair your weapon and armor before dropping into the chamber. Fighting the King after clearing most of the Woodpile can leave you short on durability and healing.
How Many Termite King Carapaces Do You Need?
The Termite Half-Plate requires 4 Carapaces, while the Splinter Cannon requires 3.
That means:
- Half-Plate only: 4 Carapaces
- Splinter Cannon only: 3 Carapaces
- Both items: 7 Carapaces
After defeating the King, check your actual Carapace total. If you still need more materials, return for another fight after the King respawns.
Use the Shortcut for Repeat King Kills
After defeating the King, explore the small side passage leading away from its chamber.
It connects to an alternate exit toward the rear of the large park bench, providing a more convenient way to return to the area without repeating the entire Woodpile route.
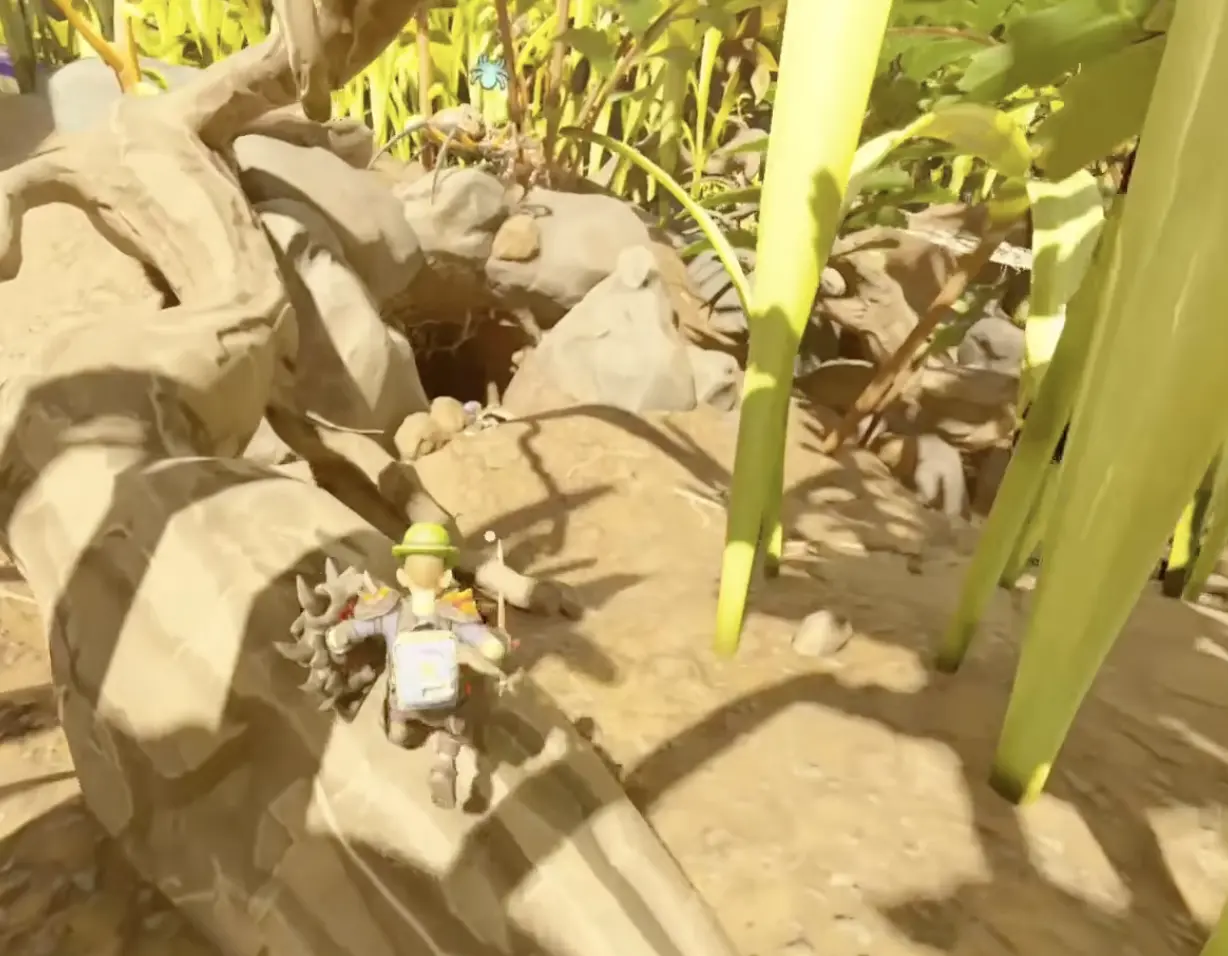
Once the exit is familiar, later farming trips become shorter. You can spend more of the journey fighting the King and less time crossing chambers filled with ordinary Termites.
Gather the Materials and Unlock the Recipes
The armor and weapon recipes come from analyzing different Termite resources.
Before returning to your Workbench, collect:
- Termite Parts from Termite Workers and other Termites in the nest.
- Termite Chompers from Termite Soldiers.
- Termite King Carapaces from the O.G.R.R. Termite King.
- Wooden Splinters throughout the Woodpile.
- Lint for processing into Lint Rope.
- Pupa Leather from processed Pupa materials.
- Rust for the Splinter Cannon.
- Spew Spore Chunks from the hazardous growths for standard ammunition.
The glove around the central Woodpile chamber is a useful place to collect Lint while exploring.
After collecting the enemy materials, analyze the Termite Chompers, Termite Parts, and Termite King Carapace. Those three resources unlock the principal equipment recipes.
You do not have to return to the nest with every single crafting ingredient on your first visit. If you already have Rust, Pupa Leather, or Lint Rope stored at home, focus on collecting the Termite-specific drops.
Termite Tricorne Recipe and Effects
The Termite Tricorne is a Tier IV Ranger headpiece made from Termite Chompers and other materials.
Its crafting recipe requires:
- 2 Termite Chompers
- 3 Termite Parts
- 2 Pupa Leather
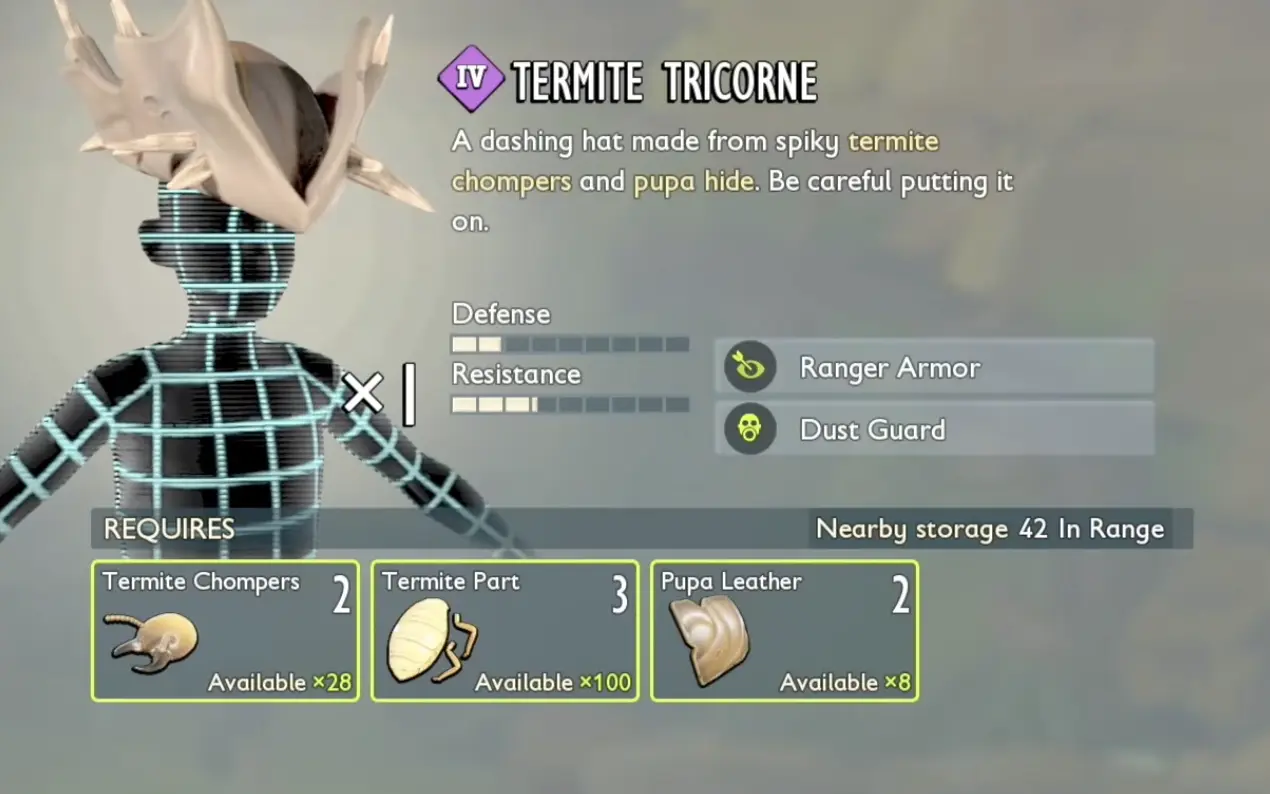
The Tricorne provides Ranger Armor and Dust Guard.
Ranger Armor increases damage dealt to enemy weak points. This makes the Tricorne useful when you can consistently target exposed weak points rather than attacking resistant body parts.
Dust Guard is valuable inside the Woodpile because Termites can interfere with your attacks using dust clouds. Reducing that disruption helps you maintain pressure instead of losing your ability to respond quickly.
The helmet is relatively accessible compared with the Half-Plate because it does not require a Termite King Carapace.
If you want to test the Ranger equipment before spending rare boss materials, the Tricorne is a reasonable first piece to craft.
Termite Half-Plate Recipe and Effects
The Termite Half-Plate is the most expensive armor piece in the set.
It requires:
- 4 Termite King Carapaces
- 5 Wooden Splinters
- 4 Pupa Leather
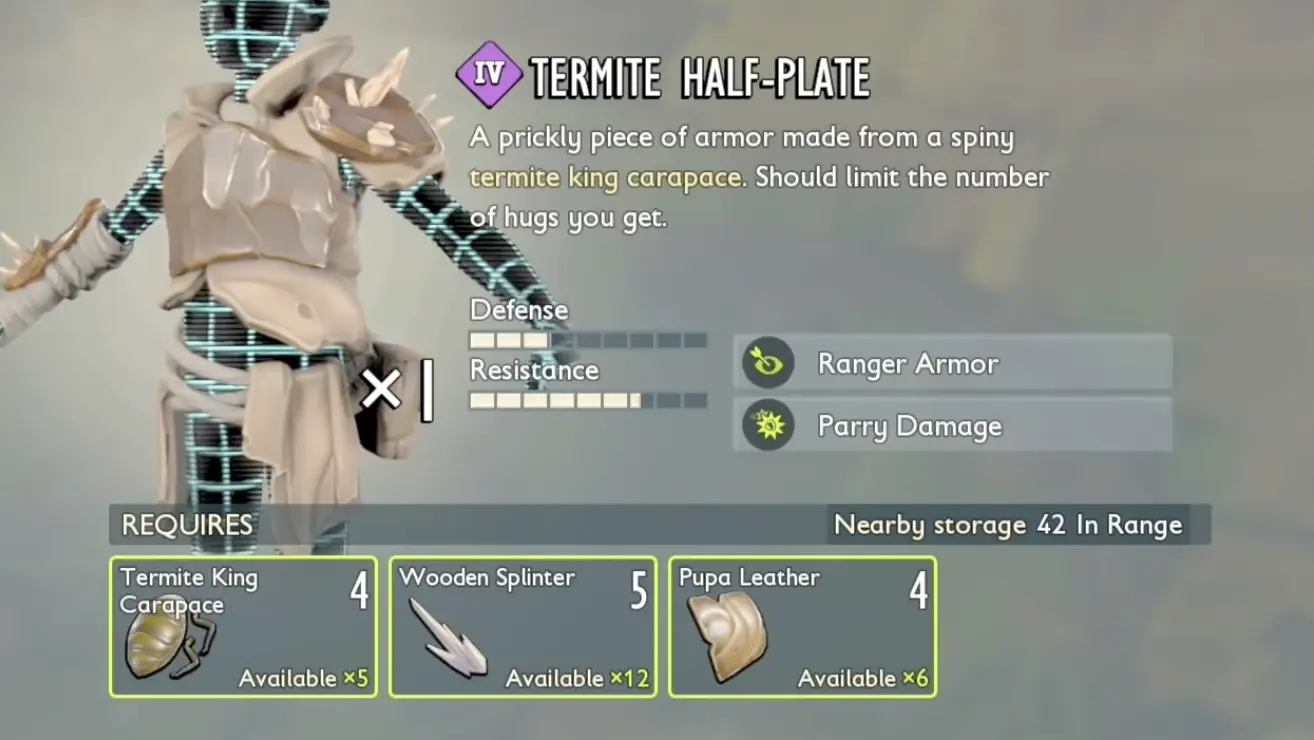
The Half-Plate provides Ranger Armor and Parry Damage.
Parry Damage rewards successful defensive timing by damaging an enemy when you perform a perfect block. It becomes more valuable against creatures that attack frequently and give you repeated opportunities to block.
This is the piece that determines how quickly you can complete the full armor set. If you spend your first three Carapaces on the Splinter Cannon, you will need to gather another four before crafting the Half-Plate.
That is not necessarily a bad decision, but it changes when the full set bonus becomes available.
For a character already using a good ranged weapon, crafting the chest armor first can make sense. For someone who specifically wants the new shotgun-style weapon, the Splinter Cannon may provide a more immediate change in combat.
Termite Boots Recipe and Effects
The Termite Boots complete the three-piece set.
Their recipe requires:
- 4 Termite Parts
- 3 Wooden Splinters
- 3 Lint Rope
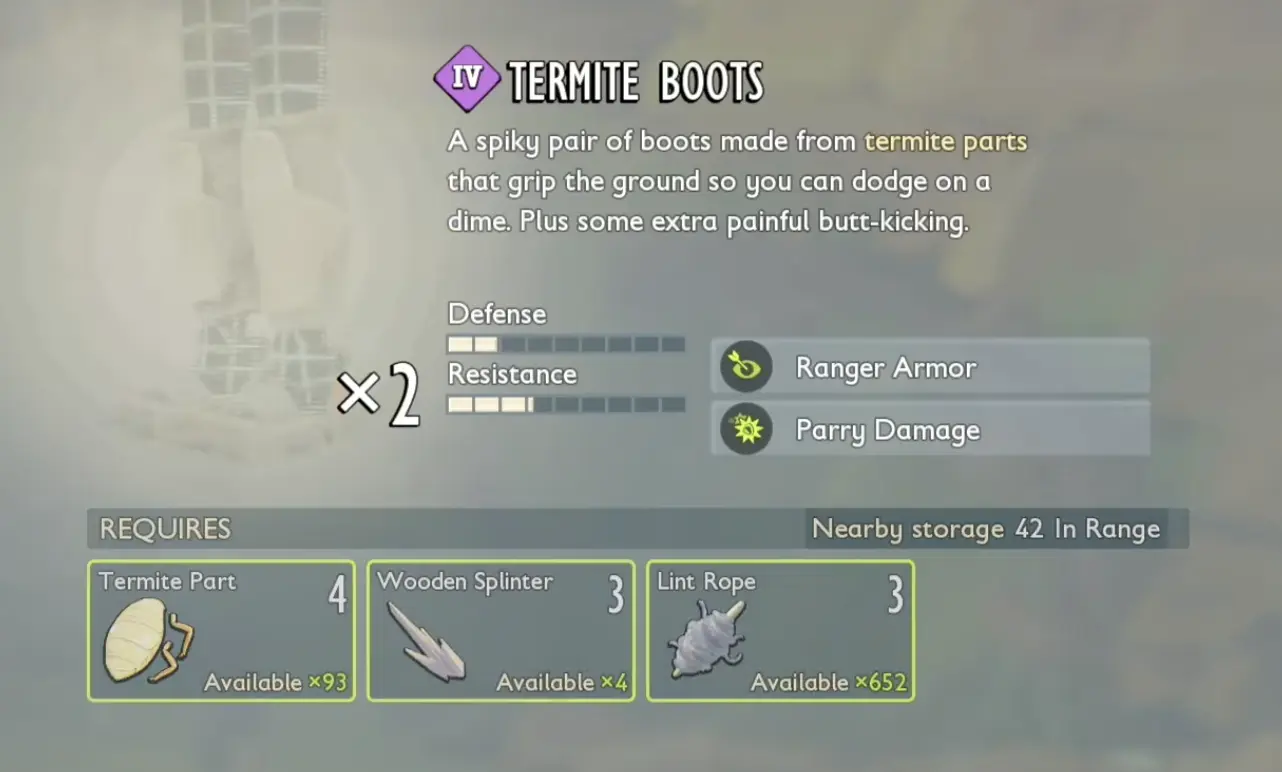
Like the Half-Plate, the Boots provide Ranger Armor and Parry Damage.
These are usually the easiest of the three pieces to finish once you have explored the Woodpile and gathered some Lint. You do not need any King Carapaces for the Boots.
If you already have the materials, crafting the Boots and Tricorne before tackling the King again lets you prepare two-thirds of the set without using additional rare drops.
Total Materials for the Complete Termite Armor Set
To craft one Termite Tricorne, one Termite Half-Plate, and one pair of Termite Boots, gather:
- 4 Termite King Carapaces
- 2 Termite Chompers
- 7 Termite Parts
- 8 Wooden Splinters
- 6 Pupa Leather
- 3 Lint Rope
These quantities cover the three armor pieces only.
They do not include the Splinter Cannon, its ammunition, Smithing upgrades, or any materials used for unrelated equipment.
If your current goal is simply to finish the armor set, this is the amount to prepare before returning to the Workbench.
How to Craft the Splinter Cannon
The Splinter Cannon is a separate Tier IV ranged weapon unlocked from Termite King Carapace analysis.
It is a gas-powered cannon that fires a spreading cluster of Wooden Splinters. Its attacks deal Stabbing damage, and its projectiles are most effective at close range.
Crafting one Splinter Cannon requires:
- 3 Termite King Carapaces
- 4 Wooden Splinters
- 2 Rust
- 2 Pupa Leather
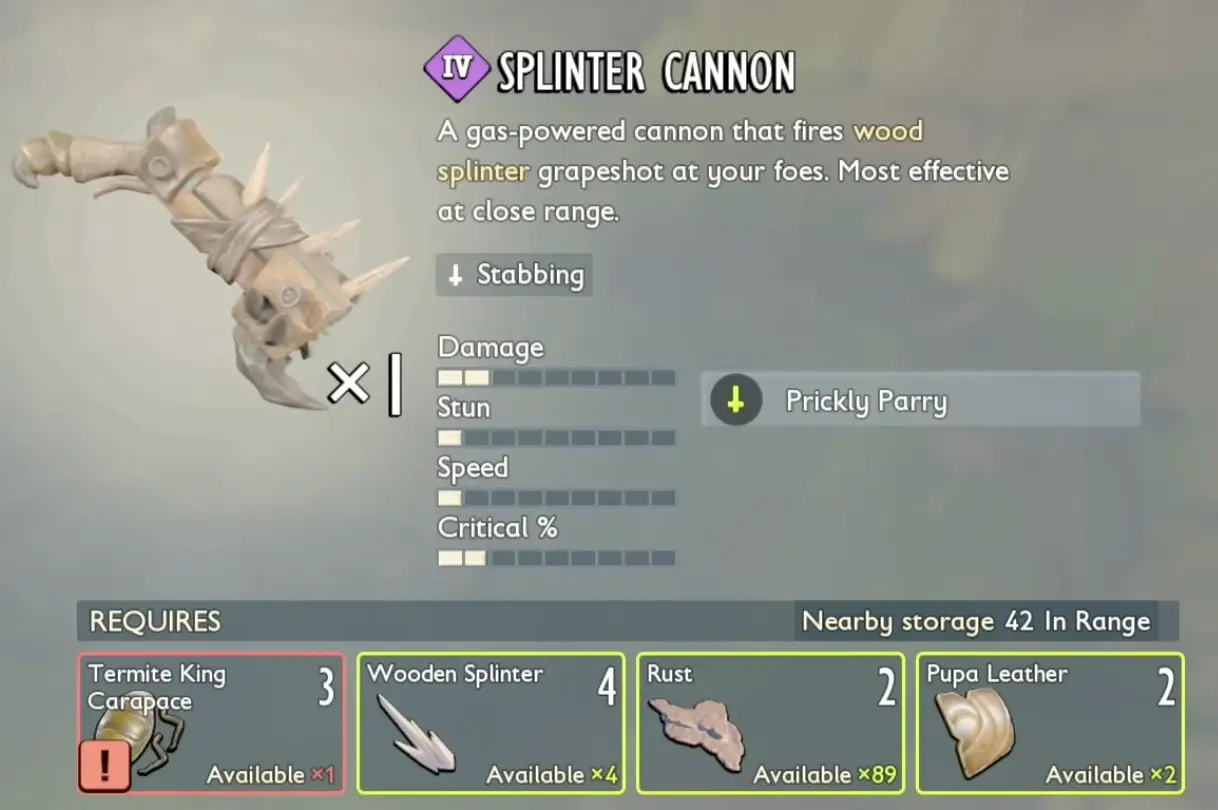
The weapon also lists Prickly Parry, which deals Stabbing damage to an attacker following a perfect block.
The Cannon’s attack behavior is quite different from a bow.
It fires several projectiles rather than one precise shot. More of those projectiles connect when you are close to the target, making the Cannon particularly dangerous against nearby enemies.
At long range, some projectiles can miss even when you aim correctly, lowering the practical damage of a shot.
This makes positioning important. Get close enough to land the spread, but leave yourself sufficient room to block or move away if the enemy attacks.
Armor and Splinter Cannon Combined Material Cost
If you want all three Termite Armor pieces and one Splinter Cannon, the total becomes:
- 7 Termite King Carapaces
- 2 Termite Chompers
- 7 Termite Parts
- 12 Wooden Splinters
- 8 Pupa Leather
- 3 Lint Rope
- 2 Rust
This does not include ammunition.
The difference between four and seven Carapaces is important. A player who only wants the armor does not need to farm the additional three for the Cannon.
Splinter Shot Recipe and Elemental Ammo
The Splinter Cannon needs ammunition before it can fire.
Its standard ammunition is Splinter Shot, a Tier IV projectile made using Woodpile resources.
One Splinter Shot crafting recipe requires:
- 3 Spew Spore Chunks
- 5 Wooden Splinters
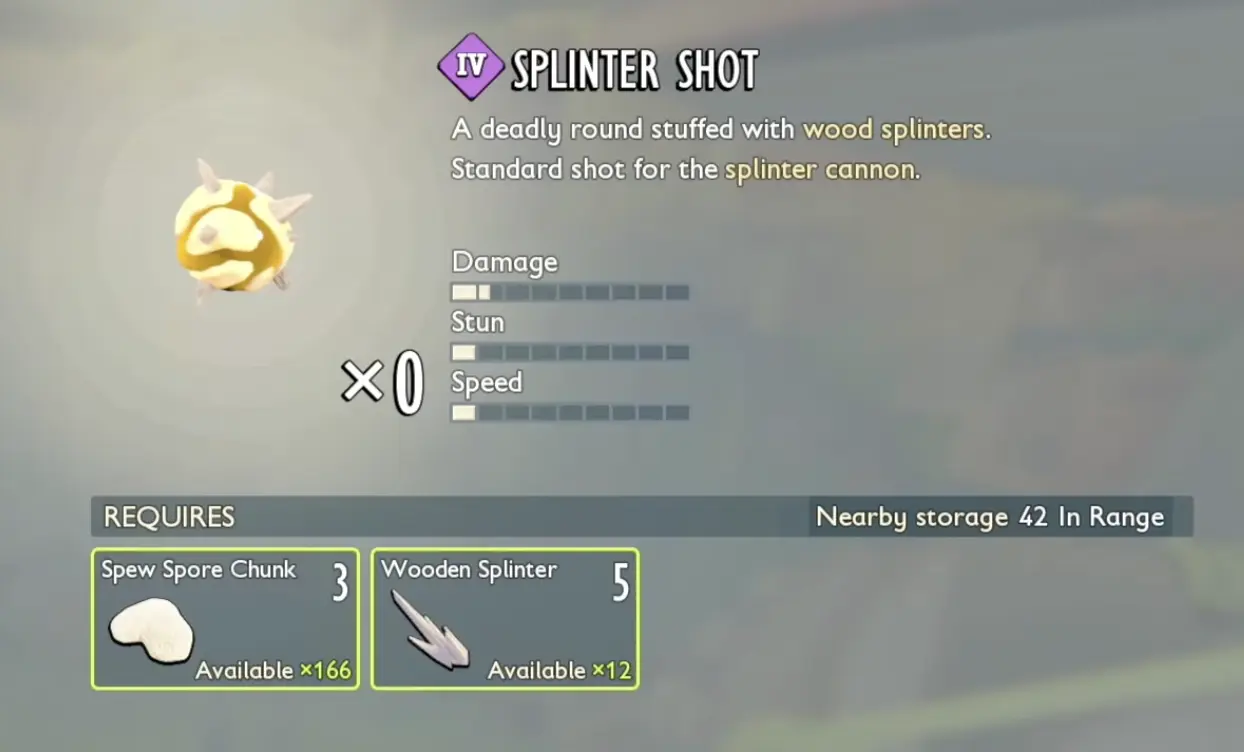
The Woodpile provides both materials. Wooden Splinters are scattered through the nest, while Spew Spore Chunks come from the dangerous fungal growths.
Collecting ammunition materials while traveling toward the King is more convenient than making a separate trip after crafting the Cannon.
Mint Shot, Spicy Shot, and Sour Shot
The Cannon also supports three elemental ammunition types:
- Mint Shot — Fresh damage.
- Spicy Shot — Spicy damage.
- Sour Shot — Sour damage.
These allow you to change damage elements without crafting another Cannon.
Make the standard Splinter Shot first, then check the available elemental ammunition recipes and their additional requirements.
Choosing ammunition based on the target matters more than always using the highest available element. A creature resistant to Fresh damage will not become an easier target simply because you load Mint Shot.
Against Termites, use Peep information to select a suitable damage type. Against Skritch, remember that the Centipede resists Fresh, Spicy, and Sour, making the choice more complicated than simply selecting elemental ammunition.
The Skritch Centipede Boss strategy explains its resistances and Gut weak point.
When Is the Splinter Cannon Worth Crafting?
The Cannon is useful when you frequently fight at short or medium range and can position yourself to land multiple projectiles.
It is particularly attractive against:
- Groups of ordinary enemies.
- Creatures that leave clear openings after an attack.
- Enemies that can be stunned and punished with another close-range shot.
- Dangerous creatures where elemental ammunition helps exploit a weakness.
It is less convenient for players who prefer keeping a large distance or who do not want to maintain a supply of ammunition.
You can use the Cannon without wearing the full Termite Armor set. The armor improves its combat synergy, but the weapon is useful on its own.
How the Full Termite Armor Set Works
The three pieces share the Ranger Armor classification, while their individual bonuses provide protection against dust and additional damage through perfect blocks.
Wearing the complete set activates Stopping Power.
Stopping Power enhances ranged stun after performing a perfect block for a short period.
That effect encourages you to fight more actively than a typical ranged build.
Rather than firing continuously from maximum distance, allow an enemy to approach, perfect block its attack, and use the resulting opening to fire back.
A practical sequence is:
- Approach with enough stamina to defend.
- Perfect block an incoming attack.
- Fire the Splinter Cannon while Stopping Power is active.
- Take advantage of the accumulated stun.
- Move away or prepare for the next block before the enemy recovers.
This makes the set especially useful against creatures with recognizable attack patterns.
Ranger Armor increases damage dealt to enemy weak points. When an enemy exposes a weak point, aim your follow-up attacks at that target to benefit from the bonus.
Should You Upgrade the Armor Along the Sleek Path?
The Termite Armor’s Sleek upgrades provide additional ranged stun-related bonuses.
That makes Sleek particularly attractive if you intend to use the full armor set alongside the Splinter Cannon.
The combat benefits reinforce one another:
- Perfect blocks provide the initial defensive opening.
- Parry Damage punishes the enemy for attacking.
- Stopping Power improves your ranged stun pressure.
- Sleek bonuses further support the ranged stun setup.
If you are using Termite Armor primarily for its defensive properties and already have a different preferred weapon, you do not need to rush every Sleek upgrade immediately.
For a Splinter Cannon build, upgrading the pieces together makes more sense because the bonuses support the same combat pattern.
Kingly Memento: The Termite King Trinket
The O.G.R.R. Termite King can also provide Kingly Memento, a rare trinket associated with the new Termite equipment.
Its effect, Splinter Barrage, releases splinters when you perform a perfect block.
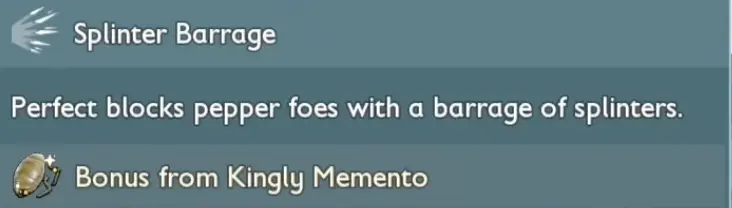
This fits the same pattern as Stopping Power: defend successfully, damage or pressure the approaching enemy, and follow up with a ranged attack.
The trinket is not required to make the armor set work. The full set’s Stopping Power bonus functions independently.
Because Kingly Memento is a rare drop, do not assume it will appear after your first King kill.
Loot Luck equipment and stealing effects can be helpful when farming rare enemy rewards, but the material farming process and the rare trinket hunt are separate goals.
Once you have the Carapaces needed for your desired equipment, decide whether the additional King fights are worth the time for the trinket.
What Should You Craft First?
You do not need to make the entire equipment set in a single trip.
The most efficient order depends on how you fight.
If You Want the Splinter Cannon First
Prioritize 3 Termite King Carapaces, 4 Wooden Splinters, 2 Rust, and 2 Pupa Leather.
Craft some standard ammunition alongside it. There is little reason to build the Cannon and then discover that you cannot fire it.
This route is attractive if your current armor is already good enough and you want to test the new weapon immediately.
You can return later for the additional Carapaces needed to finish the Half-Plate.
If You Want the Complete Termite Armor First
Make the Tricorne and Boots from ordinary materials, then save 4 King Carapaces for the Half-Plate.
This gives you the full Ranger set and Stopping Power without first spending Carapaces on a separate weapon.
It is a sensible choice when you already own a ranged weapon that works well with stun bonuses.
If You Want the Full Armor and Cannon Together
Prepare the seven required King Carapaces and the other materials before crafting.
You will also need more Wooden Splinters and Spew Spore Chunks for ammunition.
The advantage is that you can equip the complete combination immediately and begin using its perfect-block counterattacks without returning to the Woodpile for another major crafting ingredient.
Is Termite Armor Better Than Your Current Gear?
Termite Armor is strongest when you can consistently perfect block and take advantage of ranged stun.
Its Dust Guard helps with certain disruptive attacks, but its biggest advantage comes from combining defense and ranged counterattacks.
If you mostly fight with slow melee weapons, prefer avoiding attacks entirely, or rarely use ranged weapons, the full set may not provide as much immediate benefit as continuing to upgrade your current armor.
The Splinter Cannon also has its own tradeoff. It can deal substantial damage at close range, but requires ammunition and loses effectiveness when too many projectiles miss.
For a player who enjoys timing blocks and fighting near the enemy, the combination is much more rewarding.
Once you can reliably perfect block, fire back during Stopping Power, and capitalize on stuns, the Termite equipment becomes a powerful way to control dangerous encounters without relying exclusively on raw weapon damage.