How to Get Iron in Graveyard Keeper 2
Find early Iron, open the Forest mine with explosives, clear the underground route, and set up a Zombie Miner, storage and porter for steady ore.
Updated:
Quick Answer
Need Iron now? Reach Metallurgy 3, mine the early surface deposits, and use Furnace II to turn the ore into Ingots.
For repeatable Iron, open the Forest mine with the bandits’ explosives, clear the underground connection, then add a Zombie Miner, mine-side storage and a porter.
Early Iron is easy to mistake for a gathering problem. A few deposits around the world can keep one project moving, but better tools, construction parts and town repairs soon consume metal faster than scattered nodes replace it.
The Forest mine changes that rhythm. Getting there is not enough on its own: the entrance is blocked, the explosives come from a separate bandit problem, the repeatable extraction is handled by zombies, and the mine still needs storage and transport before it can run without regular visits.
Once that chain is stable, Iron stops deciding where I have to spend the next day.
Use Surface Iron for Immediate Jobs
Small Iron deposits appear before the Forest mine becomes available, including nodes around the regions you reach during the early story.
The first meaningful restriction is Metallurgy 3. Seeing an Iron deposit does not mean the Keeper can mine it immediately; when the node shows a Mastery requirement, more food, wood or Bronze will not solve the block.
A Bronze Hammer helps move Metallurgy progression forward. Raise the relevant capability, then take enough surface Iron to support whatever is currently stopping you.
For how Mastery, Inspirations and technology restrictions interact, use Inspirations & Talents.
I treat the Forest and swamp deposits as temporary supply. Clearing every distant node as soon as it appears costs travel time while the mine is still going to replace that routine later.
Build Furnace II Before Stockpiling Ore
Iron Ore sitting in storage does not solve an Iron shortage until you can turn it into usable metal.
The key early upgrade is Furnace II.
You do not need Iron Ingots to break into this production step. Furnace II can be built with materials such as polished stone, polished bronze and brick, so the upgrade is reachable before you already have a dependable Iron supply.
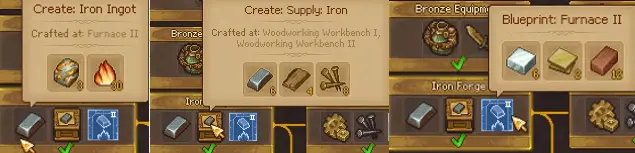
One tested batch converts:
3 Iron Ore → 4 Iron Ingots
Fuel values have changed since release, so I use the requirement currently shown by the Furnace rather than planning around an older fixed amount. The important step is getting Furnace II online; after that, the ore you already collected can feed nails, details, equipment and other metal recipes.
Reach the Forest Mine After Getting the Forest Pass
The permanent Iron route begins in the Forest.
When guards still block the entrance, searching for the mine or explosives is premature. Continue the story until you receive the actual Forest Pass, then return to the outpost.
The Walkthrough covers the story route leading there.
Inside the Forest, the guards point you toward Hans, an old miner camped along the road before the bridge toward the cursed swamp. They also mention an abandoned mine and lumber mill, with the mine tied into the old Inquisitor underground network.
That abandoned mine is the one that eventually provides repeatable Iron.
Hans Reveals the Real Mine Blocker
Speaking with Hans does not immediately open an endless source of ore.
The main tunnel is blocked by rocks, and ordinary mining tools will not clear it. Hans tells you that the obstruction needs explosives.
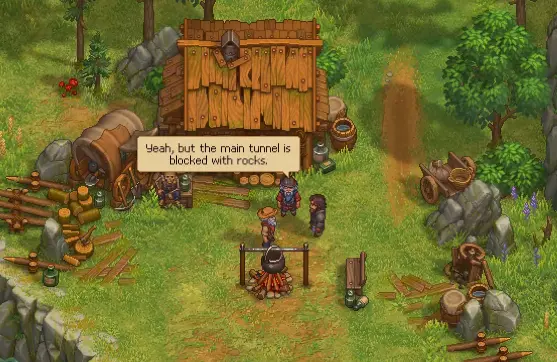
Sulfur exists farther inside the mine, which creates a dead end if you try to solve the explosives problem entirely on your own: the material you might expect to use is behind the blockage you are trying to remove.
The bandits already possess explosives. They simply will not hand them over until their own problem is resolved.
Their issue is a missing treasure connected to their former leader, Robert—who is now a skull.
Bring Larry Into the Bandits’ Treasure Problem
Return to the Inquisitor base and talk to Larry.
The solution is less conventional than mining. Larry pretends to be Robert so the bandits will accept his answer about the missing treasure and finally treat the Keeper as an ally.
Larry wants the performance done at night and asks for a candle, made from:
- 2 Beeswax
- Thread
Bring the candle, complete the impersonation scene, then return to the bandits.
Larry’s explanation is that their real treasure was the friendship they built together. Somehow, this is enough to settle the dispute and convince them to give you the explosives.
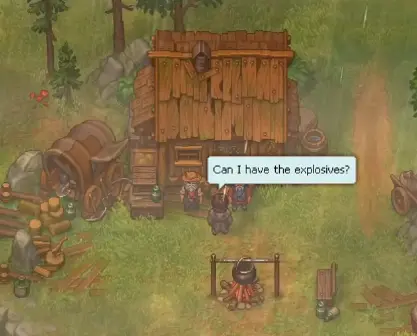
This is separate from the Royal Pardon used for progression toward the swamp. The pardon opens a different route; the Robert and Larry sequence is what gets you the mine explosives.
I usually finish this chain once several active projects are competing for Iron. Before that, nearby deposits can still bridge the gap. Once metal shortages are forcing repeated trips across the Forest and swamp, opening the mine saves far more time than another surface run.
Use the Explosives on the Blocked Mine Entrance
Take the explosives back to the rockfall and clear the entrance.
What appears beyond it can be confusing if you were expecting a permanent ore vein for the Keeper to mine personally.
The deeper operation is built around zombie extraction instead.
So opening the entrance and unlocking repeatable Iron are two different steps. The blast gets you inside; the zombie setup turns the location into a resource source that can keep working.
Clear the Underground Connection When Zombie Mining Is Missing
The physical route beneath the Inquisitor base matters as much as the technology.
The Forest mine, old underground passages and basement are connected. When Zombie Mining, Quarry or Digging should be available but the corresponding construction options are still missing, inspect the underground route before spending more technology points.
Clear the remaining obstacles between the mine and the Factory/basement side. The connection needs to be usable all the way through rather than merely visible from the other side.
After clearing it, return to the mine and check its build options again.
Two failures can look similar here:
- the technology is available but the mining structure does not appear;
- the structure exists, but the assigned zombie refuses to work.
The first points back toward access and the underground connection. The second belongs to the worker, tool, storage or job requirements.
Unlock Zombie Mining and Assign a Worker
Repeatable extraction uses Zombie Mining in the Metallurgy progression.
Build the mining station and assign a zombie. An Iron Pickaxe is the useful equipment target for this worker once you can produce one.
The zombie’s own capabilities still matter. A worker can reach the station and stand there without extracting anything because its Mastery or equipment does not meet the job requirement.
Check the worker before rebuilding the mine.
For zombie Mastery, tools, perks and other worker-level failures, use Zombie Automation & Resurrection.
Once the miner starts working, the next limit is no longer extraction. It is where all that Iron and Coal can be stored.
Build Mine-Side Storage Before Leaving the Miner Alone
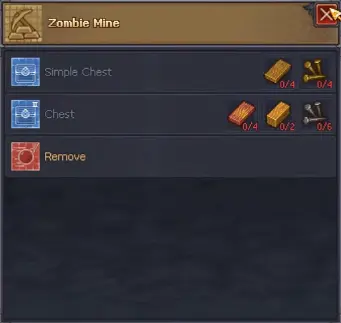
The Zombie Mine build menu includes local storage such as a Simple Chest and a Chest.
Build storage in the mining area before expecting uninterrupted production.
A working miner can stop simply because its output has nowhere left to go. That failure is easy to misread because the visible symptom is an idle zombie even though the worker, tool and technology are all still correct.
Check the nearby chest before changing anything else. Iron and Coal share that storage capacity, so Coal can fill enough space to stall the Iron side as well.
Clear room and watch the miner again. When production resumes immediately, the worker was never the problem.
Add a Porter When Collecting the Mine Becomes the Chore
Manual collection is perfectly reasonable when the Zombie Mine is new and output is still small.
The porter becomes worthwhile once you keep traveling back only to empty the same mine storage.
Build a Porter Station and assign another zombie. The mine-side chain becomes:
Zombie Miner → mine-side storage → Porter → home/yard storage
The miner stays on extraction while the porter removes finished output before the local chest fills.
This is the point where the mine begins saving travel time as well as gathering time. Without transport, the Keeper still has to make collection runs; with storage and the porter moving normally, extraction can continue while you work somewhere else.
Factory transport uses a different setup. Once your Iron and Coal are stable and you want them feeding a Smithy, conveyors, Assembly Bench and Town Warehouse orders, continue with the Factory setup.
Diagnose a Zombie Mine From the Output Backward
A mine that has already worked successfully usually does not need its entire unlock sequence repeated.
Start where the materials are supposed to leave:
- Mine storage — is the chest full?
- Coal — has it occupied most of the available space?
- Porter — is another zombie actually carrying output away?
- Miner — does the assigned worker still have the required tool and capability?
Only after those checks would I return to technology or the underground route.
The order matters because a full chest makes the miner look broken even though the actual blockage is farther down the chain. Clearing storage or restoring transport is much cheaper than rebuilding a mining station that was already working.
Stop Crossing the Map for Surface Iron Once the Mine Keeps Up
Surface deposits remain usable after the Zombie Mine opens, but they stop being the backbone of your metal supply.
Before automation, every visible node buys time. Once a miner, storage and porter are keeping Iron moving consistently, crossing the Forest or swamp solely for another small deposit becomes difficult to justify.
Let the mine cover routine demand for Ingots, nails, details and tools. Keep surface nodes for moments when you are already passing through the area or need a quick emergency top-up.
When consumption begins outrunning the mine, check storage and transport before adding another extraction point. More miners cannot help much when finished ore is already waiting in a full chest.
Let Stable Iron Feed the Next Production Job
A reliable Iron supply changes more than the number of Ingots in storage. Tool upgrades stop competing with every town repair, Iron Details become easier to spend when they are actually needed, and larger construction projects no longer depend on finding another surface node.
The basic Iron chain has done its job when this route is stable:
mine → local storage → porter → Furnace II
Beyond that point, the next bottleneck may be processing rather than extraction. When repeated Iron and Coal deliveries are ready but you still spend time manually turning them into Town supplies, move that work into the underground Factory and build the Smithy-to-Warehouse production line there.