Graveyard Keeper 2 Battles Guide: Zombie Army & Defenses
Prepare for town battles, reach Defense Power requirements, command squads with banners, build zombie armies, and survive later multi-squad fights.
Updated:
Quick Answer
For the first major town battle, prepare the Bell, meet the required squad and Defense Power, finish your barricades, and bring healing before starting the fight.
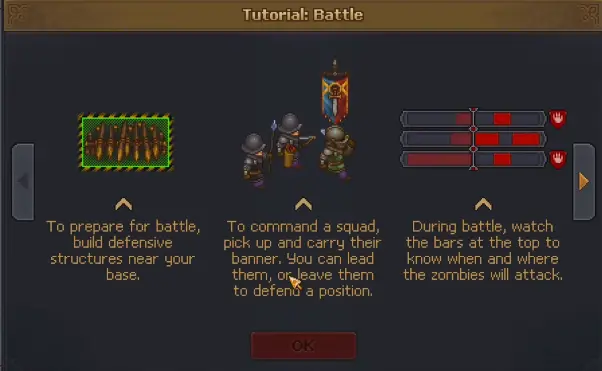
Once battle begins, carry the Red Banner to move your squad, place it where you want the soldiers to hold, and watch the bars at the top of the screen to see which lane is about to come under pressure.
The first town battle looks like a combat check, but the numbers on the preparation screen are only the admission ticket.
I could meet the requirement and still make the fight much harder by putting the squad in the wrong lane, moving away from a captured flag too early or spending too much money before the next offensive. Later battles add more squad slots, stronger defenses and zombie soldiers of your own, so the system becomes a resource problem and a positioning problem at the same time.
The useful progression is not “build the biggest army possible.” It is:
meet the current requirement → protect the weak lane → capture or hold the objective → improve the army only when the next battle asks for more.
The First Battle Starts at 1 Squad and 12 Defense Power
The first large town offensive gives you a concrete preparation gate.
A workable setup reaches:
- 1 squad
- 12 Defense Power
- 2 barricades
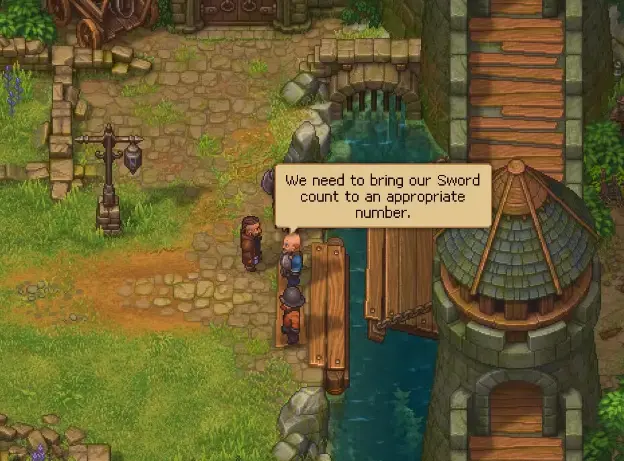
Reaching the minimum does not mean I immediately press Start Battle.
The fight costs money, takes enough time that a failed attempt is painful, and can end with the Keeper or the base being overwhelmed. I finish the required defenses, put healing on the hotbar and make sure the Bell is ready before committing.
The first mercenary payment is 5 silver. The next offensive shown after the Port victory rises to 7 silver 50 copper, so spending the rest of the purse on optional upgrades immediately after winning the first fight can leave the next military step waiting on cash.
Build the Bell Before the Fight Goes Bad
The Bell appears during the story stretch that leads into the first large town attack.
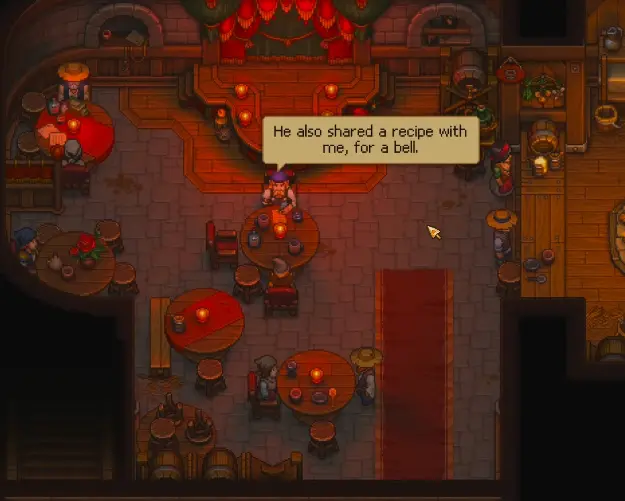
Its value is not extra damage. It gives you a way to retreat when the attack is going badly.
That changes the preparation decision. The Bell is worth finishing before spending the same materials on an upgrade that only makes an already functional workstation slightly better. Once the battle starts, discovering that your retreat option is still unfinished is too late.
If you have reached the town conflict but the story has not yet brought you to the Bell and battle preparation, continue the Walkthrough until that military sequence opens.
Barracks Defenses Raise the Number That Actually Gates the Fight
Your personal sword is useful once combat starts, but the battle screen checks the larger defensive setup.
The Barracks gives access to several defensive structures as progression expands, including Barricades, Spiked Barricades and Fortified Barricades.
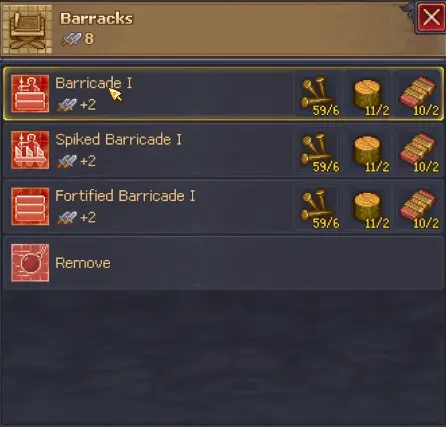
An early setup can move from roughly 10 Defense Power to 14, already clearing the first battle’s requirement of 12.
That is a better use of materials than massively overbuilding the first battlefield. Build enough to clear the gate with some margin, then save the remaining metal and construction parts for whatever the next stage actually requires.
The structures also remain useful after the first victory, so I do not treat them as disposable items that need to be torn down immediately afterward.
When a barricade or tower you expect to build is missing entirely, check the technology path before grinding another stack of materials. Missing technology, Mastery and workstation unlocks are handled in Inspirations & Talents.
Carry the Red Banner to Move the Squad
The Red Banner is the central control during the first battle.
Pick it up and the soldiers follow you. Put it down at a valid position and the squad stays there.
The banner cannot simply be dropped anywhere you want. The battlefield has specific positions where it can be placed, so scouting the nearby lanes before the wave arrives saves a lot of frantic running later.
I had much better results once I stopped dragging the squad toward whichever zombie happened to be closest. The bars across the top of the battle screen show where and when the next pressure is coming.
Read those first, then decide whether the banner really needs to move.
Killing Zombies Is Not the Win Condition
The first battle teaches a rule that remains important later: this is territorial combat, not a fixed kill-count challenge.
To capture an enemy flag:
clear the nearby enemies → hold the position → keep troops close while the capture progresses
More troops near the flag make it capture faster.
That creates a tradeoff. Moving the whole squad onto the new objective speeds the capture, but it can expose the position you just secured. The enemy is able to retake ground.
Two failure states are especially important:
- if enemies capture your base, the attempt is lost;
- if the Keeper’s health reaches zero, the attempt is lost.
Victory requires taking the required enemy positions and keeping control until the battle objective finishes.
The First Victory Unlocks Your Own Zombie Squads
Winning the first major battle does more than open the Port section of town.
One of the important rewards is the Defender’s Emblem.
Take it back to the Barracks and speak with the Battle Ram to unlock a squad slot.
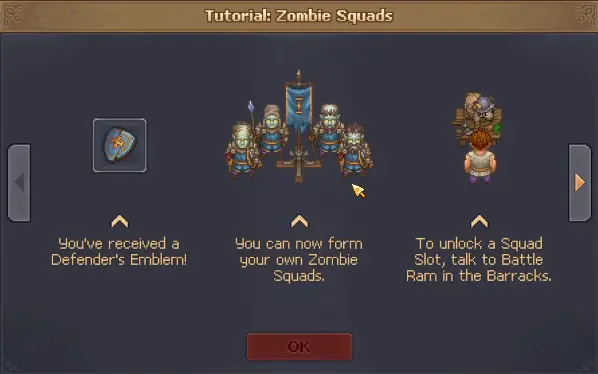
From that point forward, mercenaries are no longer your only way to increase the army.
Bring zombies to the Barracks and place them into the available squad slot. Story progression later allows more squads to participate in the same battle.
A Zombie Needs Armor and a Pike or Bow Before It Counts as a Soldier
A working zombie is not automatically a combat zombie.
The Barracks requires battle zombies to be equipped with:
- armor
- and either a pike or a bow
Without the combat equipment, a zombie you dragged all the way from a farm, mine or workshop may still fail to count toward the squad.
Better equipment also raises the squad’s combat rating.
This is one of the points where trying to improvise at the last minute wastes a lot of time. Moving four production zombies to the Barracks is easy; discovering that several of them still need armor and weapons after the battle window has arrived is not.
I prepare the equipment first, then pull workers away from production.
How to create additional zombies, improve their bodies and handle resurrection requirements belongs to Zombie Automation & Resurrection. For battle preparation, the important question is simpler: is this zombie equipped well enough to count and survive?
Do Not Empty Your Production Areas Just to Fill Squad Slots Early
The first custom squad can tempt you to turn every available zombie into a soldier.
That creates another cost.
A zombie currently cutting wood, mining, farming or running a workstation is doing something useful every day. Moving that worker to the Barracks may solve a battle requirement while quietly stopping the production chain that was supposed to make the next batch of armor, weapons or building parts.
I only strip productive jobs when the battle screen actually needs the extra squad.
Once later fights begin asking for several squads regularly, dedicated combat zombies make more sense. Before then, a mixed workforce gives much more flexibility.
Mercenaries Are Fast Power, but the Cost Keeps Growing
Mercenaries remain useful even after zombie squads unlock.
Their biggest advantage is speed. A hired squad avoids the work of pulling zombies out of production, finding armor for each one and preparing the correct weapons.
That makes a mercenary attractive when I am only a little short of the next battle requirement.
The downside is that the cost does not end with the first fight. Mercenaries need to be paid again, harder offensives become more expensive, and one later mercenary route can ask for 3 Gold Wine before that help becomes available.
At that point I compare two delays:
Can I produce the wine and pay the mercenary faster, or can I arm another zombie squad with resources I already have?
If the wine chain is still several technologies and crops away, hiring the extra force is no longer the quick option it first appeared to be.
Later Battles Increase Both Squad Count and Defense Power
The first fight’s 1 squad / 12 Defense Power requirement is only the starting point.
By a later mid-game offensive, the preparation screen can already demand:
3 squads and 64 Defense Power
At that scale, one banner and two basic barricades are no longer enough to make the battlefield comfortable.
This is also where stronger structures such as upgraded arrow towers, Spiked Barricades and Fortified Barricades begin earning their material cost. Raising Defense Power is useful before the fight; towers and barriers then continue working after the waves start.
When Iron becomes the resource preventing those upgrades rather than the battle mechanics themselves, fix the supply through Iron & the Zombie Mine instead of spending several days searching surface deposits again.
Multiple Squads Need Separate Jobs
Three squads should not be moved as one giant blob.
In one later fight, the pressure pattern made it much safer to put two squads on one lane and one squad on another, then move support only after the first position stabilized.
That is the main tactical change from the opening battle.
With one squad, moving the banner is mostly a question of when to leave the current position. With several squads, the question becomes which position can survive without you.
I use the wave bars to make that decision:
heavy incoming lane → reinforce it
quiet captured lane → leave one squad holding
new capture objective → move only the force you can spare
Dragging every squad to the same flag may capture it quickly, but it also gives the next wave an undefended route back into territory you already paid to take.
Ranged Squads Are Safer When the Front Line Is Taking Heavy Losses
Later battles also expose differences between combat roles.
In my three-squad fighting, the ranged zombies survived much more comfortably when they had space to shoot, while spear-equipped zombies standing directly in front of dangerous waves took the worst losses.
That did not make bows an automatic answer to every battle. It changed what I upgraded next.
A melee zombie expected to hold the front needs enough defensive development to survive that job. A ranged zombie can contribute damage while another unit, barricade or tower keeps enemies away from it.
This becomes especially noticeable against dangerous enemies that punish units standing still in front of them.
After one battle left the spear line badly depleted while the archers were still functioning, I stopped treating armor as something to add only when I needed more squad rating. For a frontline squad, defense is part of keeping the army intact for the next fight.
Arrow Towers and Barricades Buy Time Between Lanes
Later battlefields give defensive structures a second purpose beyond satisfying Defense Power.
They buy time.
An arrow tower can keep damaging enemies while you are moving between objectives. A fortified position can prevent one lane from collapsing immediately while two squads are fighting somewhere else.
That means placement matters more as the army grows.
I prefer to spend defenses on positions that must survive while I am away, rather than stacking everything around the group I already intend to control personally.
A strong squad and a tower sitting together on a quiet lane are wasted resources if another route is collapsing with nothing protecting it.
Not Every Later Battle Ends When the Last Flag Is Captured
The first fight teaches capture mechanics, but later encounters change the objective layout.
One later battle required holding a key position even after the push had succeeded. When that point was finally secure, the fight still had 2 minutes 49 seconds remaining.
At that moment, continuing to chase enemies away from the objective would have been the wrong play.
The job had changed from:
advance and capture
to:
hold the position until the timer expires
Another later battlefield uses five flags, which creates the opposite problem: spreading several squads across a much larger capture sequence while still leaving enough force to defend the rear.
So I check the current objective before applying the previous battle’s tactic. The same army system can support a capture fight, a multi-flag push or a timed defense, but the squad movement should change with the win condition.
Fix the Failure You Actually Saw Before Buying More Power
Losing a battle does not automatically mean the army needs another full tier of upgrades.
The failure usually points toward the next investment.
Battle will not start:
Check the required squad count, Defense Power and defensive structures.
Zombie does not count toward a squad:
Give it armor and the required pike or bow before replacing the worker.
Captured positions keep falling behind you:
Stop moving every squad forward. Leave enough force on the lane that still has
incoming pressure.
Frontline zombies die much faster than the archers:
Improve the melee squad’s defensive setup before producing even more bodies.
A timed-defense objective is already secured but losses keep increasing:
Hold the important position instead of chasing enemies beyond the defenses.
You are only slightly below the requirement:
Compare the cost of one mercenary squad with the cost of equipping another
group of zombies. The cheaper answer depends on what your current production
can already make.
That order saves more resources than reacting to every defeat by crafting a completely new army.
After the First Battle, Save Enough for the Next One
The first victory secures the Port, not the entire town.
The military campaign continues, and the next mercenary payment already rises from 5 silver to 7 silver 50 copper.
That is why I do not spend the victory money as though combat is finished. Handle the story objectives that opened with the Port, repair what is actually blocking progress, then return to military preparation when the next offensive becomes active.
For where each battle sits in the wider story and where to go after the newly secured district opens, continue with the Walkthrough.