The Route I Use From Camp to Coronation
My complete Hearth and Hamlet progression route from the opening Camp to Gold, trade, Blueprints, Magic, Ashenholt, the Castle, coronation, and the epilogue.
Updated:
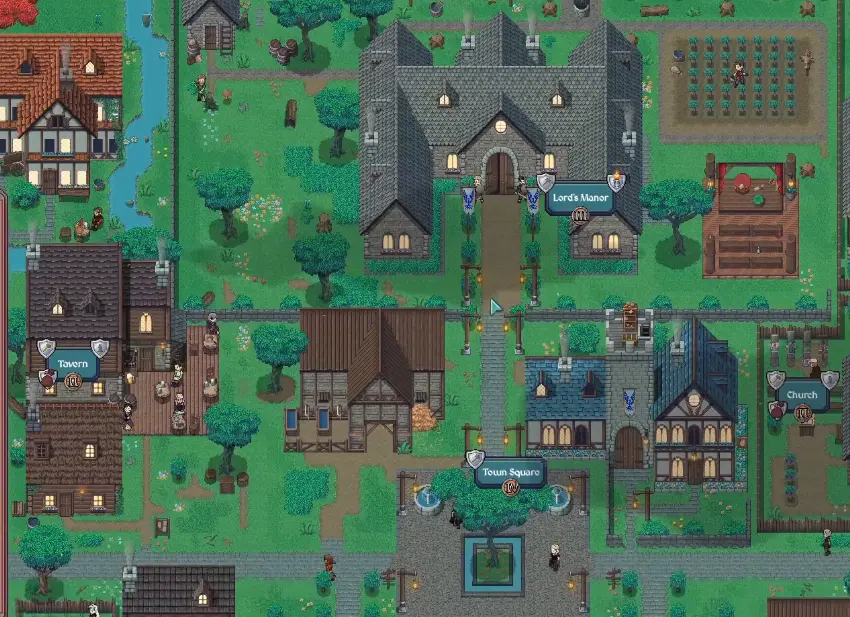
Quick Answer
I treat Hearth and Hamlet as a chain of progression gates rather than a race to buy every available upgrade.
My main route is:
stabilize the opening Camp
→ reach 50 population and develop the Town Square
→ unlock Iron and Guards
→ fight the first Goblins and cross the river for Gold
→ grow toward 400 population and complete the wall stage
→ upgrade the Market and unlock trade
→ upgrade the Library and unlock Blueprints
→ build Stone Walls
→ expand the Fishing Harbor and build a Ship
→ reach Rubiscar, recruit the Wizard, and unlock Magic
→ reach 1,200 population
→ prepare for the Ashenholt confrontation
→ survive Ancient Evil
→ finish the late diplomacy and Cathedral stages
→ build the Castle and moat
→ complete the coronation and epilogue
When a quest asks for a large payment, I stop buying side upgrades and finish the progression gate first.
Hearth and Hamlet gives me plenty of freedom between objectives, but the main story has a clear backbone.
The part that usually slows me down is not finding the next quest.
It is reaching that quest with the wrong economy.
I might have too little Food, Gold tied up in optional upgrades, a storage cap below the next requirement, an army I cannot comfortably support, or a progression building that still needs another level.
So I use the walkthrough for one question:
What should I be working toward next?
When the answer turns into a specific economy, combat, trade, Blueprint, Magic, or upgrade problem, I move to the dedicated guide instead of trying to solve every system here.
A complete run is roughly an 8–10 hour commitment if I stay active, although difficulty and play style can move that considerably.
1. Stabilize the Opening Camp
My first priority is not Research.
It is a town that can keep growing while I build.
I gather the opening Wood, improve the Camp, place my first workers, and unlock Fishing as soon as progression allows it.
Once Food production opens, I make sure Food is positive before I push population aggressively.
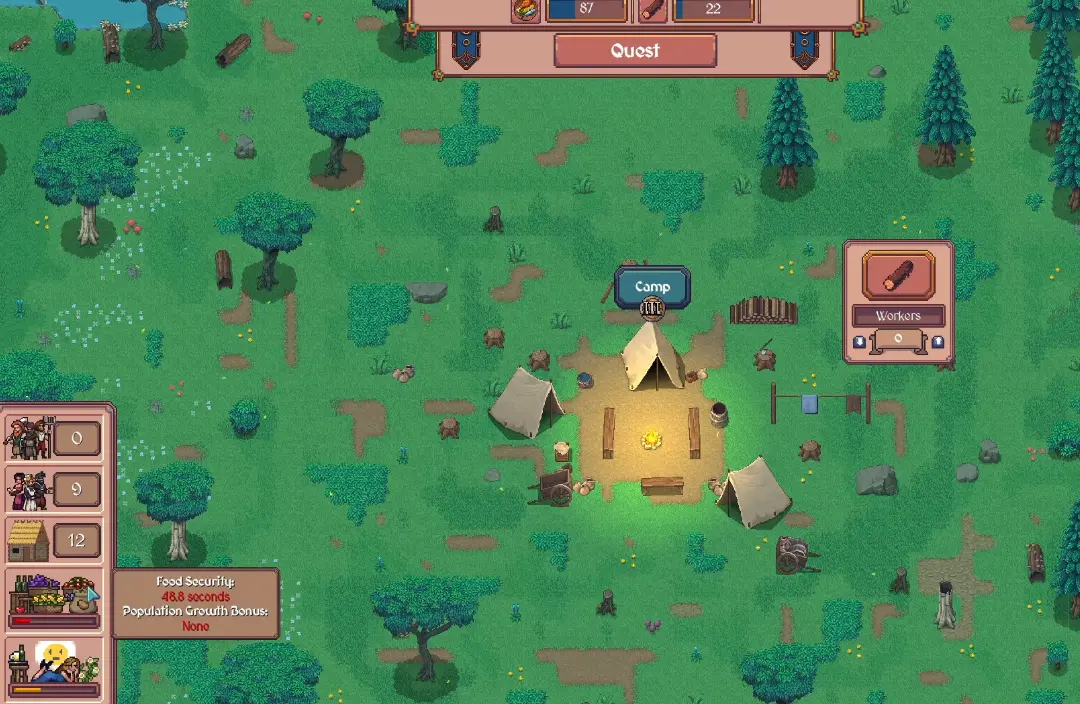
The checkpoint I want before moving deeper into the opening is simple:
Food is positive
→ population is growing
→ Wood and Stone can still be reassigned as needed
→ I am not spending every resource the moment it appears
If Food itself becomes the blocker, I switch to the Food shortage guide.
2. Reach 50 Population and Push the Town Square Stage
The early population targets move quickly if Food remains healthy.
At 50 population, I stop thinking of the settlement as only a Camp.
This is where more of the town starts interacting:
- housing;
- production;
- Research;
- Happiness;
- Stone;
- the Town Square;
- the first larger system unlocks.
I do not try to complete every early Research branch here.
I focus on whatever unlocks the next system or removes the current bottleneck.
The Town Square becomes especially important because its progression opens the next layer of the settlement, including Iron and Roads.
If I am unsure whether a Research purchase is worth delaying the next building, I use the Research and upgrade priorities.
3. Unlock Iron and Prepare the First Guards
Once Iron becomes available, I start producing it before the military becomes urgent.
I do not wait for a dangerous raid to discover that I have no Iron reserve and no workers ready to move.
The first Guard stage is also where I stop treating soldiers as free protection.
I recruit enough to handle the current threat without turning the army into the main economy.
The walkthrough checkpoint is:
Iron production working
→ Town Guard available
→ enough Guards for the current story pressure
→ Food still stable afterward
The exact decision between more Guards, soldier upgrades, Threat ratings, and Walls belongs in the Raids and Guards guide.
4. After the First Goblin Fight, Cross the River for Gold
The first major Goblin progression leads into Ashenholt’s demand.
That is my cue that Gold is no longer optional.
The story points north and tells me to acquire Gold across the river.
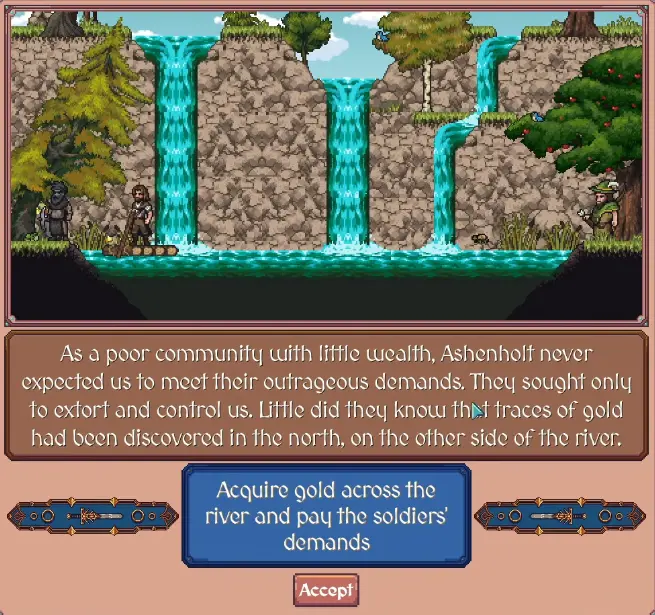
My route is:
finish the Goblin stage
→ build the rope bridge
→ cross the river
→ build the Gold Mine
→ assign a worker
→ complete the current Ashenholt payment
This is also where I become stricter about optional spending.
Once a large Gold requirement is visible, I stop buying every small upgrade that appears between me and the objective.
The full Gold economy belongs in the Gold guide.
For progression, I only need reliable Gold and the current payment cleared.
5. Grow Toward 400 Population and Complete the Wall Stage
After Gold comes online, the town enters a larger growth phase.
I push toward 400 population while keeping the core economy flexible enough to support the next construction gates.
Walls become an important progression marker here.
I focus on completing the required defensive stage rather than polishing every military side upgrade first.
This is also when storage starts becoming a real progression check.
If the next required structure costs more of a resource than I can physically hold, I fix storage before I keep farming.
Otherwise I leave storage alone and keep moving.
6. Upgrade the Market and Start Trade
After the earlier wall progression, the Market becomes one of the next major system gates.
The upgraded Market opens trade expeditions.
That changes the economy because I no longer need every production line to solve its own shortages.
A real surplus can now be converted into something the town needs more urgently.
I do not explain Demand, route choices, Caravan upgrades, or trade returns here.
Those decisions belong in the Caravan and trade guide.
The walkthrough checkpoint is only:
Market upgraded
→ first Caravan available
→ trade expeditions working
→ continue the story toward the Library
7. Upgrade the Library and Unlock Blueprints
Blueprint requirements can start appearing before the system feels fully usable.
I do not treat those early locked buttons as a sign that I missed a resource node.
I keep following progression until the Library objective asks me to unlock Blueprints.
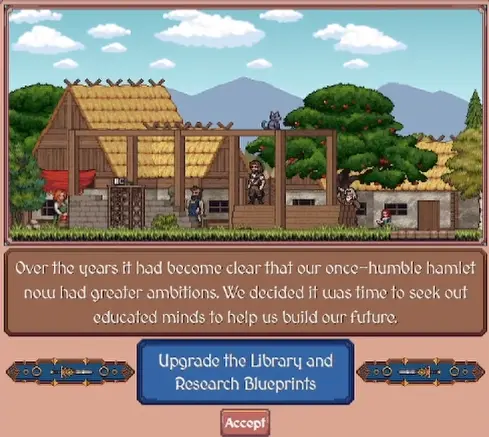
From there, advanced building upgrades become part of normal progression.
The detailed questions —
- how to commission more;
- which color is required;
- when to save them;
- which building deserves one first;
— belong in the Blueprints guide.
My walkthrough goal is simply to get the Blueprint system online and continue toward the buildings required for the next wall tier.
8. Upgrade to Stone Walls
Stone Walls are one of my clearest midgame checkpoints.
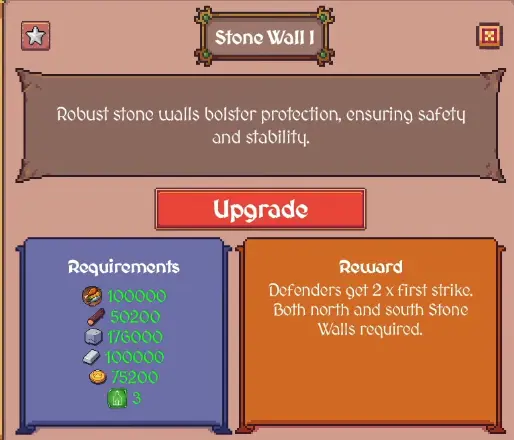
If this stage feels impossibly expensive, I do not assume the answer is simply more waiting.
I check whether:
- an important production building is still under-upgraded;
- storage is below the required amount;
- trade can solve a bottleneck;
- a required Blueprint is missing.
Once Stone Walls are complete, I stop overinvesting in optional military improvements unless a real raid requires them.
The story is about to demand a different kind of expansion.
9. Expand the Fishing Harbor and Build the Ship
After the Stone Wall stage, the story begins pushing beyond the settlement itself.
The key route is:
expand the Fishing Harbor
→ construct a Ship
→ prepare the expedition to Rubiscar
At this point I deliberately stop treating every late upgrade as urgent.
The next story chain needs substantial resources, and buying optional improvements can delay it considerably.
The Ship is also not the end of the Magic route.
It is transportation.
I still need the Rubiscar progression that follows.
10. Reach Rubiscar and Recruit the Wizard
Rubiscar is where the Magic route becomes explicit.
The expedition requires a large Gold commitment, and the Wizard stage that follows turns into a large Food commitment.
I keep those exact economy decisions in the Magic unlock guide.
For the walkthrough, the sequence is what matters:
Ship ready
→ Rubiscar expedition
→ Wizard agreement
→ Wizard joins the town
If I am still trying to reach this point and Gold or Food is collapsing, I fix that system first instead of treating Magic as the problem.
11. Build Witch’s Mire and Unlock Magic Production
The Wizard is not yet the same thing as a functioning Magic economy.
The major production checkpoint is Witch’s Mire.
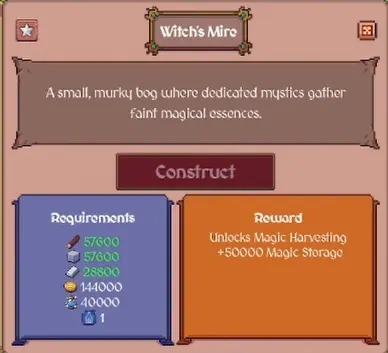
This stage combines normal resources with a higher Blueprint requirement.
If one specific requirement is missing, I solve that requirement instead of continuing to grind everything.
Once Witch’s Mire is complete, Magic Harvesting opens and the town can begin producing Magic directly.
12. Continue Into the Magic Academy
After the Wizard and Magic production are established, the story eventually moves toward the ruins and the Magic Academy.
The order I check is:
Rubiscar completed
→ Wizard recruited
→ Witch’s Mire built
→ Magic production active
→ story advances to the Academy objective
If the Academy is not available yet, I check the earlier Magic chain instead of buying random late-game upgrades.
The Magic unlock guide owns that full troubleshooting route.
13. Reach 1,200 Population
The next major population milestone is 1,200.
By this stage I already have far more systems consuming resources at once, so I do not force population if Food is barely positive.
The target itself is part of normal late-game progression.
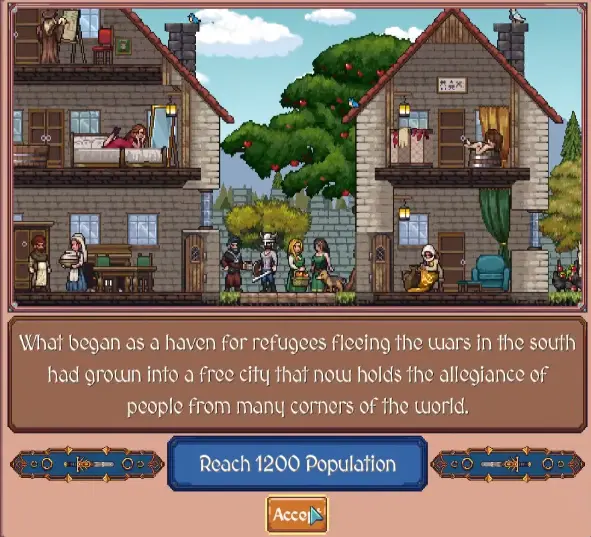
My checkpoint is not simply:
population = 1,200.
I want the town to remain flexible after reaching it.
I should still be able to shift workers into Food, Iron, Gold, or Magic without collapsing another line.
14. Prepare Before the Major Ashenholt Confrontation
The later Ashenholt conflict is not a normal small raid.
I treat it as a story commitment that deserves preparation before I trigger it.
Before pushing the confrontation, I want:
Food positive
→ Iron production ready
→ current Walls and useful military upgrades in place
→ enough reserves to recover after the fight
I do not use a fixed soldier count because difficulty, First Strike, Walls, and soldier upgrades change what the army can handle.
After the confrontation, the story begins expecting a much more serious military presence as part of the settlement’s transformation into a kingdom.
The exact army decisions remain in the Raids and Guards guide.
15. Survive Ancient Evil
The Ancient Evil sequence is one of the clearest late-game story checkpoints.
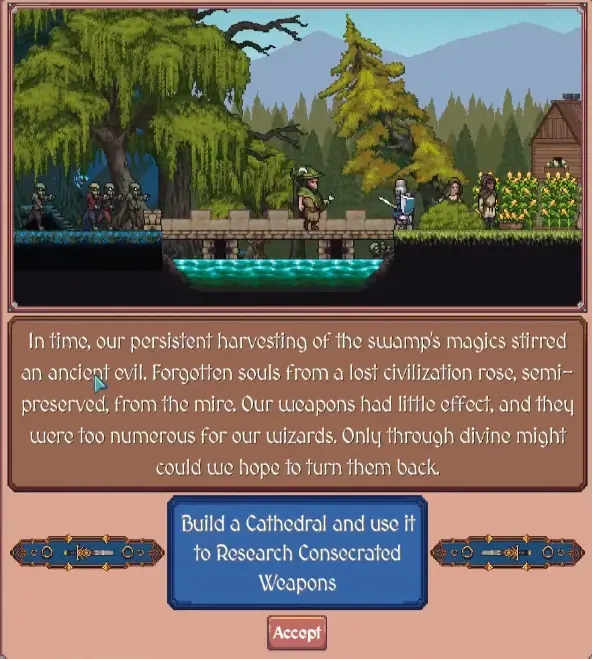
At this point I stop thinking that one large basic army will solve every problem.
The late game increasingly mixes:
- stronger Research;
- Magic;
- defense;
- diplomacy;
- high-tier buildings.
If one of those systems is significantly behind, I fix it before trying to brute-force the rest of the chain.
Surviving this stage also contributes to achievement progression, but I do not change the main route just to optimize achievements during a normal first clear.
16. Finish the Late Diplomacy and Cathedral Stage
After the largest military threats, progression shifts toward recognition and final kingdom-building requirements.
The Cathedral belongs here as a late story gate.
I keep this part intentionally concise because I do not treat Cathedral progression as a large independent system.
My rule at this point is mostly about spending discipline:
required late building or diplomacy gate
→ buy it.
optional upgrade that does not change the route
→ usually wait.
The closer I get to the ending, the less time optional percentage upgrades have to repay their cost.
17. Prepare the Final Military and Castle Requirements
The final phase pulls several mature systems together.
The story expects high-tier military development, strong production, sufficient storage, and the late civic progression already completed.
I stop trying to make every production branch perfect.
I only fix whichever resource is preventing the final requirements from being completed.
This is also when I check storage aggressively.
If the final objective requires more of a resource than I can hold, capacity becomes mandatory.
If the requirement already fits, I keep producing instead of buying storage simply because the upgrade exists.
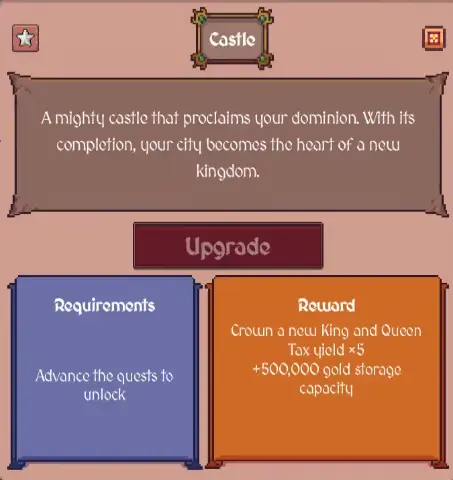
18. Build the Castle and Moat
Once the final economy is ready, the route becomes much more direct.
I finish the required late progression, then move into:
Castle
→ moat / final defensive upgrade
→ coronation
The Castle stage is expensive enough that I treat it as a whole-town test rather than another building purchase.
At this point I stop starting new side projects.
If the final requirement is visible, I point the economy directly at it.
19. Complete the Coronation and Epilogue
Late in the story, the objective shifts to crowning the new rulers.
My ending route is:
finish the remaining late requirement
→ Castle complete
→ moat complete
→ coronation ready
→ finish the story
→ epilogue
If I only care about finishing the main story, I complete the sequence.
If I am also trying for 100%, this is the point where I check whether I still need cleanup achievements before ending the run.
The Achievements guide owns that decision.
My Full Progression Route at a Glance
When I lose track of the story, this is the sequence I return to:
Camp
→ stable Food
→ 50 population
→ Town Square
→ Iron
→ Guards
→ first Goblin progression
→ river and Gold Mine
→ Ashenholt payment
→ 400 population
→ Walls
→ Market
→ Trade
→ Library
→ Blueprints
→ Stone Walls
→ Fishing Harbor
→ Ship
→ Rubiscar
→ Wizard
→ Witch’s Mire
→ Magic Harvesting
→ Magic Academy
→ 1,200 population
→ Ashenholt confrontation
→ late military progression
→ Ancient Evil
→ late diplomacy
→ Cathedral
→ Castle
→ moat
→ coronation
→ epilogue
Whenever I get stuck, I identify which item in that chain I have actually reached.
Then I fix only the system blocking the next item instead of trying to finish every upgrade in the town before I move on.