How I Trade Without Selling the Resources I Need Next
My Caravan route from the first Market upgrade to two active trade routes, including how I read demand, choose exports, and avoid selling the next quest.
Updated:
Quick Answer
I unlock trade by progressing until the upgraded Market lets me build my first Caravan.
In my run, that first Caravan cost 21,000 Gold.
Once it is available, my trade decision is:
check the next quest
→ check which resources are genuinely surplus
→ compare destination Demand
→ export the safest surplus
→ import the resource currently blocking progression
→ check everything again when the Caravan returns
I do not keep a Caravan moving just because it is available.
If the next quest needs the resource I would have to sell, I leave the Caravan idle.
Later Market progression lets me run two Caravans at once, which is when trade becomes a regular part of my economy instead of an occasional conversion.
Trade is easy to use and easy to misuse.
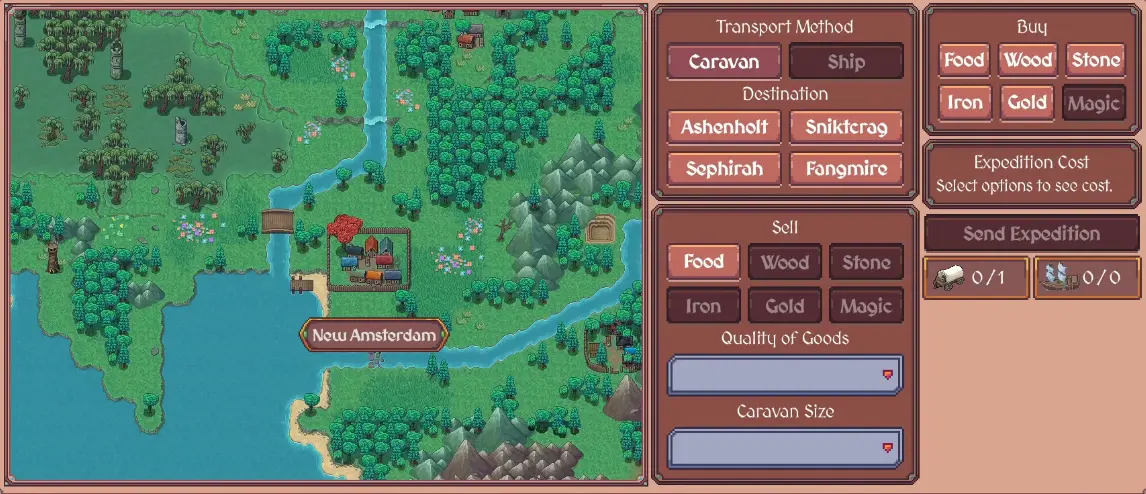
The expedition screen only asks me where to go, what to sell, and what I want back.
The harder decision is whether the resource I am about to remove from town is actually surplus.
A full storage bar can make me feel rich, but that same resource may be exactly what the next wall, Library upgrade, population push, or story payment needs.
So I do not use trade to empty storage.
I use it to convert something I can safely spare into the resource currently slowing me down.
If I need the story order around this stage, I use the complete progression route. Here I only care about the trade decisions themselves.
I Save for the First Caravan Before Buying Small Side Upgrades
Building the first Market is not enough to start useful trade.
I keep progressing until the Market upgrade and related trade option become available, then I prioritize the Caravan itself.
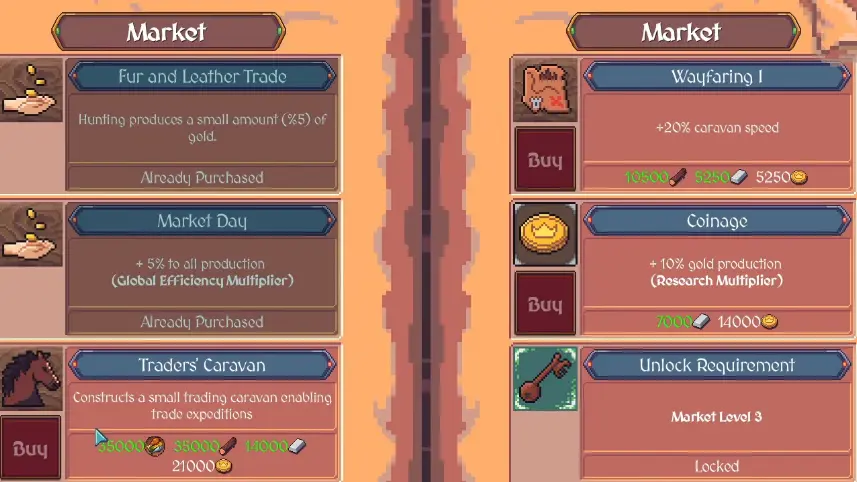
In my run, the first Caravan required 21,000 Gold.
This is one of the clearest cases where I stop buying every affordable upgrade.
Around the same stage I also had a 10% Gold production upgrade available for 9,000 Gold.
It was not a bad upgrade.
The timing was bad.
Spending 9,000 there would have delayed the 21,000-Gold purchase that opened an entirely new way to move resources around the economy.
So my rule is:
If the current objective is waiting on the Caravan, I finish the Caravan first.
I can come back for the smaller production bonus after trade is running.
If Gold itself is what is keeping me from reaching that point, I switch to the Gold guide rather than turning this page into a second Gold economy guide.
I Read the Expedition Screen as a Resource Conversion
Once the Caravan exists, the expedition screen gives me three decisions:
destination
resource sold
resource received
I do not choose a destination just because I used it on the previous trip.
I check what that destination currently wants.
That is because Demand changes how attractive an export is.
Demand Is the First Trade Value I Check
One of my first useful routes came from Food.
Ashenholt showed Very High Demand for Food, which made Food much more attractive there than sending a resource the destination barely wanted.
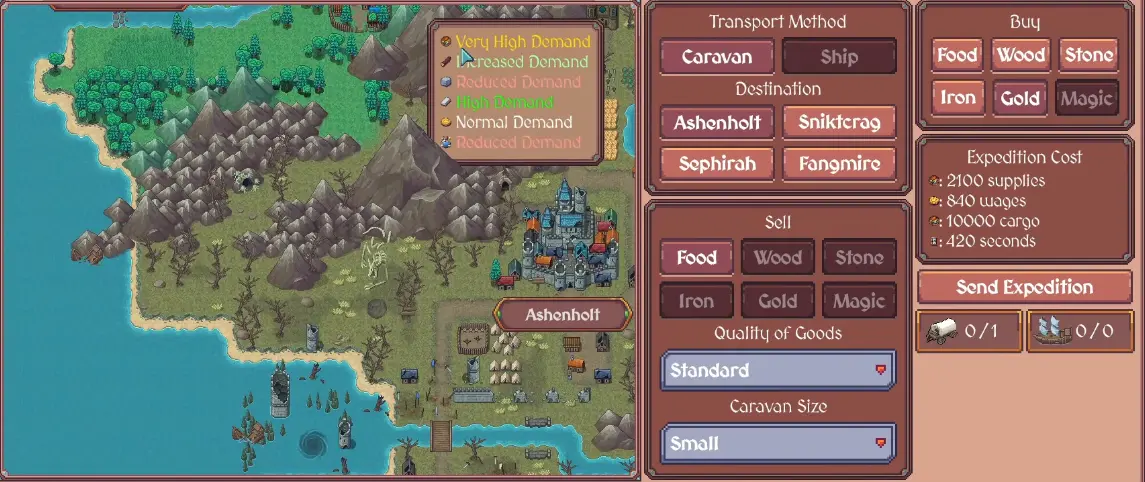
On one expedition I sent 10,000 Food into that Very High Demand and the route showed about 12,000 Gold coming back.
I do not treat that as a permanent exchange rate.
The useful lesson is not:
10,000 Food always equals 12,000 Gold.
It is:
Demand can make a resource worth exporting even when I would not normally use it as my main trade good.
Later I also saw destinations showing stronger interest in Wood or Iron.
That gave me a reason to change exports as my own economy changed instead of running the same Food route forever.
I Sell the Safest Surplus, Not the Largest Stockpile
Before sending any Caravan, I check what the town is about to need.
My basic questions are:
What does the current quest require?
Which resource is rebuilding slowly?
Is Food still comfortably positive after population and military upkeep?
Am I approaching an expensive wall, Library, Market, or other building upgrade?
If Food is capped, Food Security is comfortable, and no large Food commitment is coming, exporting Food can make sense.
If my army has pushed consumption up or I am about to grow population aggressively, I keep the Food.
The detailed Food economy belongs in the Food shortage guide. From the Caravan side, the decision is simply whether the stock is safe to remove.
I apply the same rule to every other resource.
If Stone keeps hitting its cap while Wood or Gold is blocking progression, Stone is a good trade candidate.
If the next wall needs a huge Stone reserve, I stop selling Stone even when its Demand looks attractive.
The best trade is usually not the resource with the biggest number in storage.
It is the resource I can remove without creating the next bottleneck myself.
I Do Not Unlock Every Trade Good Immediately
As progression continues, more resources become useful as trade goods.
That gives me more ways to exploit strong Demand, but I do not buy every trade-related unlock as soon as it appears.
I wait until one of two things is true:
I regularly produce that resource faster than I can spend it.
or
a useful destination wants it badly enough that opening the trade option solves a real bottleneck.
If neither is true, I leave the upgrade alone.
Trade upgrades still compete with the same Gold and resources I need for Library progression, Blueprints, defenses, and the next major objective.
Around the Blueprint stage especially, I do not try to complete the entire trade menu just because the options have appeared.
The trade system helps me progress into Blueprints; it should not consume the resources I need to get there.
Caravan Speed Comes After I Find a Route Worth Repeating
Once I own a Caravan, speed upgrades become much more interesting.
But even then I do not buy speed automatically.
Early expeditions in my runs could take several minutes.
If I have found a trade I want to repeat continuously, reducing that turnaround has real value.
If I only send a Caravan occasionally because my resources are needed at home, faster travel does not solve an important problem.
So my order is:
useful repeatable route
→ then Caravan speed
not:
buy every Caravan upgrade
→ hope I find a reason to use it later
I do not pay to make bad trades return faster.
I Recheck the Town Every Time a Caravan Returns
A returning Caravan is not an automatic resend signal.
Even if the last trade was excellent, something may have changed while it was away.
Maybe the next quest appeared.
Maybe Food consumption increased.
Maybe I spent the resource I had been importing.
Maybe another destination now has better Demand.
If the same trade still makes sense, I send it again.
If not, I change it.
That keeps trade attached to the state of my town instead of turning one profitable route into a habit I stop thinking about.
The Second Caravan Is When Trade Becomes Infrastructure
The first Caravan is useful, but I still spend a lot of time waiting for one conversion to finish.
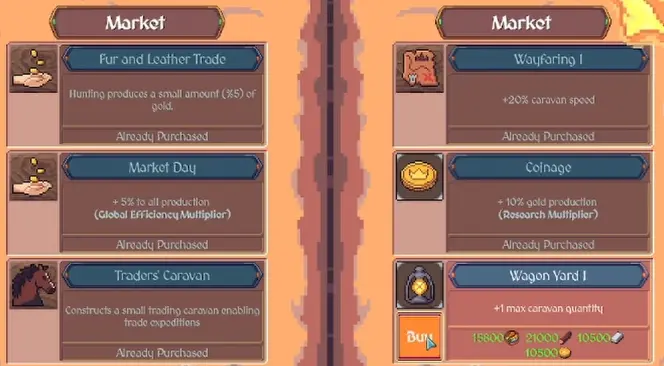
Later Market progression opens additional Caravan capacity and stronger trade options.
At that point I can eventually run two Caravans at once.
That changes what trade can do.
Instead of choosing between:
bring in Gold
or
bring in the resource I am short on
I can potentially run both kinds of route at the same time.
A later state in my run had two Caravan slots and a Moderate Caravan size.
One returning route brought back 36,000 Gold.
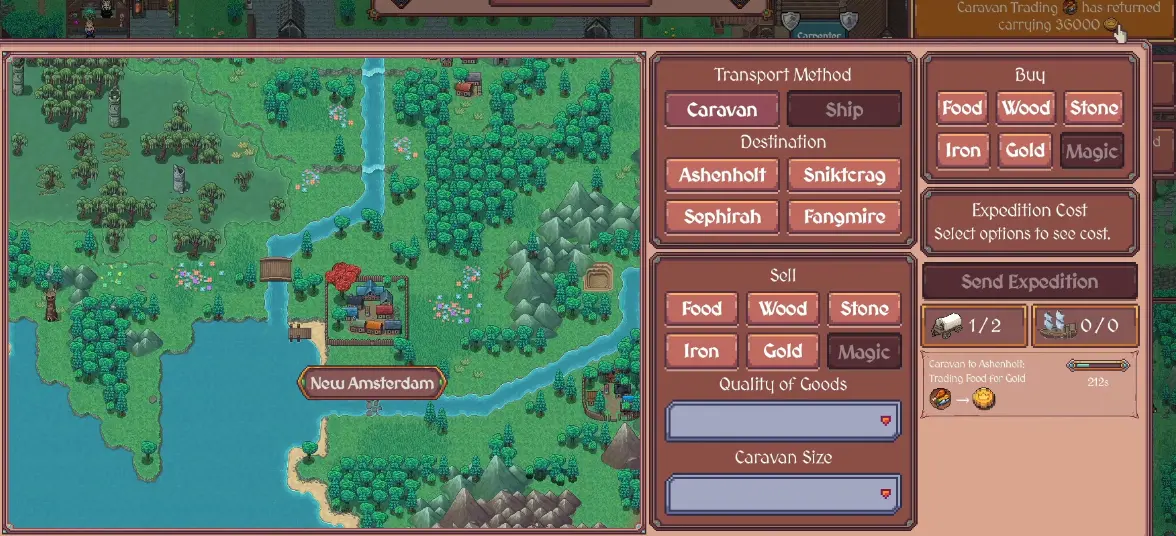
That 36,000 is not a promised return for every route.
It is an example of how much more important trade can become after the Market, available goods, Caravan capacity, and destination Demand all improve.
I Only Get the Second Caravan When I Can Feed Two Routes
Unlocking a second Caravan does not automatically mean my economy is ready to use it.
I consider it worthwhile when:
- the first Caravan is almost always away;
- at least one resource keeps hitting storage cap;
- I regularly have more than one bottleneck trade could solve;
- shipping one cargo does not put Food or construction resources at risk.
I delay it if the first Caravan already consumes most of my safe surplus.
Two Caravan slots do not help if the second one sits idle.
They help even less if I start exporting so aggressively that I later have to wait for the same resources to rebuild.
The signal I look for is:
the first Caravan is constantly useful, and the town remains stable while it is away.
That is when I know more Caravan capacity can actually improve progression.
I Stop Trading Before a Large Story Payment
One of my most important trade habits is knowing when not to trade.
As soon as the story starts pointing toward a major requirement, I become more conservative with the resources involved.
I stop asking:
Can I get a good price for this?
and start asking:
Will I need this before the Caravan returns and the stockpile rebuilds?
That matters around large walls, Library progression, population pushes, and later Magic requirements.
When I am approaching those stages, I keep the required resource until I know I have enough.
The full Magic progression belongs in the Magic unlock guide. The trade lesson is simply that a valuable export stops being valuable when it delays the next objective.
Sometimes the correct trade decision is to leave the Caravan sitting at home.
An idle Caravan costs me potential income.
Selling the resource that blocks the next quest costs me progression.
I choose the idle Caravan.
The Trade Loop I Use in the Mid and Late Game
Once I have more destinations, more goods, and additional Caravan capacity, I stop looking for one permanent “best trade.”
I use the same decision loop every time:
check the current quest
→ check stockpiles and net production
→ check destination Demand
→ export the safest surplus
→ import the current bottleneck
→ keep a reserve for the next major cost
→ recheck everything when the Caravan returns
That is what keeps trade useful.
The moment I sell a resource and then immediately have to wait for that exact same resource to rebuild for the next objective, I know I traded too aggressively.