How I Recover a Town Before Starvation Snowballs
My recovery order for Food shortages: check Food flow, cut avoidable consumption, move workers, rebuild a surplus, then resume growth and military expansion.
Updated:
Quick Answer
When Food starts falling, I stop trying to progress for a moment.
My recovery order is:
check the Food change, not just the amount stored
→ turn off optional Food consumption
→ stop adding military upkeep
→ move workers from capped or nonessential resources into Food
→ rebuild a clearly positive Food flow
→ wait for Starvation and Food Security to recover
→ resume growth, trade, and military expansion gradually
A large Food stockpile can hide a bad economy. If Food is falling every tick, more storage only gives me longer before the shortage becomes visible.
Food is the resource I watch whenever the town changes phase.
Early on, Food determines whether population growth can accelerate at all.
Later, the same economy has to support a larger population, military upkeep, policies, construction costs, and the occasional trade shipment.
That is why a settlement can look completely safe for a long time and then suddenly start sliding toward Starvation after one new expense.
When that happens, I do not immediately buy every Farm, Fishing, or Hunting upgrade I can find.
I first ask:
What changed the Food flow?
If I only need the next story objective, I use the complete progression route.
If the Food number itself is falling, I fix the economy first.
I Read Food Security Before I Trust the Stockpile
Food Security tells me much more than a full storage bar.
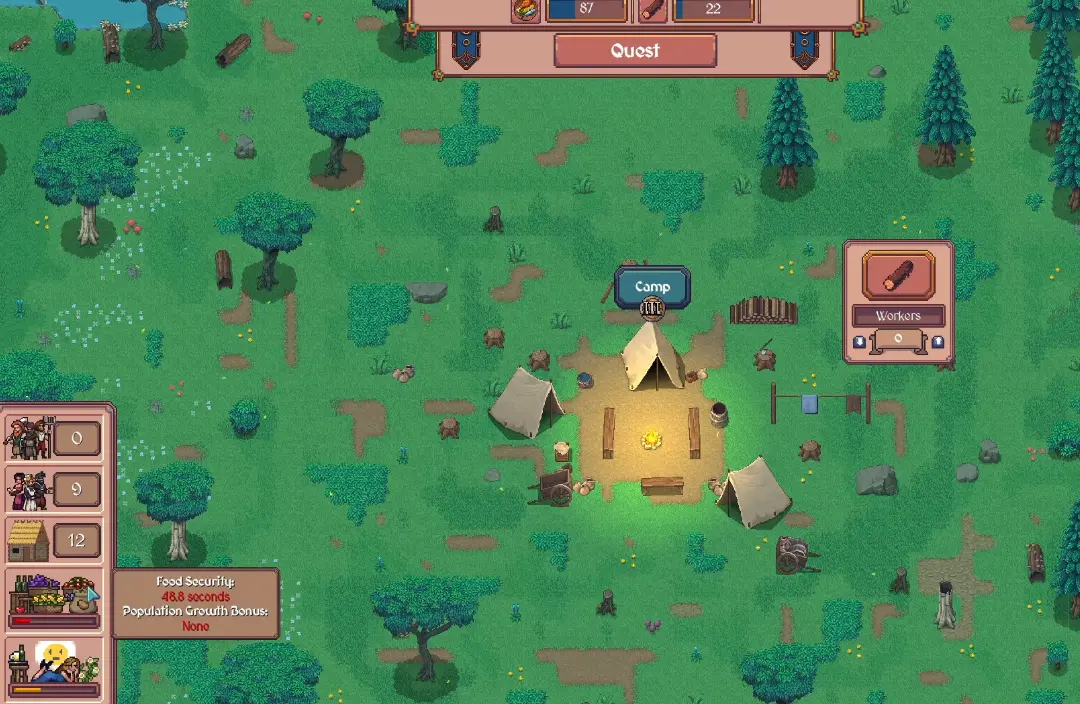
Very early in one run, I had roughly 45 seconds of Food Security and no population growth bonus.
Once I built a stronger surplus, the settlement moved into a better growth state and population was increasing at roughly 1 person per minute.
That immediately changed how I treated Food purchases.
If the current objective is population growth, I do not keep spending large chunks of Food simply because I can afford the button.
A purchase can knock Food Security back down and stall growth even when production is still technically positive.
The first Fisherman’s Hut also gave me a useful early baseline.
Each worker was producing 2 Food, and with two workers assigned I was around +2 net Food after consumption in that early setup.
That stopped the immediate shortage.
It was not a comfortable growth economy.
When population is the current gate, I want enough positive Food to build Security as well as replace consumption.
When the quest has moved to Wood, Stone, Iron, or another system, I can move some of those workers away again.
I Stop Spending Food When Population Is the Real Objective
One of the easiest ways to make population progression feel broken is to keep spending Food while waiting for population to rise.
I saw this happen repeatedly.
Food production was positive.
Then I bought something.
The reserve dropped.
The population growth bonus weakened or disappeared.
Then I waited for the same Food to rebuild before growth improved again.
So when the current objective is a population gate, I change my spending rule:
If an optional purchase does not improve Food, housing, or the current population objective, it can wait.
I would rather leave a small side upgrade untouched for another minute than repeatedly reset the Food buffer I need for new workers.
Once the population target is complete, I can spend the reserve and move workers toward the next bottleneck.
My Emergency Recovery Starts With the Leak
When Food has already turned negative, I do not start by browsing Research.
I stop whatever is making the shortage worse.
1. I cut optional consumption
If a policy is increasing Food use and I can live without its bonus temporarily, I switch it off.
2. I stop increasing military upkeep
I do not recruit more soldiers or buy upkeep-heavy military upgrades while Food is already red.
3. I move workers immediately
Workers on capped Wood, Stone, or Iron are the easiest ones to redirect into Fishing, Hunting, or Farming.
4. I rebuild a real positive margin
If Starvation is already active, +1 Food is not a recovery plan.
I want enough net production to rebuild stored Food while the rest of the settlement continues consuming it.
5. I leave the economy alone long enough to stabilize
I do not immediately spend the first Food I recover.
I wait until the shortage is clearly easing before I restart expensive construction, Food exports, or military expansion.
That fixes the actual imbalance faster than buying more capacity while the same negative flow keeps draining it.
Military Upkeep Is My First Midgame Food Check
The army is where Food becomes much harder to read.
A military upgrade can look affordable because the purchase cost itself is manageable.
The dangerous part is what happens when its recurring upkeep applies across the entire army.
In one midgame state, Food had turned negative after military expansion.
When I opened the breakdown, military consumption was approaching the scale of the civilian population’s Food use.
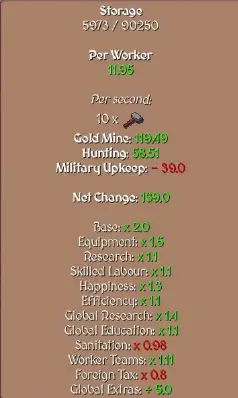
That is why I do not judge an army upgrade only by its combat reward.
If it improves soldiers without adding more recurring Food cost, I value it much more highly during a tight economy.
If it increases upkeep across every soldier, I check the Food margin first.
The combat question — how many Guards I need, how I judge Threat, and whether Walls are enough — belongs in the Raids and Guards guide.
From the Food side, my rule is simpler:
military strength I am not using still consumes resources.
If the town is already winning safely, I do not keep expanding the army just because I can.
Soup Kitchen Helps Until Its Food Cost Becomes the Bottleneck
The Soup Kitchen is a good example of why I check both sides of a policy.
It gives +10% Happiness but also raises Food consumption by 10%.
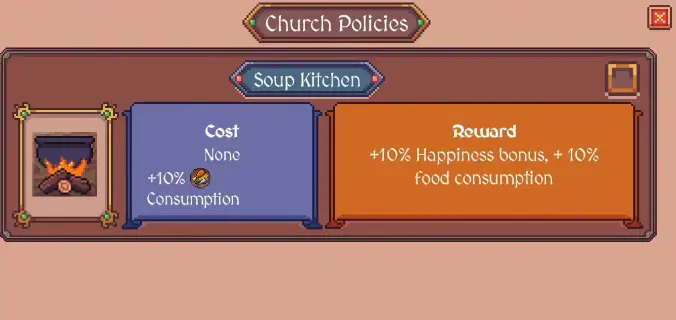
When Food is strong, that trade can be worthwhile.
When Food is already near zero, the question changes.
I am no longer trying to optimize total production.
I am trying to stop the shortage.
So I switch the policy off, rebuild Food, and reconsider it after the economy is stable again.
I do not leave a recurring cost active simply because it was useful before the bottleneck changed.
A Defeat Can Turn a Stable Town Into a Food Emergency
One of the worst Food collapses I encountered did not begin with weak Farms.
It began with a lost battle.
The defeat applied a large temporary penalty to Happiness and production while the army was still consuming resources.
Food became the first economy I had to repair.
In that state, military upkeep was already -9.
I moved workers out of less urgent production and back into Food.
After the reallocation, the Food flow recovered to roughly +40.
The exact number is not the important part.
A smaller or larger town will produce a different result.
The useful test is whether Food is rebuilding fast enough to survive the remaining defeat penalty.
If I am sitting at +1 or +2 while Starvation is active, I keep reallocating.
I want a recovery margin, not a technically positive number.
Only after Food is safe do I go back to replacing losses or pushing the next objective.
Starvation Gets Worse When I Leave a Weak Economy Unattended
A town can look stable while I am actively moving workers around and reacting to threats.
The real test is what happens when I stop touching it.
I once left a settlement running for roughly ten minutes with what looked like a reasonable Food reserve.
When I returned, the town had suffered a defeat and the status had escalated to Starvation intensified.
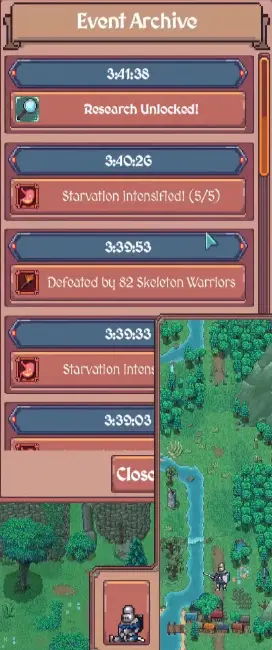
Recovery was not instant.
Even after redirecting workers and improving Food production, the starvation state still needed time to ease.
That is why I am much more conservative before leaving the town running.
I want:
- clearly positive Food production;
- a meaningful stored reserve;
- no unnecessary Food-consuming policy;
- no military expansion that is about to increase upkeep;
- no dangerous incoming threat I am already worried about.
If one of those checks fails, I stabilize the town first.
Food Storage Buys Time; It Does Not Repair the Economy
Food Storage is useful.
It gives me more room to absorb a large purchase, population change, or temporary production shock.
But it does not change net Food production.
If Food is negative, more storage simply delays the moment the reserve reaches zero.
So I upgrade Food Storage when:
I repeatedly hit the current cap
or
a required purchase exceeds what I can currently hold
or
the economy is already stable and I want a larger emergency reserve.
I do not buy Food Storage as my first response to a red Food number.
First I make the number positive.
Then I decide whether more capacity is actually useful.
I Only Trade Food That the Town Can Really Spare
A full Food bar is not automatic permission to put Food on a Caravan.
Before I export it, I check:
Is Food production clearly positive after current upkeep?
Is Food Security already comfortable?
Is a large population, military, or construction cost coming next?
If the first two are yes and the third is no, I can treat some Food as surplus.
If the town is near break-even, I keep it.
The exact route, Demand, and export decision belong in the Caravan and trade guide.
From the Food side, I only need one rule:
I never export the reserve that is keeping growth or starvation recovery alive.
I Do Not Call the Shortage Fixed as Soon as Food Turns Green
A positive Food number is the beginning of recovery.
It is not the end.
Before I start spending normally again, I look for this sequence:
Food is clearly positive
→ Starvation has stopped worsening
→ Food Security is rebuilding
→ population growth is active again if I need it
→ a normal purchase does not immediately destroy the margin
Only then do I begin moving workers away from Food.
And I do it gradually.
If Stone is now the bottleneck, I move one or two workers to Stone and watch Food again.
If the Food margin stays healthy, I move another.
If it collapses, I move one back.
That small adjustment is much safer than removing half the Food workforce because the storage bar happens to be full.
Food Shortages Are Usually Flow Problems First
The main lesson I use throughout the game is simple:
Food shortage is usually a flow problem before it is a building problem.
Population can increase consumption.
Military upkeep can consume the surplus.
Policies can add recurring costs.
A defeat can cut production.
Trade can remove a reserve instantly.
Storage can hide the problem without solving it.
So when Food starts falling, I do not ask which Food upgrade I can buy first.
I ask what changed.
Then I remove the new pressure, redirect workers, rebuild the margin, and only resume progression once the town can absorb normal spending again.