How I Keep Gold From Stalling My Town
My Gold route from the first Ashenholt demand to late-game costs, including when I mine, use Hunting, tax, upgrade storage, save, and stop buying side upgrades.
Updated:
Quick Answer
I do not try to make Gold at the start of the game.
I wait until Ashenholt demands payment, then:
finish the first Goblin fight
→ build the rope bridge
→ cross the river
→ build and staff the Gold Mine
→ pay the current Gold gate before buying optional upgrades
→ add Hunting Gold when that upgrade becomes available
→ use trade as a secondary Gold source when I have a real surplus
→ use taxation only when my Happiness can absorb the penalty
→ raise Gold storage only when the next required payment will not fit
The mistake I avoid most is spending several small amounts of Gold while a much larger mandatory payment is already in sight.
Gold changes how I spend everything else.
Before Gold appears, a bad purchase usually means I gather more Wood, Stone, or Food.
Once Gold becomes the bottleneck, almost every optional purchase competes with story progression, Blueprints, military upgrades, advanced buildings, and later Magic infrastructure.
That is why I treat Gold as a timing problem, not only a production problem.
If I need the surrounding quest order, I use the complete progression route.
Here I only care about three questions:
How do I get Gold online?
How do I increase Gold income when it is still the bottleneck?
When should I stop spending and save for the next gate?
Gold Unlocks After the First Ashenholt Demand
I do not waste time looking for a Gold Mine around the opening settlement.
The Gold route begins after the first Goblin encounter.
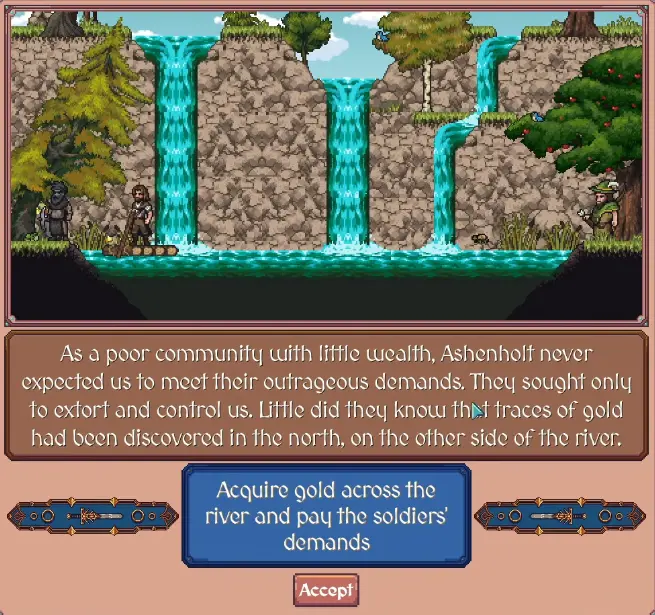
Ashenholt arrives, demands payment, and the objective points me toward Gold across the river.
My route is:
finish the Goblin encounter
→ take the Ashenholt objective
→ build the rope bridge
→ cross north
→ build the Gold Mine
→ assign a worker
→ save for the payment
The first payment asks for 10,000 Gold.
At this point, my Gold storage can already hold 20,000, so I do not need to buy extra capacity just to finish the first demand.
I also want this stage finished quickly because the Ashenholt modifier in my run reduced both production and Happiness by 10%.
That means delaying the payment does not only delay Gold progression.
It slows the rest of the town at the same time.
I Staff the Gold Mine Before Buying Convenience Upgrades
The first Gold Mine does not need to be impressive.
Its first job is simply to turn the Ashenholt objective from a dead stop into a countdown.
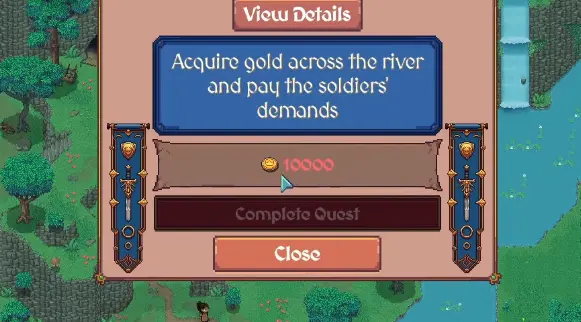
Once the Mine is working, every Gold purchase has to compete with the current quest.
If I have 6,000 Gold and the objective wants 10,000, I do not spend 4,000 on an optional upgrade unless it directly shortens the same bottleneck.
That does not mean I never buy upgrades while saving.
A meaningful global production increase can still be worth it because it improves the whole economy.
A small bonus to Wood while Wood is already sitting at its cap usually is not.
My basic rule is:
If the upgrade solves the bottleneck, consider it.
If it only makes a comfortable system more comfortable, save the Gold.
Hunting Becomes My Best Secondary Gold Source Early On
One of my favorite Gold upgrades is the Workshop research that makes Hunting generate Gold.
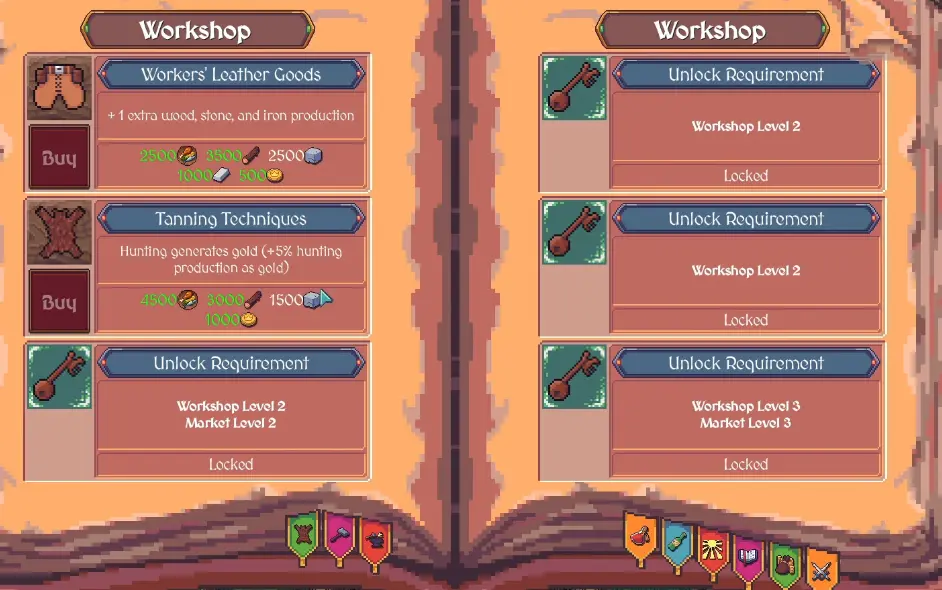
This does not make the Hunting building a replacement for the Gold Mine.
It gives Hunting a second job.
In one midgame setup:
2 Gold Mine workers produced about 10 Gold
while
8 Hunters produced about 11 Gold
The totals looked similar.
The worker efficiency did not.
The Gold Mine was producing almost the same Gold with a quarter of the workforce.
So when Gold itself is the bottleneck, I prioritize Mine workers.
When I need Food and Gold at the same time, Hunters become much more attractive because the same workers contribute to both problems.
Later upgrades can change the comparison dramatically.
I saw one developed Hunting setup reach roughly 113 Gold per tick, close to the Gold Mine’s total output at that stage.
Later still, the Mine could pull ahead again.
That is why I do not keep a permanent rule that says:
Hunting is better
or
Gold Mine is better.
I compare what both buildings are doing in my current town and assign workers based on the resource I actually need.
I Let Trade Supplement Gold Instead of Replacing the Gold Economy
Once trade is available, Gold no longer has to come only from the Mine and Hunting.
A real surplus of Food, Wood, Stone, or Iron can be converted into Gold when destination Demand makes the route worthwhile.
I do not repeat the route values or Caravan upgrade decisions here because those belong in the Caravan and trade guide.
From the Gold side, I only use one rule:
If trade converts a resource I genuinely do not need into the Gold blocking progression, I use it.
If I would have to sell something the next quest needs, I keep the resource and let Gold accumulate another way.
That keeps Trade as a secondary Gold tool instead of turning the Gold guide into a second Caravan guide.
I Use Taxation to Break a Gold Bottleneck, Not as a Permanent Default
Taxation is powerful because it can add Gold without moving workers into another building.
It is also expensive in a different way.
One taxation option I used applied -20% Happiness and generated 1 Gold per 15 population per second.
At around 500 population, that worked out to roughly 30 Gold per second.
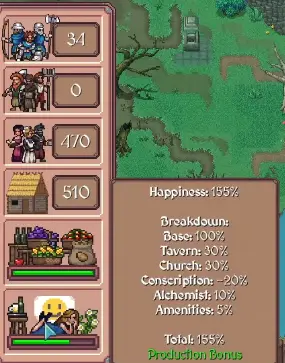
The important part is that Happiness affects production.
So taxation can increase direct Gold income while simultaneously making Food, Wood, Stone, Iron, and other production weaker.
That is why I use taxes when:
- Gold is clearly the current progression bottleneck;
- Happiness is comfortably high;
- the rest of the economy can handle a lower production multiplier;
- I am close enough to a major Gold payment that the extra income materially changes the wait.
I leave taxes off when Food is fragile or when lower Happiness would slow several other resources I also need for the same objective.
Taxes are much easier to justify in a developed settlement with a real Happiness buffer than they are immediately after Gold unlocks.
I Upgrade the Gold Mine When Gold Is Still Blocking Several Things
Blueprints make Gold Mine upgrades more expensive in a strategic sense.
The question is no longer just:
Do I have the resources?
It becomes:
Does the Gold Mine deserve this Blueprint more than another building?
In one run, I had several advanced buildings available but Gold was still the resource delaying most progression.
I used an early Blueprint on the Gold Mine.
That was worth it because one upgrade improved the resource that several other purchases were waiting on.
I do not turn that into a permanent “Gold Mine first” rule.
If trade is already bringing in enough Gold and Iron, Magic, or another resource has become the new bottleneck, I spend the Blueprint elsewhere.
The Blueprints guide owns the Blueprint tier and spending rules.
From the Gold side, I only ask:
Will this Mine upgrade materially shorten my next Gold wait?
If yes, it is a strong candidate.
If Gold is already comfortable, I save the Blueprint.
Gold Storage Becomes a Real Gate Later
The first Gold payment does not need a storage upgrade.
Later payments can.
I eventually reached an objective asking for 100,000 Gold while the current Gold cap was too low to hold the requirement.
At that point, Gold production was not the real problem.
Storage was.
Waiting at the cap would never finish the quest.
So I changed priorities and increased capacity before continuing the Gold grind.
My rule is:
If the next required payment fits inside the current cap, keep earning.
If the required payment is larger than the cap, fix storage first.
What I do not do is upgrade Gold storage several stages early just because more capacity sounds useful.
Storage only becomes a progression upgrade when the current cap is actually blocking the next payment or regularly wasting large Gold inflows.
Until then, the Gold spent on capacity may be better used on the objective itself.
I Stop Shopping When I Can See a Large Gold Gate
This is the habit that saves me more time than any tiny production optimization.
Hearth and Hamlet constantly gives me something affordable to buy while I am saving for something expensive.
That creates a very easy loop:
save Gold
→ see a cheap upgrade
→ buy it
→ start saving again
→ see another cheap upgrade
→ wonder why the quest payment never arrives
I stop doing that as soon as the next Gold gate becomes clear.
One stage asks for 40,000 Gold.
A later Ashenholt demand reaches 100,000 Gold.
At those points, I start treating optional purchases much more harshly.
A permanent upgrade bought early enough has time to repay its cost.
The same upgrade bought when I am already close to the mandatory payment may simply move the finish line farther away.
So I ask:
How long does this upgrade have to pay itself back before I need the Gold?
If the answer is “not long,” I usually save.
Late-Game Gold Comes From Several Systems Working Together
By late game, I stop expecting one Gold building to fund everything.
My Gold economy becomes a combination of:
Gold Mine
-
Hunting Gold
-
useful trade
-
taxation when the Happiness cost is acceptable
-
global production bonuses
That matters because late costs rise far beyond the first 10,000-Gold objective.
In one complete route, the final Castle stage required roughly 2.75 million Gold.
By then I was also paying for late Research, Blueprints, Magic progression, defense, and storage.
At that scale, the wrong question is:
How do I mine 2.75 million Gold?
The better question is:
How many Gold-producing systems can I keep working at once without creating a Food, Happiness, or resource shortage somewhere else?
I keep the Gold Mine productive.
I keep Hunting useful when I still need Food.
I trade true surpluses.
I use taxation when the economy can absorb it.
And once the final Gold objective is visible, I become much less interested in luxury upgrades.
The Gold Check I Use Before Every Expensive Purchase
Before I spend a large amount of Gold, I ask three questions.
What is the next mandatory Gold payment?
If I am already close, I save.
Is Gold actually the resource slowing progression?
If not, I solve the real bottleneck instead.
Does this purchase materially improve future Gold income?
A meaningful Gold Mine upgrade or another Gold-producing system can justify delaying a payment if it changes the economy enough.
A small convenience bonus usually cannot.
That is the pattern I use from the first Ashenholt demand to the end of the game:
unlock the Gold Mine when the story sends me across the river
→ staff it immediately
→ add Hunting Gold without abandoning Food
→ use trade only for genuine surpluses
→ tax when Happiness has room
→ increase storage only when the required payment will not fit
→ stop buying side upgrades once a major Gold gate is close
Gold stops feeling like a permanent wall once I stop trying to buy everything between one mandatory payment and the next.