How I Find and Safely Return the Second Floor Key
How I unlock the Second Floor Key quest, search the Deep Layers without looping, protect the Key after finding it, and reopen the upstairs floor.
Updated:
Quick Answer
The Second Floor Key is not available as an opening-game objective.
My progression was:
finish the preceding rescue → return to the Outpost → receive the lost-Key objective → go back into the Deep Layers → search the generated floor → pick up the Key → stop farming → make extraction safe → return to the Outpost → take the Key upstairs.
The biggest mistake I would avoid is searching early runs for a fixed Key location.
I did not start hunting for it until the rescue progression was finished, and once I finally had the Key, the run stopped being a normal loot run.
The Second Floor Key was the point where my Deep Layers priorities changed.
Before I found it, another room could mean:
- more Scrap;
- more Gold;
- another useful object;
- another chance to improve the run.
After I found it, those things became secondary.
I was carrying something that could open the next part of the Outpost.
From that moment on, I cared much more about getting home than clearing the rest of the floor.
The Second Floor Key Quest Has a Prerequisite
I would not start farming early Deep Layers runs specifically for the Key.
The quest did not appear for me immediately.
I first had to complete the preceding rescue objective.
That sent me underground looking for the missing friend.
Once I found the objective, I still had useful loot nearby and briefly wanted to keep farming.
I did not.
I brought the objective home.
That return was what moved the progression forward.
Back at the Outpost, I was told that:
- the Second Floor had been deliberately locked;
- Grain Rot had appeared upstairs;
- sealing the area was meant to stop it spreading;
- the Key had been lost during an earlier Deep Layers run.
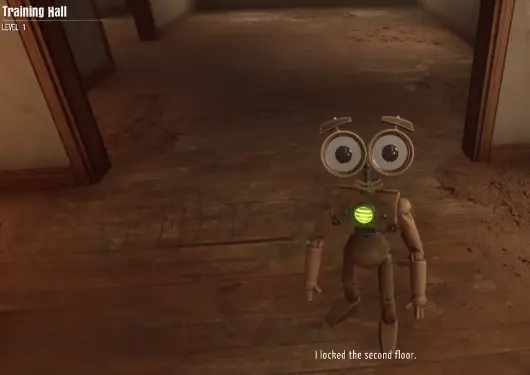
That is the important trigger.
If I have not reached this dialogue or objective yet, I do not waste runs searching every dark corner for the Key.
I finish the current progression step first.
There Is No Fixed Room Route I Use for the Key
Once the quest is active, I go back into the Deep Layers.
I do not use a route like:
right from the elevator → second room → specific cabinet.
The floor layouts change.
So the useful problem is not memorizing coordinates.
It is making sure I do not keep searching the same section.
My route is:
start at the elevator → clear one connected branch → return toward a known intersection → take the next unchecked branch.
I use recognizable rooms, already-opened containers, and the elevator itself as anchors.
If I walk into a room and immediately recognize that I already checked it, I leave.
I do not inspect every object again just because I am worried I somehow missed the Key.
The Second Floor Key Is Easy to Miss
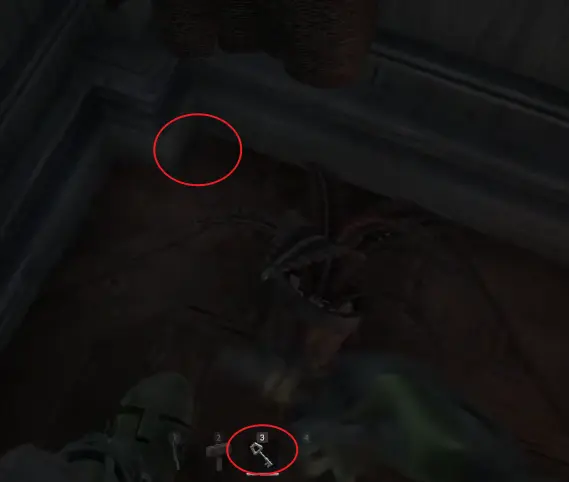
The Key itself is not a large glowing quest object.
Mine was a small pickup sitting low against the environment.
That made it easy to overlook from across the room.
Once the quest is active, I pay more attention to small interactable pickups instead of only scanning for large valuables.
The inventory confirmation matters too.
The moment I see that I am actually carrying the Key, my goal changes.
Once I Find the Key, I Stop Treating the Run as Farming
This is the most important decision on the page.
Before finding the Key, I am willing to ask:
Is another branch worth exploring?
After finding it, I ask:
What still has to happen before I can get this home?
Those are very different questions.
My priority becomes:
confirm the Key
↓
check whether the exit still has another requirement
↓
recover enough to make the return safely
↓
follow the safest route I already know
↓
leave
I may still take something useful if it is directly on the return path.
I do not open another entire wing of the map because I saw one more glowing object in the distance.
The Key already makes the run valuable.
I do not need to turn a successful progression run into a perfect farming run.
Finding the Key Does Not Automatically Mean I Can Leave
This is the one extraction lesson that matters directly to the Key quest.
Finding the Key does not override whatever conditions the current run already has.
My successful run still had another elevator problem to solve before I could extract.
So after picking up the Key, I check:
Is the normal extraction requirement ready?
Is there another elevator condition still blocking me?
If something like Broken Fuse is active, I solve that because it is standing between the Key and the Outpost.
I do not reopen the whole Fuse troubleshooting story here.
If that is the part causing the problem, my Replace Fuse Guide covers the actual replacement search, unusable Fuses, containers, and the Compass alternative.
For the Key page, the important rule is:
the Key changes my priority, but it does not cancel the floor’s exit conditions.
I Protect the Return Route Instead of Maximizing the Run
Once the Key is in my inventory, I become much less interested in optional risk.
I save stamina for actual danger.
I stop carrying bulky furniture that makes the route awkward.
I avoid unnecessary fights.
And I stop investigating rooms that are nowhere near my return path.
I use a very simple combat rule:
if the enemy is not blocking the route home, I do not need to prove I can kill it.
A fight can cost:
- health;
- stamina;
- route awareness;
- time;
- the entire progression item if the run collapses.
That is too much downside for an encounter I never needed.
For broader solo survival and retreat decisions, I keep the full logic in my Solo Guide.
My Successful Key Run Returned 1,300 XP and Reached Level 8
The run that finally brought my Second Floor Key home was not a 100% map clear.
I found the Key.
I handled what was still required for extraction.
Then I left.
The successful return paid:
1,300 XP
and pushed my progression to:
Level 8.
I do not treat that as a universal promise that every Key run will always produce exactly the same result.
What matters is what the example proves about my decision.
I had already secured:
- the progression item;
- a successful extraction;
- a strong XP return.
Continuing to clear optional rooms would not have made the run meaningfully more successful.
It would only have created another chance to lose it.
That is why this number belongs on the Key page.
It is the concrete result of bringing the progression item home instead of overstaying.
Returning to the Outpost Is Not the Last Step
After extraction, I still had the Key.
The next step was upstairs.
I did not need to start another Deep Layers run.
I needed to actually take the Key to the locked area and continue the objective.
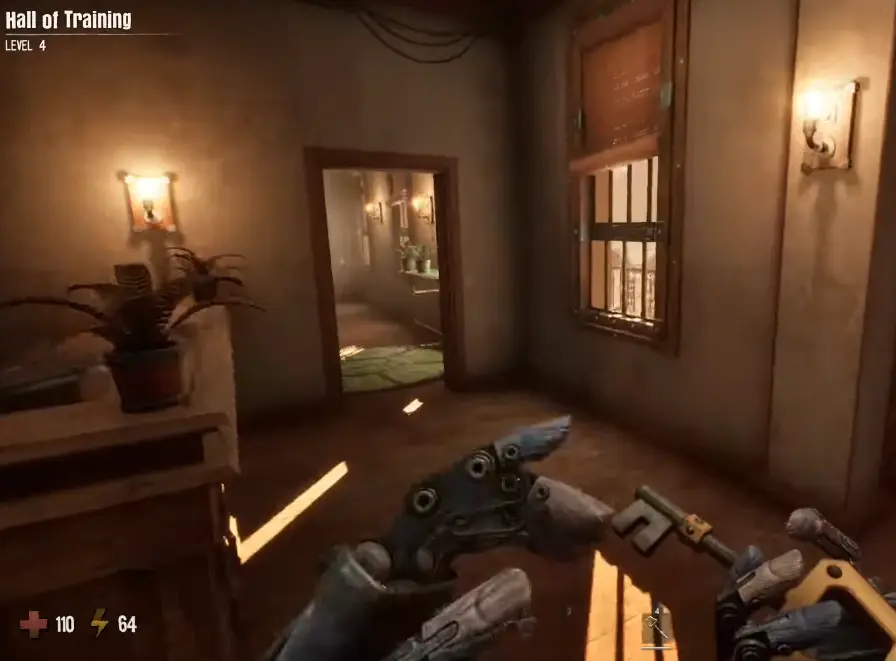
This is worth checking if the quest feels stuck.
If I already returned successfully but the Second Floor still appears closed, I do not immediately assume I missed another underground objective.
I take the Key upstairs first.
The Second Floor Opens After I Use the Key
Once I complete that step, the Second Floor opens again.
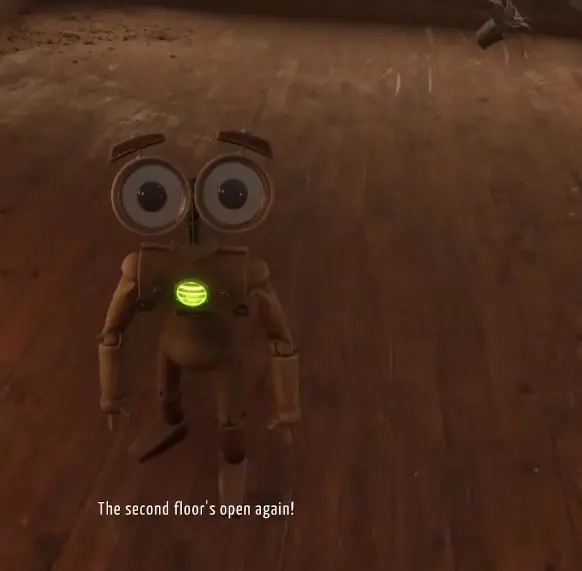
This is the point where the Key stops mattering.
I am no longer solving:
How do I open the Second Floor?
I am solving:
What do I do with the contaminated Second Floor now that it is open?
That distinction is important because I do not try to prepare for every later system before I even have the door unlocked.
First I return the Key.
Then I deal with what the new area actually asks me to do.
Grain Rot Is the Next Blocker, Not Part of the Key Search
The newly opened floor is contaminated.
The next progression instruction moves toward clearing that Grain Rot.
Fire becomes relevant here.
I have used fire to remove sections of Rot, but I do not turn this Key page into a full Rot-removal guide.
The Key has already done its job.
At this point, the clean progression handoff is:
Key returned → Second Floor opened → Grain Rot becomes the next problem.
The broader sequence after that, including later Second Floor progression and Tink, stays in the main GRAIN ROT Beginner & Progression Guide.
When I Abandon a Key Search and Reset
The Key is important, but I do not let the quest convince me that every attempt must be rescued.
If I have not found the Key yet and the run is already collapsing, I leave.
Examples include:
- health is critically low and I have no realistic recovery;
- the route back is no longer under control;
- I keep looping through the same searched sections;
- the current extraction problem is becoming more expensive than restarting;
- I have already secured enough resources that losing everything would hurt more than another Key attempt.
The important distinction is whether I am already carrying the Key.
Before I find the Key
I can reset the attempt and search another generated floor.
After I find the Key
My threshold for optional risk drops dramatically.
I now have something specific to protect.
That keeps me from turning:
bad Key search
into:
bad Key search + lost Scrap + lost Gold + lost time.
I Do Not Search Every Object Once the Quest Is Active
The Key search becomes much faster when I stop treating the room like a general loot sweep.
I am looking for a small progression pickup.
So I pay attention to:
- floor-level interactables;
- small items that stand out against the environment;
- rooms I have not genuinely checked;
- the inventory icon after interacting.
I do not spend several minutes moving every large piece of furniture just because the Key might theoretically be hidden somewhere nearby.
If I know the room has already been searched cleanly, I move on.
The most expensive mistake is not missing the Key once.
It is searching the same room four times.
The Route I Use From Rescue to Second Floor
My complete progression sequence is:
Finish the preceding rescue objective.
↓
Return to the Outpost.
↓
Receive the objective explaining that the Second Floor is locked and the Key was lost.
↓
Go back into the Deep Layers.
↓
Search one connected section at a time.
↓
Find the small Second Floor Key pickup and confirm it in my inventory.
↓
Stop treating the run like ordinary farming.
↓
Make sure the current extraction conditions are solved.
↓
Return to the Outpost.
↓
Take the Key upstairs.
↓
Use it to reopen the Second Floor.
↓
Move on to the Grain Rot problem upstairs.
That is why I do not think of the Second Floor Key as a normal collectible.
The difficult part is not only locating it.
It is recognizing when the run has already given me something more valuable than everything I have not looted yet.
FAQ
Is the Second Floor Key always in the same room in GRAIN ROT? +
I do not use a fixed-room location. The quest sends me back into the Deep Layers after explaining that the Key was lost on a previous run, and the layouts change. I search the current floor systematically instead of following one permanent room route.
Why did bringing the Second Floor Key back not immediately open the floor? +
Returning to the Outpost was not my final step. After extracting with the Key, I still had to take it upstairs and continue the objective there before the Second Floor reopened.