GRAIN ROT Progression Guide
Featured
The Outpost Upgrade Order I Use in GRAIN ROT
Which rooms I upgrade first, what their modifiers actually do, how I spend Scrap efficiently, and when I stop decorating and go back downstairs.
Read Guide →Game Guide Hub
My practical GRAIN ROT progression route from the opening tutorial and first Deep Layers dives through the Second Floor, Corrupted Elite, and Ancients.
Recommended Order
Use these guides to find the right GRAIN ROT walkthrough, solution or next step.
Progression Guide
Which rooms I upgrade first, what their modifiers actually do, how I spend Scrap efficiently, and when I stop decorating and go back downstairs.
Solo Guide
The solo route I use to survive Deep Layers runs, manage healing and stamina, carry smarter loot, protect progression items, and leave before greed ruins the run.
Progression Guide
How I unlock the Second Floor Key quest, search the Deep Layers without looping, protect the Key after finding it, and reopen the upstairs floor.
Troubleshooting Guide
How I find a working Fuse, recognize the 0% Durability trap, search the floor efficiently, and get the elevator working without wasting the run.
Guide Cluster
Which rooms I upgrade first, what their modifiers actually do, how I spend Scrap efficiently, and when I stop decorating and go back downstairs.
Read Guide →The solo route I use to survive Deep Layers runs, manage healing and stamina, carry smarter loot, protect progression items, and leave before greed ruins the run.
Read Guide →How I unlock the Second Floor Key quest, search the Deep Layers without looping, protect the Key after finding it, and reopen the upstairs floor.
Read Guide →How I find a working Fuse, recognize the 0% Durability trap, search the floor efficiently, and get the elevator working without wasting the run.
Read Guide →How I process loot, prepare the exit before I need it, survive noisy extraction attempts, and decide when another room is no longer worth the run.
Read Guide →What each elevator modifier actually changes, the numbers that matter, and how I adjust my route when profit, danger, and extraction conditions overlap.
Read Guide →My route after opening the Second Floor: clear the Rot, find Tink, boost a useful weapon, choose an upstairs room, and prepare for the next progression step.
Read Guide →My route from Dr. Quill to the Radio Tower and Ancient Facility, including Umbrella prep, all 10 clues, missed-note checks, and the return trip.
Read Guide →How I recover health, stamina, and Spark in GRAIN ROT, including Beds, Chairs, Repair Glue, body recovery, and how I remove Grain Rot safely.
Read Guide →How I trigger the Corrupted Elite objective, find its Boss Room in the Deep Layers, prepare upgraded weapons, survive its charge, and confirm the kill.
Read Guide →If I am starting GRAIN ROT fresh, this is the progression route I follow:
finish the Outpost tutorial → learn Spark, Artifacts, and Constructs → make short Deep Layers runs → prepare extraction before over-looting → upgrade the weakness that is actually ending my runs → read elevator modifiers → finish the rescue objective → recover the Second Floor Key → reopen the Second Floor → continue through Tink and the upstairs progression → defeat the Corrupted Elite when The Big One appears → follow Dr. Quill’s topside route into the Ancient Facility.
Before every descent, I ask one question:
What am I going downstairs for, and what result would be good enough to make me come home?
That question has saved more runs for me than trying to fully clear every floor.
GRAIN ROT started making sense to me when I stopped treating the Outpost and the Deep Layers as separate halves of the game.
They are one progression loop.
I go down to bring back whatever the current problem needs:
Then I turn those gains into a stronger Outpost, a safer route, or the next story step.
The mistake I made early was trying to make every descent do everything.
I wanted Scrap, Gold, better weapons, every unexplored room, and the current quest objective all in the same run.
That usually meant I stayed underground after the run had already succeeded.
Now I give each descent a purpose.
I keep this Hub focused on the overall progression route.
If one specific problem is blocking me, I use the guide that owns that problem:
If I am not stuck on one specific mechanic, I stay here and follow the larger route below.
I do not rush into repeated Deep Layers runs as soon as I can move around.
The opening Outpost objectives introduce systems that continue mattering much later.
My early route includes:
The Spark tutorial initially felt like a small mechanic lesson.
It is not.
My physical body is the Vessel.
Leaving it as the Spark teaches me that GRAIN ROT does not treat losing a body as the same thing as instantly losing all control.
That becomes much more important later when runs start going wrong.
For the full recovery side of Spark, bodies, Beds, and healing, I use my Heal and Revive Guide.
Merch eventually introduces Artifact Cards.
The sequence I learned is:
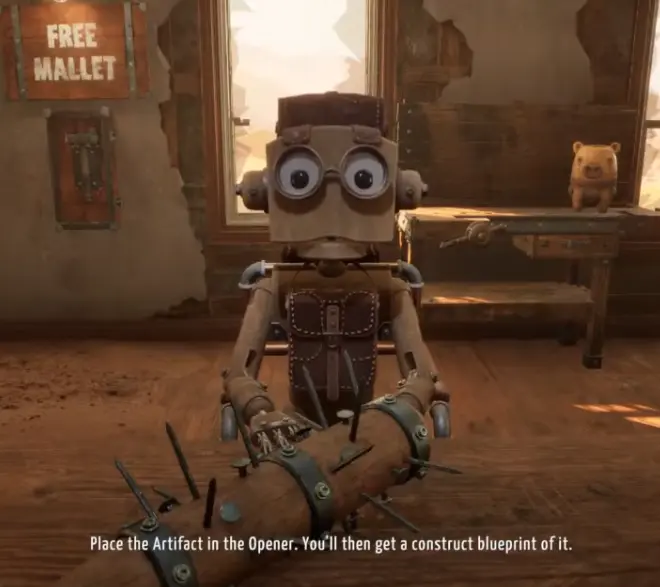
Artifact Card → Ball Machine → Artifact → Opener → Construct Blueprint.
The Ball Machine produces the Artifact.
I then use the Opener to turn that Artifact into a Construct Blueprint.
I do not try to collect every Blueprint immediately.
At this point I care more about understanding the system and unlocking enough useful options to keep progressing.
If the choice is between chasing another random Blueprint and bringing home enough Scrap to solve a real blocker, I usually take the Scrap.
My first instinct underground was to explore everything.
That was a mistake.
The Deep Layers are much easier when I treat the elevator as my anchor instead of trying to memorize one permanent map.
My normal early route is:
leave the elevator → clear one connected branch → return toward something I recognize → decide whether another branch is still worth the risk.
Those first dives are mostly teaching me:
A successful first dive does not need to reveal the entire floor.
It needs to make the next dive easier.
The biggest improvement I made to my Deep Layers runs was stopping myself from treating extraction as the final emergency.
If the current run needs valuables processed, a Fuse replaced, or another exit condition solved, I start working on that while the run is still healthy.
I do not wait until:
Once the exit is ready, the way I judge the rest of the floor changes.
Before extraction is prepared:
I still have a required problem to solve.
After extraction is prepared:
everything beyond my actual objective is optional risk.
That is when I become much more selective about opening another branch.
The detailed extraction loop belongs in my How to Extract Guide.
Back at the Outpost, I do not spread Scrap evenly across every room.
I ask:
Why did the last run fail?
If I died too easily, I work on survivability.
If I could survive but repeatedly ran out of stamina while retreating, I fix movement and stamina.
If weak equipment is the reason fights are getting out of control, I look at the Workshop or the later equipment systems.
If fights are safe but simply taking too long, damage becomes more attractive.
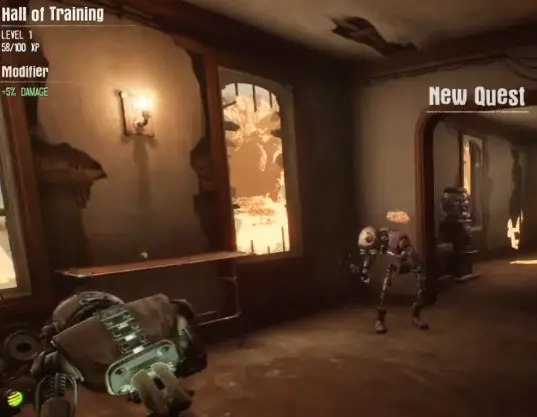
I also stop investing when the next room level is no longer the best solution to my current problem.
The exact room bonuses, furniture XP, Workshop progression, and Scrap efficiency belong in my Outpost Upgrades Guide.
Once the basic loop becomes familiar, elevator modifiers start changing what kind of run I am about to enter.
Some make a floor more profitable.
Some help navigation.
Some add enemies or environmental pressure.
Others add a new extraction problem.
I do not need to memorize every icon before I can play well.
I just need to ask:
Does this make extraction harder?
Does this increase danger?
Does this change what I should prioritize?
Does this give me an advantage worth exploiting?
That is enough to change my plan before the doors open.
If I need the exact symbols and effects, I use my Elevator Symbols Guide.
Broken Fuse is a good example of why I read the elevator first.
If the floor adds an extra exit condition, I treat solving it as part of normal exploration.
I do not wait until the end of the run and then discover the elevator is not ready.
So when Broken Fuse is active, my route becomes:
explore normally → watch for the replacement while the run is stable → keep the exit problem in mind before going deeper.
The actual Fuse locations, unusable Fuse problem, and replacement troubleshooting are owned by my Replace Fuse Guide.
This distinction helps me decide what to fix next.
Sometimes I am not stuck because I missed a quest trigger.
I am stuck because I cannot survive long enough to reach it.
If I repeatedly die late in a run, I do not immediately assume progression is broken.
I first look at:
Solo makes those mistakes more expensive because nobody else can keep working while I recover.
My full solo risk loop is in the Solo Guide, while Beds, Chairs, Repair Glue, Spark recovery, and body recovery belong in the Heal and Revive Guide.
On the Hub, the rule is simply:
if I cannot reliably return from routine dives, I fix survival before forcing the next progression objective.
The Second Floor Key is not something I search for from the beginning.
My progression first sent me back into the Deep Layers for a rescue objective.
Once I completed that step and returned, the next major progression gate became the missing Second Floor Key.
That sequence matters.
If the Key objective has not appeared yet, I do not waste runs searching every dark corner hoping to find it early.
I finish the progression step already in front of me.
Once the Key objective does appear, the full search and return route belongs in my Second Floor Key Guide.
This is one of the most important habits I use throughout GRAIN ROT.
When I am carrying ordinary Scrap, I can still debate whether another room is worth checking.
When I am carrying something that unlocks the next progression phase, the equation changes.
My priorities become:
protect the objective → make sure extraction works → take the safest route home.
I may grab something useful directly on the way back.
I do not turn around and begin another large unexplored branch just because the inventory still has room.
That logic applies to more than one quest.
A secured progression item is usually worth more to me than squeezing another ordinary farming route into the same descent.
Bringing the Second Floor Key home is a major milestone, but it is not the end of that progression chain.
Once the floor reopens, the game moves into a new phase involving:

I deliberately do not repeat the Rot-clearing method, Tink’s machine costs, or individual room modifiers here.
Those are all owned by my Second Floor Guide.
For the overall route, the only thing I need to know is:
reopening the floor moves me from Key progression into the next Outpost and equipment phase.
After enough Second Floor progression, I eventually receive a clear objective to defeat a Corrupted Elite.
That is the point where I stop treating harder enemies as optional obstacles.
The fight itself has become progression.
I do not start hunting random large enemies before that objective appears.
And once it does appear, I do not force it while ordinary Deep Layers runs are still falling apart.
My preparation question becomes:
Is my current setup stable enough that finding the boss is the problem, rather than simply surviving the floor?
The actual quest name, Boss Room search, Elite behavior, weapon preparation, and completion confirmation belong in my Corrupted Elite Boss Guide.
On this Hub, the important progression marker is:
Second Floor progression → The Big One → Corrupted Elite defeated.
The game does not stay underground forever.
Later progression sends me toward Dr. Quill and the desert outside the Outpost.
That changes the kind of problem I am solving again.
Instead of another ordinary Deep Layers loot route, I am dealing with:
I treat that as a separate progression phase rather than trying to fold it into my normal dungeon routine.
The complete route, surface preparation, Ancient Facility search, and clue troubleshooting belong in my Find Clues About the Ancients Guide.
For the Hub, this is the continuation I remember:
Corrupted Elite → Dr. Quill → Radio Tower → Ancient Facility → Ancients progression.
A lot of my bad decisions came from mentally treating every reward as the same kind of value.
They are not.
Gold helps me buy or prepare for a specific need.
Scrap moves Outpost progression.
Equipment changes how safely I can handle the next run.
Quest items and completed objectives can unlock an entirely new phase of the game.
That gives different dives different definitions of success.
If I went down because I need Scrap and I already have enough for the upgrade I wanted, I have a reason to leave.
If I went down for a progression item and I found it, the item matters more than another side room.
If I entered a floor specifically for a boss objective and the boss is dead, I do not need that same run to become my best farming run too.
The more clearly I define the goal before the elevator opens, the easier these decisions become.
I usually continue when:
I start heading home when:
I do not need every run to be perfect.
I need enough good runs to actually reach the Outpost.
When progression feels unclear, this is the order I check.
Still in the opening tutorial?
Finish the repair, Spark, Mallet, Artifact, and Construct objectives before
trying to optimize everything.
Tutorial finished but the Outpost barely moves?
Start short Deep Layers runs with a clear Scrap, Gold, or equipment goal.
I keep dying before useful runs come home?
Fix the survival problem first. Use the
Solo Guide or
Heal and Revive Guide depending on what is
actually failing.
The elevator is showing symbols I do not understand?
Check the
Elevator Symbols Guide before committing to the
floor.
Broken Fuse appeared?
Treat the replacement as an early run objective and use the
Replace Fuse Guide if the interaction or location is
the blocker.
I keep losing good runs at the end?
Prepare the exit sooner. The full route is in my
Extraction Guide.
The Second Floor Key objective has not appeared?
Finish the rescue progression first.
I have the Key objective but cannot complete it?
Use the
Second Floor Key Guide.
The Second Floor is open again?
Move into the upstairs progression in my
Second Floor Guide.
The Big One / Corrupted Elite objective appeared?
Prepare for a deliberate combat run instead of another farming run, then use my
Corrupted Elite Boss Guide.
Dr. Quill sent me toward the old Radio Tower?
That is topside Ancients progression. Follow my
Find Clues About the Ancients Guide.
The progression rule that keeps working for me is simple:
solve the next blocker, make the current run pay for that solution, and come home before optional loot turns progress into another failed run.
Not in the runs I tested. My player level remained after failed Deep Layers runs, although unsecured loot, equipment, and resources could still be lost.
No. I do not use one permanent room-by-room route. I keep the elevator as an anchor, clear connected branches one at a time, and use recognizable rooms or the Map Room when available so I do not keep looping.
Usually not. Once I have secured the objective that made the run worthwhile and prepared the exit, every extra unexplored branch is optional risk. I progress faster by bringing successful runs home.