The Outpost Upgrade Order I Use in GRAIN ROT
Which rooms I upgrade first, what their modifiers actually do, how I spend Scrap efficiently, and when I stop decorating and go back downstairs.
Updated:
Quick Answer
For solo progression, my usual Outpost priority is:
maximum health → maximum stamina → Workshop → attack power → elevator.
I do not max those rooms in order.
I stop as soon as the current upgrade fixes the problem that has been costing me runs, then I spend the next pile of Scrap somewhere more useful or go back into the Deep Layers.
Some of the room results I have directly checked include:
100 → 105 maximum health
+20 Stamina
+5% Damage
Tier 2 Inventory
and
Tier 2 Elevator.
The Outpost looked like a decorating system the first time I started repairing it.
That impression did not last.
Once I started reading the room modifiers, I realized that most of the work I was doing upstairs could directly change the next Deep Layers run.
Health could give me another margin for error.
Stamina could make a retreat possible.
The Workshop could improve the equipment pool.
Hall of Training could shorten fights.
The basement could improve elevator consistency.
That changed the question I ask before spending Scrap.
I no longer ask:
Which room looks the most unfinished?
I ask:
What would have made my last run succeed?
The Outpost Upgrades I Prioritize
Room names can be changed, so when I am checking an unfamiliar room I trust the Modifier and room description more than the custom name.
| Upgrade | Verified result I have seen | When I prioritize it |
|---|---|---|
| Maximum health | 100 → 105 HP | Small amounts of damage are ending good runs |
| Maximum stamina | Resolve Hall reached +20 Stamina | I can survive fights but cannot retreat cleanly |
| Workshop | Level 2 showed Tier 2 Inventory | Merch’s weapon or utility pool is blocking progression |
| Attack power | Hall of Training Level 1 showed +5% Damage | Fights are controlled but take too long |
| Elevator | Level 2 showed Tier 2 Elevator | My basic Deep Layers loop is stable and I want fewer Blank rolls |
That is the only upgrade table I need.
The harder part is knowing when not to keep pushing the same room.
Health Is My Safest Early Solo Investment
The health room permanently increases maximum health.
One early upgrade gave me a result I could verify immediately:
100 → 105 HP.
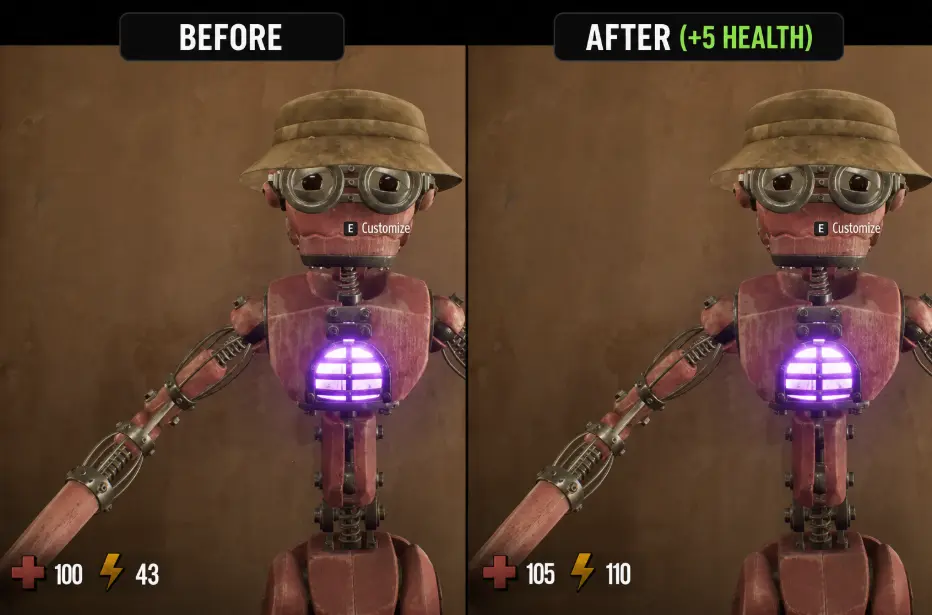
Five HP sounds minor until I am repeatedly reaching safety with almost nothing left.
I prioritize health when:
- one extra enemy hit is killing me;
- environmental damage leaves almost no margin;
- I can reach the return route but die just before safety;
- I am still learning an encounter and cannot avoid every mistake.
The important part is knowing when to stop.
If I start returning with plenty of HP but keep running out of stamina during the escape, another health level is no longer solving the right problem.
Stamina Moves Up Once Retreats Become the Problem
Stamina mattered more as soon as my runs started going beyond easy early-floor loot trips.
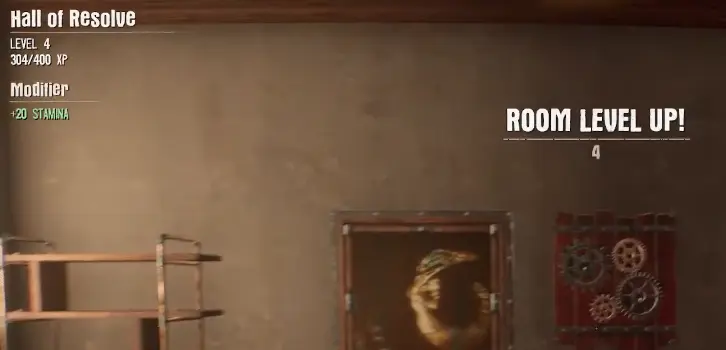
My Resolve Hall eventually reached:
Level 4
304 / 400 XP
+20 Stamina
I use that extra stamina as emergency reserve.
My retreat usually looks more like:
break contact → sprint to a known room → recover → continue toward the elevator
than one uninterrupted sprint across the map.
So upgrading stamina and managing stamina are separate things.
A larger bar helps.
Emptying the larger bar while nothing is chasing me still leaves me helpless when I actually need it.
For the full solo retreat logic, I keep that in my Solo Guide rather than repeating it here.
Tier 2 Inventory Is a Workshop Upgrade, Not Extra Carry Slots
The Workshop is the Outpost upgrade I think is easiest to misread.
Its room description says upgrading it will unlock:
stronger weapons and new utilities.
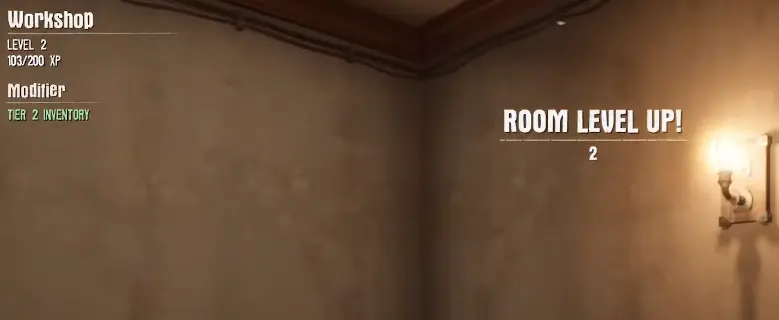
When I later had the Workshop at Level 2, the room showed:
- 103 / 200 XP
- Modifier: Tier 2 Inventory
I would not describe this as increasing the number of items my character can carry.
The modifier belongs to the Workshop, and the practical progression is tied to the equipment and utilities Merch can offer.
That makes the Workshop valuable when my problem is not survival.
It is equipment access.
I Upgrade the Workshop When I Need Something the Current Pool Is Not Giving Me
The Second Floor gave me a good example.
Once I needed better ways to deal with the contaminated area, stronger fire-related equipment became much more relevant than it had been during basic Scrap runs.
That was a real reason to invest in the Workshop.
A routine early farming run was not.
There is also an important difference between:
improving the Workshop
and
forcing shop refreshes.
I once paid 50 Gold for a refresh because I wanted the shop to solve a specific problem.
It did not give me anything useful.
That was enough to stop me treating refreshes as guaranteed progression.
Later Workshop progression did improve the kinds of stock I could find, including more useful weapons and Glue, but I still do not assume another 50-Gold refresh will produce the exact item I want.
My rule is:
upgrade the Workshop when the item pool is the blocker; stop paying for refreshes when I am only gambling on one specific roll.
If I already have a workable weapon and enough supplies to run again, I save the Gold and go downstairs.
Hall of Training Is a Damage Upgrade, but I Usually Take It Later Solo
Hall of Training is much more straightforward.
At Level 1, I had:
- 58 / 100 XP
- +5% Damage

I move damage up my priority list when:
- I can already survive the encounter consistently;
- the enemy is taking too long to kill;
- long fights are creating unnecessary extra damage;
- health and stamina no longer feel like the obvious weakness.
I leave damage lower when I am dying while trying to disengage.
More attack power only helps when low attack power is actually part of the failure.
This is also one reason my co-op order can differ from solo.
With several players attacking the same threat, shortening a fight can have more immediate group value.
I Treat the Elevator as a Later Consistency Upgrade
The basement room improves the elevator.
One upgraded room showed:
- Level 2
- 113 / 200 XP
- Tier 2 Elevator
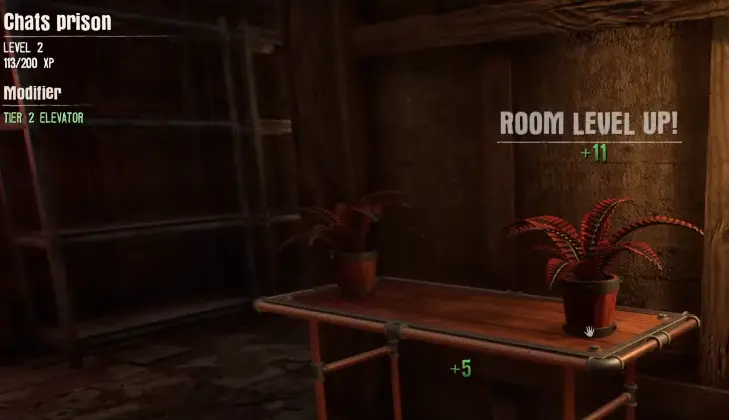
The practical benefit I care about is reducing the chance of Blank elevator rolls.
That is useful.
It is just not my first emergency upgrade.
If I still have:
- poor survivability;
- bad stamina;
- weak equipment;
- almost no Scrap;
I solve those problems first.
A more interesting elevator roll does not help much if I cannot survive the floor it gives me.
Once my normal Deep Layers loop is working, fewer Blank rolls become much more attractive.
The individual modifiers themselves belong in my Elevator Symbols Guide.
The distinction matters:
upgrading the elevator improves consistency; it does not remove dangerous modifiers or Broken Fuse runs.
I Repair and Clean Before Buying Furniture
A lot of my early Scrap disappeared because I treated room leveling like interior decorating.
Now my order is:
repair obvious damage → clean the room → check the XP bar → decorate only if I still need more XP.
Repairing a room does not necessarily finish its next level.
I had a Workshop that looked basically repaired and cleaned but was still at:
95 XP.
At that point, searching for another damaged wall was the wrong job.
The room simply needed more progression value from furniture.
So I separate the two states.
The room is still damaged:
I repair and clean.
The room looks finished but the XP bar is short:
I start looking at furniture.
That keeps me from buying decoration before I know I actually need it.
Furniture XP Is Where I Save the Most Scrap
Furniture does not give equal progression value.
Some examples I have checked include:
- wall sign: 8 XP
- shelf: 12 XP
- bed: 20 XP
- sofa: about 16 XP for 80
- phone: 6 XP for 80
- crate: only 2 XP for 50 Scrap
Those numbers made me stop buying by appearance or rarity.
If I need eight more XP, an 8-XP sign can be perfect.
I do not need to buy an expensive object that overshoots the threshold.
The weaker value-per-cost examples are also useful.
A phone costing 80 for 6 XP is a very different progression purchase from a piece that gives a much larger jump for similar Scrap.
I buy what reaches the breakpoint efficiently.
I do not buy furniture just because it looks like a higher-tier object.
Placement Can Increase the Effective Room XP
Furniture also does not always behave like isolated XP blocks.
I have moved pieces around and watched their effective contribution change.
One example was an 8-XP carpet.
With other furniture placed around or over it, the displayed contribution could rise into roughly the 11–12 XP range.
That changed the way I finish a room.
If I am only a few points short, I first ask:
Can I get more from what I already own?
before:
What else can I buy?
This becomes more important as room thresholds climb.
The cheapest room XP is the XP I can get without buying another object.
I Do Not Force the Biggest Room to Level First
Another expensive mistake was deciding that a large room had to be the one I finished next simply because I had already started working on it.
Large rooms can mean:
- more broken surfaces;
- more cleaning;
- more empty space;
- more furniture before the next level.
If a smaller room has a modifier I want and is already close to the next threshold, that can be the much better investment.
So when progression only asks me to level a room, I check:
How useful is the modifier?
and
How much XP does this room still need?
I do not reward a room for being large.
I reward it for giving me useful progression efficiently.
I Stop Spending When Another Deep Layers Run Is Better Value
There is always something else I could fix upstairs.
That does not mean I should.
I go back downstairs when:
- the room just reached the modifier breakpoint I wanted;
- the next level needs far more XP than I can buy efficiently;
- I am nearly out of Scrap;
- the next quest already sends me into the Deep Layers;
- my current stats are good enough for that objective;
- I am decorating only because I do not like leaving the room unfinished.
At that point, the best upgrade is often:
get more resources.
Trying to squeeze another room level out of an empty wallet is slower than making another successful run.
And if I already know how much value I need before leaving that next run, my Extraction Guide is the page I use for that decision.
My Solo Upgrade Order
For a normal solo start, I use this as a baseline:
1. Maximum health
Enough margin that one small mistake does not immediately kill a good run.
2. Maximum stamina
Enough reserve to disengage and make the return route.
3. Workshop
Move it higher if Merch’s equipment pool is blocking the next objective.
4. Attack power
Take it when fights are safe but inefficient.
5. Elevator
Invest more once repeated Deep Layers runs are already stable.
That is not a permanent build order.
If the evidence from my runs says stamina is the problem before health, stamina moves up.
If gear is the blocker, Workshop moves up.
The order reacts to the save.
Co-op Changes the Priority, Not the Principle
With more players, I am less strict about health always coming first.
Workshop progression can benefit several players through better equipment access.
Damage can also become more attractive because multiple players can turn a shorter fight into a much safer fight.
My rough co-op baseline is closer to:
Workshop → health / stamina → attack power → elevator.
I still do not follow it mechanically.
If everybody is exhausted during retreats, stamina wins.
If everyone is surviving but the team’s equipment is poor, Workshop wins.
If routine enemies are taking too long to clear, damage becomes more valuable.
The Outpost is not a build I finish once.
It is where I fix the weakness the Deep Layers keep exposing.
The Rule I Use Before Spending the Next Pile of Scrap
Before I craft one more piece of furniture or push another room level, I ask:
What changes on my next run if I buy this?
If I can answer that clearly, the upgrade is probably worth considering.
If the answer is only:
the room will be closer to finished
I usually stop.
I do not need every room complete.
I need the Outpost to make the next run more reliable than the last one.
FAQ
Does Tier 2 Inventory give my character more carrying slots? +
I would not treat it as a carry-capacity upgrade. Tier 2 Inventory appears on the Workshop, whose description says upgrading it unlocks stronger weapons and new utilities. I use it as Workshop and Merch stock progression.
Do repairs count toward room progression, or do I need furniture for every level? +
I use repairs and cleaning first because they can move room progression without buying extra decoration. Once the room is physically repaired but still short of the next level, that is when I start adding furniture for the remaining XP.