What Every Elevator Symbol Means in GRAIN ROT
What each elevator modifier actually changes, the numbers that matter, and how I adjust my route when profit, danger, and extraction conditions overlap.
Updated:
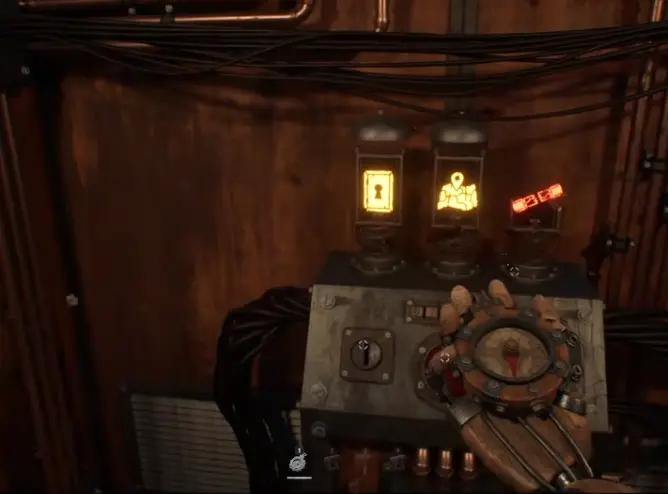
Quick Answer
I check the elevator before every Deep Layers run because the symbols can change what I should prioritize as soon as the doors open.
The modifiers I react to fastest are:
Broken Fuse — I know extraction has another condition.
2x Gold — processed valuables become much more profitable.
Compactor — I get a quieter alternative to the main Extractor.
Map Room — navigation becomes easier and the room can interact with other modifiers.
Red Skull / Lights Out / Bear Trap — I lower how greedy I am.
The biggest lesson is not memorizing nine icons individually.
It is reading the combination and deciding what I need to solve first.
I ignored the elevator panel on some of my earliest runs.
That usually meant discovering the modifier the inconvenient way:
a Fuse was broken when I wanted to leave,
the lights disappeared after I exhausted my stamina,
or I was treating a dangerous floor like an ordinary loot run.
Now the panel is the last thing I check before committing to the floor.
GRAIN ROT Elevator Symbols at a Glance
| Symbol | What it changes | My immediate reaction |
|---|---|---|
| Shop Cube | Shop-type items can spawn around the facility | Watch for useful gear while following my normal route |
| Broken Fuse | Extraction needs a working Fuse or substitute | Start solving the extra exit condition early |
| Map Room | Adds a live navigation room with useful objects | Use it as a route anchor |
| Bear Trap | Random Bear Traps appear | Stop sprinting blindly through cluttered areas |
| Lights Out | Reduced lighting; stamina affects personal light | Preserve stamina before dangerous crossings |
| Compactor | Adds a quieter processing machine | Prefer it when enemy pressure is a concern |
| 2x Gold | Processed item value doubles | Prioritize good extractor objects |
| Red Skull | Increases enemy presence | Shorten optional loot routes |
| Secret Gold Room | Adds a boarded hidden Gold room | Check hallways for the hidden entrance |
The table is the quick identification layer.
The details below are where the modifiers actually change how I play.
Shop Cube Makes Floor Loot More Interesting
Shop Cube can scatter shop-style items around the facility.
The useful item pool I have seen documented includes things such as:
- guns;
- healing bottles;
- bats;
- Compasses;
- Mallets.
I do not read that as a guarantee that the exact weapon I want will appear.
I read it as:
useful gear can now be part of the floor itself.
That changes my spending before the run.
If I already have a usable weapon and Shop Cube rolled, I am less interested in burning Gold on repeated Merch refreshes just to force another option.
I would rather descend first and see what the modifier gives me.
There is also a useful interaction with Map Room.
If Shop Cube + Map Room are active together, I check the bench in the Map Room because a shop item can appear there.
That is much more efficient than wandering through already-cleared rooms looking for one more random pickup.
Broken Fuse Adds Another Exit Condition
Broken Fuse changes extraction rather than ordinary combat or loot.
Once it rolls, I know that simply earning enough extraction value may not be enough.
The elevator also needs a working Fuse condition solved.
That means I do not leave the problem until the final minute.
I start paying attention to likely Fuse containers while following my normal route.
A Compass can also substitute for the Fuse, which becomes especially useful when the run is already valuable and I do not want to extend the search.
That is all I need from the modifier page.
If a Fuse will not work, I find a dead Fuse, or I need the exact replacement route, I use the dedicated Replace Fuse Guide rather than repeating the full troubleshooting process here.
Map Room Gives Me a Real Navigation Anchor
Map Room is one of the utility modifiers I am usually happy to see.
The room contains a table with a map that shows the active locations of me and my allies.
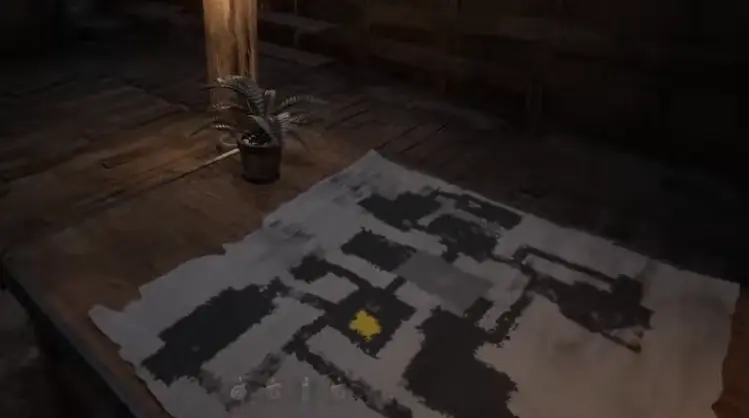
That is helpful solo because generated layouts can become confusing.
It is even better in co-op.
Instead of trying to explain:
“I am near the corridor beside the room with the broken wall”
I can use the map as an actual reference point.
The room can also contain:
- a fan;
- a gramophone;
- a telephone;
- a lantern;
- the map table.
The Lantern has a practical use beyond lighting.
Breaking it and standing in the resulting fire removes Grain Rot little by little.
The tradeoff is that the fire also hurts me.
So I treat it as:
remove the Rot I need to remove → get out of the fire → recover health separately.
Map Room also has two useful modifier interactions.
With Broken Fuse, a Fuse can appear in the box at the table.
With Shop Cube, a weapon can appear on the bench.
Those are the first places I check before doing another large facility sweep.
Bear Trap Costs 10 HP and About 2.5–3 Seconds
Bear Trap is one of the modifiers where the numbers matter more than the icon.
Stepping on a trap can:
- deal 10 damage;
- stop me moving for roughly 2.5–3 seconds.
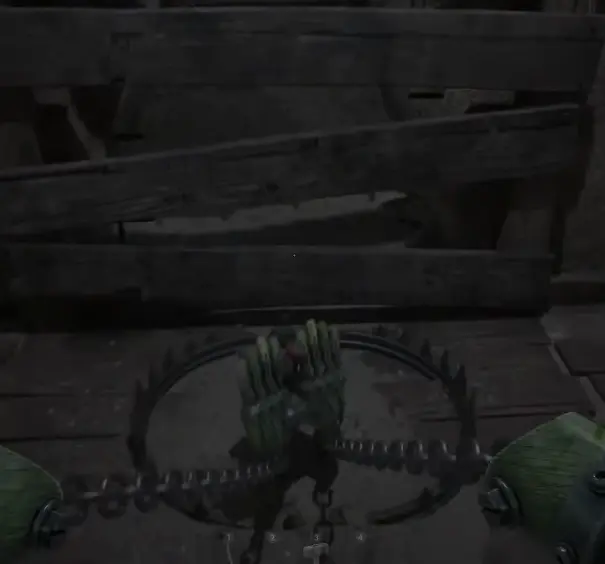
That is why I slow down around:
- dark doorways;
- cluttered rooms;
- narrow return routes;
- places where another player has already been moving objects around.
The safer option is to trigger the trap with an item.
Doing that disarms the Bear Trap without damaging the item.
Enemies can trigger traps too.
When an enemy steps into one, it takes 10 damage and is briefly immobilized.
That makes Bear Trap one of the few dangerous modifiers I can sometimes turn into an advantage.
If the trap is on my main return route, I remove it.
If it is in a side doorway I can remember, I may leave it active and use the position against an enemy later.
Lights Out Makes Stamina Part of Visibility
Lights Out does more than make the facility darker.
The modifier also makes my personal light depend on stamina.
If I sprint until stamina reaches 0, my light can flicker and shut off.
Once stamina recovers to around 35, it comes back.
That makes stamina a visibility resource.
My normal sprint habit changes immediately.
I do not empty the bar just to cross a safe hallway faster.
I want enough reserve that if something appears ahead of me, I can still:
identify the threat → turn around → sprint away → keep enough visibility to reach the next safe room.
This matters even more when I am returning with a quest item.
Saving a few seconds is not worth turning the final route into a blind escape.
Compactor Is the Quieter Extraction Modifier
Compactor adds another processing machine somewhere in the facility.
Its basic function overlaps with the main Extractor:
put valuables through it and turn them into useful extraction value.
The important difference is noise.
The Compactor is much quieter.
Its lever has roughly the alert range of smashing a picture on a wall, while the main Extractor can draw enemies from much farther across the map.
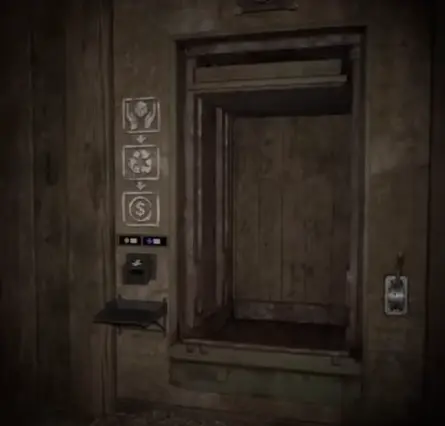
That changes where I process loot.
If the Compactor is reasonably close to the rooms I am already clearing, I prefer using it instead of carrying everything back toward the noisier machine.
It is not completely silent.
I still need a retreat route.
It just gives me much more control over when processing loot turns into enemy pressure.
There is also another Compactor room layout with a free Mallet supply behind the machine.
Those Mallets can be taken repeatedly.
That becomes useful on Scrap-heavy runs because a broken Mallet no longer has to be the reason I stop farming.
For the actual leave-or-stay logic after processing enough value, I keep that in the Extraction Guide.
2x Gold Doubles Processed Item Value, Not Everything
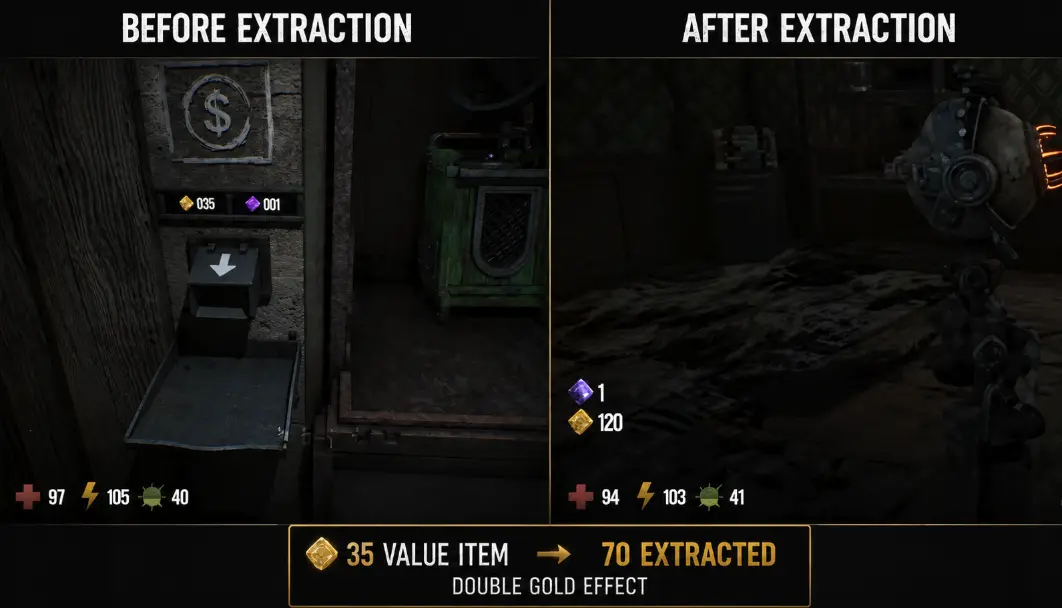
2x Gold is one of the strongest profit modifiers, but its wording can make the effect sound broader than it really is.
What I have verified is that processed item value doubles.
For example:
25 → 50
and:
35 → 70
It does not double every currency source.
I do not expect it to double:
- Piggy Bank Gold;
- loose Gold around the facility;
- Purple Coins.
A Purple Coin worth 1 remains 1.
That makes the route decision fairly straightforward.
On a 2x Gold run, I value good processable objects more highly than small loose currency pickups.
I am willing to make a reasonable detour for something that will double at the machine.
I am much less willing to cross the whole facility for one small coin just because the run says 2x Gold.
And once the exit is already ready, the modifier still does not justify infinite greed.
Double profit is useful only if I make it home.
Red Skull Means More Enemy Pressure
Red Skull increases enemy presence.
I would not turn that into one universal number for every floor.
The useful reference I have is an early Level 1 comparison.
A normal Level 1 run was described as having roughly 1–3 enemies, while the Red Skull test clearly produced more enemy activity and continued pressure.
So I treat the symbol as:
optional detours just became more expensive.
I still complete objectives.
I still loot.
But once the run has already achieved what I came downstairs for, I am less interested in opening another distant branch.
The modifier becomes particularly nasty when combined with something that also slows the escape.
For example:
Red Skull + Broken Fuse
means more enemy pressure while I still have an extra extraction requirement.
Red Skull + Lights Out
means more threats while bad stamina management can also remove my personal light.
That is when I become much more conservative.
Secret Gold Room Means Look for a Boarded Hallway
Secret Gold Room does not place an obvious treasure vault next to the elevator.
The modifier adds a hidden room somewhere along a hallway.
The visual clue is the boarded entrance.

I can break into it several ways:
- pull the boards away by hand;
- punch them;
- use a weapon;
- use a Mallet.
Inside, the tested room contained multiple Piggy Banks along with additional value, for roughly 30 Gold total.
A box can also appear in the corner.
That is a worthwhile bonus when the hallway is already close to my route.
I do not treat it as mandatory.
If I am critically low on health, carrying an important quest item, or already have a safe profitable extraction ready, I do not spend a collapsing run searching every remaining hallway for thirty more Gold.
Modifier Combinations Matter More Than Individual Symbols
The strongest decisions come from combinations.
I have rolled Broken Fuse + 2x Gold together.
Those modifiers pull me in opposite directions.
2x Gold says:
stay longer and process good valuables.
Broken Fuse says:
make sure the exit can actually work.
My priority becomes:
get useful value → solve the Fuse condition → make extraction safe → only then decide whether the double-profit floor deserves another loot branch.
I do not maximize the profitable modifier first and hope the extraction problem works itself out later.
The same logic applies to other combinations.
Map Room + Shop Cube
I check the Map Room bench for the extra shop item opportunity.
Map Room + Broken Fuse
I check the Map Room table box as part of the Fuse search.
Compactor + 2x Gold
This is one of my favorite profit combinations because processed valuables pay better while I also have a quieter machine.
Red Skull + Lights Out
I shorten exploration and preserve stamina.
More enemies plus weaker visibility is not the combination where I want to reach zero stamina three rooms away from the elevator.
The icon tells me what changed.
The combination tells me what problem gets solved first.
Blank Means No Special Modifier
A Blank roll has no special effect.
That becomes relevant once I start improving the Outpost elevator.
The elevator room upgrade I have used reduces the chance of Blank rolls.
I do not rush that upgrade on my earliest runs.
If I am still dying because I have poor health, weak stamina management, or bad equipment, getting a more interesting elevator roll is not fixing the real problem.
Once the basic loop is reliable, fewer Blank rolls become more attractive because more of my repeated runs can receive an actual modifier.
My Outpost Upgrades Guide covers when I move Scrap into the elevator instead of another survival or equipment upgrade.
How I Read the Elevator Before Pulling the Lever
I only make four checks now.
Does anything add an extraction condition?
Broken Fuse gets solved early.
Does anything increase danger?
Red Skull, Bear Trap, and Lights Out lower how much optional risk I want.
Does anything increase profit?
2x Gold and Secret Gold Room change what I am willing to carry or search for.
Did I get a utility modifier?
Map Room, Shop Cube, and Compactor can change my preferred route.
Then I go.
I do not need to memorize a perfect strategy for every possible combination.
I just need to avoid the mistake I made early:
treating every Deep Layers run like the same run.
FAQ
Can multiple elevator symbols be active in the same GRAIN ROT run? +
Yes. I have rolled combinations such as Broken Fuse with 2x Gold. I always read the symbols together because one modifier can increase profit while another adds danger or an extra extraction condition.
Does upgrading the Outpost elevator remove dangerous modifiers? +
No. The elevator room upgrade I have used reduces the chance of Blank rolls. It does not disable Broken Fuse, Red Skull, Lights Out, Bear Trap, or other modifiers.