How I Find and Replace the Fuse in GRAIN ROT
How I find a working Fuse, recognize the 0% Durability trap, search the floor efficiently, and get the elevator working without wasting the run.
Updated:
Quick Answer
When I get a Broken Fuse run, I start checking lockers and boxes while I explore instead of waiting until I am ready to leave.
The important trap is that the first Fuse I find may not be usable.
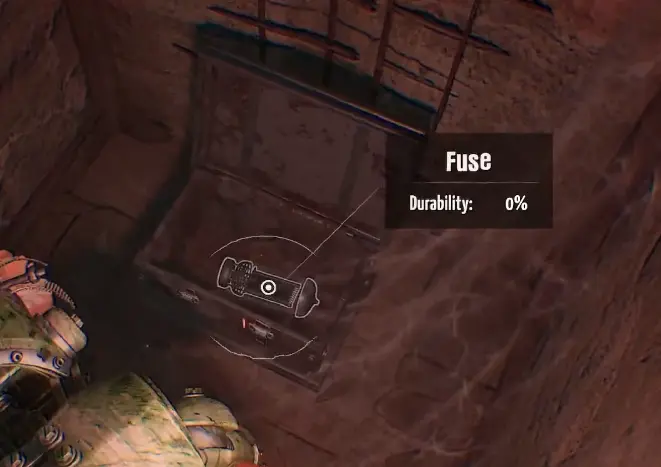
I have found one that looked correct but showed:
Durability: 0%
That Fuse was already dead.
I stopped trying to interact with it, continued searching, found another Fuse in a locker, returned it to the elevator, and inserted it into the Fuse slot.
If I already have a Compass, I can also use that as the replacement instead of extending the search.
Broken Fuse was one of the first mechanics in GRAIN ROT that genuinely made me think the game had bugged.
The objective told me to replace the Fuse.
I searched.
Eventually I found an object that looked exactly right.
Then I could not use it.
I kept trying the interaction because I assumed I had missed the correct angle or button.
The real answer was much simpler:
the Fuse itself was already broken.
Once I learned to inspect the item first, Broken Fuse stopped feeling like a random softlock and became a problem I could solve methodically.
Broken Fuse Adds an Extra Extraction Requirement
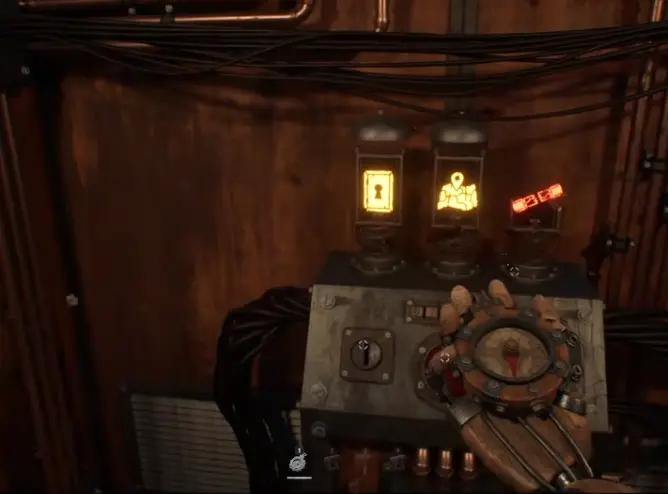
Broken Fuse appears as one of the elevator modifiers.
When I see it before entering the Deep Layers, I know the run has an extra job:
find a usable Fuse and get it back to the elevator.
That changes my route immediately.
On my first bad Fuse run, I did the opposite.
I focused on valuables first.
I got close to being ready to leave.
Then the objective was still sitting there:
Replace Fuse.
At that point I had no search plan.
I wandered through rooms I had already visited, looked at decorative objects that were never going to help, and lost track of which containers I had opened.
The search took long enough for the run to collapse.
Now, if Broken Fuse rolled, I search for the replacement during normal exploration.
I Search Lockers and Boxes Before Random Objects
My most reliable Fuse search rule is:
containers first.
I prioritize:
- lockers;
- boxes;
- obvious unopened containers;
- the Map Room table box if that room exists.
I do not expect the replacement to be sitting beside the elevator.
I do not waste time checking every chair, shelf, or random decorative object.
My route is usually:
elevator → first connected branch → unopened lockers and boxes → return toward a recognizable point → next unchecked branch.
That matters because generated layouts make it very easy to convince myself that an old hallway is a new one.
If I see lockers already open, that is one of my clearest signs that I am looping.
A Fuse With 0% Durability Is Already Broken
This is the most important troubleshooting detail on the page.
I found a Fuse lying in the environment.
It looked like the objective item.
But I could not use it normally.
When I inspected it, the UI showed:
Fuse
Durability: 0%
That changes the diagnosis completely.
If I see a Fuse and it will not solve the objective, I now do this:
inspect it
↓
check Durability
↓
if it is 0%, stop trying to use it
↓
continue searching for another Fuse
I do not repeatedly mash the interaction button.
I do not assume the quest is softlocked.
And I do not restart the run just because the first Fuse I found is dead.
Finding One Broken Fuse Does Not Mean the Run Is Stuck
This was my second wrong assumption.
After finding the 0% Fuse, I initially thought:
that must have been the Fuse for this floor.
It was not.
I went back through the area and realized I had skipped some lockers.
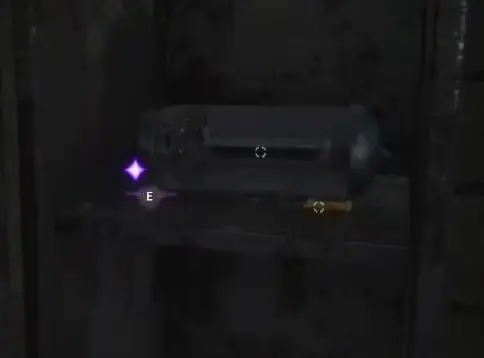
When I checked them properly, I found another Fuse.
That is why I treat Fuses like other searchable run resources.
The first one I see is not automatically the one I need.
There can be another replacement elsewhere.
The important distinction is:
found a Fuse
versus
found a usable Fuse.
Check the Map Room Table Box When Both Modifiers Roll
There is one search location I prioritize when the run gives me both:
Map Room + Broken Fuse.
The Map Room has a table with the map on it.
When Broken Fuse is active, a Fuse can appear in the box at that table.
I do not assume the Map Room will exist on every Fuse run.
But if the modifier is already there, I check that box before doing another large sweep of previously visited rooms.
That is one of the useful interactions between elevator modifiers.
The full Map Room, Shop Cube, Bear Trap, Lights Out, Compactor, 2x Gold, Red Skull, and Secret Gold Room behavior is in my Elevator Symbols Guide.
I Take the Working Fuse Back Before Starting Another Long Detour
Once I finally have a usable Fuse, I stop treating the search as unfinished business.
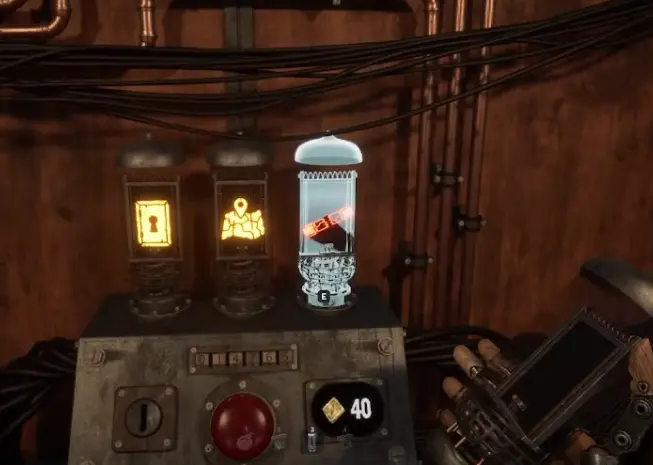
I return to the elevator.
Then I put the Fuse into the Fuse slot.
That does not mean I always leave immediately.
It means I want the mechanical problem solved first.
After the Fuse is installed, I can still ask whether a nearby room is worth checking.
But now that decision is optional.
I am no longer carrying the solution three rooms away while hoping nothing goes wrong.
This becomes especially important if I already have:
- a quest item;
- a strong resource haul;
- low health;
- a bad enemy situation.
In those cases, repairing the elevator usually pushes me much closer to leaving.
A Compass Can Replace the Fuse
There is another solution that can save a long search:
the Compass can be used in place of the Fuse.
That creates a real decision rather than a mandatory rule.
If the run is calm and I am carrying nothing important, I may keep the Compass and continue searching for a proper replacement.
If the run already matters, I am much more willing to spend the Compass.
For example, I lean toward using it when:
- I have a progression item;
- my health is already low;
- enemies are making the search dangerous;
- I have already covered most of the floor;
- the extra search is becoming more expensive than the Compass itself.
My rule is:
the more valuable the run becomes, the less I care about preserving one utility item at the cost of a dangerous search.
That is exactly the kind of choice I want to make before the floor is already falling apart.
Broken Fuse and the Second Floor Key Can Overlap
One of the worst times to discover the Fuse problem is after finding a major quest item.
I have had a Second Floor Key run where finding the Key did not mean I could immediately go home.
The elevator still needed its Fuse condition solved.
That is the important crossover between the two mechanics:
finding the quest item does not override the elevator modifier.
If I already have the Key, I do not start another optional loot branch while the Fuse is still unresolved.
I solve the exit problem.
Then I go home.
The actual Key quest, where I search for it, how the objective unlocks, and what happens after I return it belong in my Second Floor Key Guide.
I keep the Fuse page focused on getting the elevator working.
Having Enough Extraction Value Does Not Repair the Fuse
This distinction caused a lot of unnecessary confusion on my first attempt.
I had been collecting and processing value.
The run felt almost finished.
But Broken Fuse is a separate condition.
So I make two checks:
Is the normal extraction requirement covered?
Is the Broken Fuse condition solved?
Having one does not automatically complete the other.
I do not need to repeat the entire extraction system here.
The full process for converting valuables, checking the current requirement, preparing the exit early, and deciding when the run is worth securing is in my Extraction Guide.
For this page, the rule is simply:
money ready does not mean Fuse ready.
I Stop Rechecking Rooms Once the Containers Tell Me I Am Looping
Fuse searching becomes inefficient very quickly if I lose track of the map.
I have walked into the same kitchen more than once thinking I had finally found another branch.
That is why opened containers become useful landmarks.
If I enter a room and the lockers I remember checking are already open, I do not search that room from scratch.
I turn around.
This is also why I prefer a branch-based search over random wandering.
A simple pattern like:
known anchor → unchecked branch → containers → return
is much safer than:
follow whichever doorway looks unfamiliar.
The Fuse is small enough that I need a systematic search.
The map itself does not need to be systematic.
What I Do If I Still Cannot Find a Working Fuse
If I have searched for a while and still have nothing usable, I check the failure points in this order:
Did I inspect the Fuse I already found?
If it is 0% Durability, I stop treating it as the solution.
Did I actually open the lockers?
Seeing a locker and opening it are not the same thing.
Did I check boxes as well?
I do not restrict the search to one container type.
Is Map Room active?
If yes, I check the table box.
Do I already have a Compass?
If yes, I decide whether preserving it is worth extending the run.
Am I looping?
If I keep seeing open containers, I return toward the elevator and take a
different branch.
That checklist is much faster than assuming the mechanic has failed.
When I Leave After Repairing the Fuse
The Fuse being repaired gives me a choice.
It does not command me to keep looting.
I usually leave soon after if:
- I already have the objective I came for;
- health is low;
- stamina is becoming unreliable;
- enemies are pressuring the return route;
- the run has already produced what I needed;
- I spent too long solving the Fuse and do not want to add another risky loop.
If the area beside the elevator is safe and there is one obvious useful item nearby, I may still take it.
What I do not do anymore is repair the Fuse and then start a completely new exploration route just because extraction finally works.
That turns a solved problem back into another chance to fail.
My Broken Fuse Route
When Broken Fuse appears, this is the sequence I use:
Read the Broken Fuse modifier before committing to the floor.
↓
Check lockers and boxes as I explore.
↓
If a Fuse will not work, inspect its Durability.
↓
Leave a 0% Durability Fuse and continue searching.
↓
Check the Map Room table box if that modifier is active.
↓
Use a working Fuse, or sacrifice a Compass when the search is no longer worth the risk.
↓
Return the solution to the elevator and repair the Fuse slot.
↓
Check that the rest of the extraction conditions are ready.
↓
Decide whether the run is still worth extending.
The part that changed this mechanic for me was realizing:
the first Fuse I find is not necessarily the answer.
Once I started checking Durability, prioritizing lockers and boxes, and treating the Compass as an emergency alternative, Broken Fuse became a search problem instead of a run-ending mystery.
FAQ
Does upgrading the Outpost elevator prevent Broken Fuse runs? +
No. The elevator room upgrade I have used reduces the chance of Blank rolls. I do not treat it as a way to disable the Broken Fuse modifier.
Is the replacement Fuse always in the same room? +
I do not use a fixed-room location. The Deep Layers layout changes, so I search unopened lockers and boxes systematically and check the Map Room table box when that modifier is active.