How I Heal, Revive, and Recover in GRAIN ROT
How I recover health, stamina, and Spark in GRAIN ROT, including Beds, Chairs, Repair Glue, body recovery, and how I remove Grain Rot safely.
Updated:
Quick Answer
If I need to recover in GRAIN ROT, I separate the problem first:
- low health → I look for a Bed or use Repair Glue
- low stamina → I use a Chair
- dead / out of body → I manage Spark and look for a body I can safely return to
- Grain Rot / infection pressure → I use fire carefully, then recover immediately afterward
The most important practical rule is that I do not treat every recovery tool the same. A Bed is not a Chair, and a Chair is not a heal.
That sounds obvious, but a lot of bad runs happen because I try to solve the wrong problem with the wrong tool.
The first thing that made GRAIN ROT easier for me was realizing that “recovery” is really several different systems.
I am not just asking:
How do I heal?
I am usually asking one of these instead:
- how do I get my HP back?
- how do I recover stamina before the next run?
- what do I do after I die?
- how do I keep my Spark alive long enough to matter?
- how do I clear Grain Rot without turning the cure into another emergency?
Once I started treating those as separate questions, I wasted fewer items and threw away fewer runs.
A Bed Is My Normal Health Recovery Tool
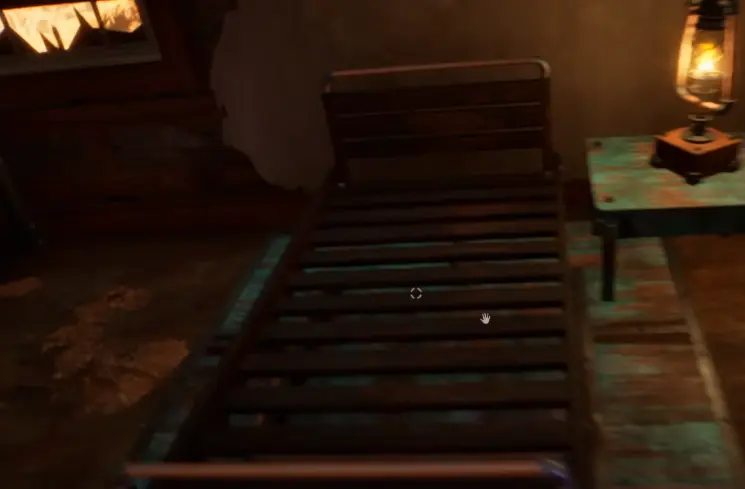
When I just need my health back, the first thing I want is a Bed.
That is still the most reliable, least wasteful way I have found to recover HP.
If there is a usable Bed nearby, I usually stop there first instead of spending a consumable immediately.
This matters because GRAIN ROT constantly tempts me to treat every run as if I can squeeze in one more room.
That is how I end up trying to progress on half health when the smart move was simply to rest for a few seconds.
Beds become even more valuable on longer routes.
On outside runs, I used one intermediate building almost like a checkpoint because the Bed there let me reset before committing to the next exposed sprint.
That was much better than trying to brute-force the whole route in one go.
A Chair Solves Stamina, Not Health
This is the next correction that helped me.
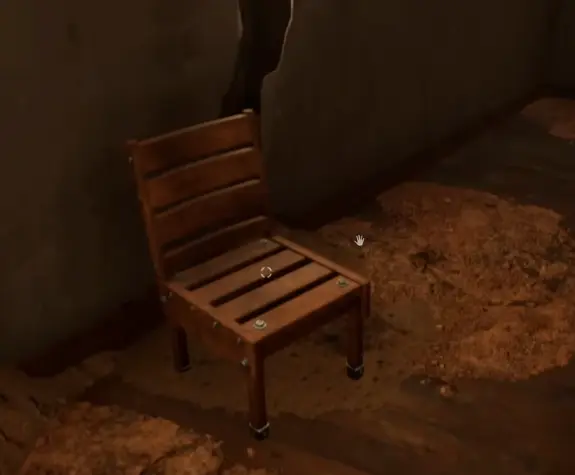
A Chair is useful, but it is not a replacement for healing.
I use it when the problem is stamina, especially before a long run, a retreat, or another carry-heavy route.
That distinction sounds small, but it changes decisions all the time.
If my route failed because I ran out of stamina halfway back to safety, a Chair is exactly what I want.
If my route failed because I am one mistake away from dying, sitting in a Chair does not fix the run.
It only makes the wrong bar recover.
So my mental rule is simple:
Bed = health
Chair = stamina
If I only remember one thing from this page during a bad run, it is that.
I Use Repair Glue When I Need Health Right Now
Beds are my preferred recovery.
Repair Glue is what I use when I cannot afford to wait or cannot safely get back to a Bed first.
That usually means one of three situations:
- I am already in the middle of a long route
- I have to cross another dangerous section immediately
- going back to the Bed would waste more than the Glue saves
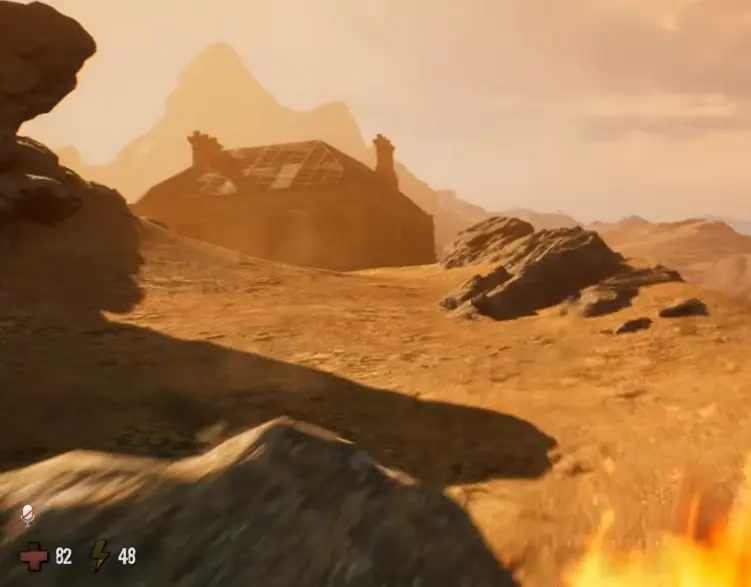
One of the clearest examples came on the topside route toward the bunker and radio-tower area.
At around 60 HP, which was roughly half the bar on that run, pushing onward without more recovery already felt bad.
And that was before the longer second leg.
That is exactly the kind of situation where I stop pretending chip damage is “fine” and start treating Glue as progression insurance.
What I do not do is spend Glue too casually when a Bed is a few steps away.
If a Bed solves the problem safely, I save the Glue.
If a Bed is behind me and the dangerous stretch is in front of me, Glue becomes much easier to justify.
I Do Not Waste Recovery Before the Harder Half of a Route
This is one of the most useful habits I picked up.
Many routes in GRAIN ROT have a safe-ish half and a worse half.
If I use my best recovery too early, I make the actually difficult part harder.
So I ask:
Where is the part of the route that is most likely to kill me?
If the answer is “the second outside sprint,” I save Glue for that part.
If the answer is “the room after the next drop,” I do not waste everything just topping off before it.
This is why I often recover in stages:
- use a Bed when it is convenient
- use a Chair before a long movement section
- save Glue for the moment the route actually becomes expensive to fail
That sequence keeps me from overcommitting too early.
What Happens When I Die: I Become a Spark
Death in GRAIN ROT is not always the same as “the run is over.”
A lot of the time, I transition into Spark.
That means I am still involved, but I am operating on borrowed time.
The biggest mistake I made early was treating Spark like a safe spectator mode.
It is not.
Spark is a recovery problem of its own.
I have to keep it alive long enough to do something useful with it.
That changes my priorities immediately.
I stop thinking about loot.
I stop thinking about the route.
I start thinking about:
- where my teammates are
- whether there is a body I can get back into
- whether I am drifting too far away and wasting the recovery window
If I Am in Spark, I Stay Close Instead of Wandering Off
The most practical lesson here is that I do not drift away from the group just because I can move quickly.
When my Spark was running low, staying close to other players mattered.
That was the difference between continuing the recovery attempt and just fading out.
So if I die in co-op, I usually do not go exploring.
I stay near the players who can actually help stabilize the situation.
That gives me a chance to keep going instead of turning a single death into a full lost run.
Getting Back Into a Body Is the Real Revive Step
Spark only buys time.
The real goal is getting back into a body.
Sometimes that means returning to my own body if the situation is still under control.
Sometimes it means finding another body I can safely use.
That is why I treat the revive question as:
How do I get a body back?
not:
How do I float around longer?
If the room is still active and dangerous, I do not blindly rush back into the worst spot just because my old body is technically there.
A “revive” that puts me straight back into the same losing fight is not much of a revive.
I want a body I can actually survive in.
That is one of the reasons body recovery feels easier in co-op than solo.
In co-op, teammates can stabilize the room or hold the threat long enough for the recovery to matter.
In solo, if I lose the body in a bad position, the run is often much harder to rescue cleanly.
I Do Not Confuse Reviving With Winning the Fight
This is another small but useful shift in mindset.
If I get back into a body with almost no margin and immediately try to finish the whole fight, I often just die again.
Instead, after a recovery I ask:
- do I need to leave first?
- do I need health first?
- do I need a safer weapon or angle first?
The revive itself is only step one.
The real goal is turning that second chance into a stable position.
That sometimes means retreating instead of heroically standing my ground.
Fire Removes Grain Rot, but I Keep the Cure Short
The other recovery-like problem players run into is Grain Rot itself.
The practical answer I found is that fire helps remove it.
That includes controlled fire from tools such as Lanterns.
But I do not solve Rot by trying to stand in flames forever.
I solve it by making the exposure short and deliberate.
The cleanest version of the trick was:
- create the fire
- step into it long enough to clear what needs clearing
- step back out quickly
- recover the health I just traded
That final step matters.
If I remove the Rot and then keep pushing on red health, I have solved one problem by creating another.
So I always pair Rot removal with a recovery plan:
- Bed nearby
- Glue ready
- or a clear retreat path immediately afterward
I Treat Health, Stamina, and Rot as One Loop
My recovery decisions got better once I stopped thinking in isolated buttons.
A good run usually looks more like this:
take damage
↓
heal with a Bed or Glue
↓
recover stamina with a Chair before the next move
↓
clear Rot if that is the blocker
↓
recover again before forcing the next section
That loop is much more realistic than pretending one item fixes everything.
When I Turn Back Instead of Forcing One More Room
Not every bad situation needs a heroic salvage attempt.
Sometimes recovery is not the answer because I am already too committed.
I usually stop and reset the run when several of these are true at once:
- health is low
- stamina is low
- Glue is gone
- there is no Bed in the route I understand
- I am already carrying valuable gear or progression items
- the next room is less readable than the one I just survived
At that point, “push forward and maybe find recovery” is usually worse than retreating while retreat is still possible.
The full go-deeper / turn-back decision loop belongs on my Solo Guide.
This page owns the recovery side of that decision.
What I Actually Do in Common Recovery Situations
If I am low on health and a Bed is nearby, I use the Bed.
If I am low on stamina before another long push, I use a Chair.
If I am far from safety and the next section is worse, I keep Repair Glue for that worse section.
If I die and become Spark, I stay close to help, then focus on getting back into a usable body.
If I need to remove Grain Rot, I use fire briefly and recover immediately afterward.
That is the full recovery framework I keep coming back to.
Not because it is flashy, but because it keeps runs from collapsing for stupid reasons.
The Main Recovery Mistake I See
The most common mistake is not “forgetting a mechanic.”
It is using the right mechanic at the wrong time.
A player heals with Glue when a Bed was free.
A player sits in a Chair when the real problem is low health.
A player gets revived and instantly tries to finish a fight instead of stabilizing.
A player clears Rot with fire and then dies from the recovery they never planned.
Once I stopped mixing those cases together, recovery in GRAIN ROT started to feel much more manageable.
That is the real point of this page:
not every recovery tool is for the same emergency, and the run gets much easier once I treat them that way.