What I Do After Unlocking the Second Floor in GRAIN ROT
My route after opening the Second Floor: clear the Rot, find Tink, boost a useful weapon, choose an upstairs room, and prepare for the next progression step.
Updated:

Quick Answer
If I have already returned the Second Floor Key, I progress upstairs in this order:
open the Second Floor → clear the Grain Rot blocking progression → keep following the upstairs objectives → find Tink → use the Upgrader on a weapon I actually want to keep → level the Second Floor room that solves my next problem.
The first weapon boost I used cost 100 Gold, so I do not upgrade a throwaway weapon just because the machine becomes available.
For room progression, I care more about fixing the weakness in my next run than leveling every upstairs room evenly.
Opening the Second Floor feels like a major milestone, but it is not the end of the Key progression.
It is the start of another phase.
The Key gets me through the door.
After that, I still need to reclaim the upstairs area, follow the new objectives, find Tink, understand the Upgrader, and decide where my next Scrap investment actually belongs.
That changed the way I think about the unlock.
I do not treat:
Second Floor open
as:
Second Floor finished.
If you have not returned the Key yet, stop here and use my Second Floor Key Guide.
That page owns the rescue prerequisite, Key search, return trip, and the actual unlock.
Opening the Second Floor Reveals the Next Blocker
Once I restore access, I stop thinking about the Key.
The problem is now upstairs.
The reopened area has Grain Rot contamination that needs to be dealt with before the floor becomes useful again.
The practical rule I use is simple:
if the Rot is blocking progression, burn it.
Fire removes the contamination.
The problem is that fire can also hurt my Vessel.
So I do not turn clearing Rot into a prolonged burn.
I create the fire where I need it, let it do the job, and move back out.
If I take meaningful damage, I recover before forcing the next step.
The complete healing and Rot-removal loop belongs in my Heal and Revive Guide.
For this page, the important progression sequence is simply:
open floor → clear the blocker → keep following the upstairs objective.
I Do Not Stockpile Lanterns Just Because Fire Is Useful
This is where Lanterns become more than environmental objects.
They can help solve a progression blocker.
That does not mean I buy or build a pile of them in advance.
I only spend when fire is the thing stopping me.
If I already have a way to clear the contamination, I use it.
If I do not, then a Lantern becomes a useful purchase because it solves the problem directly in front of me.
That is the same resource rule I use throughout GRAIN ROT:
buy the solution to the current blocker, not every item that might become useful later.
Once enough of the upstairs problem is handled, I keep checking the Second Floor instead of immediately going back to another ordinary Deep Layers farm run.
Following the Upstairs Progression Leads Me to Tink
The next major change on the Second Floor is Tink.
Tink introduces herself as an engineer and mechanic and, more importantly, introduces the equipment improvement system.
I do not need a separate screenshot just to prove Tink exists because the Upgrader scene already shows both the character and the machine clearly.

This is the point where weapon progression stops being only:
find weapon → buy weapon → replace weapon.
I can now invest in equipment I already like.
That makes weapon choice more important.
A mediocre weapon is no longer automatically worth improving just because I can put it in the machine.
How Tink’s Upgrader Works
The process itself is straightforward:
insert an item → provide the required material → pay the cost → pull the lever → take the improved item back.
On my first Hammer boost, the displayed cost was 100 Gold.
That immediately made the machine a decision rather than a free tutorial step.
One hundred Gold is enough that I ask:
Am I actually going to keep using this weapon?
If the answer is no, I keep the money.
If I only picked up the weapon because it happened to be available, I do not pay to improve it.
If it is already the weapon carrying my runs and I expect to take it into the next major combat objective, the investment makes much more sense.
The Game Explicitly Pushes Me Into Both New Upgrade Systems
After the Second Floor progression moves forward, I get two very useful objectives:
Better Than New — Boost an Item in the Upgrader
and
Back in Business — Level up a second-floor room to level 3.
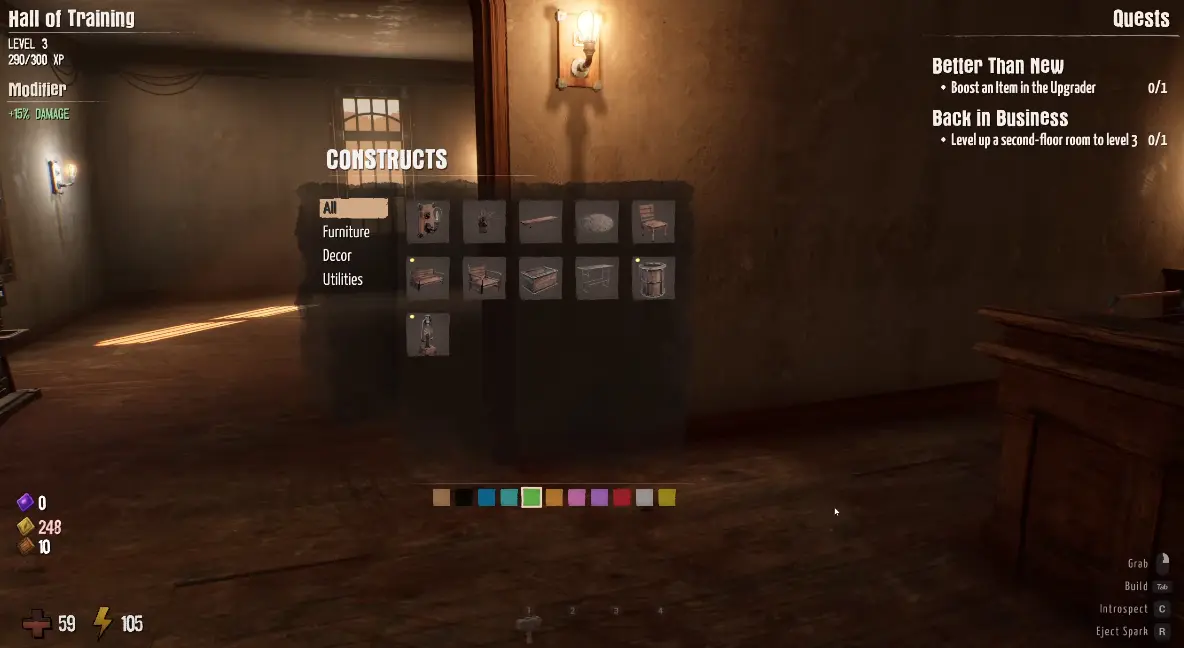
That is the point where I stop asking whether Tink and the new rooms are optional side systems.
The game is explicitly asking me to use both.
But I still do not spend blindly.
The objectives tell me what system to use.
They do not tell me which weapon or which room is the best investment for my current save.
That part still depends on what is actually going wrong in my runs.
I Test One Improved Weapon Before Spending Again
After my first boost, the weapon had a visible changed state.
I do not treat that visual change as proof that I should immediately upgrade a second weapon.
I take the first one downstairs.
What I want to learn is:
- does it kill ordinary Corrupted noticeably faster?
- does the weapon still feel comfortable at its normal range?
- does durability still fit the way I use it?
- did the boost actually solve the combat problem that made me spend 100 Gold?
If it still feels wrong, I stop investing.
A successful use of the Upgrader does not automatically turn a weapon into the right long-term weapon.
This matters even more because later progression eventually asks me to fight a Corrupted Elite.
I would rather reach that point with one tested upgraded weapon than several expensive weapons I barely use.
The Second Floor Gives Me New Permanent Upgrade Choices
The upstairs rooms expand the kinds of permanent bonuses I can build around.
The three directions I encountered were:
- Critical Hit Chance
- Stamina Recovery
- Sprint Speed
I do not treat them as three rooms that should always have matching levels.
They solve different problems.
For me, the most useful question is:
What ended or slowed down my last successful attempt?
That usually gives me a better answer than simply choosing the stat with the largest-sounding number.
I Take Stamina Recovery When Retreats Are the Problem
If I can survive fights but keep running out of stamina while escaping, I look at Stamina Recovery.
This becomes more useful as routes get longer.
A fight may only last a few seconds.
A retreat can stretch across several rooms.
Faster recovery gives me more opportunities to:
- pause somewhere safe;
- refill enough stamina for another sprint;
- reposition without starting another fight;
- keep moving a progression item toward the elevator.
If the real reason I am dying is that I cannot disengage, another damage bonus does not solve the problem.
Stamina Recovery might.
Sprint Speed Becomes More Valuable When Travel Is the Problem
Sprint Speed becomes more attractive when progression starts sending me farther from safe areas.
That matters underground, but it becomes especially easy to appreciate once longer surface routes enter the progression.
One upgrade state I encountered moved displayed Sprint Speed from 50 to 60.
I do not treat that number as a mandatory breakpoint for every player.
What matters is that the improvement was large enough to make movement feel meaningfully different.
If the next objective involves a long exposed route, spending here can solve a more immediate problem than Crit.
I Choose Crit When Combat Is Actually Holding Me Back
I do not ignore Critical Hit Chance.
I just do not make it my automatic first choice.
Crit becomes more attractive once:
- normal movement already feels comfortable;
- stamina is no longer ending otherwise good runs;
- I have a weapon I plan to keep;
- tougher enemies are taking too long to kill.
At that point, more combat output is solving a real weakness.
Before that, it can be a distraction.
If I am dying because I cannot retreat, better Crit does not repair the route.
For Back in Business, I Pick the Useful Room Closest to Level 3
The Back in Business objective specifically asks me to get a Second Floor room to Level 3.
That makes the decision more concrete.
I do not start from:
Which stat is theoretically strongest?
I start from:
Which useful room can I push to Level 3 efficiently?
If one room already has meaningful progress and its modifier helps my next objective, I would rather finish that room than pour a much larger pile of Scrap into another room from zero.
For example:
- if Stamina Recovery is already close and retreats are the problem, I finish it;
- if Sprint Speed is close and my next route is movement-heavy, I finish that;
- if combat is the clear bottleneck and the Crit room is already near the objective, I use that.
The full furniture XP and Scrap-efficiency system belongs in my Outpost Upgrades Guide.
This page only owns the Second Floor decision once these new rooms are available.
I Do Not Empty My Entire Scrap Reserve Into the New Rooms
Opening several new upgrade paths at once creates a trap.
Everything suddenly looks worth fixing.
I avoid trying to level all of it immediately.
I stop spending when:
I reached the Level 3 objective or other useful breakpoint I wanted.
The next level costs far more than the problem it currently solves.
Spending more would leave me unable to handle another obvious progression blocker.
Permanent upgrades are valuable.
Having no Scrap left when the next quest asks me to solve something else is not.
My Second Floor Upgrade Priority Is Situational
I do not use one universal order.
My default logic is:
bad retreats → Stamina Recovery
long travel or exposed routes → Sprint Speed
slow fights after movement is already stable → Critical Hit Chance
That keeps every upgrade tied to a problem I have actually experienced.
If I am not sure which problem is bigger, I stop rebuilding and make another run.
One descent usually tells me more than staring at three room names upstairs.
I Stop Rebuilding Once the Second Floor Has Done Its Job
Before I return to regular progression, I check:
Is the upstairs blocker cleared?
Have I found Tink?
Have I understood and used the Upgrader?
Do I have a weapon worth carrying forward?
Have I chosen a useful Second Floor room instead of spreading Scrap everywhere?
If those answers are good enough, I leave the building phase alone.
The Second Floor does not need to look finished.
It needs to make the next run stronger.
That keeps the loop moving:
Deep Layers resources → Second Floor investment → stronger next objective.
What Comes After the Second Floor?
Once the upstairs progression is moving again, combat starts becoming a more explicit objective.
The important transition is the appearance of The Big One, which asks me to defeat a Corrupted Elite in the Deeper Layers.
I do not repeat that boss route here.
This page ends when I have:
- reclaimed the useful Second Floor progression;
- found Tink;
- used the Upgrader;
- pushed a useful upstairs room toward the required level;
- prepared equipment for what comes next.
From there, I continue with my Corrupted Elite Boss Guide.
That page owns the Boss Room search, Bigger Jack encounter, charge attack, successful kill, and completion confirmation.
For me, that makes the Second Floor less of a side-building project and more of a preparation stage:
the choices I make upstairs determine how comfortable the next major run is.