Welcome to Elderfield Guide: Walkthrough & Where to Go Next
Not sure where to go next in Welcome to Elderfield? Follow the main progression from early systems and the Mall through Old Woods, Catacombs and Deeper Research.
Get the Rusty Pickaxe from Molly, buy the 150g Basic Pickaxe from Mall Rat, and craft Sturdy, Quality and Superior upgrades when mining blocks your route.
I let the huge farming, gold and death counters build naturally, then plan the achievements that need specific bosses, alignments, social choices and endgame clears.
Compare all 7 Old Gods, choose the right Sunday alignment for farming, combat or rituals, and plan God Forge recipes and follower rooms before switching.
Understand the Task screen, Long-Term and failed tasks, empty Task Board, vague objectives, and how quests unlock shops, keys, stock, recipes and routes.
Get the Farm, Molly’s Workshop and Herb’s fishing setup running early, then follow whichever objective has given you a concrete new route. Adrian’s key starts the main Mall progression, Pen Pals gives Greystone Estates a purpose, and later progression moves through Old Woods → Catacombs → Deeper Research. When the game names a missing key, stronger tool or access item, solve that requirement instead of searching the same room for another entrance.
Where to Go Next in Welcome to Elderfield
Elderfield reveals most of its town long before I have a reason — or the equipment — to finish every location.
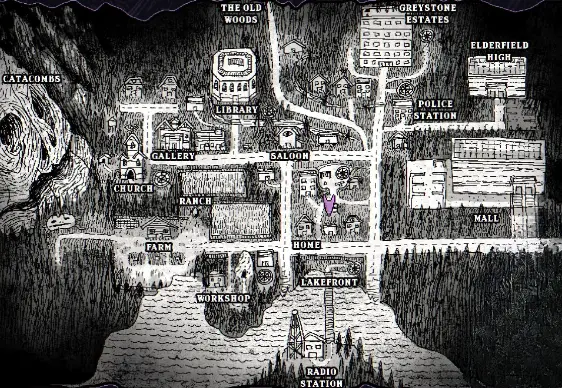
The map can show the Ranch, Church, Gallery, Library, Catacombs, Old Woods, Greystone Estates, Elderfield High, Police Station, Mall, Lakefront, Radio Station and Workshop while several of those places are still waiting on a quest, key, tool or combat upgrade.
The town opens quickly, so I choose destinations from the blocker or objective I currently have rather than trying to clear every visible location.
The quickest way out of that confusion is to identify what kind of problem I actually have.
What Is Happening?
What Usually Moves Me Forward
Useful Route
I know the objective but cannot find the place
Check the major landmarks, districts and travel points
There is still plenty of overlap between these activities. Crops grow while I explore, several quests can point to the same district, and an area I leave today can become useful again as soon as another NPC gives me the missing item.
Get the Farm, Workshop and Fishing Working Before the Town Gets Busy
The opening hours are easier when three basic systems are already available.
Farm work keeps progressing while I am elsewhere, so I start growing crops instead of waiting until a later request suddenly needs them. Molly introduces mining and the Workshop; I get that chain moving early, then upgrade the pickaxe only when the material in front of me actually exceeds my current tier.
The full mining progression is in the pickaxe guide.
Herb serves the same purpose for fishing. Getting the rod and learning bait before another NPC asks for a particular fish turns that request into a targeted trip rather than an entire system unlock.
Fishing eventually expands well beyond the first Lakefront requests. The fishing guide covers the fish list, bait, rods, seasonal catches, Fishing Contest and later fishing areas.
The task journal can stay crowded during all of this. Regular requests, Long-Term Tasks and temporary situations do not need to disappear in the order they arrived. When the journal itself is the problem, the quest guide explains failed tasks, Long-Term Tasks, the Task Board and what to check when an objective seems stuck.
Let New Access Decide When a Location Matters
A place becoming visible on the map is weaker information than receiving something that changes what I can do there.
Adrian demonstrates that clearly with the Mall.
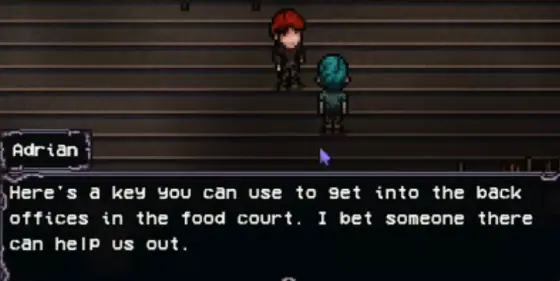
His situation eventually gives me access to the food-court back offices, turning the building from general exploration into a concrete progression route.
Adrian's access to the back offices is the point where I have a specific Mall route to follow instead of wandering the public floors.
From there, the Mall becomes the first area where combat, keys, security, fishing and mining start colliding. Hall Monitor, the Administrator and the Mine do not all need to be solved in one uninterrupted visit; I push until the building gives me a real blocker, then deal with that blocker before returning.
The exact sequence through the offices, security route, Stalktopus, Administrator, Mall Mine and Gem Golem is in the Mall walkthrough.
Greystone Estates works the same way. Pen Pals gives me a clear reason to go there by sending me to Carla in Room 8. Once that happens, I prepare for the building rather than assuming I am making a quick social call.
The Greystone Estates walkthrough handles the apartment route, Carla, the Grave Warden, rubble, Laundry Man and the other major situations inside the building.
Some Cross-Town Quests Are Better Followed One Requirement at a Time
Old Man Jackson’s Build a Wife request is one of the clearest examples of a task that refuses to stay in one district.
The Toy Heart and later materials come from different parts of Elderfield, so guessing the entire shopping list before Jackson asks for it creates more work than simply following the sequence as it develops.
That same habit helps elsewhere. When an NPC names a specific fish, material, key or building, I treat the new requirement as the useful clue. Elderfield often sends me back to a place I have already visited, but with a different reason for being there.
Sunday Can Change the Rest of the Week
Old God alignment is another system I keep running beside normal exploration.
Sunday is the moment to think about what the coming week actually contains. A farming-heavy stretch, difficult boss, ritual setup or follower room can each make a different alignment useful, and the God Forge changes with the pledge as well.
I therefore avoid treating the first god I choose as a permanent commitment.
The seven alignments, their exact bonuses and penalties, Forge recipes and follower-room locations are in the Old Gods guide.
Old Woods Is the First Area Where Access Can Be Misleading
The Old Woods taught me that simply reaching a region does not mean I should keep forcing it.
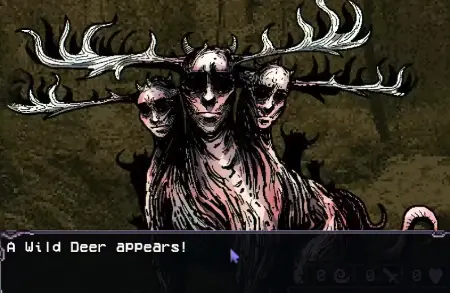
An early Old Woods visit can make the difficulty jump obvious before any major boss appears.
When a normal encounter is already consuming the food and healing I usually save for bosses, another hour of deeper exploration rarely fixes the underlying problem.
The region becomes much more useful once its own progression starts moving: Barry and the Joggers Club lead into the abandoned mill, the Mines become relevant, and eventually the Ancient Tree controls access deeper into the Woods.
The Old Woods guide covers the Mill Key, Lost Mirror, Joggers Club, Verdite Ore, Campsite, strange stairs and Ancient Tree.
After the Ancient Tree route is resolved, the game begins pointing much more naturally toward the Catacombs.
Catacombs Have Their Own Progression Layer
The Catacombs are visible before their internal route makes much sense.
Once I have an actual reason to work through them, the pattern becomes clearer: breakable walls consume the appropriate hammers, Charlie helps with Sophia, and later access introduces the merchant, Wire Cutters, Mines and deeper threats.
That is enough detail for deciding whether the Catacombs are my current destination. The individual floors, hammer requirements, Living Bones, Sophia route and Catacombs Ghost are covered in the Catacombs guide.
A particularly important distinction appears later: finishing ordinary Catacombs progression is not the same thing as reaching Deep Catacombs.
That belongs to a larger chain connecting three different regions.
Deeper Research Connects the Mall, Woods and Catacombs
The next major progression thread begins when Bone Cleanup eventually supplies the Mall Elevator Key.
From that point, the route stops behaving like ordinary Mall exploration. Professor Dayton’s research sends me through Deep Mall, then provides the item needed to cross the darkness beyond the Old Woods, and later sends me back toward the Catacombs.
The three important milestones are:
Essence of Daeus → Essence of Delvek → Essence of Kaal.
Each one changes where I need to go next, and the route also introduces the Eternal Lantern and Climbing Rope.
Rather than trying to remember which deep region supplies which item, I follow the complete sequence in Deeper Research.
This is also the point where revisiting old areas becomes part of normal progression. The Mall, Old Woods and Catacombs are no longer isolated locations; something earned in one can be the access item for another.
The Art Gallery Works Better as a Long-Term Collection
The Gallery does not demand the same kind of concentrated push as the dungeons.
After its grand opening, unusual named items become more interesting because discoveries from different parts of Elderfield can belong to the collection. I keep the first copy of something unfamiliar when replacing it later would be expensive, seasonal or uncertain.
I add pieces as the rest of the run produces them rather than stopping everything to finish the building immediately.
The Gallery also has achievement conditions, which are included with the other unusual requirements in the all 51 achievements guide.
Later progression gives the Gallery another reason to matter, but I wait until the game actually points me back there rather than treating every missing collection slot as urgent.
The Stone Tower Is Not an Early Locked-Door Puzzle
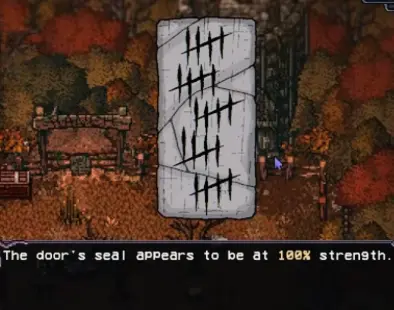
The Stone Tower appears almost immediately, which makes its sealed entrance unusually distracting.
It can still show 100% seal strength while the rest of my run is centered on normal farming and town progression.
A full seal does not mean an early key is hidden nearby. Farm development and much later progression both matter before the Tower becomes the main objective.
Professor Dayton explains that crops and animals contribute to weakening the seal, and later identifies the structure as a shrine connected to Xxarteck, God of the End.
That makes the early decision easy: I keep developing the farm and working through the rest of Elderfield instead of checking the Tower door after every small quest.
By the time later research starts pointing back toward Xxarteck, the Tower fits naturally into the wider progression instead of looking like an unexplained obstacle beside the Farm.
Let Normal Play Carry Most Achievement Counters
Welcome to Elderfield has 51 achievements, but a large part of that list rewards things already happening during an ordinary run: crops, gold, animal products, relationships and major bosses.
I let those totals accumulate.
The conditions worth checking deliberately are the ones I could genuinely miss — unusual social interactions, specific boss kills, alignment requirements, the Fishing Contest, school scenarios and the Stone Tower difficulty clears.
By the middle of the game, several destinations can be valid at the same time. I get unstuck faster by looking for the most recent concrete change rather than trying to decide which map icon is universally “next.”
A new key makes an old door relevant again. A named fish sends me back to fishing. A stronger-tool warning turns exploration into an equipment problem. Pen Pals makes Greystone meaningful; Adrian does the same for the Mall. The Ancient Tree pushes the wider route toward Catacombs, and later the Mall Elevator Key begins the three-region Deeper Research chain.
Combat gives equally useful feedback. When ordinary enemies are using up the recovery I need for the real objective, leaving is usually more productive than proving I can survive one more room.
Some tasks can remain unfinished for a long time without blocking anything important. What keeps the run moving is not clearing every visible objective — it is recognizing when something has changed enough to make an old location useful again.