Welcome to Elderfield Pickaxe Guide: How to Get Every Upgrade
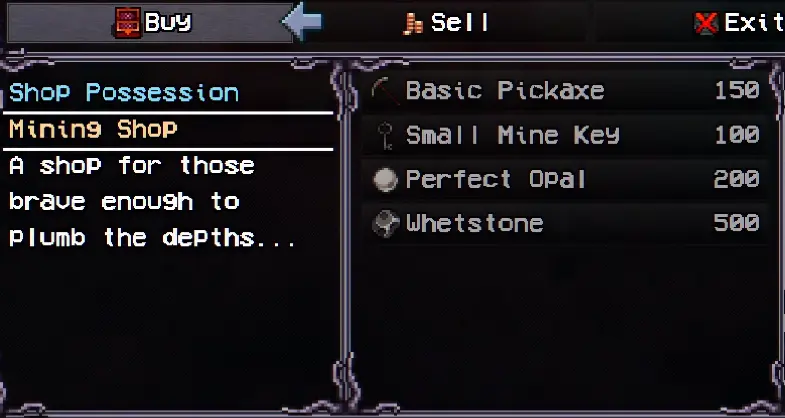
Get the Rusty Pickaxe from Molly, buy the 150g Basic Pickaxe from Mall Rat, and craft Sturdy, Quality and Superior upgrades when mining blocks your route.
Updated:
Quick Answer
Start Helping Molly in the Town Outskirts to receive the Rusty Pickaxe, then mine 1 Copper Ore in the small mine east of her Workshop. Buy the Basic Pickaxe for 150g from Mall Rat once the Mall Mine starts asking for a stronger tool. Keep both early pickaxes because the Sturdy Pickaxe consumes the Rusty and Basic Pickaxes in its recipe.
Every Pickaxe Upgrade in Welcome to Elderfield
The pickaxe chain is not just a sequence of tools I throw away whenever a better one appears. The early tools feed directly into later crafting, and the expensive upgrades only start paying for themselves when the mine is actually refusing my current tier.
| Pickaxe | Mining Level | How to Get It | Cost / Recipe | Main Use |
|---|---|---|---|---|
| Rusty Pickaxe | Early mining | Molly during Helping Molly | Given during the task | First Copper Ore and beginner mining |
| Basic Pickaxe | Next tier | Mall Rat in the Mall Mine | 150g | First stronger-tool mining gates |
| Sturdy Pickaxe | Lv. 3 | Forge after Workshop progression | Rusty Pickaxe + Basic Pickaxe + 8 Copper Bars + 6 Iron Bars | Mid-game ore and mining gates |
| Quality Pickaxe | Lv. 4 | Forge later | Sturdy Pickaxe + 10 Hardwood + 4 Void Crystal Bars + 4 Verdite Bars + 4 Green Crystals | Advanced mining |
| Superior Pickaxe | Lv. 5 | Final known forge tier | Quality Pickaxe + 1 Crafting Pattern + 2 Steel Bars + 1 Gold Plate + 5 Bone Ingots | Late-game mining |
The costs rise sharply after Basic. That makes timing important: 150g is manageable once the Mall Mine is blocked, while fourteen metal bars or several advanced materials are worth committing only when the next mining tier opens something I actually need.
Molly Gives the Rusty Pickaxe During Helping Molly
My first pickaxe came from Molly in the Town Outskirts.
Her Workshop is locked, and she needs 1 Copper Ore to make another key. Accepting Helping Molly puts the Rusty Pickaxe in my inventory before I ever enter the mine.
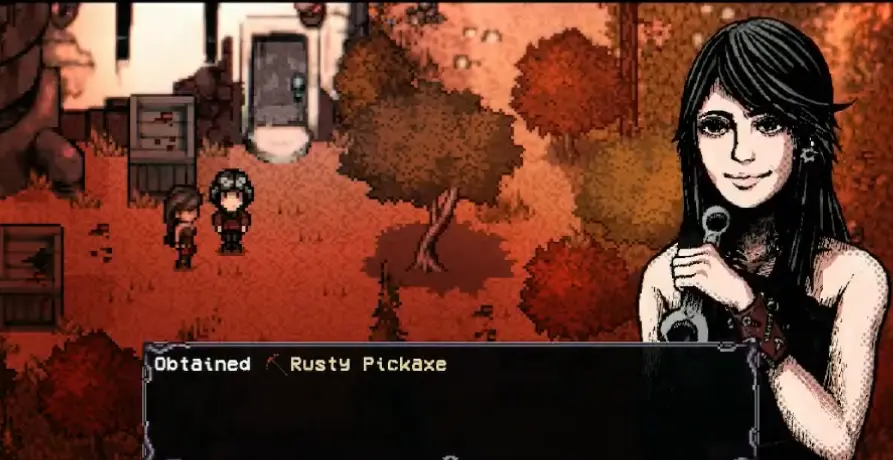
The mine needed for this task is close by. From Molly’s Workshop area, I head east into the local mine rather than going all the way to the Mall.
That first trip has one useful goal: bring Molly the Copper Ore she asked for.
Mine One Copper Ore and Return to Molly
The beginner mine can tempt me into staying longer because there are more rocks to break, but one Copper Ore is enough to advance Helping Molly.
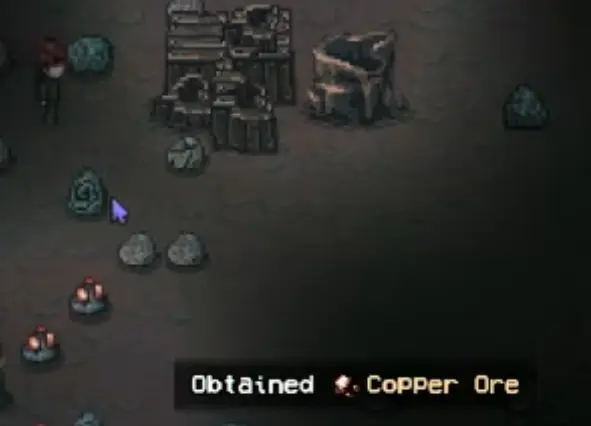
Mining is not completely harmless. A resource swing can lead to unwanted effects, and later mines add much more danger on top of the gathering loop.
For this first visit, stretching the run for a few extra materials is less valuable than returning the Copper Ore and getting Molly’s Workshop available.
The Workshop is what turns mining from a starter activity into a real upgrade path.
Stay With the Rusty Pickaxe Until Mining Rejects It
The Rusty Pickaxe is enough for the opening mining work.
The clearer upgrade signal appears in the Mall Mine, where some resources eventually stop accepting the starter tool. When the interaction explicitly says I need stronger mining equipment, I know the obstacle is no longer about finding another corridor.
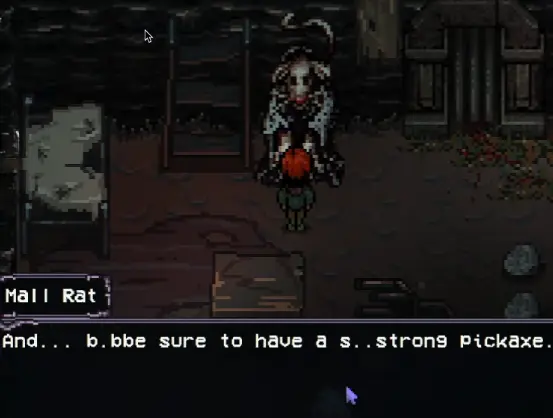
That distinction saves me from two bad decisions at once.
Buying an upgrade too early ties up money I could use elsewhere. Staying with an under-tier tool after the mine has already rejected it wastes time without opening anything new.
The best moment to move up is when the mine itself creates the requirement.
Buy the Basic Pickaxe From Mall Rat for 150g
The first paid upgrade is conveniently located inside the Mall Mine.
Mall Rat sells the Basic Pickaxe for 150g.
Early in the run, 150g still competes with food, seeds and other useful purchases. Finding Mall Rat is therefore not enough reason for me to buy the pickaxe immediately.
If the Rusty Pickaxe still breaks every material I currently need, the money can stay in my pocket.
Once the Mall Mine starts refusing the Rusty tier, 150g stops being a convenience purchase and becomes the price of continued mining access.
That is when I buy it.
Do Not Throw Away the Rusty or Basic Pickaxe
The first two tools look disposable because the Basic Pickaxe replaces the Rusty one in actual mining.
They are not disposable.
The Sturdy Pickaxe recipe requires both.
Putting the Rusty tool into storage is safer than carrying it around once Basic is doing the mining. The important part is simply making sure it still exists when the Sturdy recipe becomes relevant.
Sturdy Pickaxe Recipe
The Sturdy Pickaxe is a Mining Lv. 3 tool.
Its full recipe is:
- 1 Rusty Pickaxe
- 1 Basic Pickaxe
- 8 Copper Bars
- 6 Iron Bars
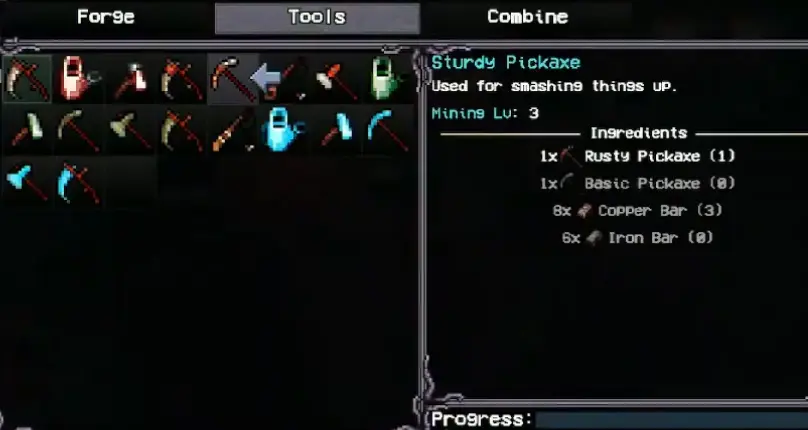
This is where mining starts competing seriously for processed metal.
Eight Copper Bars plus six Iron Bars is enough material that selling every spare ore for quick cash can come back to hurt later. Once Mining Lv. 3 gates are becoming relevant, I start reserving the bars instead of treating all metal as sale stock.
On the other hand, seeing the recipe is not the same as needing the recipe.
If Basic is still handling every resource on the route I care about, fourteen bars may be more useful for other progression. I forge Sturdy when the next mining tier is becoming the thing that stops me.
A Better Pickaxe Does Not Solve a Dangerous Mine
The Mall Mine creates an easy misread because mining progression and combat progression happen in the same place.
A blocked ore node and an enemy that empties my healing supply can appear only a few rooms apart, but they need completely different solutions.
A stronger pickaxe solves:
- ore that rejects the current tool;
- mining-tier interactions;
- deeper resource access tied to Mining Level.
It does not solve:
- weak damage;
- low HP;
- bad status effects;
- an empty food supply;
- or a boss I am not ready to survive.
The deeper Mall route eventually becomes much more than a mining trip. When my blocker is the path through the Mall rather than the tool in my hand, I follow the Mall walkthrough instead of spending more metal on an unrelated upgrade.
That separation keeps resources from disappearing into the wrong solution.
Leave With the Ore Instead of Turning a Good Run Into a Death
Stronger tools encourage me to stay underground because every upgrade reveals more things worth breaking.
That can quietly turn a productive run into a bad one.
Once food is running low, the inventory is packed with materials I want to keep, or several fights have already damaged the build, the next ore node is not automatically worth the risk.
The bars I can process safely at home are more useful than another handful of raw materials lost after a death.
This becomes increasingly important after Basic and Sturdy, when the mine is offering more valuable resources and the route to reach them is longer.
A pickaxe upgrade should expand the run, not convince me to ignore the point where the run is already finished.
Quality Pickaxe Recipe
The Quality Pickaxe raises mining to Lv. 4.
It requires:
- 1 Sturdy Pickaxe
- 10 Hardwood
- 4 Void Crystal Bars
- 4 Verdite Bars
- 4 Green Crystals
At this stage, the cost is no longer mostly common metal. Hardwood, advanced bars and crystals can all compete with other uses, so crafting Quality simply because the recipe is visible can be expensive.
The material commitment makes more sense once Mining Lv. 4 is actually standing between me and the resources or route I want.
Until then, the Sturdy Pickaxe can keep doing its job.
Superior Pickaxe Recipe
The Superior Pickaxe is the Mining Lv. 5 upgrade and the final known step in this chain.
The recipe is:
- 1 Quality Pickaxe
- 1 Crafting Pattern
- 2 Steel Bars
- 1 Gold Plate
- 5 Bone Ingots
The difference from the Basic upgrade is obvious.
Basic asks for 150g.
Superior asks for several specialized late-game materials plus the previous pickaxe.
By this point, I only spend those materials when Mining Lv. 5 access has become useful enough to justify them. Crafting it early does not create extra value if I am not yet pushing content that needs the tier.
The Pickaxe Path I Actually Follow
The cleanest route through the whole chain is:
Helping Molly → Rusty Pickaxe → 1 Copper Ore → Workshop → Mall Mine → 150g Basic Pickaxe → Sturdy → Quality → Superior
I let the current mining restriction decide when each arrow matters.
The Rusty Pickaxe is free and solves the opening Copper task. Basic becomes worth 150g when the Mall Mine begins refusing Rusty. Rusty and Basic both stay in storage afterward because Sturdy consumes them. Copper and Iron become materials I deliberately reserve as Mining Lv. 3 approaches, while the Quality and Superior ingredients only start leaving storage once their tiers open something I intend to use.
That keeps the mining chain moving without spending gold, bars or rare materials several steps before they become useful.