My Twisted Tower Walkthrough From the Beach to Tower Top
The route I use through Hotel, Mermaid Palace, Clown Casino, Fairground Forest, Lightspeed Land, Charlotte's Castle, and the final climb.
Updated:
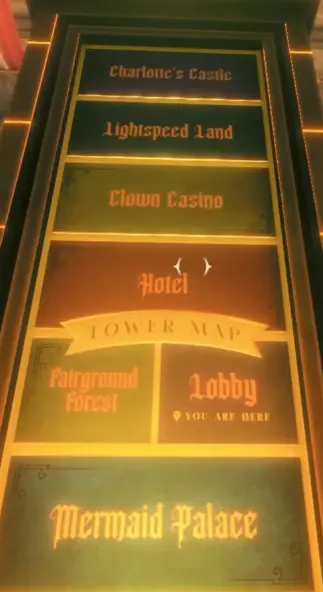
Quick Answer
My main progression route is:
Beach
→ Lobby
→ Hotel
→ Lobby
→ Mermaid Palace
→ Lobby
→ Clown Casino
→ Lobby
→ Fairground Forest
→ Lobby / Bell Tower
→ Lightspeed Pass
→ Lightspeed Land
→ Charlotte’s Castle
→ Tower Top
The part that confused me most at first was how often the game expects me to return to the Lobby after finding a Twisted Token.
If a new route looks completely blocked, I usually check whether I have just earned a token or traversal toy before trying to force the current room.
Twisted Tower looks like a straight climb, but I do not actually progress by moving upward continuously.
The pattern I use is much closer to:
clear one themed area
→ find its progression item
→ return to the Lobby
→ unlock the next toy or route
→ leave for the next area
Once I understood that rhythm, I stopped wasting time trying to open doors that were not supposed to work yet.
There are also several places where the game deliberately shows me something early — a blocked door, trampoline, unreachable platform or route — and only gives me the tool for it later.
My rule is simple:
if the game clearly tells me an area is closed or I lack the required movement tool, I remember it and keep progressing instead of searching the same room for another key.
Beach — Get the Mallet and Enter the Tower
I start on the Beach with very little.
The first important pickup is the Twisted Mallet.
I use it immediately as my basic tool for breaking objects and opening up small resource opportunities around the route.
Tickets also start appearing almost immediately.
They are the game’s spending currency, so I collect them whenever they are directly on my path, but I do not turn the opening section into a full room-by-room cleanup.
There will be much better reasons to spend and earn tickets later.
The Beach also teaches sliding:
sprint → crouch
I make sure I am comfortable doing that before entering the tower because movement mechanics continue to matter later.
From the Beach, I follow the only real progression route into the Lobby.
Lobby — Learn the Route Before Spending Everything
The Lobby becomes my central checkpoint for most of the game.
The first thing I pay attention to is the large tower map.
There are weapon upgrade stations here, and tickets can also be used for other supplies later.
I do not spend every ticket as soon as I see an upgrade station.
Early on, my priorities are:
- keep enough resources to recover from mistakes;
- buy power when it solves a problem I am actually having;
- avoid draining my ticket balance just because an upgrade is available.
The Journal is also important because it shows my current objective and tracks hidden areas.
I use the objective whenever I lose the main route rather than assuming every visible door should open immediately.
One early example is the trampoline in the Lobby.
I can see it long before I can properly use it.
I leave it alone.
The same applies to doors marked with an X later in the Hotel. The game explicitly treats those as reconstruction areas that may become accessible later.
Trying to solve those early only wastes time.
Once I have the Hotel Ticket, I take the elevator and move into the Hotel.
Hotel — Reach the Bedrooms, Then the Honeymoon Suites
My first clear objective in the Hotel is to find Charlotte around the guest bedrooms.
The route begins in the Family Center.
The attacking phones look stranger than they really are. I use the Mallet on them and keep moving.
Soon after, I reach the first important lesson about progression gates:
X-marked reconstruction doors are not my current problem.
I leave them behind and continue through the active Hotel route.
I also pick up Miss Fire during this section.
That gives me another combat option, but I still avoid treating every new weapon or upgrade as something that must immediately consume all of my tickets.
The Hotel Starts Rearranging Itself
One of the first genuine navigation blockers is the rotating Hotel section.
The environment changes orientation, and it is easy to think I have missed a normal door somewhere.
I stop using the original room orientation as my reference and instead follow whatever route becomes physically reachable after the rotation.
Eventually I pick up the Red Key and continue through the Kids Corner side of the Hotel.
There is a supply stand here where I can spend tickets on things such as ammunition and food.
This is where I start being more selective about spending.
If my health and ammunition are comfortable, I would rather carry tickets forward than buy supplies I do not need yet.
If I have burned resources recovering from the Hotel fights, this is a reasonable place to stabilize before pushing deeper.
Moving Stairs → Honeymoon Suites Key
The next major route uses the moving stairs to reach another part of the Hotel.
I keep following the active route until I obtain the Honeymoon Suites Key.
That is my confirmation that I am done searching the earlier Hotel rooms.
I then head into the Honeymoon Suites progression and eventually recover the area’s Twisted Token.
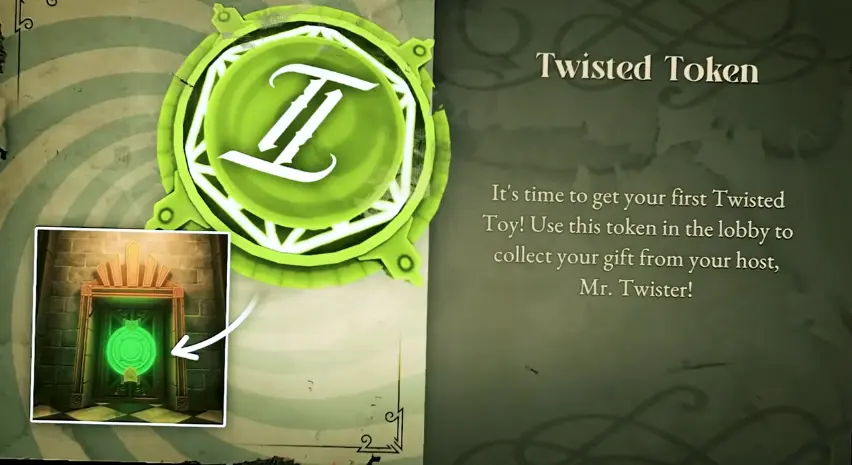
This is one of the most important habits in my entire run:
when I obtain a Twisted Token and the game points me back toward the Lobby, I go back.
I do not keep searching the finished area hoping the next main route is hidden there.
For the complete token progression and what each one unlocks, I use the Twisted Token guide.
Return to the Lobby — Unlock the Harpoon
Back in the Lobby, I use the Hotel progression to open the next route.
The important reward here is the Harpoon.
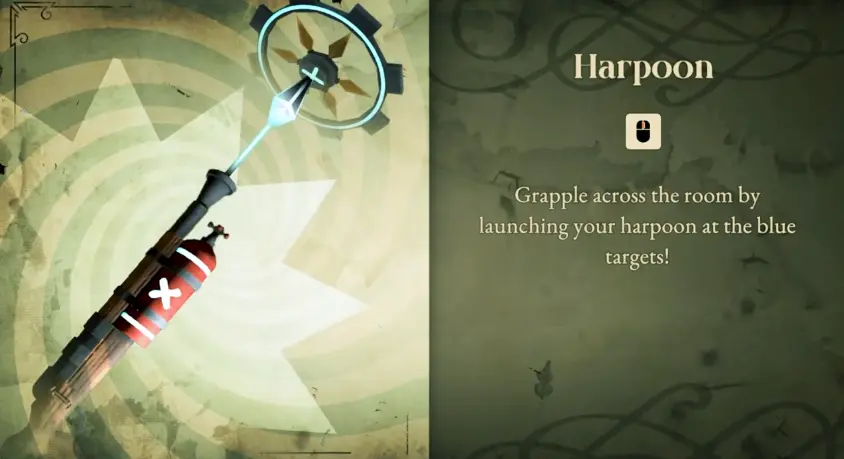
Once I have it, I stop thinking about the Hotel and focus on the next destination.
I also obtain the Mermaid Palace Ticket.
That is my signal to leave the Lobby and enter the underground waterpark.
The Harpoon later becomes part of a larger traversal chain with the other toys, so I keep their exact locations and uses together in the movement toys guide.
Mermaid Palace — Valve Wheel, Crimson Pearl and the Sewer
Mermaid Palace is the first area where I can lose a lot of time by doing steps in the wrong order.
The opening also introduces underwater movement.
There is an oxygen gauge, so I do not linger underwater just because I can see another corridor.
I surface when needed and treat diving as part of the route rather than free exploration.
If the Valve Point Does Nothing, Find the Wheel First
Eventually I reach a mechanism that needs a Valve Wheel.
If I am standing at that mechanism without the wheel, there is nothing clever to solve.
I leave it and search the reachable side route until I find the Valve Wheel, then return.
The bigger blocker comes around The Crimson Pearl.
I can reach the door before I am actually ready to open it.
There is a password involved, but the useful lesson is not to start guessing.
I first complete the nearby device progression, then recover the password, then return to the Crimson Pearl entrance.
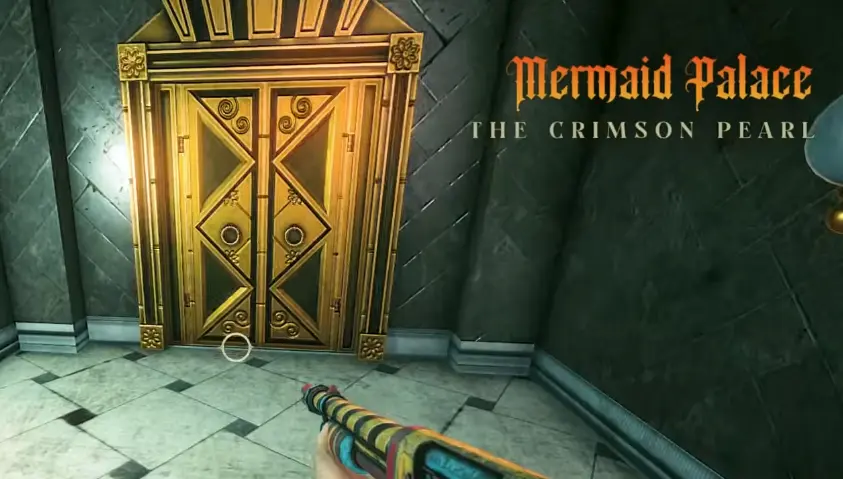
Inside this section I obtain the Marble Magnum.
This becomes one of the weapons I value most for ticket economy.
Later, once its useful upgrade is active, headshots can generate substantially more tickets, so I start looking for efficient kills instead of treating every encounter as a reason to dump ammunition.
For the exact Valve Wheel and password sequence, I keep the full solution in the Mermaid Palace puzzle guide.
Go Down Into the Sewer
After the main Mermaid Palace fight, the route continues downward into the Sewer.
This section can feel wrong because the overall story keeps telling me to reach the top of the tower while the level sends me deeper underground.
I follow it anyway.
The Sewer has one of the nastier combat runs in the first half of the game.
The spiders keep coming, and getting hit by them can interfere with visibility.
I do not stand still trying to clear every possible enemy spawn.
When the route opens, I use a strong close-range weapon and keep moving.
At the end of the Sewer progression I obtain another Twisted Token.
That is my cue to return to the Lobby again.
Return to the Lobby — Get the Fairy Wings
Back in the Lobby, the next major unlock is the Fairy Wings.
They make movement considerably faster.
I do not spend time rechecking every old room immediately after getting them.
The main route is already pointing toward the Clown Casino, so I use the improved mobility to continue forward.
This is another point where the game rewards me for following its progression loop:
area → token → Lobby → new traversal ability → next area
Clown Casino — Buttons, Bubble Gun and Three Levers
I reach the Clown Casino by crossing Nipples Bridge.
The Casino is more mechanical than the Hotel.
Very early, I find buttons that clearly need something placed on them.
If a button is sitting there with nothing obvious in my inventory, I do not assume I have missed a hidden interaction prompt.
I keep exploring until I find the object or route that makes the button useful.
The Bubble Gun appears during this progression.
It is useful for controlling groups, although I still prefer the Marble Magnum when I have a clean opportunity to turn accurate shots into better ticket returns.
The Real Progress Check Is Three Levers
The Casino route ultimately revolves around activating three levers.
This is the point where I stop using “I have explored most rooms” as my definition of progress.
I use:
three levers activated
as the actual completion check.
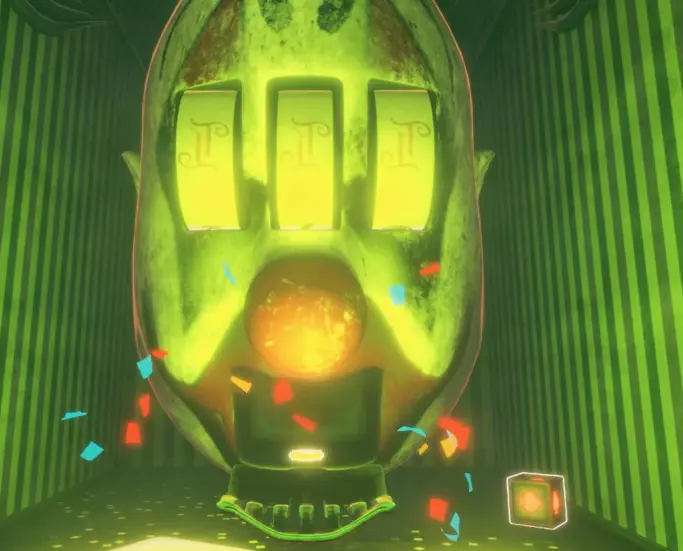
Once all three are done, I can recover the Casino’s Twisted Token.
The Casino also contains several optional side routes and hidden spaces, but I do not mix those into my main progression check.
For the full button and lever route, I use the Clown Casino puzzle guide.
After collecting the token, I take the elevator back to the Lobby.
Return to the Lobby — Unlock the Trampoline Route
The Casino token changes what I can do around the Lobby.
The big difference is the trampoline route.
A mechanic that was useless near the beginning of the game is now part of progression.
Once I have the new movement capability, I can use the trampoline properly and reach places that were previously above me.
Mr. Twister then sends me back outside.
I leave the tower through the entrance, cross the Beach again and enter the Fairground Forest.
Fairground Forest — Three Platforms, Ferris Wheel and Maze
Fairground Forest is the area where I spent the most time wondering whether I was still going the right way.
The first major environmental setup uses three platforms.
One is already connected, so I am looking for the missing pieces rather than trying to activate the whole structure from scratch.
One platform can appear to disappear after I place it.
When that happened to me, I found it had respawned back where I originally picked it up.
That is worth checking before assuming the puzzle has broken.
Use the New Weapons to Open the Route
Later I obtain the Sling Snipe.
Its range matters because I can use it on distant red targets, including one near a minigun.
I do not waste health trying to brute-force a position that clearly gives me a ranged solution.
Once the surrounding progression is complete, the route pushes toward the Ferris Wheel and Godmother Maze.
The Maze Is Easier When I Stop Looking Only at the Ground
The maze was my biggest navigation slowdown in this area.
Walking faster did not help because I was simply repeating the same turns.
What finally helped was looking upward.
Higher landmarks gave me a better sense of direction than the walls directly in front of me.
If I feel like I have seen the same corridor twice, I stop, look above the maze walls and reorient before moving again.
After getting through the Maze, I return toward the Ferris Wheel.
The Ferris Wheel itself can still look inactive.
I do not wait for it to start behaving like a normal ride.
I climb onto it and reach the key on top.
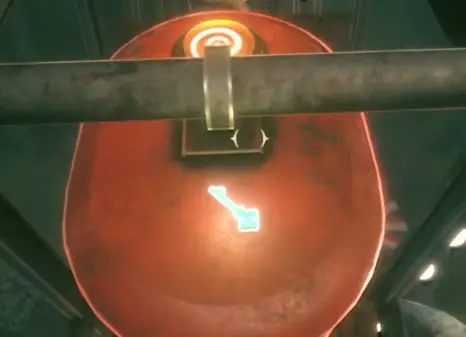
That leads me to the Fairground Forest Twisted Token.
Once I have it, I return to the Lobby again.
The exact platform, maze and Ferris Wheel route is kept together in the Fairground Forest maze guide.
Lobby and Bell Tower — Get the Jetpack Before Lightspeed Land
Back in the Lobby, I now use the trampoline to reach the red token above.
That opens the route through the Bell Tower side of the Lobby.
The next major traversal toy is the Jetpack.
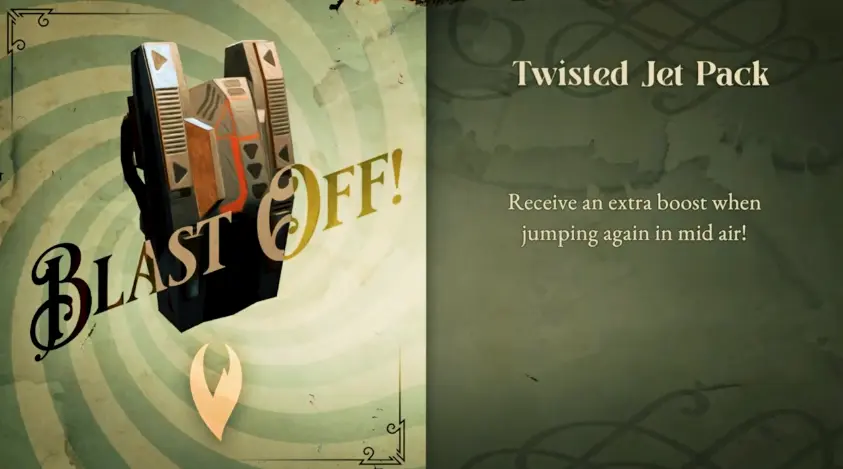
Piper makes the requirement clear: I need the Jetpack to reach Lightspeed Land.
So if I can see the next destination but still cannot physically reach it, I stop trying to force the jump and finish the Bell Tower progression first.
After getting the Jetpack, I obtain the Lightspeedland Ticket and return to the elevator.
Now I can head to Lightspeed Pass.
Lightspeed Pass — Use the Environment Instead of Trading Damage
Lightspeed Pass is more combat-heavy, but I still look for environmental answers before spending health and ammunition.
One obvious example is the Big Boy Cannon.
When I see the minigun threat ahead, I use the cannon rather than trying to win a direct damage race.
This area is a transition rather than a place where I stop for a long cleanup.
Once the path opens, I continue into Lightspeed Land.
Lightspeed Land — Expect Your Weapons to Be Taken
Lightspeed Land deliberately resets the feeling of progression.
Shortly after entering the space-station section, I fall and Mr. Twister reveals that his mascots have taken all of my weapons.
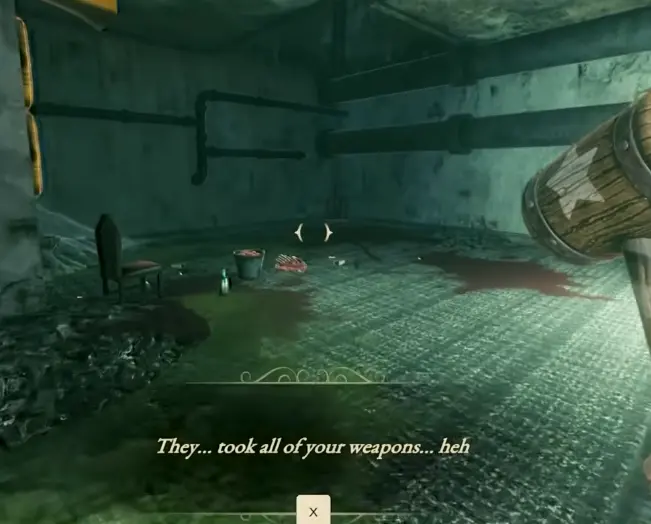
This is not a bug and I do not reload an earlier save.
I start recovering weapons around the station.
The W.A.S.P Ray Gun is one of the new pickups here, and previous weapons also begin reappearing as I move through the area.
I treat this section like a second opening:
- use what I currently have;
- recover weapons as the route presents them;
- do not burn ammunition trying to play as though my full loadout still exists.
There are several fights where I can lose a lot of health by rushing the recovery route.
If I am planning a clean run, this is one of the points where I slow down and prioritize survival over clearing a room quickly.
Eventually the route reconnects with the roller-coaster section and then the Galactic Cinema.
If I Get Stuck Inside the Cinema, Go Up
The cinema looks more complicated than its actual exit.
When I wondered how to leave, the solution was simply to move upward.
I follow the upper route instead of searching the ground floor for another conventional door.
The story sequence here leads directly toward the final area.
Charlotte’s Castle — Activate the Device and Come Back
The next major location is Charlotte’s Castle.
This is a shorter progression section, but it has a very clear structure.
I push through the first fights until I reach the required device.
Once I activate it, I turn back rather than continuing to search for a new exit beyond that point.
Returning triggers the next major battle.
I make sure I am reasonably healthy before committing because this is no longer an area where I want to spend resources casually.
Finishing the sequence rewards the Ticket to the Top.
At that point I am done with normal area progression.
I head to Tower Top.
Tower Top — Final Boss
Tower Top is the final challenge.
The arena changes around me during the fight, so staying locked onto one safe position does not work for long.
I keep moving with the shifting geometry and focus on the active target rather than trying to clear the encounter like a normal room.

Once I finish the final sequence, I reach Charlotte and the ending plays out.
Completing the game also unlocks Adventure Plus.
I do not need Adventure Plus to understand the first-run progression route, so I leave it for post-game cleanup rather than mixing it into this walkthrough.
If I am continuing toward 100%, the next thing I check is my Twisted Tower achievements progress and any hidden areas I missed in the all secrets guide.