How I Beat Twisted Tower Without Dying
My safer No-Death Daredevil route, with the fights, jumps, spider runs, weapon reset, and late-game sections where I stop taking unnecessary risks.
Updated:
Quick Answer
No-Death Daredevil requires me to finish Twisted Tower without a single death.
I do this after learning the normal progression route, not during my first blind run.
The sections where I play most carefully are:
Mermaid Palace Sewer — keep moving through the spider rush.
Clown Casino — use crowd control instead of letting groups surround me.
Fairground Forest — use the Sling Snipe on the distant red target instead of challenging the minigun directly.
Lightspeed Pass — use the Big Boy Cannon on the minigun.
Lightspeed Land — expect to lose the weapons I have collected and rebuild the loadout instead of panicking.
Charlotte’s Castle and Tower Top — enter prepared and prioritize survival over fast damage.
I also leave optional high-risk detours alone unless I specifically want Secret Safari in the same run.
No-Death Daredevil was only at 1.5% in the early achievement data, and I can see why.
Twisted Tower is not especially punishing in every room.
The problem is that one mistake anywhere across the entire climb can ruin the attempt.
For me, the dangerous parts are not just the obvious late-game fights.
A bad optional jump, getting boxed in by spiders, walking directly into a minigun, or entering Lightspeed Land expecting to keep my normal loadout can be just as dangerous.
That is why I do not treat a no-death attempt like a faster version of my first playthrough.
I treat it as a risk-management run.
I Learn the Full Route Before Starting No-Death Daredevil
I would not make my first blind clear my serious no-death attempt.
There are too many moments where Twisted Tower intentionally makes me think I should keep searching even though the correct answer is to backtrack.
By the time I start No-Death Daredevil, I want to know the main sequence already:
Hotel
→ Mermaid Palace / Sewer
→ Clown Casino
→ Fairground Forest
→ Bell Tower / Jet Pack
→ Lightspeed Pass
→ Lightspeed Land
→ Charlotte’s Castle
→ Tower Top.
If I still need the exact progression order, I use my full walkthrough first.
Knowing where to go removes a surprising amount of risk.
I spend less time wandering into optional fights and less time experimenting with jumps that are not supposed to work yet.
I Treat Any Death as the End of the Attempt
The achievement wording is simple:
complete the quest without a single death.
I do not build my run around save reloads, quitting before a death registers, or other workarounds.
I have not seen enough reliable evidence that those methods preserve the achievement, so I do not risk an entire run on them.
My rule is stricter and easier to follow:
if I die, the clean attempt is over.
That also changes how I judge optional content.
Something being reachable does not automatically make it worth doing.
Survival Matters More Than Hoarding Tickets
Tickets normally compete between weapon upgrades, ammunition, food, and achievements.
For No-Death Daredevil, I simplify that decision.
If spending tickets gives me a meaningful survival advantage right now, I am willing to spend them.
Food restores health, so I do not walk into a major fight badly injured just because I want to preserve every ticket.
I also do not force Ticket Titan into the same attempt if holding 2,000 tickets would make me skip an upgrade or supply purchase I genuinely need.
The achievement cleanup route is covered separately in my achievements guide.
On this run, staying alive wins the argument.
Hotel — Do Not Add Risk to a Straightforward Opening
The Hotel is where I settle into the run.
I do not rush it just because it is early.
More importantly, I do not waste health investigating things that are clearly not part of current progression.
The X-marked restricted doors are the obvious example.
They are not first-playthrough blockers I need to force open.
I leave them alone.
I follow the normal Red Key → Kids Corner → moving stairs → Honeymoon Suites route and only take the fights needed to keep progressing.
The Hotel is not where I want to prove that I can play aggressively.
It is where I want to leave with a clean health pool and the first Twisted Token.
Mermaid Palace — Solve the Route Instead of Staying Exposed
Mermaid Palace adds underwater oxygen management and several deliberate backtracks.
For a no-death attempt, I do not turn those backtracks into random exploration.
I already know the important progression:
Valve Wheel
→ required device
→ VIP code 1326
→ Crimson Pearl
→ Marble Magnum
→ Sewer.
If I need to re-check any of those puzzle locations, I use the Mermaid Palace puzzle guide rather than improvising during the no-death run.
Underwater, I surface when I need oxygen instead of squeezing one more side corridor into the dive.
There is no benefit to turning an easy navigation section into a survival check.
The Sewer Spider Rush Is One of My Main Danger Points
The Sewer is where I noticeably change pace.
The spiders keep coming, and getting hit can interfere with visibility.
Trying to stand in one spot and eliminate every enemy works against me here.
The game itself pushes the safer idea:
get the shotgun out and run.
I keep enough space to react, shoot when something is actually blocking my escape, and continue toward the elevator.
I do not chase individual spiders backward through the Sewer.
That gives the encounter more time to surround me.
Once I reach the elevator and the Sewer Twisted Token, the risk is over.
I leave.
Clown Casino — Crowd Control Is More Valuable Than Showing Off
Clown Casino can turn messy quickly because later rooms throw several enemies into the same space.
This is where the Bubble Gun and Firecrackers earn their place in my loadout.
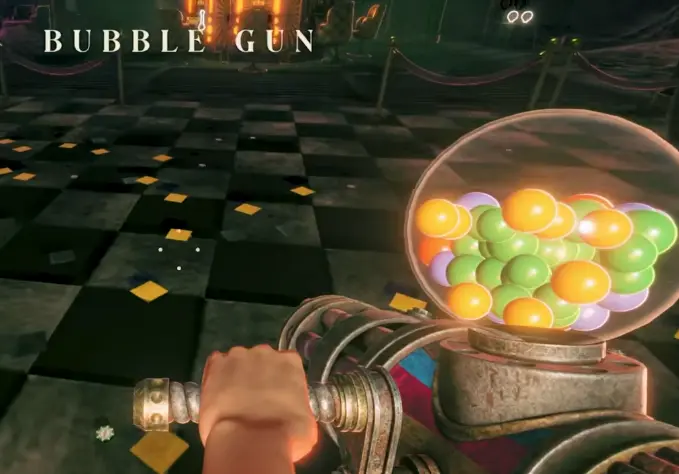
The Bubble Gun is particularly useful when groups start stacking up.
Firecrackers are another strong answer when a cluster is becoming expensive to control with individual shots.
I do not waste those tools on one harmless target and then enter the harder room empty.
The progression itself is already known:
pressure buttons → three levers → token.
That means I do not need to explore every Casino room twice during the no-death run.
If all three levers are active, I take the token and leave.
Fairground Forest — Use the Intended Ranged Solution
Fairground Forest has a perfect example of why I prefer solving the environmental problem over trading damage.
After picking up the Sling Snipe, I encounter a minigun farther ahead.
There is a red target near it.
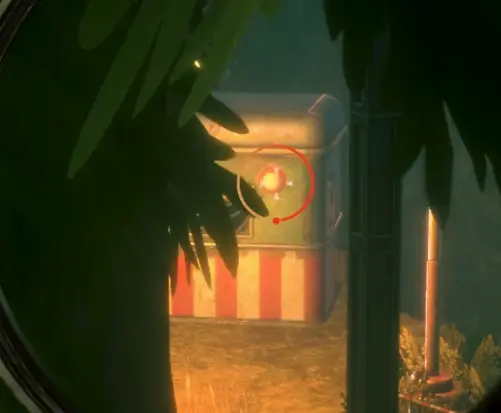
I shoot the target from range.
I do not push toward the minigun simply because I think I can survive a few hits.
No-death routing is full of small decisions like this.
If the game provides a low-risk environmental solution, I use it.
Do Not Panic If a Forest Platform Respawns
The three-platform section creates another kind of risk: impatience.
One movable platform can respawn back at its original pickup position.
If that happens, I do not start making desperate jumps across the incomplete route.
I go back and retrieve it.
The same applies to Godmother Maze.
When I lose my direction, I slow down and look above the walls for larger landmarks.
Running faster while lost only gives the spiders more opportunities to catch me in a bad corner.
The exact maze and Ferris Wheel progression remains in my Fairground Forest guide.
I Separate No-Death From Secret Safari at First
It is possible to collect secrets while keeping a no-death run alive.
That does not mean I want to combine the achievements on my first serious attempt.
The reason is Lightspeed Land.
One of the easiest ways for me to turn a perfectly good run into a death is an optional movement detour where the landing is much less forgiving than the main route.
Secret Safari requires every hidden Secret Area in one playthrough.
No-Death Daredevil only requires me to finish without dying.
Those goals do not need to share a run.
When I want the safest possible No-Death Daredevil attempt, I follow mandatory progression and remove optional jumps from the risk budget.
Lightspeed Pass — Use the Big Boy Cannon
Lightspeed Pass gives me another minigun problem.
Again, I do not solve it by standing in front of the gun and trying to out-damage it.
There is a Big Boy Cannon available.
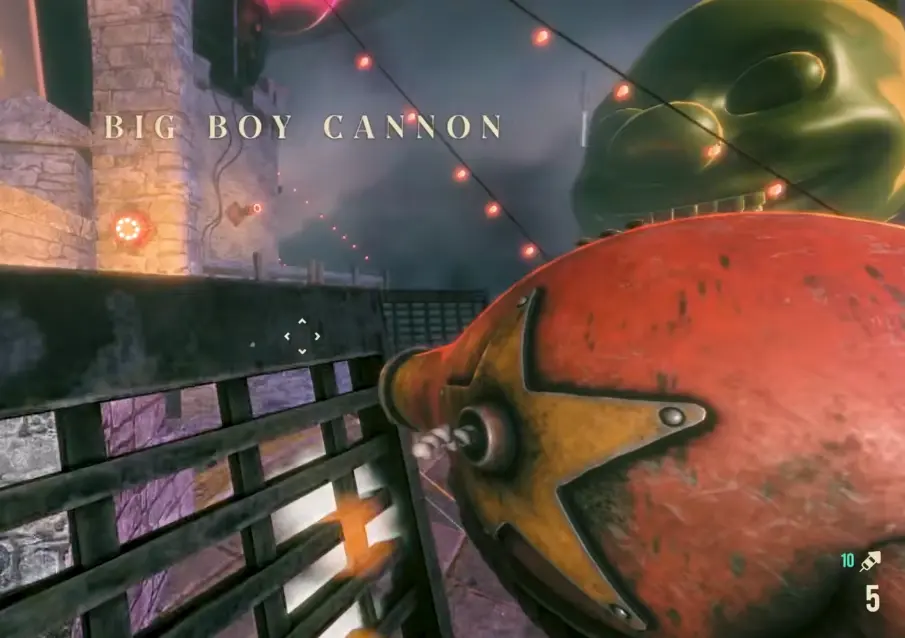
I use the cannon to destroy the minigun and continue.
This is exactly the kind of interaction I want memorized before a no-death attempt.
The first time through, I may spend time wondering what the cannon is for.
On the achievement run, I already know.
Lightspeed Land — Expect to Lose Every Weapon
Lightspeed Land is one of the biggest mental traps in the no-death route.
After entering the space-station section, I take a scripted fall.
Then Mr. Twister reveals what happened:
the mascots took all of my weapons.
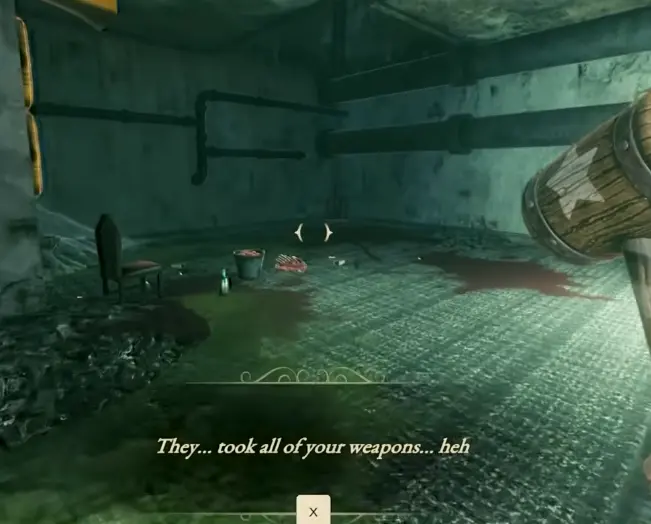
I do not panic and I do not treat the missing inventory as a bug.
The area is designed around rebuilding the loadout.
That means I immediately become more conservative.
I no longer have the exact collection of weapons that carried me through the previous areas.
Rebuild Before I Start Taking Aggressive Fights
The W.A.S.P Ray Gun is one of the useful weapons I recover in Lightspeed Land.
Its secondary fire can detonate the photons fired by the weapon.
I use the weapons the station gives me and rebuild from there instead of trying to play as if I still have every previous option available.
The area also has an encounter that begins after taking a key, so I do not grab every obvious objective item while badly hurt and assume I will have a quiet moment afterward.
If my health is low and I have a chance to stabilize first, I take it.
The Lightspeed Land Secret Is Not Worth a No-Death Gamble
This is the optional detour I am most willing to leave behind.
On an exploratory run, the Lightspeed Land Secret Area can require a movement commitment where a failed approach means death.
That is exactly the opposite of what I want in No-Death Daredevil.
If I am doing Secret Safari, I follow the safer Secret route deliberately.
If I am only doing No-Death Daredevil, I skip it.
The Secret locations belong in the all secrets guide, not in my mandatory no-death line.
Charlotte’s Castle — Heal Before I Commit to the Return Fight
Charlotte’s Castle is where I stop thinking:
I’m almost finished, so I can spend health freely.
The endgame still has enough combat left to kill the run.
The Castle progression sends me through an initial combat section to a required device.
After activating the device, I have to head back.
That return triggers another major fight.
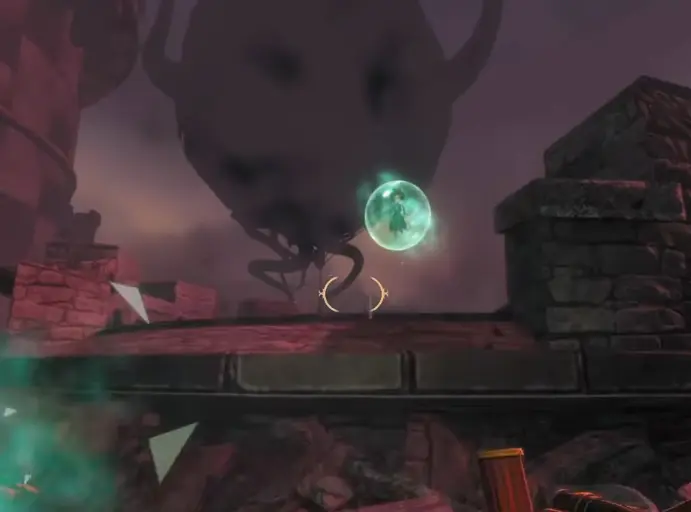
If I have food available, this is not where I save it for some imaginary harder room.
I know a fight is coming.
I heal before committing.
After winning, I get the Ticket to the Top.
Only then am I ready for the final section.
Tower Top — Footing Matters More Than Fast Damage
Tower Top is the final no-death check.

The important thing is that the arena does not stay static.
The Tower changes during the fight.
That means a position that feels safe at one moment may not remain the place I want to stand.
I keep repositioning and watch the floor instead of tunnel-visioning on damage.
At this stage I would rather take another attack cycle than turn several hours of clean progress into a fall while trying to finish five seconds sooner.
The fight ends quickly enough when I stay under control.
My No-Death Rule for the Whole Tower
The rule I use is not complicated:
mandatory risk is a problem to solve.
Optional risk is something I remove.
I use the intended environmental solution when there is one.
I buy survival when I actually need it.
I stop re-exploring an area once its token tells me to return to the Lobby.
I do not combine difficult achievements just because they technically can be combined.
And when I reach the final fights, I play them like the beginning of the run still matters.
Because for No-Death Daredevil, it does.