The Puzzles and Investigations That Actually Stopped Me
I use this guide when I know where I am but cannot tell whether a safe, key, Evidence group, mechanism, or investigation is actually ready to solve.
Updated:
Quick Answer
I use this page when I know the area I am in but cannot tell which blocker I am supposed to solve.
Opening apartments
Apartment 5 and the first floodgate belong to one connected route.
Open the Fuse Box & Apartment 5 guide.
Redemption Church
The story floodgate and the optional Trident investigation are two different
problems.
Open the Church & Trident guide.
Printing House
The Red Franklin cannot be finished when I first find a Printing Plate.
Open the Printing Press guide.
Devil’s Reef Hotel
Room 301 is optional; Staff Key → Lorelei → backstage is the real progression
chain.
Open the Devil’s Reef Hotel guide.
Akeley Memorial Hospital
Prism Stations, masks, the storage locker and Wireless Room all belong to the same
hospital route.
Open the Hospital puzzle guide.
Holloway Manor DLC
The Museum, Medallion, three heirlooms, family memories and final curse sequence form
one separate manor route.
Open the Holloway Manor walkthrough.
Fish Market and later story puzzles
These stay closely tied to the main campaign route.
Continue with the full walkthrough.
The puzzles that cost me the most time in The Sinking City 2 were not always the hardest ones.
Usually I was stuck for one of two reasons:
I had the right information but interpreted it incorrectly
or
the game had shown me the puzzle before giving me everything needed to solve it.
Those feel almost identical while I am standing in front of a locked safe or strange machine.
So before I start guessing, I ask:
Do I actually have everything this puzzle refers to?
If the answer is no, I keep exploring.
If the answer is yes, I stop searching for another item and re-check the clue.
Investigation Difficulty Does Not Change the Physical Solution
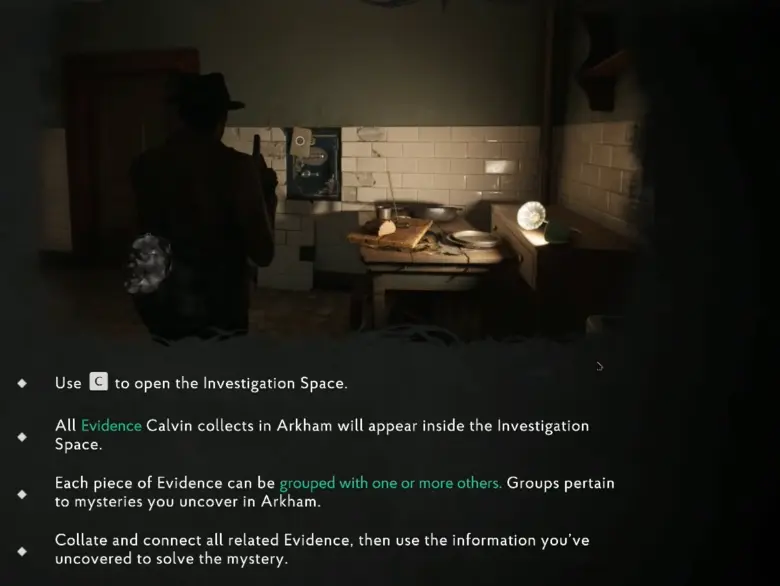
The Investigation Space is where Calvin’s Evidence is collected and grouped into mysteries.
Investigation Difficulty changes how much assistance I receive while reading and connecting that Evidence.
With more assistance, important information and possible Evidence relationships are easier to identify.
With less assistance, I have to recognize those relationships myself.
What it does not do is change the physical answer.
Changing Investigation Difficulty will not give a safe a different combination.
It will not replace a Prism layout.
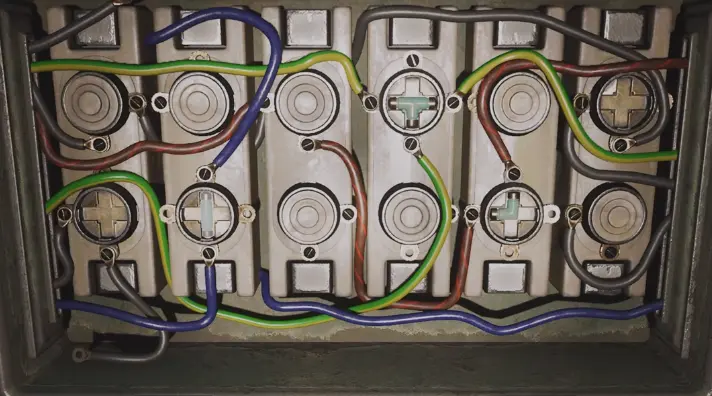
It will not change how the opening Fuse Box works.
That distinction matters when I am deciding whether I am stuck on:
interpreting Evidence
or
operating the actual mechanism.
Opening Apartments — Apartment 5 and the Fuse Box Are One Route
The opening residential section shows me two blockers almost immediately:
- a wall safe in Apartment 5;
- a powerless floodgate switchboard.
Neither needs to be brute-forced when I first see it.
The apartment does not initially contain enough information to finish the safe, and the switchboard is missing the pieces it needs.
The radio shop connects both problems.
That is why I treat this entire opening area as one loop rather than two unrelated puzzles.
If I am stuck on:
- the Apartment 5 wall safe;
- where the missing clue comes from;
- the electrical fuses;
- fuse rotation;
- or the completed switchboard;
I use the Fuse Box and Apartment 5 guide for the complete apartment and floodgate route.
Redemption Church — First Decide Which Problem I Am Solving
Redemption Church is where I first confused optional investigation progress with main-story progress.
There are two distinct objectives here.
One opens the route forward.
The other takes me through the much larger Trident mystery.
I do not assume the Trident investigation must be finished simply because I am still inside the church district.
For a story-focused run, I identify the blocker that opens the route and continue.
For a completion-focused run, I stay for the optional investigation while the Star Key and ritual clues are already in front of me.
If I am stuck on:
- the Star Key;
- the church floodgate;
- The First Vision;
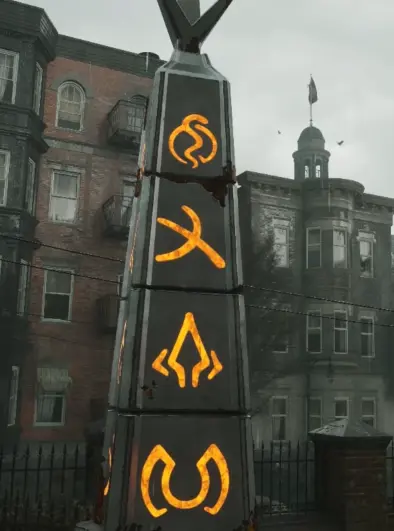
- the four Trident symbols;
- charging the Trident;
- or The Other Gods;
I use the Redemption Church and Trident guide for the complete church route.
Printing Press — The Machine Appears Before the Investigation Is Complete
The Red Franklin is the clearest example of a puzzle I can reach before I should try to finish it.
The investigation uses Printing Plates A, B and C, but those plates are spread across the wider district.
So finding one plate is not a reason to return to the machine.
Even finding two is not enough.
The useful question is:
Do I have the complete named set?
If not, I continue the church, graveyard, Printing House and fire-department routes.
Once all three pieces are accounted for, the Red Franklin becomes a real puzzle instead of an incomplete mechanism.
If I am stuck on:
- where Plate A, B or C is;
- the A.P.H. Key;
- how the double-sided plates work;
- the gold configuration;
- the silver configuration;
- or which reward to choose;
I use the Printing Press puzzle guide for the plate route and both final configurations.
Devil’s Reef Hotel — Room 301 Is Not the Main Progression Gate
Devil’s Reef Hotel becomes confusing when I treat every locked room as equally important.
They are not.
The hotel has an access chain.
I first gather information, then follow Staff access, then Lorelei’s route, then the backstage machinery.
Room 301 sits beside that progression as an optional safe.
Solving it does not mean the hotel itself is finished.
The opposite is also useful:
if Room 301 is still closed but my Staff/Lorelei route is advancing, the main story is not necessarily blocked.
If I am stuck on:
- Room 301;
- where Staff access comes from;
- Lorelei Tokens;
- the Lorelei chests;
- the three triangular keys;
- the Lorelei Lock;
- ventilation;
- the Generator Room;
- or the stage lift;
I use the Devil’s Reef Hotel guide to keep the hotel progression in the correct order.
Akeley Memorial — Identify the Type of Blocker First
Akeley Memorial has more simultaneous puzzle systems than any earlier area.
I encounter:
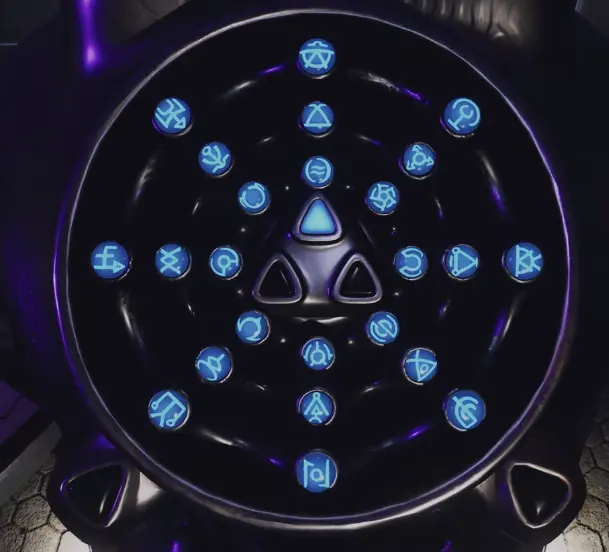
- Prism Stations;
- color-symbol Evidence;
- mirror doors;
- face masks;
- rusted routes;
- keys;
- a storage-room lock;
- the Wireless Room investigation;
- and optional Nightmare encounters.
Trying to treat all of those as one giant hospital puzzle is what makes Akeley feel overwhelming.
Instead, I classify the thing stopping me.
Prism Station
I check whether I actually have the complete Evidence set for that color.
Mirror door
I check my face-mask progression.
Rusted route
I check whether I have the tool specifically introduced for those doors.
Restricted door
I check which named hospital key it needs.
Wireless Room
I stop treating the testimonies as normal clues that can all be true.
That investigation is built around statements that contradict one another, so the problem is interpreting the group rather than finding one more dial note.
If I am stuck on any of those systems, I use the Akeley Memorial Hospital puzzle guide for the Prism Stations, masks, storage-room lock and Wireless Room progression.
Wireless Room — Contradiction Is Part of the Puzzle
The Wireless Room deserves one extra warning because it behaves differently from a normal clue hunt.
The testimonies do not all agree.
That means finding three statements does not mean I should combine all three as though every sentence is factual.
I compare:
- what each testimony says about Primary;
- what it says about Secondary;
- what it says about Tertiary;
- and which statements accuse another speaker of being wrong.
The contradiction is intentional.
So if I have already collected the testimonies, I do not leave Akeley looking for a fourth witness simply because the statements conflict.
That conflict is the puzzle.
Completing the Wireless Room investigation rewards 3 Dream Essence.
If I need to reconstruct the Evidence relationships, I return to the Hospital puzzle guide.
Fish Market — Follow the New Story Information
By the Fish Market, puzzle progression becomes more tightly attached to the main story.
I deal with:
- the Eye and Fay’s body;
- the memory and music barrier;
- a later safe;
- the electrical charging sequence;
- and the wreck.
These blockers make more sense to me when I keep them in story order rather than jumping between individual answers.
If I am stuck there, I follow the full walkthrough from the Fish Market through the wreck and into the endgame.
Holloway Manor — Follow Its Own Progression
Holloway Manor is separate from the main Arkham route.
Once I am inside the manor, I stop using the base-game districts as my reference points and follow Holloway’s own progression instead.
The house also changes what I can reach as the investigation advances.
That means a locked room I cannot use early is not automatically a puzzle I have failed to solve.
The important progression is tied to the Museum, family objects and the memories they unlock.
If I am stuck on:
- reaching the Museum;
- the Medallion;
- when previously blocked rooms become relevant;
- the three-heirloom route;
- the changing manor layout;
- Ezra’s ritual;
- the tunnels;
- or the final Shadow encounter;
I use the Holloway Manor DLC walkthrough and follow the manor in objective order.
How I Tell Whether a Puzzle Is Ready
When a puzzle refuses to move, these are the checks that actually help me.
The game names several pieces, colors or parts
I assume the set is incomplete until I have all of them.
That is the Printing Press and Prism Station pattern.
The lock has a specific shape or identity
I look for the matching named key instead of trying unrelated items.
That is how the Star Key, Staff Key and hospital masks behave.
I just found a new clue that changes an earlier mystery
That is a real reason to reconsider the blocker.
A clue that names a room, object, color or family member is usually more useful than checking every old doorway again.
I just received a new access item
I reconsider places that were blocked earlier.
I do not assume I was supposed to open them the first time I saw them.
Holloway Manor makes this especially clear once its house-access progression changes.
I already have every required clue and the mechanism still fails
I stop searching.
At that point I re-check:
- order;
- orientation;
- interpretation;
- or which clue applies to which part of the puzzle.
The Sinking City 2 is comfortable showing me a mechanism long before it gives me the answer.
The useful skill is not solving everything immediately.
It is recognizing when the game has finally given me enough information to solve the problem in front of me.