How I Clear Devil's Reef Hotel Without Getting Lost
My Devil's Reef Hotel route covers Room 301 code 2137, the Staff Key, three Lorelei Tokens, the Lorelei Lock, generator puzzle, and stage lift.
Updated:
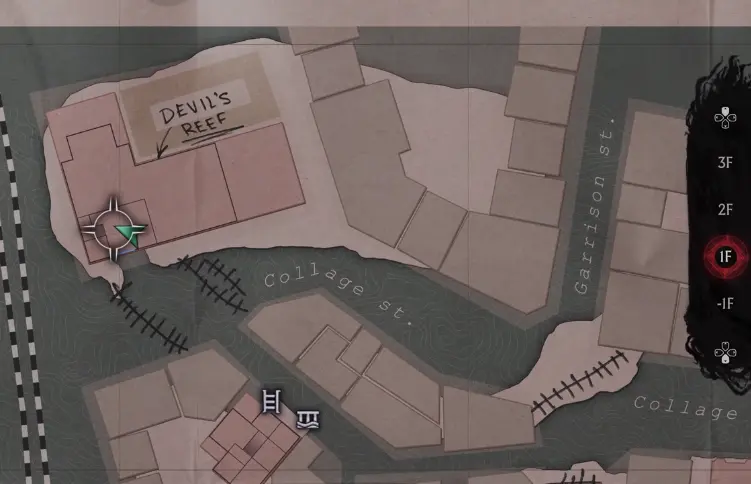
Quick Answer
My Devil’s Reef Hotel route is:
hotel map + Hotel Ledger
→ Room 301 safe — 2137
→ Staff Key route
→ 3 Lorelei Tokens
→ open the Lorelei chests and collect all 3 Key for the Lorelei Lock pickups
→ use the three triangular keys at the Lorelei Lock
→ ventilation / generator route
→ stage lift and final hotel sequence
The most misleading part is the Staff Key.
The route gives me Staff Key pickups more than once, but the in-game item is a complete Staff Key, not two halves that I combine into one key.
Devil’s Reef Hotel looks like a building I should clear floor by floor.
That is what got me lost.
The hotel makes much more sense when I follow its access chain:
information
→ staff rooms
→ Lorelei Tokens
→ Lorelei Lock
→ backstage
The Room 301 safe sits beside that route as a worthwhile optional reward, but it is not the thing moving the story forward.
Get the Hotel Map and Hotel Ledger First
Lorelei points me toward the basement and backstage, but those routes are not ready when I first enter.
I start with two items that explain the hotel:
- the Devil’s Reef Hotel map;
- the Hotel Ledger.
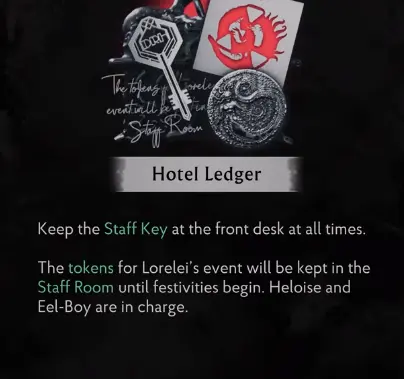
The Ledger says the Staff Key should be kept at the front desk and that the tokens for Lorelei’s event are kept in a staff room.
That tells me exactly what kind of progression I am looking for.
The important trap is taking “front desk” too literally.
When I first reach that part of the hotel, I do not necessarily find the Staff Key sitting cleanly on the counter.
If the obvious front-desk area is exhausted, I stop circling it and continue into the still-unexplored hotel route.
There is more building above and around the public rooms than the first approach makes obvious.
Room 301 Safe Code: 2137
Room 301 contains the first clean optional puzzle I finish.
The code is:
2137
The clue is “Baby, One More Tide”.
I read the lyric as four numbers:
- bat wings → 2
- tail → 1
- beast with eight have three → 3
- sins → 7
That gives:
2 - 1 - 3 - 7
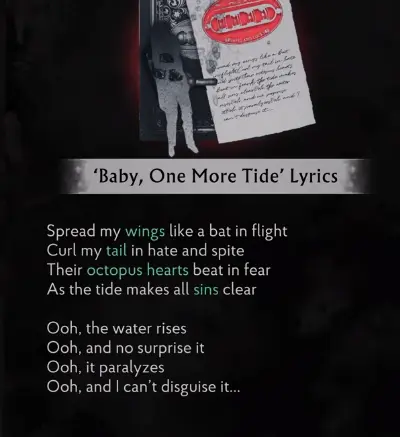
Entering 2137 opens the safe and gives me Voss’s Target Grip.
I solve this while I am already passing through the hotel rather than leaving a four-digit safe behind for a separate cleanup run.
The Staff Key Is a Complete Key, Not Two Halves
This is the part I would be most careful about.
The hotel route contains multiple Staff Key progression pickups, but the item itself is not called:
Staff Key Half
or
Staff Key Piece.
It is simply:
Staff Key
The item description identifies it as a gold key marked DRH and says it is used to access staff rooms.
So I do not spend time looking for two halves that need to be combined at a workbench.
I use each Staff Key as the staff-access progression item it actually is.
That distinction matters because otherwise it is very easy to think:
I found one half, so where is the crafting step?
There is no reason to wait for that.
Once a Staff Key opens the route in front of me, I follow the newly available staff section.
Follow the Staff Route to Lorelei’s Request and the Tokens
Once I get into the staff-side rooms, the hotel starts revealing what Lorelei’s event actually involved.
I find Lorelei’s Request and eventually reach the token route.
There are 3 Lorelei Tokens.
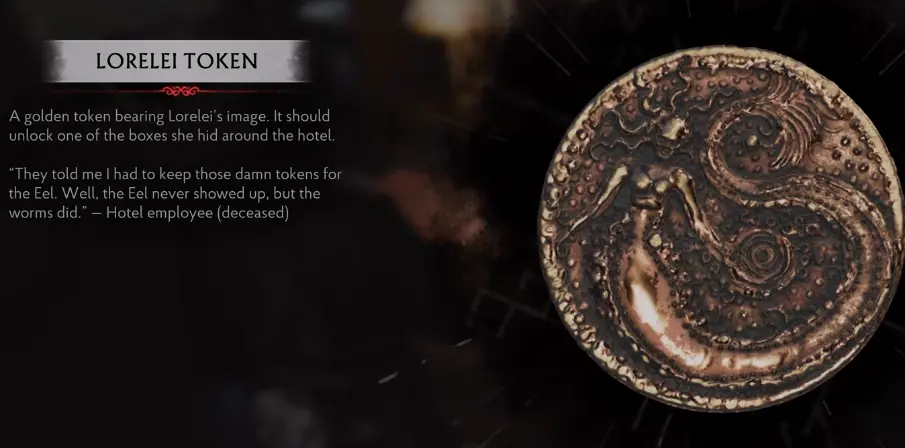
This is where the route becomes much clearer.
I am no longer searching the whole hotel for random keys.
I am doing one specific chain:
get the Tokens
→ reach the Lorelei chests
→ open all three
→ collect the Lorelei Lock keys
The 100% route places the three Lorelei Tokens together, followed by three separate Key for the Lorelei Lock pickups.
So when I only have one or two of those keys, I know the chain is not finished yet.
Collect All Three Keys for the Lorelei Lock
The Lorelei mechanism requires three triangular keys.
Those are the real completion check for this part of the hotel.
I do not head back to the mechanism after finding only one.
I finish the chest route and collect all three first.
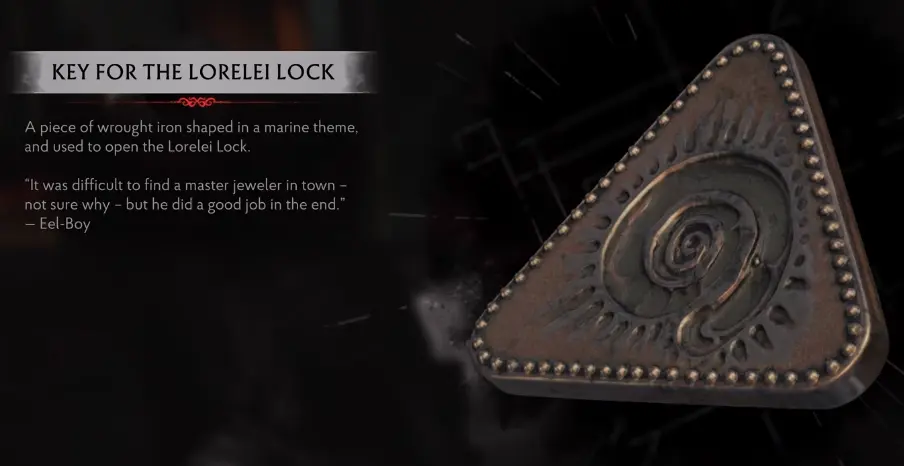
Once all three fit the Lorelei mechanism, the hotel opens into its backstage and ventilation progression.
At that point the search-heavy half of Devil’s Reef is effectively over.
The Ventilation Route Leads Toward the Generator
After the Lorelei Lock, the next clues become much more mechanical.
I start finding information tied to:
- the Ventilation System;
- Mustard Gas;
- the backstage machinery;
- and the Generator Room.
That is my sign that I am now solving the gas problem rather than another hotel-room search puzzle.
The route also gives me The Minuteman before the Generator Room.
I always take it, but its location and weapon-specific use stay in the all weapon locations guide.
Here it is mainly a useful progression marker:
if I have reached The Minuteman, I am on the correct route toward the generator.
Clear the Generator Room and Ventilation Puzzle
The Generator Room is the last major mechanical blocker before the final hotel sequence.
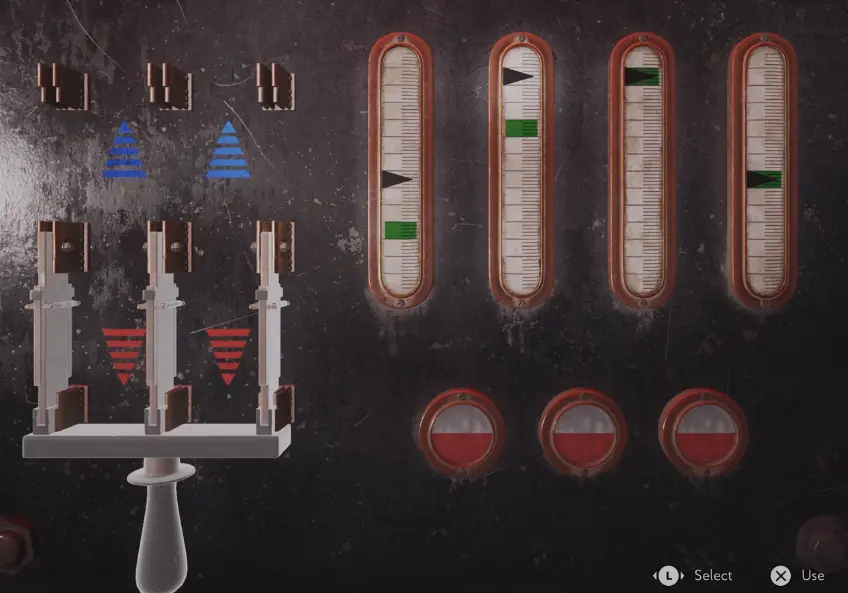
I treat this as a ventilation problem.
The controls change which parts of the system are active, so I watch the gas rather than randomly cycling the panel.
Once the correct configuration clears the blocked route, I continue immediately.
I do not return to the public hotel floors looking for another prerequisite.
By this point I have already completed the Staff Key and Lorelei Lock chains that feed into this section.
The Stage Lift Is the Final Hotel Progression
After the generator and ventilation route, Devil’s Reef changes from a navigation area into a more contained story/combat sequence.
The stage lift is the next major objective.
At this point I stop looking for:
- another safe code;
- another Staff Key;
- another Lorelei chest.
Those systems are already finished.
The remaining job is to push through the stage-side sequence and complete Lorelei’s hotel event.
Once that sequence is resolved, I take Lorelei back rather than continuing to sweep the hotel.
That return is what moves the main story forward.
My Devil’s Reef Completion Check
Before I leave, these are the things I expect to have finished:
Room 301 safe — 2137
Voss’s Target Grip
Staff Key access
3 Lorelei Tokens
3 Key for the Lorelei Lock pickups
Lorelei Lock
Generator / ventilation route
The Minuteman pickup
stage lift sequence
If the generator route is still inaccessible, the part I re-check is the Lorelei Token → chest → three triangular keys chain.
If the staff side is still inaccessible, I re-check the Staff Key route.
If only Room 301 is unfinished, that is an optional safe problem rather than the reason the main hotel route is blocked.