Where I Find All 5 Base-Game Weapons in The Sinking City 2
My route to all five base-game weapons in The Sinking City 2, where each pickup appears in story progression, and when I actually keep each gun in my loadout.
Updated:
Quick Answer
There are 5 weapons in the base game.
I get them in this order:
Equalizer Mk. II — starting pistol
→ Field Surgeon — shotgun, after the Redemption Church route
→ The Minuteman — submachine gun, inside Devil’s Reef Hotel
→ Black Reef Longshot — rifle, inside Akeley Memorial Hospital
→ Linguist’s Folly — grenade launcher, late in the story
The four weapon pickups also unlock:
Out Of Your Shell — shotgun
Fast Friends — submachine gun
We Aim To Please — rifle
A Blast From The Past — grenade launcher
I always collect a weapon when I reach it.
Whether I keep carrying it afterward depends on what that specific gun adds to my current loadout.
The Sinking City 2 does not use a simple:
new gun = old gun obsolete
progression.
I still use the Equalizer long after finding stronger weapons.
The Field Surgeon solves a different problem from The Minuteman.
The Black Reef Longshot gives me something neither of them does.
And Linguist’s Folly is powerful enough that I save it for situations where explosive damage actually matters.
For every weapon, I care about two things:
Where do I get it?
and
What job does it earn in my loadout?
All 5 Base-Game Weapons in Story Order
My weapon progression is:
- Equalizer Mk. II — Pistol
- Field Surgeon — Shotgun
- The Minuteman — Submachine Gun / Tommy Gun
- Black Reef Longshot — Rifle
- Linguist’s Folly — Grenade Launcher
If I am missing one, I use that order to work out which part of the story I should check.
Equalizer Mk. II — Starting Pistol
I begin the game with the Equalizer Mk. II.
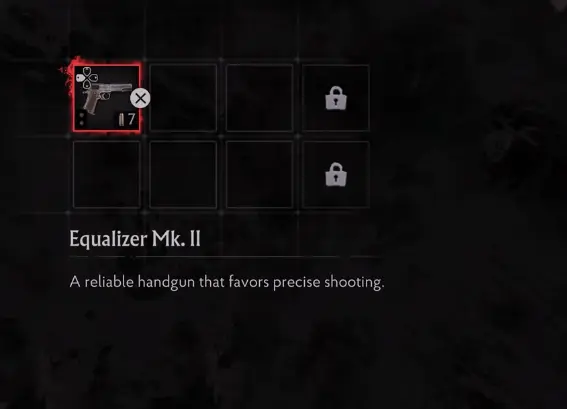
There is no later location I need to revisit for this one.
It is already part of my opening loadout.
What surprised me is how long I keep using it.
The pistol handles the fights where I do not need a specialist weapon:
- ordinary enemies;
- weakened targets;
- encounters where I have room to move;
- situations where heavier ammunition would solve a problem the pistol already handles.
That makes the Equalizer my baseline weapon.
When I consider switching to something stronger, I ask what the other gun is giving me that the pistol cannot.
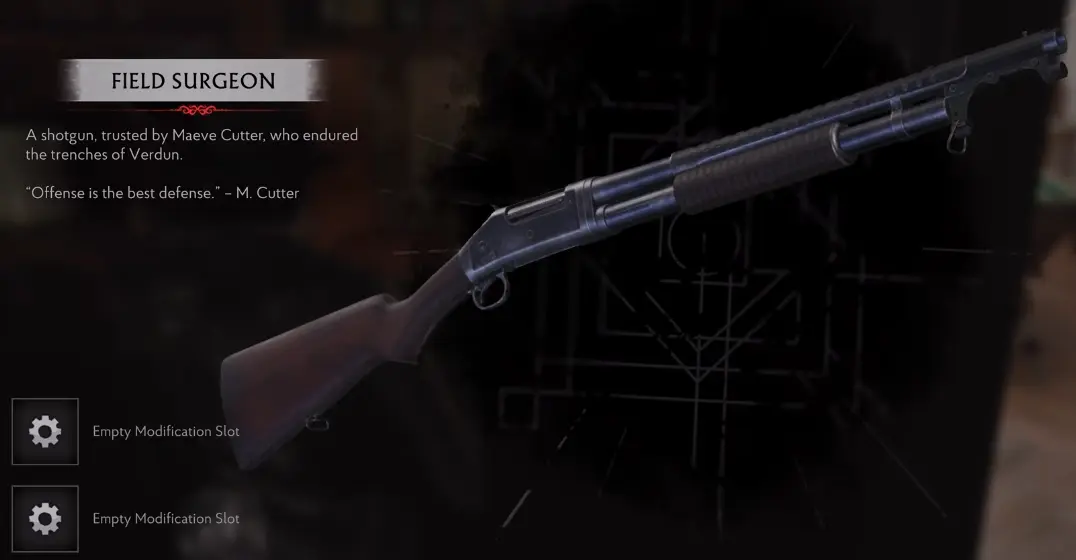
Field Surgeon — Shotgun Location
The Field Surgeon is the first additional weapon I pick up.
I find it after the Redemption Church section, during the wider route that begins opening the path toward the broken crane and Arkham Printing House.
If I have not opened the church floodgate yet, I am too early.
The route around this point is:
finish the church section
→ open the floodgate
→ continue into the broken-crane route
→ pick up the Field Surgeon before the Printing House progression is finished
Picking it up unlocks:
Out Of Your Shell
The Field Surgeon is my close-range emergency weapon.
I bring it out when:
- something rushes me;
- a narrow room removes my comfortable dodge space;
- I need stopping power immediately;
- or letting an enemy stay active is becoming more expensive than spending a shell.
I do not treat it as a replacement for the Equalizer.
The pistol handles cheap problems.
The shotgun handles close-range problems that need to end now.
I Usually Want the Field Surgeon for Tight Routes
The Field Surgeon becomes particularly valuable once the game starts moving me into denser indoor areas.
That is where its role is easiest to justify.
If I am heading through open exploration with very little shotgun ammo, I do not feel obligated to fire it constantly just because I unlocked it.
But before a cramped route or dangerous interior, this is one of the weapons I most want available.
The later Printing Press investigation can also reward Cutter’s Sturdy Stock, which gives me another reason to keep the shotgun relevant if I choose the gold press solution.
The Minuteman — Devil’s Reef Hotel
The next weapon is The Minuteman, the submachine gun / Tommy Gun.
I find it during the later part of Devil’s Reef Hotel.
This is not an early lobby pickup.
I first have to progress through the hotel’s Staff and Lorelei routes.
By the time I reach the ventilation / backstage side of the building, I start finding clues about the ventilation system and Mustard Gas.
The Minuteman appears shortly before the Generator Room section.
So my location check is:
Staff access
→ Lorelei Tokens
→ Lorelei Lock
→ ventilation / backstage route
→ The Minuteman
→ Generator Room
If I am still wandering the public hotel rooms, I have not reached it yet.
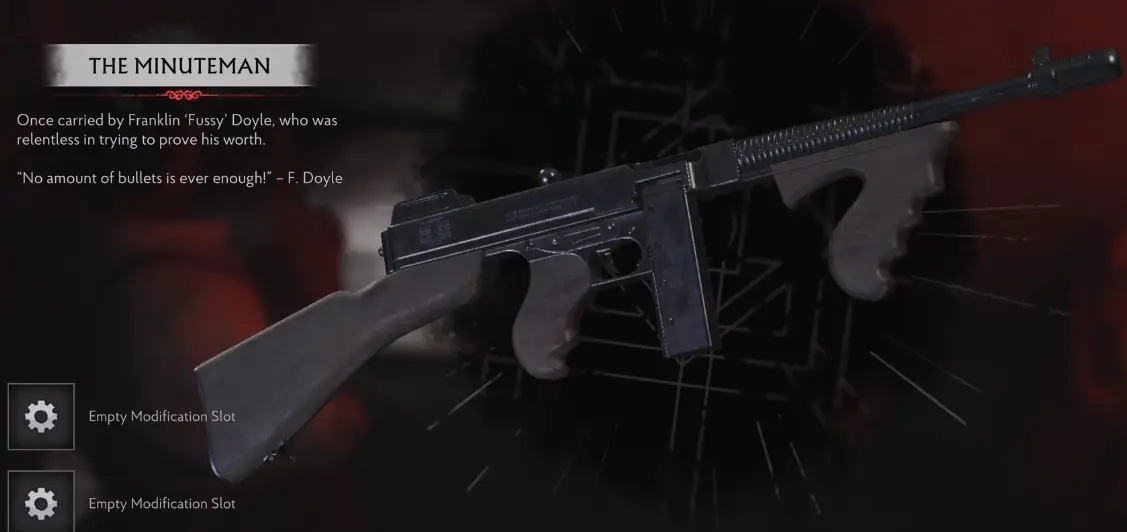
Picking it up unlocks:
Fast Friends
For the full hotel route, including the Staff Key, Lorelei progression and generator, I use the Devil’s Reef Hotel guide.
The Minuteman Is My Pressure-Release Weapon
The Minuteman gives me fast sustained damage.
That makes it useful when a fight stops being orderly.
I use it for:
- several fast enemies;
- close-to-mid-range pressure;
- situations where I need damage immediately;
- rooms where taking too long is creating more danger.
The tradeoff is obvious as soon as I start firing it:
it is very easy to spend more ammunition than I intended.
So my weapon-specific rule is:
controlled fight → I usually do not need the SMG
fight collapsing around me → The Minuteman earns its ammo
That is the role I keep for it throughout the rest of the game.
Black Reef Longshot — Akeley Memorial Hospital
The Black Reef Longshot is the rifle.
I find it inside Akeley Memorial Hospital.
More specifically, it appears during the later upper-hospital progression after I have already started dealing with:
- the Prism system;
- the Second Floor;
- the first Nightmare;
- face-mask progression.
The route reaches the Old Man’s Face Mask, then the Black Reef Longshot appears before I move deeper into the Wireless Room section.
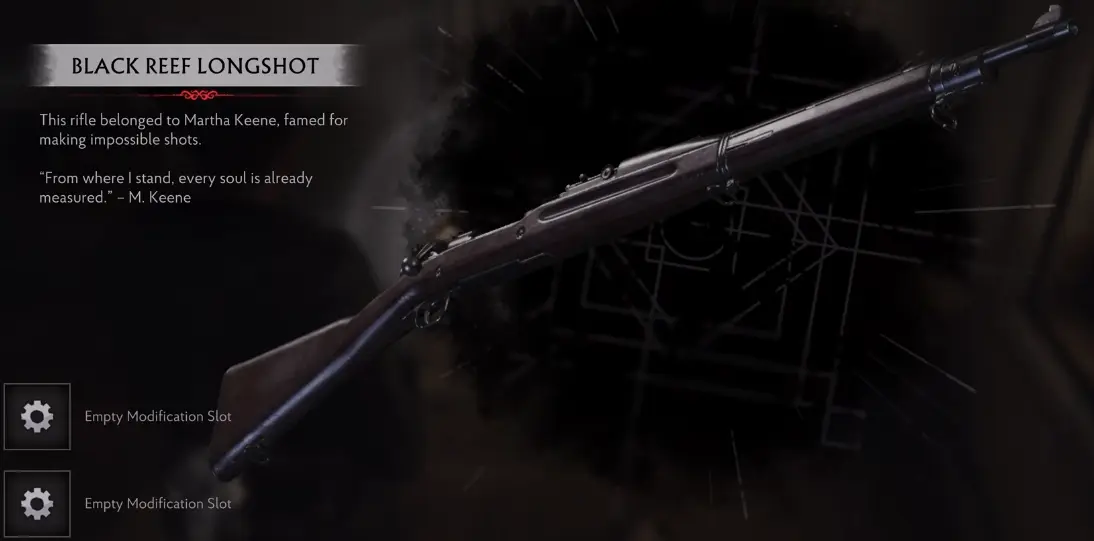
Picking it up unlocks:
We Aim To Please
If I have not reached this part of Akeley yet, I keep progressing through the hospital instead of searching an earlier district for the rifle.
The complete hospital route is in the Akeley Memorial Hospital puzzle guide.
Black Reef Longshot — I Carry It When Distance Has Value
The rifle fills a very different role from the shotgun.
The Field Surgeon rescues a fight after something gets close.
The Black Reef Longshot helps me prevent that situation.
I like it when:
- I have a long sightline;
- a dangerous enemy can be damaged before it reaches me;
- the arena gives me control over spacing;
- spending rifle ammo can prevent a much messier close-range fight.
I do not spend rifle rounds simply because the weapon feels precise.
Before firing, I ask:
Does killing or weakening this target at range materially improve the fight?
If yes, the Longshot earns its ammo.
If not, I keep the round.
Linguist’s Folly — Final Weapon Pickup
The last weapon is Linguist’s Folly, the grenade launcher.
This is a late-story weapon rather than something I expect to find during the early Arkham districts.
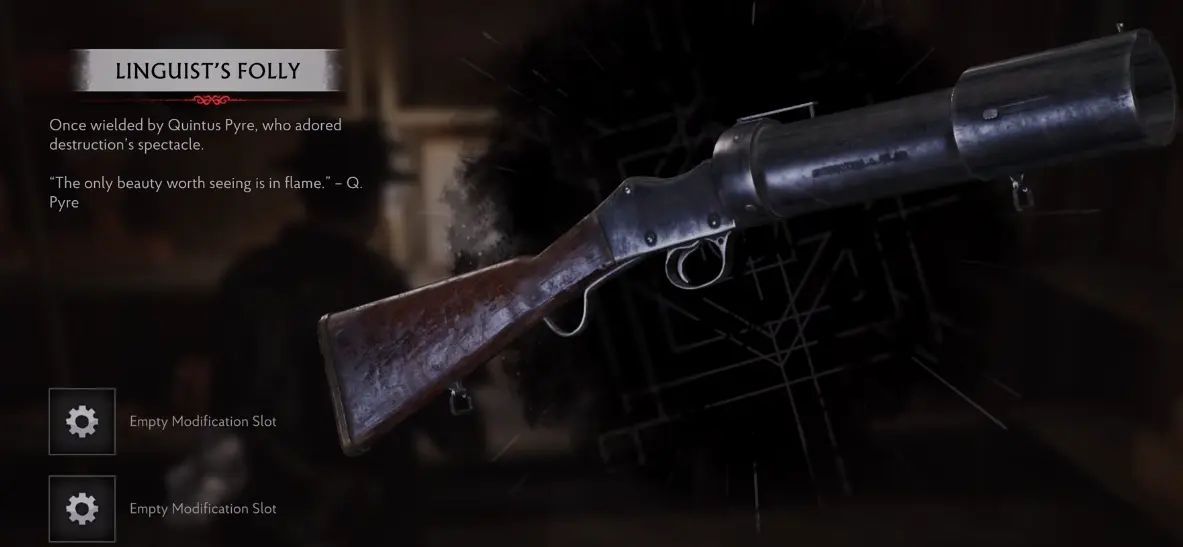
Picking it up unlocks:
A Blast From The Past
By this point I already have the pistol, shotgun, SMG and rifle.
That means the grenade launcher does not need to become another general-purpose gun.
Its job is much narrower.
Linguist’s Folly Is for Fights That Justify Explosives
I use Linguist’s Folly when explosive damage changes the encounter enough to justify the ammunition.
That means:
- clustered enemies;
- high-pressure combat sequences;
- situations where several threats need to be controlled quickly;
- late fights where saving the explosive round would cost me more health or ammo elsewhere.
I do not use it on an isolated ordinary enemy simply because the launcher is now available.
It is the most specialized weapon in my set.
That is exactly why I want it ready when the right fight appears.
The Weapon Roles I Actually Use
By the time I own all five, I think of them like this:
Equalizer Mk. II
My general-purpose weapon.
Field Surgeon
My close-range stopping weapon.
The Minuteman
My answer when several threats are creating immediate pressure.
Black Reef Longshot
My ranged specialist when spacing works in my favor.
Linguist’s Folly
My explosive option for fights that justify its cost.
The progression is not:
Pistol → Shotgun → SMG → Rifle → Grenade Launcher
with each new gun replacing the previous one.
It is:
general purpose + close-range power + burst pressure + range + explosives
Each pickup adds another answer.
Pick Up and Carry Are Two Different Decisions
I always collect each of the five weapons when I reach it.
That guarantees the pickup and, for the four later guns, the associated achievement.
After that, I decide whether the weapon belongs in the route I am about to play.
My decision is weapon-specific:
Field Surgeon — worth carrying when close-range pressure is likely.
The Minuteman — worth carrying when I have enough SMG ammo to use its burst role.
Black Reef Longshot — worth carrying when the route gives me meaningful range.
Linguist’s Folly — worth carrying when I expect combat heavy enough to justify explosives.
I do not need all four specialists active just because I own them.
That is what keeps each weapon useful instead of turning my loadout into a collection of guns I am afraid to fire.
All Weapon Achievement Checklist
Once I have collected the four additional weapons, I expect these achievements:
Field Surgeon → Out Of Your Shell
The Minuteman → Fast Friends
Black Reef Longshot → We Aim To Please
Linguist’s Folly → A Blast From The Past
If one is missing, I check the corresponding weapon pickup before assuming the achievement itself failed.
My complete base-game weapon set is:
Equalizer Mk. II
Field Surgeon
The Minuteman
Black Reef Longshot
Linguist’s Folly
Once all five are available, I stop thinking about weapon progression as finding a strictly stronger gun.
From that point on, the important question is which of those five solves the fight ahead most efficiently.