The Sinking City 2 Guide: What I Do Next in Arkham
I use this guide to choose my next route, identify the blocker in front of me, manage inventory and ammo, and decide when backtracking is actually worth it.
My route to all five base-game weapons in The Sinking City 2, where each pickup appears in story progression, and when I actually keep each gun in my loadout.
My story-order route to all 10 Mushroom Jack broadcasts, with area checkpoints that let me know whether Mycophile is still on track before the endgame.
The hardest part of The Sinking City 2 is not always the puzzle directly in front of
me.
Arkham constantly shows me things before I can finish them.
I see locked rooms before their keys, machines before their missing parts, E.R.C.s
before I have an Activator, and investigation clues that only make sense after I find
another piece somewhere else.
Trying to solve everything immediately turned my first few hours into unnecessary
loops.
What works better for me is simple:
I keep following the active route until the game gives me something that changes an
earlier blocker.
A new key is a reason to go back.
A new tool is a reason to go back.
A complete set of puzzle pieces is a reason to go back.
Walking past the same locked door with exactly the same inventory is not.
Arkham constantly puts unfinished rooms and optional routes beside the path forward. I make faster progress when every detour has a reason.
Where I Go When I Am Stuck
I separate two problems that feel almost identical while I am playing.
I do not know the next story destination
That is a progression problem.
I return to the
full walkthrough
and pick up the campaign route from my current area.
I know where I am, but something will not open
That is usually a puzzle or investigation problem.
backtrack because something changed, not because I am worried I forgot something.
Holloway Manor Is Its Own Route
Holloway Manor is separate from the normal Arkham campaign progression.
Once I start that investigation, I follow the manor’s own objectives instead of
trying to connect its rooms to the base-game route.
The house also changes what I can reach as the investigation advances, so I do not
assume every inaccessible room is meant to open the first time I see it.
If I am playing the DLC, I use the
Holloway Manor walkthrough
and follow its progression through to the final curse encounter.
Safe Rooms Are My Reset Points
I use safe rooms as part of my route, not only when I am nearly dead.
They give me three things I care about:
manual saving
stash access
and later
the Talent Table
Manual saves are made at the phonograph inside a safe room.
The stash lets me stop treating everything I own as something that needs to stay in my
current inventory.
That matters because inventory space gets increasingly competitive.
Weapons, ammunition, healing items and progression objects can all arrive during the
same stretch.
So whenever I reach a safe room, I ask:
What am I actually doing next?
If the next route is mostly exploration, I want free inventory slots.
If I expect a boss or combat-heavy sequence, I carry more healing and ammunition.
If the next stretch is mostly investigation work, I do not bring every situational
weapon simply because I own it.
I Pick Up Every Base-Game Weapon, but I Do Not Carry Every Weapon
Finding a new weapon and deciding to carry it are two different choices for me.
I always take the pickup.
I do not automatically give it permanent inventory space.
My handgun remains useful because ordinary enemies do not always justify more valuable
ammunition.
I bring heavier weapons when the route is likely to reward their stopping power,
range or burst damage.
I keep the five base-game pickups and their practical roles in the
weapon locations guide.
I Spend Ammo Based on What the Fight Is Blocking
I do not clear every creature simply because it is visible.
Early in the game, ammunition is too valuable for that.
My basic rule is:
if an enemy blocks the route, threatens a required interaction, or traps me in a
set piece, I fight.
If I can safely move past it and lose nothing by doing so, I often keep the ammunition.
That calculation changes in heavier combat sections.
I would rather spend strong ammunition to finish a dangerous encounter cleanly than
save one premium round and lose several healing items instead.
Ammo economy is not:
never use the good bullets.
It is:
spend them when the fight actually deserves them.
Investigation Space Tells Me Which Clues Belong Together
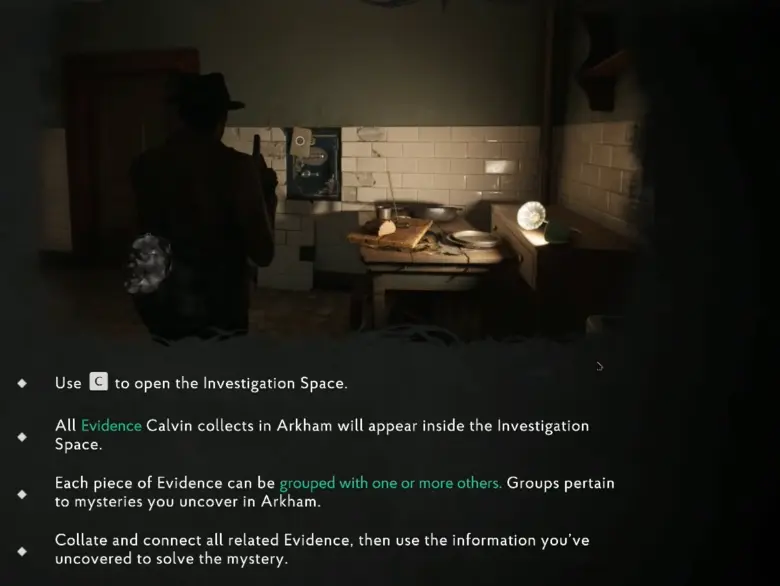
Every piece of Evidence I collect goes into the Investigation Space.
Related pieces can be grouped into the same mystery, and those connections can reveal
what I should investigate next.
I use the Investigation Space to work out which pieces of Evidence belong to the same mystery instead of forcing every available clue into a connection.
I do not connect Evidence randomly.
If two clues do not clearly support the same mystery yet, I leave them alone and keep
exploring.
Correct Evidence connections can reward Dream Essence, so the system matters even
when the main story does not force me to finish every optional mystery.
Investigation Difficulty changes how much help I receive while interpreting those
clues.
It does not change the physical answer to a safe, mechanism or Prism puzzle.
So if I already understand the Evidence but the physical interaction still fails, I
check the mechanism itself rather than changing difficulty and expecting a new answer.
Dream Essence Changes How I Judge Optional Detours
Dream Essence contributes directly to Calvin’s progression through the Talent Table.
I can gain it through optional investigations, Evidence connections and exploration.
That makes optional content much easier for me to evaluate.
If an investigation is already on my route and gives me useful progression, I am much
more likely to finish it immediately.
If it requires a long return trip through an area I have already left, I weigh the
detour against whatever I am currently trying to accomplish.
That is why I prefer finishing worthwhile side investigations while their routes are
still fresh.
I Do Not Expect Every Talent Immediately
The Talent Table contains multiple tiers, and some Talents have additional unlock
requirements.
So if something is still unavailable, I do not immediately assume I missed a hidden
room somewhere in Arkham.
For my first run, I spend Dream Essence on upgrades that help the route I am actually
playing.
I care more about a useful build now than forcing every Talent to unlock as early as
possible.
E.R.C.s Give Me a Real Reason to Return
Emergency Relief Crates are another place where I avoid pointless backtracking.
If I find one before I can open it, I remember the location and continue.
I do not keep searching the same room for an alternate interaction that is not there.
Once I have what I need to open the crate and I am still reasonably close, the detour
becomes worth reconsidering.
Their rewards can improve progression, so I do not ignore them permanently.
I simply wait until returning makes sense.
I Track Mushroom Jack While I Am Already Moving Through Arkham
Mushroom Jack broadcasts are spread across the campaign.
The Mycophile achievement requires listening to every broadcast in a single
playthrough.
That makes these much easier to collect during normal progression than during one huge
late-game cleanup.