Silent Hill Townfall Part 3 The Patient Walkthrough
Complete Part 3 The Patient with the correct vital signs, X-ray settings, medications, infusion rates, intubation, and surgery sequence.
Updated:
Quick Answer
Report 70/40 blood pressure, 162 BPM, and 80% oxygen, then enter 7103 at the X-ray room. Scan the skull with 3 / 7 / 1 and the chest with 7 / 3 / 1.2.
Part 3 starts with Zoe alone in surgery while Dr. Glenn directs her over the intercom. The difficulty here is not navigation at first; it is keeping several medical tasks separate. The patient’s vital signs, two X-rays, three medications, three pump rates and the intubation procedure all have their own inputs, and using a value from the previous step in the next machine will fail.
Once the surgery is finished, the same Medical Center changes completely. That second half is a ward-navigation sequence built around blood bags, keys and vertical routes rather than medical treatment.
Report 70/40, 162 and 80% to Dr. Glenn
Use the intercom in surgery and inspect the patient’s monitors.
Dr. Glenn asks for three readings:
Blood pressure — 70/40
Pulse — 162 BPM
Blood oxygen — 80%
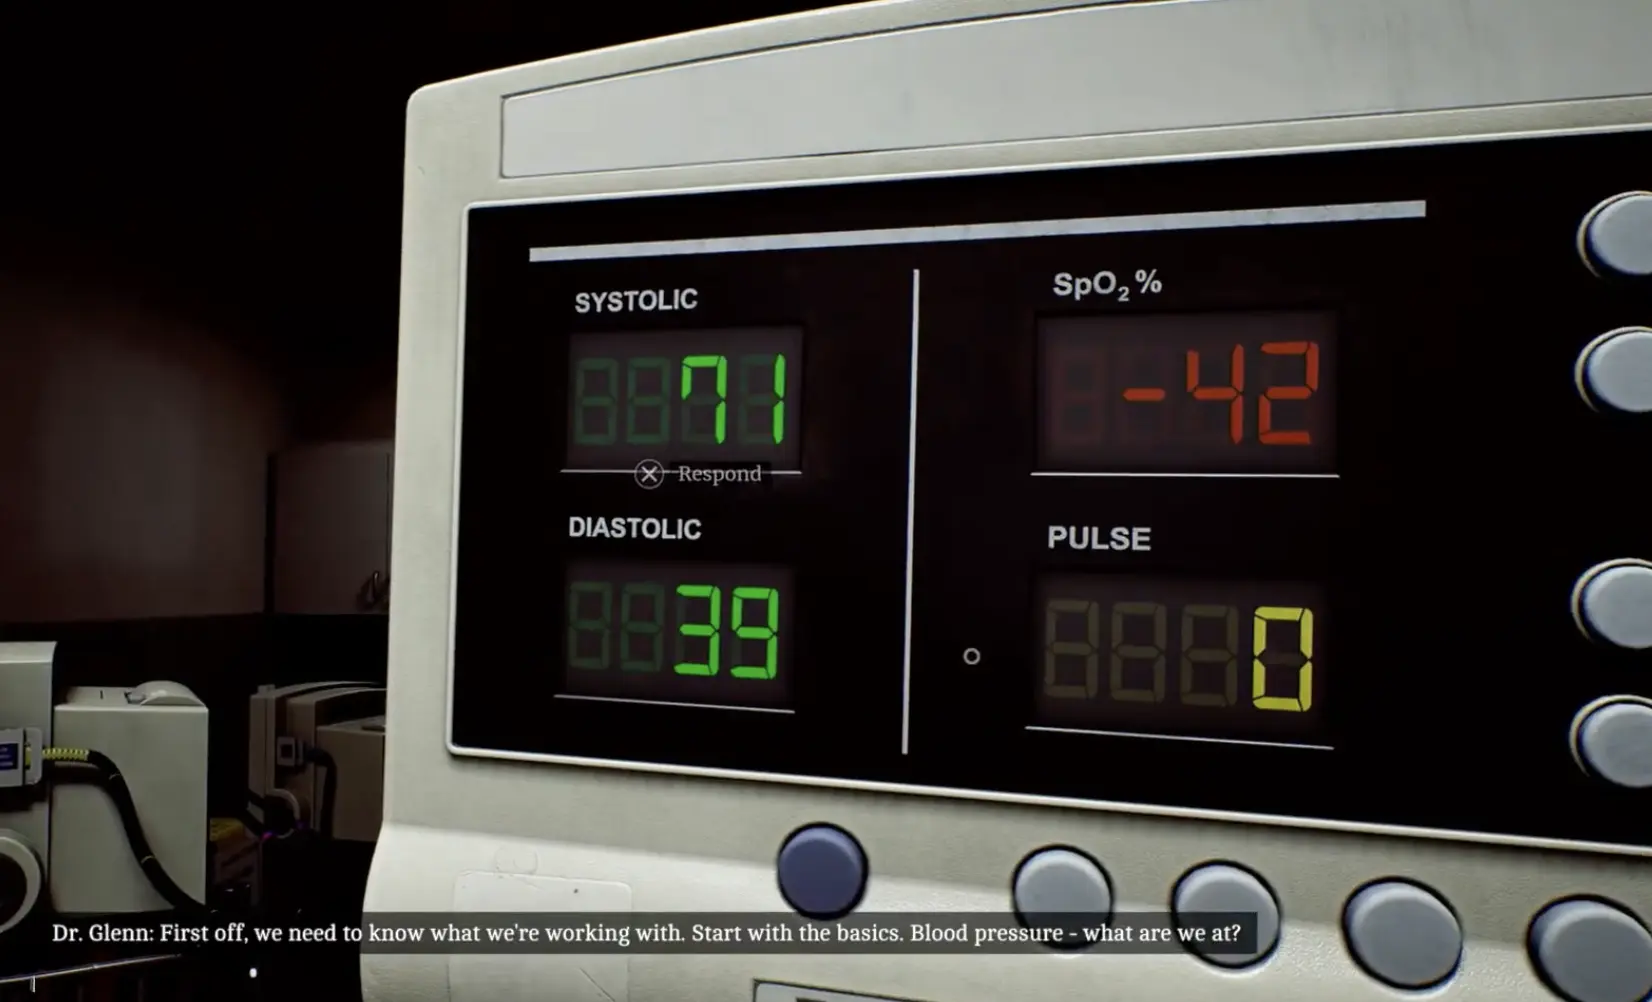
The displays contain values that can be misread if you grab the first large number you see. Wrong answers are rejected, and Zoe can take damage during failed attempts, so read the systolic and diastolic values together rather than treating them as separate monitors.
Once all three readings are accepted, Dr. Glenn concludes that the patient has suffered severe trauma and sends Zoe to obtain X-rays of the head and chest.
Open the X-Ray Room With 7103
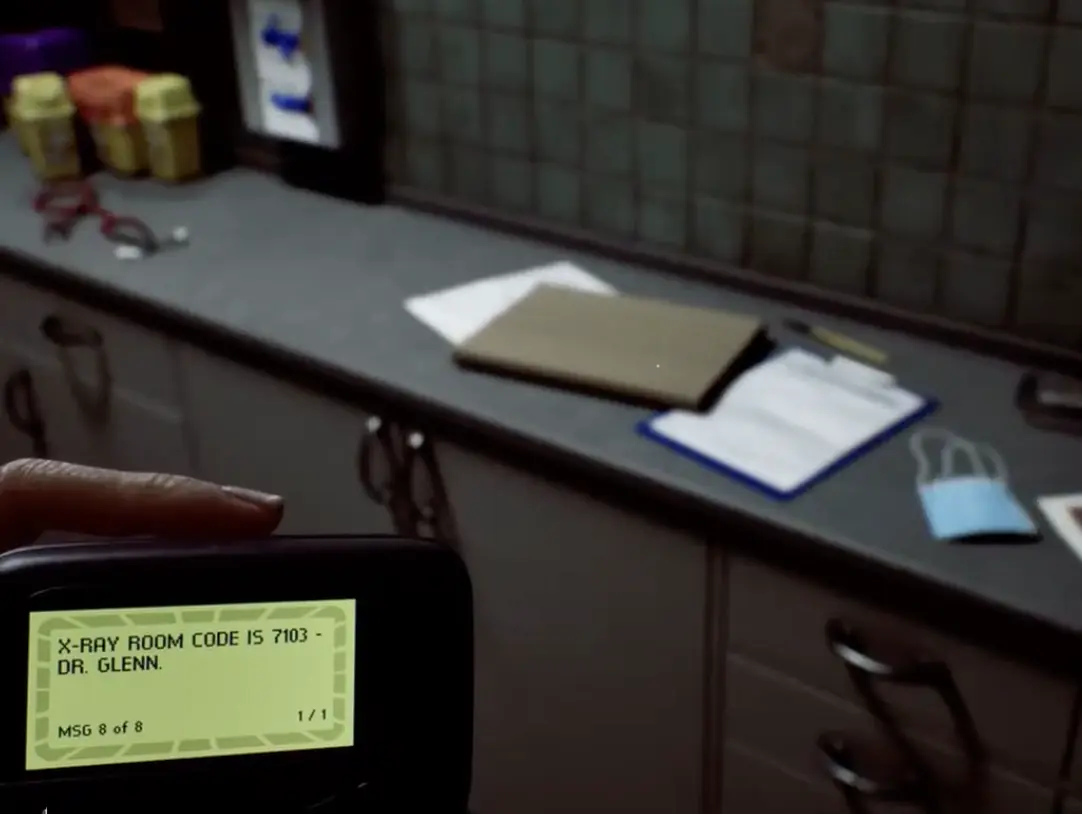
A pager message gives you the four-digit door code:
7103
Inside, read the equipment instructions before starting. The X-ray system requires two things for each image:
- align the scanner with the correct body area;
- enter the correct exposure values.
The white reference points on the display show when the scanner is positioned correctly. A recognizable skull or chest image is not enough by itself; line up the markers before capturing.
Skull X-Ray Settings: 3 / 7 / 1
Position the scanner over the patient’s head.
Set the three values to:
3 / 7 / 1
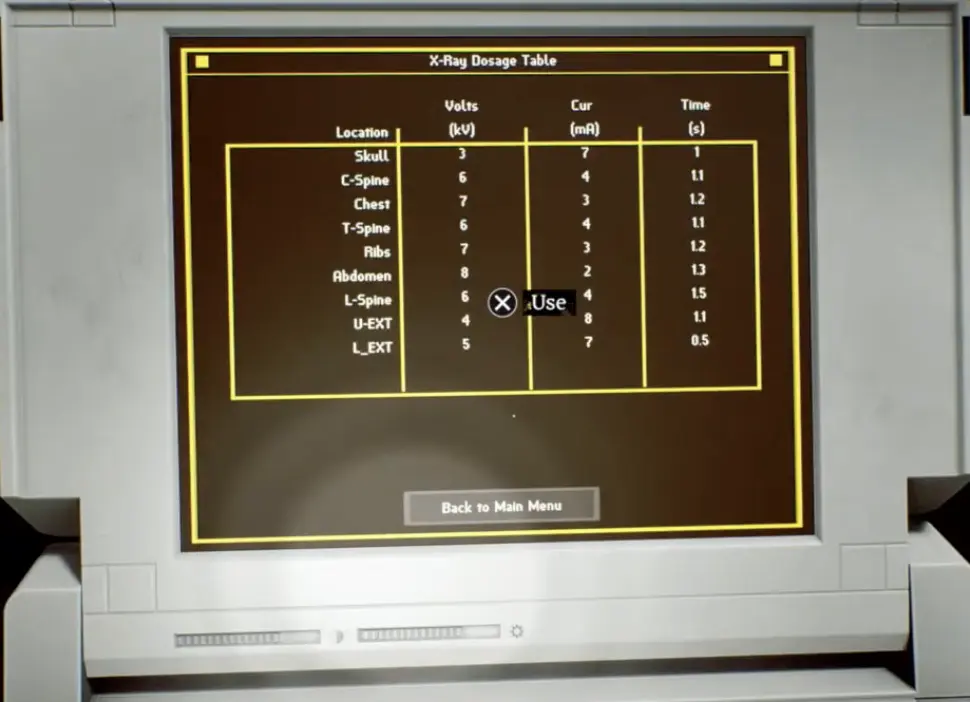
Capture the skull image once the alignment is correct.
Do not leave the room after the first scan. Dr. Glenn requires a chest image as well.
Chest X-Ray Settings: 7 / 3 / 1.2
Move the scanner down over the chest and realign the reference points.
This time enter:
7 / 3 / 1.2
The two scans deliberately reverse the first two values, so carrying 3 / 7 / 1 over from the skull is the most likely mistake.
After both images are printed and reviewed, Dr. Glenn identifies the injuries and orders three medications for the next stage.
Find the Three Infusion Medications
The Medical Center contains far more medication than Zoe actually needs. Picking up every container you see does not solve the task, and several labels lead nowhere for the current patient.
The required prescriptions are identified by these doses:
- 2.5 mg
- 3 mg
- 11 mg
The most useful clue during the search is the Dailies Infusion Status information. Reading it updates the useful storage locations and turns what initially looks like a blind sweep of the hospital into a much narrower search.
One of the required routes passes through the Record Room, which is protected by another keypad.
Record Room Code: 2605
Enter:
2605
at the Record Room door.
Continue searching the marked medication locations after opening it. One of the remaining drugs is reached through the Pharmacy Store route.
Do not return to surgery after finding only one or two. Dr. Glenn requires all three medications before the treatment can begin.
Once Zoe has the full set, go back to the operating room.
Set the Infusion Rates to 15 / 7 / 8
Each medication goes into a separate infusion pump, and the prescribed milligram amount is not the delivery rate you enter on the machine.
Use:
2.5 mg medication — rate 15
3 mg medication — rate 7
11 mg medication — rate 8
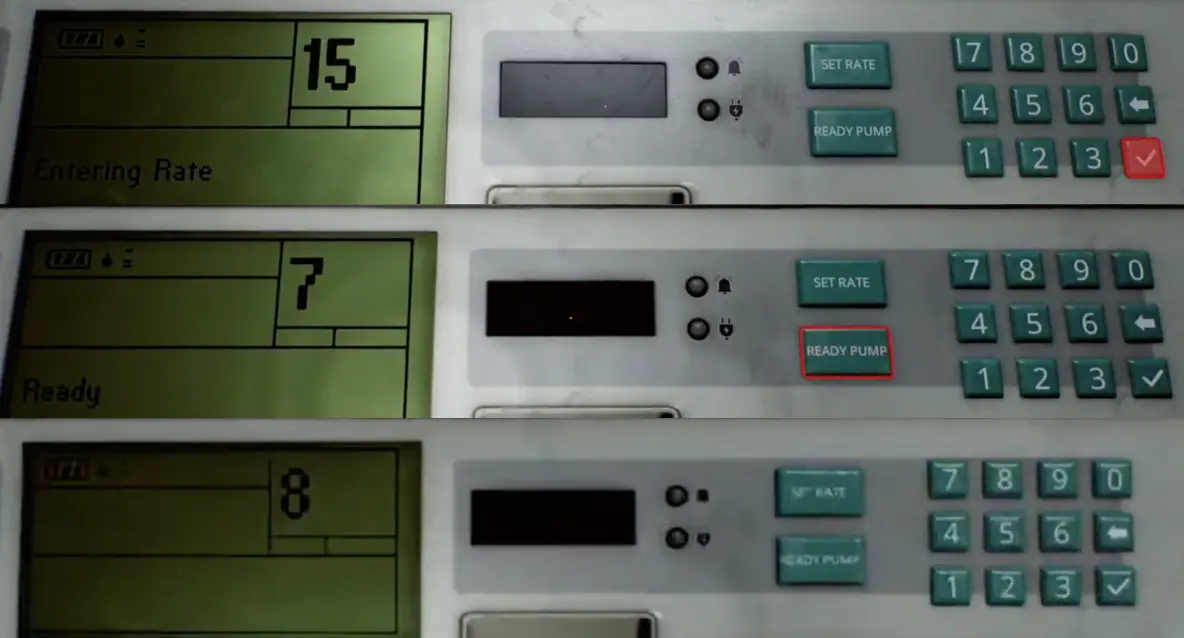
The 11 mg → 8 calculation uses the patient’s 88 kg body weight, which is why entering the medication dose itself does not work.
Set all three rates, then select Ready Pump on each unit.
Only after all three pumps are ready should you use the central array controller.
When the setup is correct, the treatment starts and the patient’s vital signs begin to stabilize.
Call 5353 for the Intubation Kit
Stabilizing the patient does not finish the procedure. Dr. Glenn next tells Zoe that the airway must be secured and directs her to contact the basement.
Use the reception phone and dial:
5353
The basement confirms that one kit remains and sends it up.
Go to the collection point and take the Medical Intubation Kit.
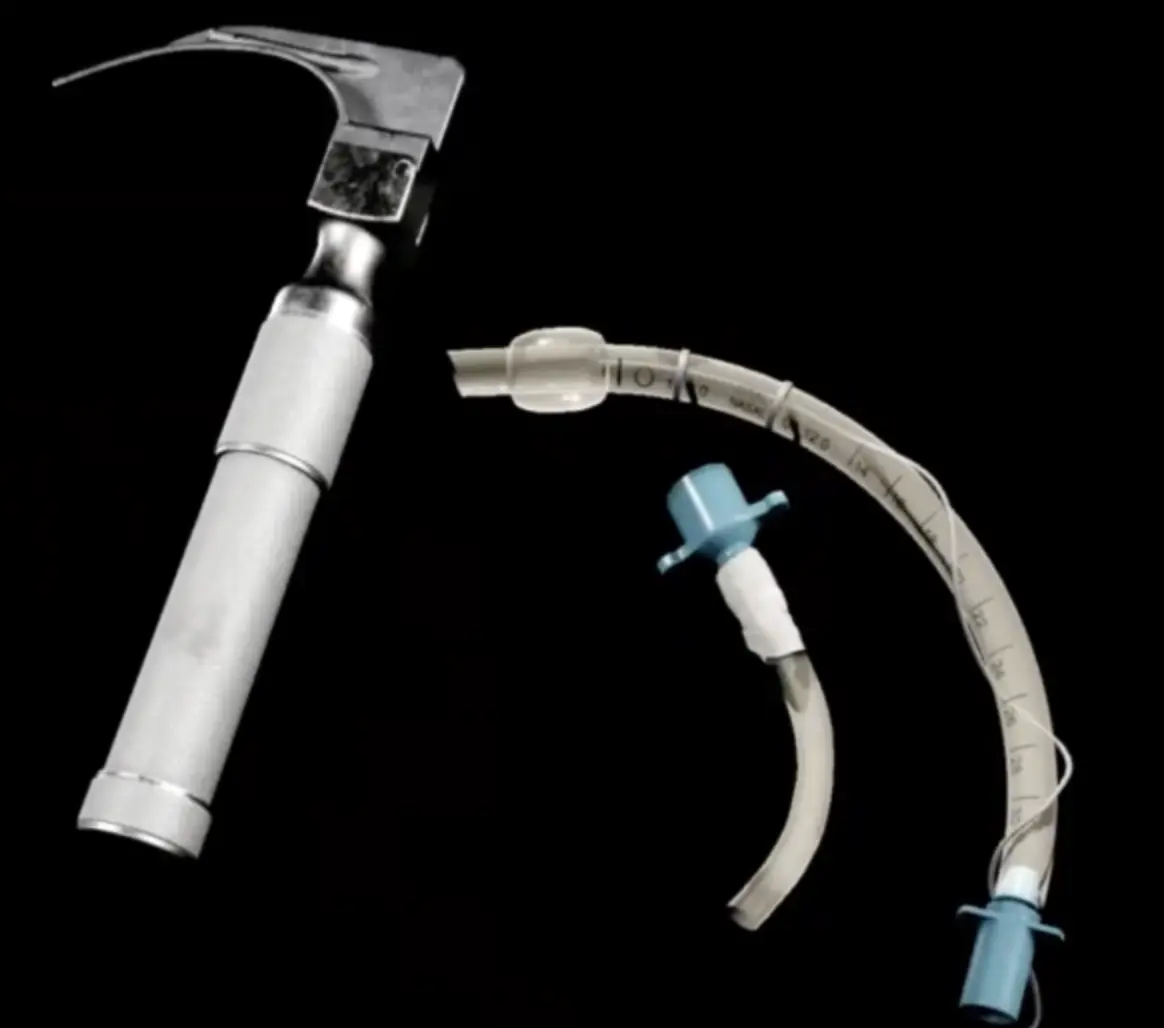
Bring it back to the operating room.
Complete the Intubation Procedure
Dr. Glenn talks Zoe through each stage.
Follow the sequence as the interaction targets appear:
open the mouth
→ visualize the vocal cords
→ advance the ET tube
→ hold the tube in place
→ remove the stylet
This is not another number puzzle. Wait for the correct anatomical interaction point rather than dragging the tool ahead of the prompt.
Once the tube is secured, Dr. Glenn moves immediately to the chest injury.
Perform the Median Sternotomy
The chest X-ray gives Dr. Glenn enough information to call for a median sternotomy.
Take the Scalpel when instructed, pull the surgical drape into position and begin the incision.
There is no additional medication search or keypad between the intubation and this procedure. Once you have successfully completed the earlier medical steps, this part is largely guided.
The operation triggers the major transition in Part 3.
The Medical Center Changes After Surgery
After the surgery, Simon is back in control and the Medical Center has shifted into a distorted version of itself.
Pick up the Steel Pipe when you reach it and continue until you obtain the altered Medical Center map and begin finding patient information and blood bags.
From this point onward, the central problem is no longer the surgery machinery. Progress depends on opening ward routes, reaching rooms that are inaccessible from the floor where you first see them, and understanding which blood bags open paths versus which are needed later.
The first blood bag is not a signal to immediately use every transfusion machine you find. The hospital route has to be opened in a specific order.
For the complete sequence through the patient list, S.W., Ward W, the ladder, D.P., Ward P, the valves and the final ORDELL setup, continue with the Blood Transfusion puzzle walkthrough.
Finish the Medical Center to End Part 3
Completing the Blood Transfusion sequence opens the remaining route through the Medical Center.
Continue forward rather than returning to the earlier surgery rooms for another treatment objective. Once the hospital sequence is finished, the story leaves this area and Part 3 closes.
The next title is:
Part 4
Continue with the Part 4 Clara Woods walkthrough once the new area begins.