Silent Hill Townfall Blood Transfusion Puzzle & Blood Bags
Find the required Blood Bags, open S.W. and D.P., get through Ward W and Ward P, place the final three bags, and solve the ORDELL transfusion.
Updated:
Quick Answer
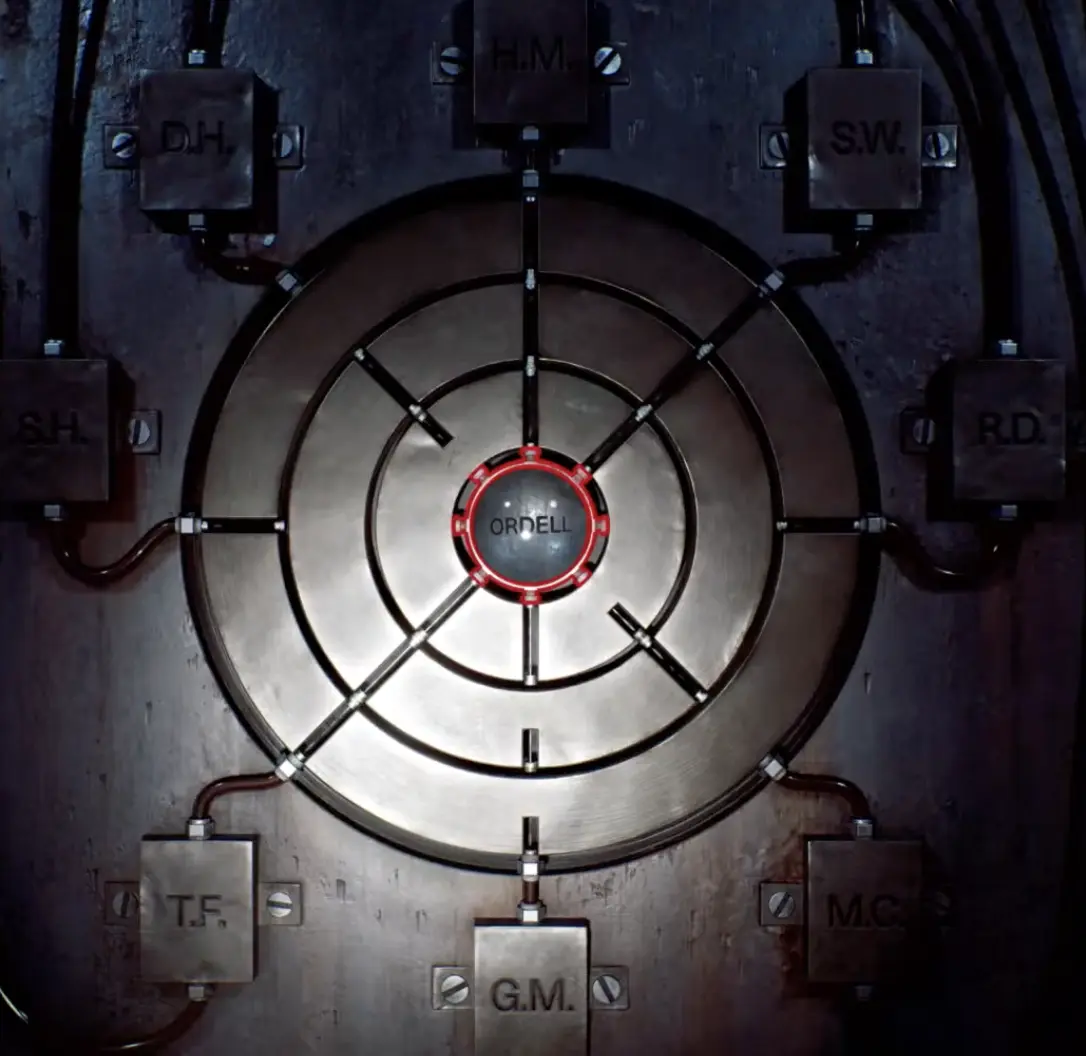
Use Alan Duncan’s Blood Bag on S.W., then Lesley Greer’s on D.P. Keep Sarah Watson, Matthew Clark and George McEwan for the central wall. At the final mechanism, connect H.M., T.F. and S.W. to ORDELL.
The Medical Center Blood Transfusion sequence is easy to misread because the game uses Blood Bags for three different jobs.
Alan Duncan and Lesley Greer open ward routes. Sarah Watson, Matthew Clark and George McEwan are kept for the wall beside the sealed double doors. The last circular mechanism does not use those bags directly at all; it asks which donors can safely feed Simon Ordell’s blood type.
Once those three functions are separated, the hospital becomes much easier to read. The real difficulty is reaching the patients in the right order while the Medical Center keeps sending you between floors.
Take the Medical Center – Different Map and Patient List
This section begins after the surgery sequence in Part 3: The Patient.
Pick up the Medical Center – Different map before committing to the wards.
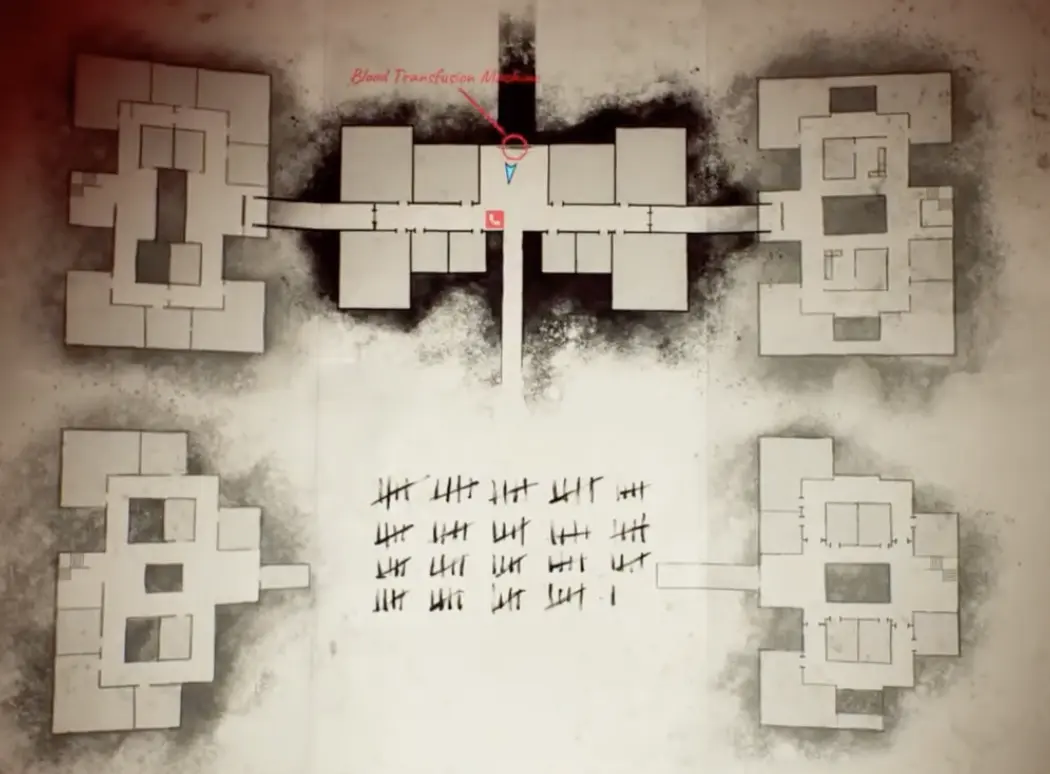
The map becomes more important than physical distance. Several rooms appear to sit beside Simon but cannot be entered from the corridor he is currently standing in.
From the central area, take the right-hand route and use the vent to reach the room containing Alan Duncan’s Blood Bag and Zoe’s Patient List.
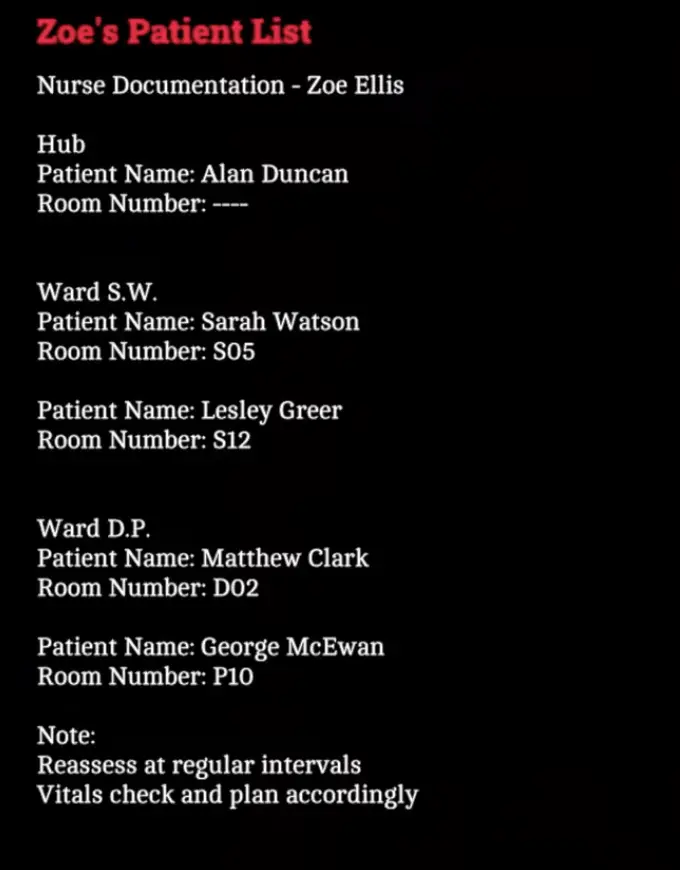
The useful entries are:
- Sarah Watson — S05
- Lesley Greer — S12
- Matthew Clark — D02
- George McEwan — P10
Alan Duncan is the first bag you need, even though he is not one of the three patients eventually placed on the central wall.
Use Alan Duncan’s Blood Bag on S.W.
Return to the central room and go to the sealed route marked:
S.W.
Insert Alan Duncan’s Blood Bag into the transfusion unit beside the door and activate it.
The blood transfer opens S.W.
This establishes the first rule of the sequence: some Blood Bags behave like keys. Alan’s job is finished as soon as S.W. opens.
Inside the new ward, make your way to Room 05 and collect Sarah Watson’s Blood Bag.
Keep it.
Do not try to use Sarah’s bag on the next sealed route. It does not replace Alan’s bag as another ward key.
The next step is reaching Lesley Greer, and that requires approaching her room from another floor.
Get the Ward W Master Key and Reach Lesley Greer From Below
Zoe’s Patient List puts Lesley Greer in Room S12, but the obvious approach to that room is blocked.
Go down into Ward W instead.
The large roaming enemy patrols this section aggressively, and the route has enough vertical backtracking that losing progress here is expensive. A save before entering the lower ward is worthwhile.
Search Room 04 and take the:
Ward W Master Key
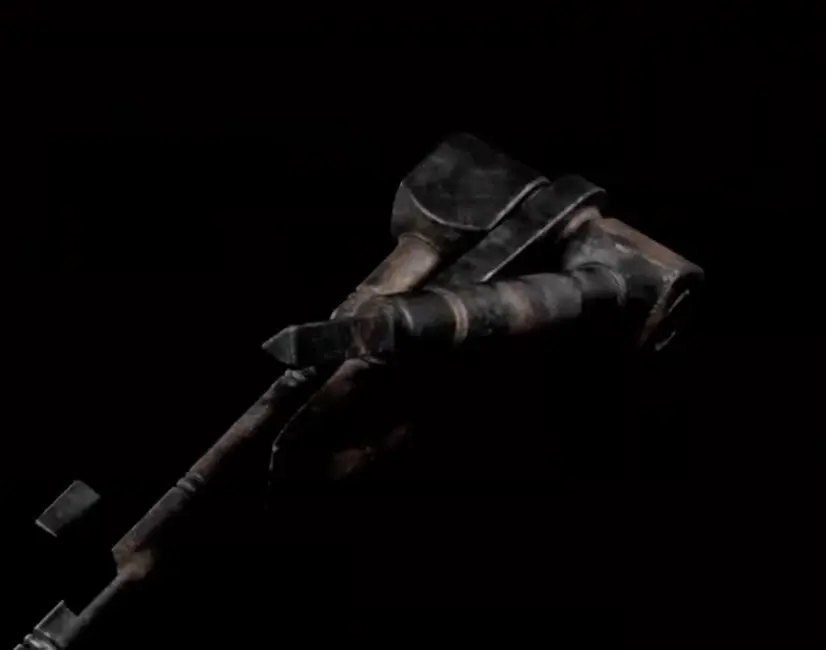
The important door is Room 13.
Unlock Room 13 with the Ward W Master Key and use the ladder inside. It carries Simon vertically into the section connected to Room 12, bypassing the route that looked inaccessible from the other side.
This is the point that can make the hospital feel broken if you keep checking the same upper-floor doors. Lesley’s room is not reached by forcing that corridor open; the ladder is the intended connection.
Enter Room 12 and take:
Lesley Greer’s Blood Bag
With Lesley’s bag collected, return to the central Medical Center area.
Use Lesley Greer’s Blood Bag on D.P.
The second sealed route is marked:
D.P.
Put Lesley Greer’s Blood Bag into the transfusion unit beside it and activate the machine.
D.P. opens.
At this point the five named Blood Bags have split into two groups:
Already consumed to open wards
- Alan Duncan → S.W.
- Lesley Greer → D.P.
Keep for the central wall
- Sarah Watson
- Matthew Clark
- George McEwan
The next ward contains Matthew and George, but neither can simply be picked up by following the room numbers in a straight line.
Send Matthew Clark’s Blood Bag Down First
Proceed through D.P. and work toward the rooms connected to D02.
At Matthew Clark’s location, the Blood Bag is tied to the elevator mechanism rather than sitting where Simon can immediately take it.
Use the elevator button to send Matthew’s Blood Bag down.
Leave it there for now. The lower collection point is not yet accessible from your current route.
Your next job is opening the path to George McEwan and finding the key that allows you to come back for Matthew.
Reach George McEwan Through the Vent
Return toward the upper section near Room 06 and find the vent.
Crawl through it, pass into the connected room and drop into the lower area beyond.
Continue toward Room 10 / P10.
Here you can collect:
George McEwan’s Blood Bag
and the:
Ward P Master Key
The Ward P key is what completes the loop back to Matthew Clark.
Take the key with you and return toward the locked route leading to the elevator collection point.
Collect Matthew Clark’s Blood Bag
Use the Ward P Master Key to open the required door near Room 03.
You can now reach the Blood Bag that was sent down earlier.
Take:
Matthew Clark’s Blood Bag
Your inventory should now contain the three bags that must survive the rest of the ward sequence:
Sarah Watson
Matthew Clark
George McEwan
The route back out does not open immediately. Collecting Matthew triggers another problem: the hospital gates close, and you need to release them before returning to the central transfusion room.
Open the Closed Gates With Both Valves
From the lower section, use the route through Room 02 to get beyond the closed gates, then work back upstairs.
Two valves control the release:
Room 05
Room 10
Turn both.
The first valve does not produce an obvious full-area change by itself, so there is no reason to keep interacting with it after the animation completes. Move on to the second valve.
The roaming enemy can patrol directly outside these rooms. Wait until it commits to another corridor before beginning the interaction; getting interrupted halfway through is much worse here than spending a few seconds watching its movement.
After the second valve, the manual release opens the route needed to leave this ward loop.
Where to Go After the Manual Release
The game does not put the exit directly beside the final valve.
Once both releases are active, stop searching the valve rooms and check the map for the vertical connection back toward the earlier hospital section.
Use the ladder route to work out of the ward and return to the central Medical Center – Different room.
Before leaving the loop, confirm that Simon still has:
Sarah Watson’s Blood Bag
Matthew Clark’s Blood Bag
George McEwan’s Blood Bag
If one is missing, the sealed double doors in the central room cannot be completed.
Place Sarah, Matthew and George on the Central Wall
Back at the central transfusion room, the three Blood Bags must be matched with the patient assessments on the walls.
This is separate from the earlier S.W. and D.P. machines. Alan and Lesley are already finished; only the three bags you carried back belong here.
Place:
Sarah Watson — the first required position on the left wall
Matthew Clark — the second required position on the left wall
George McEwan — the required position on the right wall
The assessment details explain the matches.
Sarah Watson is the patient with the severe head wound and a pulse around 90. George McEwan is distinguished by extensive second- and third-degree burns. Matthew Clark matches the remaining assessment, including the smaller forehead injury.
Once all three are in the correct places, use the transfusion switch beside the sealed double doors.
Blood moves through the wall system and the doors open.
If nothing happens, recheck those three identities. You do not need to return to Ward W for another patient.
Simon Ordell’s Blood Type Is A+
The circular mechanism behind the wall asks a different question.
Open Simon’s equipment and inspect his Medical Wristband.
His blood type is:
A+
For an A+ recipient, the compatible types represented in this puzzle are:
O-
O+
A-
A+
The initials around the mechanism correspond to different patients and blood types. You are not trying to connect every outer line to the center.
Only the compatible donor paths matter.
Connect H.M., T.F. and S.W. to ORDELL
The three donor lines you need are:
H.M. — O-
T.F. — O+
S.W. — A+
Rotate the circular sections until all three initials have uninterrupted routes into the center marked:
ORDELL
The mechanism can look incomplete with unused paths still visible around the outside. That is intentional. Filling every available line is not the goal.
When H.M., T.F. and S.W. all reach the center correctly, interact with ORDELL.
The transfusion completes and the door opens.
Use the Room 204 Key and Leave the Medical Center
Go through the newly opened corridor.
Ward W, D.P. and the Blood Bag machines are finished; there is no reason to backtrack into the hospital.
At the locked door ahead, use the:
Room 204 Key
Continue through the following story sequence.
The Medical Center section ends and the game transitions into:
Part 4
Continue with the Part 4 Clara Woods walkthrough once Simon reaches the new area.