Silent Hill Townfall Part 1 Arrival Walkthrough
Follow Part 1 Arrival through St. Amelia, Haldane Hotel, Zoe's house, the Clinic, Pharmacy, Jess's house, and the final scales sequence.
Updated:
Quick Answer
Take the St. Amelia map in Town Square, complete the Haldane Hotel sequence, then follow Zoe’s house → Shorefront Family Clinic → Pharmacy → Jess’s route → Clinic. Finishing the scales in Zoe’s room starts Part 2: Zoe.
Arrival opens St. Amelia much earlier than it explains which buildings actually matter. That is where most of the wasted time comes from: locked doors, power panels and marked locations can all be reached before Simon has the item that makes them useful.
The reliable route is not to clear the town building by building. Follow each clue until it gives you a concrete destination, use the map to cross back through the same streets, and leave anything that still says no item is available until the story sends you back.
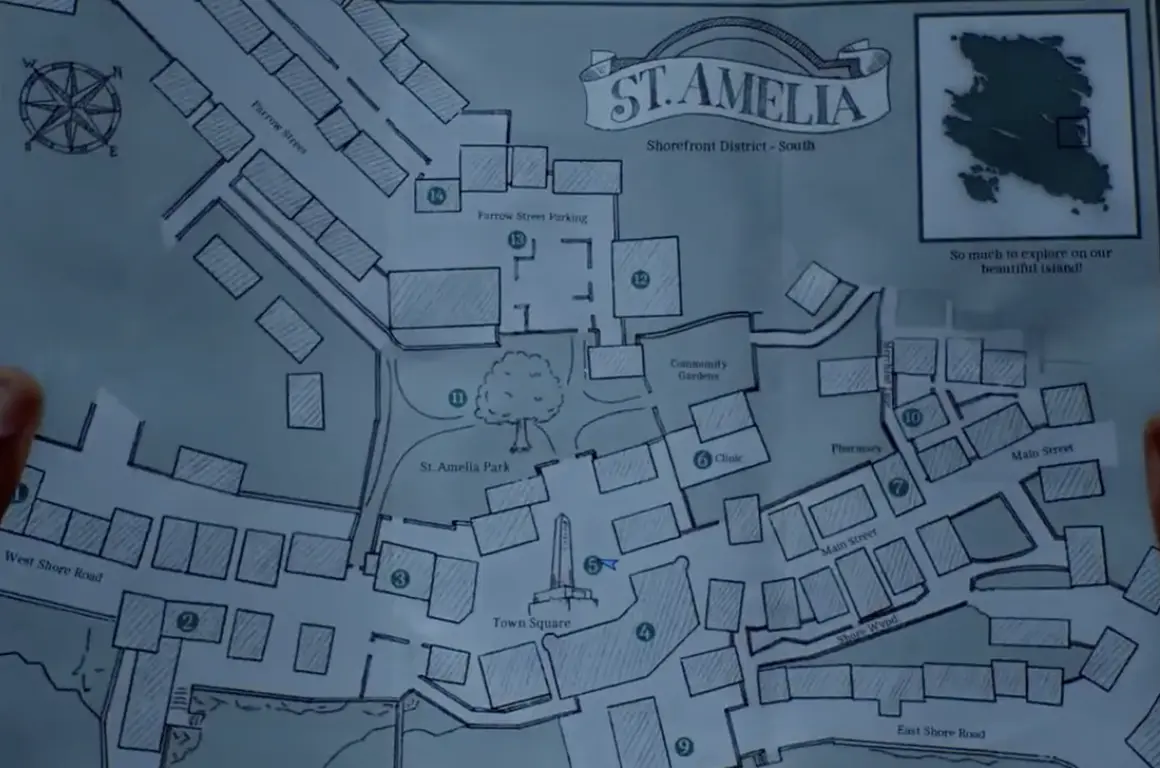
Take the St. Amelia Map in Town Square
Continue inland after reaching the island until Simon enters St. Amelia and the route opens into Town Square.
Pick up the town map as soon as you can. The southern Shorefront district marks the important buildings and gives you a much better reference once Part 1 begins sending you back and forth between the Clinic, park and surrounding streets.
Public phones also become useful around this stage. Dial 100 at a usable phone to save.
Arrival has several long town crossings, so a save before entering a new interior is more useful than repeatedly clearing enemies from streets you will revisit later.
Go to Haldane Hotel
One of the early marked locations is the Haldane Hotel.
Inside, the CRTV becomes more than an object you carry around town. Tune it when a signal appears and use its directional information to move through the abnormal hotel sequence.
The important room allocation is:
Room 204 — Simon Ordell
A date puzzle appears during this section. Set it to:
18 — January — 1996
The day and month come from the information around the room, while the hotel material establishes the 1996 date.
Once the date is accepted, continue through the hotel rather than trying to return to St. Amelia immediately. This section is comparatively linear and eventually feeds Simon back into the town.
Follow the Route to Zoe Ellis’s House
After returning to St. Amelia, follow the next CRTV route toward Zoe Ellis’s house.
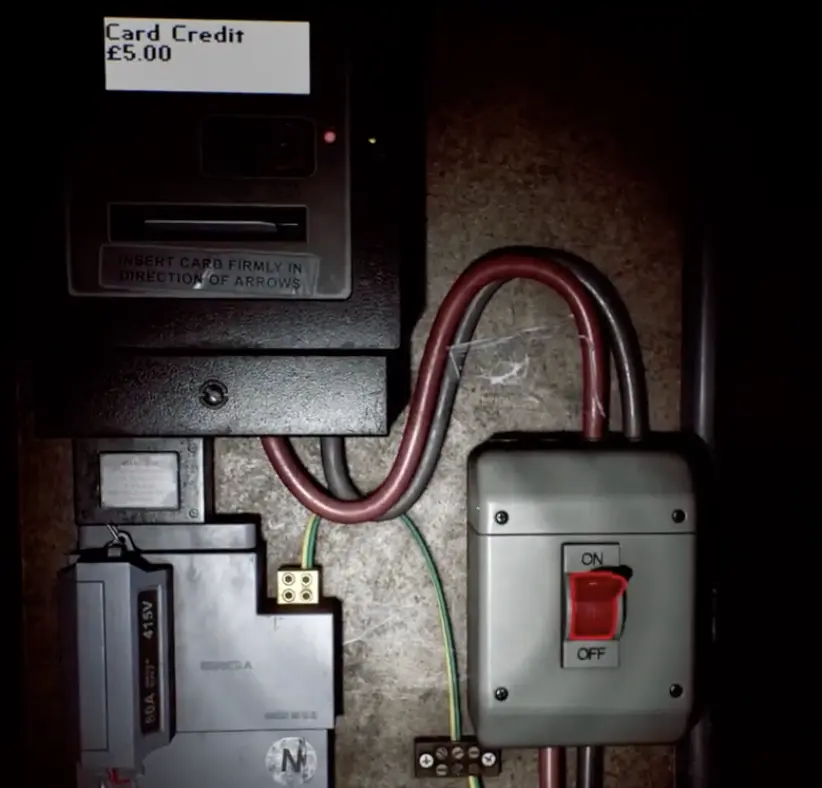
The house contains plenty of story material, but the first actual blocker is the electricity panel. Its current credit is zero, and the computer cannot give you the information you need while the power is off.
You can reach this panel before you have the card.
When the panel shows no usable item, leave the house. There is nothing else you can do to restore the electricity on that first pass.
Continue through the nearby town route until Simon obtains the prepaid electricity card, then return to Zoe’s house.
At the meter:
- Insert the card.
- Cycle to Card Credit.
- Apply the credit.
- Turn the power on.
The card adds:
£5.00
With the electricity restored, use the computer and read the information about the human tissue transport container. Its lock is set from the first and last three digits of the corresponding ET code.
The two locks are:
Left: 956
Right: 133
Enter both numbers and open the container.
Inside is Zoe’s Keycard.
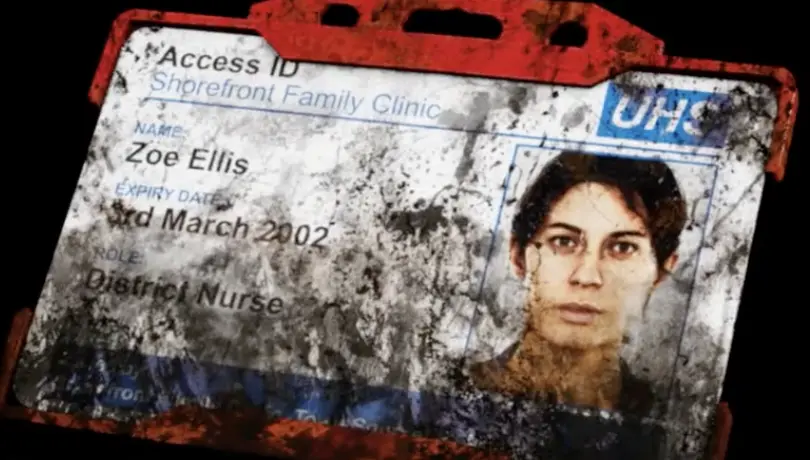
The card identifies:
Zoe Ellis
Shorefront Family Clinic
District Nurse
You are finished with the main progression in Zoe’s house once you have it.
On New Game Plus, check the bedroom floor beside the bed before leaving. One of the items required for the Sci-Fi/UFO Ending appears here; the all endings guide covers the full NG+ sequence.
Head to the Clinic.
Search Shorefront Family Clinic Before Leaving
Use Zoe’s Keycard to continue through Shorefront Family Clinic and search the rooms around Zoe’s work area.
Part 1 gives you several things here that matter later, so this is not a place to run straight through after finding one document.
The most useful pickups and clues are:
- Zoe’s Resignation Letter
- the three scales in Zoe’s room
- a Scalpel
- Empty IV Bag and IV Fluid
- the reception number 2896
Combining the Empty IV Bag with IV Fluid gives Simon an emergency revival item. When equipped, it can bring him back after a fatal hit with a small amount of health, which is useful before the longer crossings later in Arrival.
The Scalpel is also mandatory. Take it before leaving the Clinic.
At reception, call:
2896
The message is for Nurse Ellis. The Pharmacy on Main Street has a prescription signed by her with a dosage that appears wrong and wants her to come over.
That gives you the next destination.
Go to the Pharmacy on Main Street
Leave the Clinic and head toward the Pharmacy.
If this is New Game Plus, check the Video Star back room before going too far down Main Street. The Dog Ending route begins in this part of St. Amelia; follow the all endings guide before leaving the district.
Use the Scalpel when you reach the blocked access on this route.
Inside, the locker combination is:
6539
Open it and take the Prescription Dosage Error Note.
You do not need the full four-clue derivation to continue through Arrival. If you are working out the CRTV sequence rather than entering the finished combination, use the Pharmacy Locker Code solution.
The Prescription Dosage Error Note is the item that matters for the later Clinic sequence. Once you have it, continue toward St. Amelia Park instead of returning to the scales immediately.
You are still missing one required medical item.
Cross St. Amelia Park and Follow the Jess Route
The next chain runs between number 16 and Jess White’s house at 21 Pharaoh Street.
This section is easy to reverse because one location gives you the key for the other.
Start at number 16 and obtain the:
21 Pharaoh Street Back Door Key
Take it to 21 Pharaoh Street and enter Jess’s house through the back.
Inside, continue searching until you obtain the:
Lockbox Key
That key sends you back to number 16.
Use the Lockbox Key after returning and collect the Broken Stethoscope.
At this point, you have reached the end of the town-wide item route for Arrival. There is no need to keep searching the residential streets for another scales item.
Return to Shorefront Family Clinic
Go back to Zoe’s room at Shorefront Family Clinic.
The three objects used in the final scales sequence are:
Broken Stethoscope
Prescription Dosage Error Note
Zoe’s Keycard
The finished left-to-right arrangement is:
Broken Stethoscope → Prescription Dosage Error Note → Zoe’s Keycard
That is enough to continue if you already have all three objects.
If one item is missing, or you want to match each object to the wording in Zoe’s Resignation Letter, use the Clinic Scales puzzle solution.
Once all three objects are placed correctly, the scene triggers automatically.
Part 2 Starts After the Scales
There is no extra exit to find in St. Amelia after the Clinic sequence.
Completing the scales closes Arrival and changes the playable perspective. The next title shown is:
Part 2: Zoe
If the game has not changed Parts, the unfinished step is still inside Zoe’s room rather than somewhere else in town.
Continue with the Part 2 Zoe walkthrough once control changes to Zoe.