How I Save, Import, and Reuse Blueprints Instead of Rebuilding
I copy working factory modules, save them as Blueprints, export or import Blueprint strings, then test each pasted design before connecting it.
Updated:
Quick Answer
My basic Blueprint workflow is:
press C and select a working factory section
→ Ctrl+C to copy it
→ open Building with Q
→ go to Blueprints
→ use the Clipboard selection
→ Save as Blueprint
→ name and save it
If I want to move that design outside the current Blueprint library, I export it as a Blueprint string.
To use somebody else’s design, I go to:
Q → Blueprints → Import → Paste Blueprint String → Confirm
Then I place the imported module in open space and test it before connecting it permanently to the rest of my factory.
The rule that saves me the most trouble is simple: I only save a module after I have watched it work.
Blueprints changed the point where I stopped treating every Sandustry factory rebuild as a completely fresh construction job.
Early on, I was happy to draw another belt, place another Shaker, and rebuild the same little processing section manually.
That stops being fun once a useful module contains:
- several machines
- filters
- conveyor directions
- walls
- launchers
- Thermal Buffers
- and enough spacing that one misplaced block can change how the whole section behaves
Once I have already solved that layout once, I want to preserve the solution.
That is what I use Blueprints for.
But I do not save everything I build.
A Blueprint is most useful to me when it preserves something I already trust.
I Use Normal Copy and Paste Before I Save a Blueprint
I separate two jobs in my head.
If I only need another copy of something right now, I use the regular selection and copy system.
I press C, drag the selection around the section I want, then use Ctrl+C.
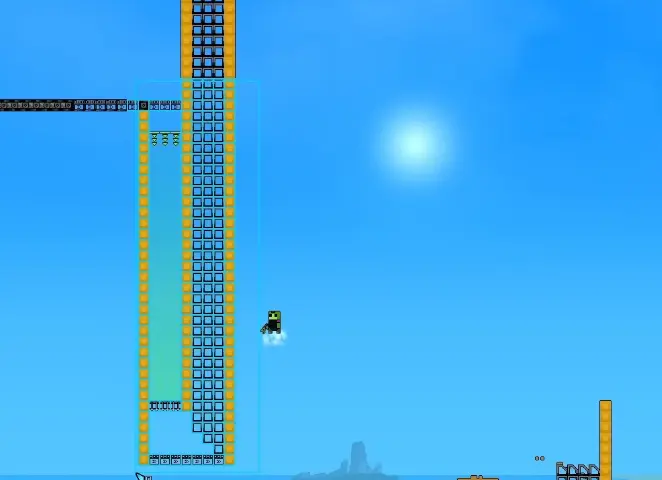
From there I can paste another copy and continue building.
That is enough when I am doing something like:
one working module
→ duplicate beside it
→ connect both to the same larger line.
I do not interrupt that build just to create a permanent Blueprint every time.
The Blueprint library becomes valuable when the design has earned the right to stay.
I Save the Module After It Proves It Works
This is the biggest habit I use with Blueprints.
I do not save a design because it looks finished.
I save it because I have watched material enter one side and get the intended result out the other.
That distinction matters.
A factory module can look perfect while:
- one Filter is backwards
- one machine is missing
- a belt points the wrong way
- heat never reaches the consumer
- an output has nowhere to go
- or one block was outside the original selection
If I save that version, I have not saved time.
I have saved a reusable mistake.
So my order is:
build
→ run material through it
→ find the mistake
→ fix it
→ run it again
→ then save the Blueprint.
I used exactly that logic with reusable processing sections later in the factory. Once a module was doing the job I wanted repeatedly, that was when it became worth preserving.
I Turn the Current Selection Into a Saved Blueprint
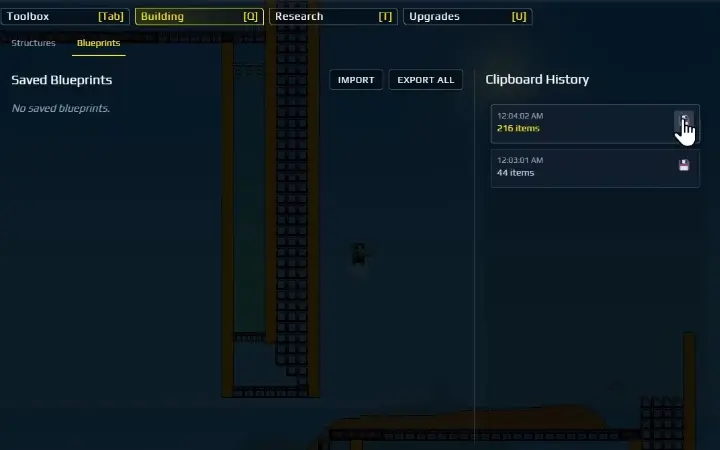
After copying a section, I open Building with Q and switch to the Blueprints tab.
The current copied selection appears in the Clipboard.
From there I use Save as Blueprint.
I give the Blueprint a name that tells me what the module actually does.
I prefer names like:
Kinetic Press
Gold Washer
Flower Burner
rather than:
Factory 1
or:
Good Setup
The reason becomes obvious later.
Once I have several saved modules, I do not want to place each one just to remember what it was.
The name should tell me why I saved it.
I Keep Blueprints Focused on One Job
Sandustry lets me save very large selections.
I can go much further than one machine.
A Blueprint string can represent a large factory section, and the system can even handle something on the scale of an entire factory.
I usually do not make that my default.
The reusable designs I like most are smaller modules with a clear job.
For example:
process one input
→ separate the outputs
→ deliver them at predictable locations.
That gives me something I can tile or repeat.
If I save one enormous factory, I inherit all of its assumptions:
where the Water is,
where the Sand enters,
how much vertical room exists,
where the next production stage needs to go.
A smaller module is easier to fit into a new factory.
That becomes especially useful once I start rebuilding sections rather than rebuilding the whole save.
I Export a Blueprint When I Want the Design Outside My Save
After saving a Blueprint, I can export it as a string.
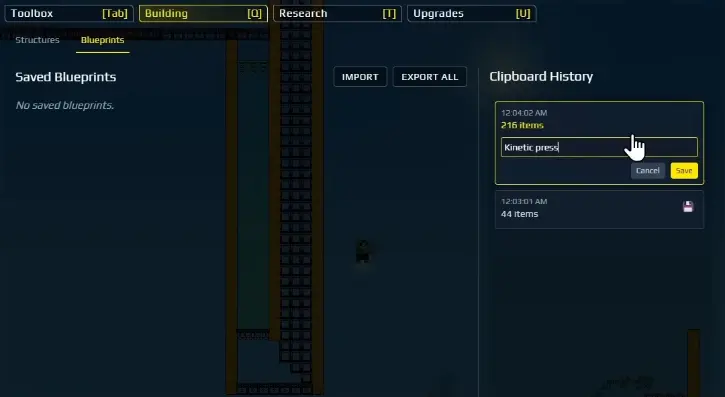
That string is the portable version of the design.
I can keep it somewhere else or share it with another player.
This is the point where I distinguish:
copy/paste
from:
saved Blueprint
from:
Blueprint string.
I use ordinary copy/paste for immediate building.
I use a saved Blueprint for a design I want available again.
I use an exported string when that design needs to travel outside the current library.
Keeping those three jobs separate makes the system much less confusing.
I Import a Blueprint String From the Blueprints Menu
When I have a Blueprint string I want to use, I do not paste it directly into the world.
I open the Building menu and go to:
Blueprints
→ Import
→ Paste Blueprint String
→ Confirm.
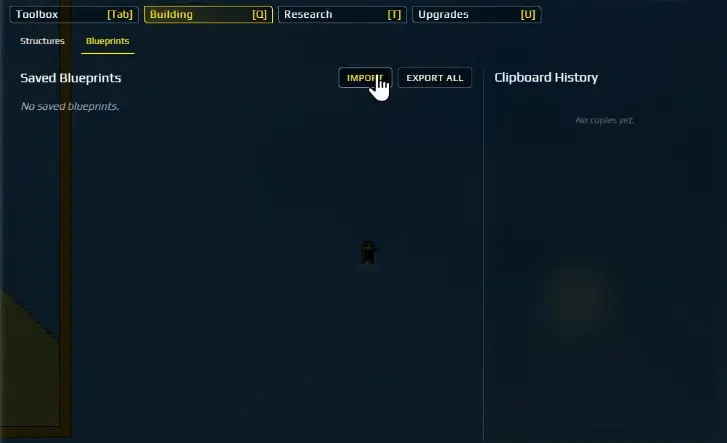
After the import succeeds, the design becomes available to place.
That is the point where I stop thinking about the string itself.
Now I care about the factory around it.
Does this module actually fit here?
Are its inputs facing the direction I need?
Is there enough room above and below it?
Can I connect its output without rebuilding half the area?
Those questions matter more than whether the Blueprint technically imported.
I Paste an Imported Module Into Open Space First
I do not place a new imported Blueprint directly against the most crowded part of my factory.
I give myself room.
A working example was a Basic Plinko Shaker design.
After importing it, I placed the module and then duplicated it to build several copies in a row.
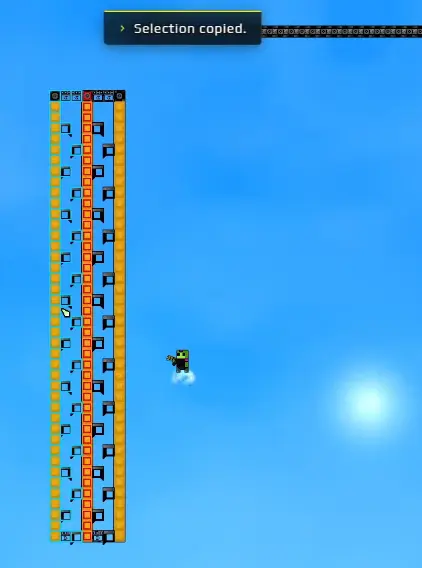
The important part was not that the design occupied the absolute minimum possible space.
It did not.
What mattered was that I could see how it worked and had enough space to integrate it.
I would rather spend a little more room on a module I can inspect than save a few blocks and make every later connection awkward.
I Check an Imported Blueprint Before Feeding the Main Factory Into It
Importing a Blueprint does not make me trust it blindly.
I inspect it before I connect a major supply line.
My first checks are physical:
Are all of the expected machines there?
Are the Filters facing the correct route?
Are conveyor outputs pointing where I expect?
Did the entire intended module fit inside the original selection?
Then I run a small amount of material.
That tells me much more than staring at the design.
If the first test works, I connect more throughput.
If it does not, I fix the pasted copy first.
I do not duplicate it ten more times and discover that I now have ten copies of the same bad Filter.
That is especially important with modules such as Shakers or the Kinetic Press, where the full production logic already has enough moving pieces. I keep the actual Gold, Residue, and Seed routing in my early factory guide instead of turning the Blueprint page into another version of that factory walkthrough.
Here I only care about whether the saved design reproduces the module correctly.
I Edit a Blueprint-Based Build Instead of Treating It as Sacred
A Blueprint is a shortcut, not a contract.
If I import a useful design but one section does not fit my factory, I change it.
In one imported setup, the basic design worked but still needed local adjustments after placement.
That is normal.
I may:
- move the whole module
- widen one side
- change where the output leaves
- alter the surrounding belt route
- or connect it to a different storage area
I do not throw away a good Blueprint because the final 10% needs adapting.
The value of the Blueprint is that I did not have to rebuild the other 90% manually.
If I Paste in the Wrong Place, I Undo Before Building Around It
One very practical shortcut matters here:
Ctrl+Z can undo a bad paste.
I use it immediately when I realize the module landed somewhere I did not want.
This sounds minor until the copied section contains dozens of blocks.
The faster I admit the placement is wrong, the less cleanup I create for myself.
I Use Repeated Modules Instead of One Giant Factory Blueprint
The system is capable of storing a very large factory selection.
What I actually prefer is a tileable module.
Something like:
one Shaker unit
or:
one Kinetic Press section
or:
one complete burner module.
Then I can prove one copy works and repeat it.
That also gives me a better scaling decision.
If one module keeps up, I stop.
If input is visibly accumulating faster than that module can process it, I paste another.
I am scaling a known working unit instead of designing a larger factory from scratch every time throughput rises.
That is where Blueprints become more than a convenience feature.
They turn a working solution into a unit of factory expansion.
I Do Not Blueprint Every Temporary Build
There are plenty of structures I never save.
If I know I am going to demolish something as soon as the next research unlock arrives, I leave it temporary.
If the layout only works because of a strange piece of terrain in the current world, I am less interested in preserving it.
If I am still babysitting the system constantly, I fix it before I save it.
The Blueprints I keep are the ones where I can say:
I would be happy to build this exact module again.
That is my threshold.
It keeps the Blueprint list useful instead of turning it into a graveyard of half-finished experiments.
The Blueprint Workflow I Actually Use
Once I know a module is good, my routine is:
select it with C
→ Ctrl+C
→ Q
→ Blueprints
→ Clipboard
→ Save as Blueprint
Then, if I want a portable copy:
Export Blueprint String.
When I am bringing a design back in:
Q
→ Blueprints
→ Import
→ paste the Blueprint string
→ Confirm
→ place it in open space
→ inspect it
→ run a real material test
→ only then connect or duplicate it.
The button presses are the easy part.
The decision that matters is when I save.
I get the most value from Blueprints when I preserve a factory problem I have already solved, not one I am still trying to understand.