Orc Incremental Progression Guide: How I Get Past Each Wall
Progress stops being a straight climb once Units, Totems and permanent upgrades start competing for the same run. I use each wall to decide whether I need Gold, a better formation, another milestone or a reset.
Updated:
Quick Answer
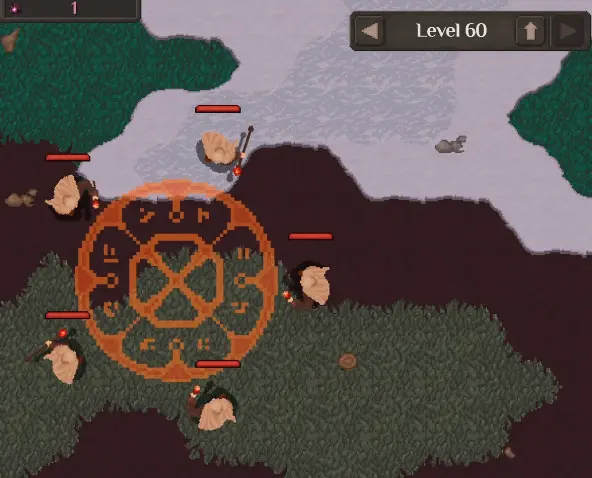
Keep pushing while the run is still unlocking something useful or one targeted upgrade can fix the current wall. If the same fight barely changes after more Gold and a formation adjustment, stop feeding temporary upgrades into it. Early on I work toward the Portal and Level 10; later I use Level 60, Warpath, new Unit unlocks and permanent-upgrade breakpoints to decide what is worth pushing for next.
The Portal Is the First Point Where Progression Stops Being Automatic
The opening is deliberately narrow. I have one frontline Orc, Fireballs and a small set of upgrades, so spending Gold is mostly a question of whether I need more damage or enough health to survive the next group.
I use those first battles to establish one habit that remains useful much later: watch the reason a fight fails before buying anything. If ranged enemies are doing the real damage, I use Fireballs on them instead of spreading shots across whatever is closest. If my Orc is dying before I can finish the group, health is doing more for the run than another offensive purchase.
The first major shift comes with Portal Plateau.
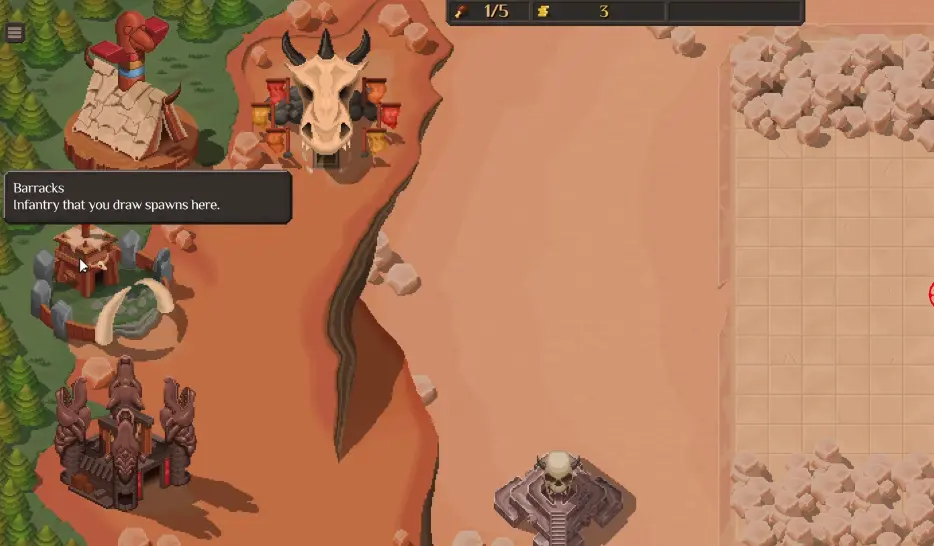
The Portal adds Units and Totems to the run, but it also introduces a new constraint: I cannot treat every new card as an automatic upgrade. Warband capacity, Unit roles and Totem triggers start competing with one another, and a card that looks stronger on its own can make the overall formation worse.
During this stage I still draw fairly aggressively because the roster is small and new roles are valuable. What I am looking for changes, though. I want a frontline that can hold contact, ranged or area damage that can work safely behind it, and support that solves a problem the current army actually has.
Once Totems start appearing, I treat them as another Power decision rather than as free passive bonuses. I check the Totems guide when I need to know whether a trigger, radius or duplicate effect is worth building around.
When the problem is the whole army — Unit roles, positioning, Power allocation or which carry deserves support — I use the build and formation guide.
From this point onward, progression is no longer just a stat climb. Every new unlock has to fit an army that is already competing for limited space and Power.
Level 10 Tests Whether the Opening Army Is Functional
The first clear boss checkpoint arrives at Level 10.
I do not spend a long time preparing for it. At this point, cheap temporary upgrades still move the needle quickly, and an early boss is more useful as a diagnosis than as a farming target.
If the boss nearly dies, I stay in the run. A little more frontline health, another damage purchase or better Fireball targeting can easily be enough.
A wipe that happens almost immediately tells me something different. I look at which Unit disappears first, whether the backline is exposed, and whether the card I just paid for is actually contributing to the fight.
The same logic applies to the ranged enemies around these early stages. Archers are often a better Fireball target than another melee body because leaving them untouched lets them damage the formation while my frontline is occupied elsewhere.
That distinction becomes more important as the Warband grows. Later runs can contain healing, artillery, spellcasters and expensive Units that need several seconds of protection before their value shows up.
A Wall Does Not Mean the Run Is Finished
When progression stops, my first response is usually to go backward rather than reset.
I disable automatic progression when needed and return to a level the army clears reliably. That creates a stable Gold farm while I decide what purchase could actually change the failed fight.
The useful distinction is between a solvable wall and an exhausted run.
A solvable wall usually has a visible weakness. My frontline dies too early, the enemy backline survives too long, a useful Unit is sitting outside the Warband because capacity is full, or one active carry is still several affordable upgrades away from a meaningful improvement.
An exhausted run feels different. I can buy several real upgrades, retry the fight and still watch almost the same sequence happen again.
That is the point where more Gold stops being an answer by itself.
I still test formation before giving up. Moving a fragile ranged Unit farther back or replacing one expensive card with several health pools can change a fight far more than another generic percentage increase. If positioning or one targeted purchase turns a wipe into a close loss, the run still has room.
If nothing meaningful changes, I start looking beyond temporary progression.
New Units Give Me Reasons to Push a Healthy Run Farther
Milestone unlocks are one of the strongest reasons I avoid resetting a run that is still moving.
The early roster does not stay static for long. Witch Doctor adds sustain rather than pure damage, while Catapult gives me long-range area damage and changes how I approach clustered enemies. Later, War Raider brings an area-damage vanguard role that can hook enemies into close combat.
The important point is not that every later Unit is stronger.
Unlocking a Unit adds it to the future draw pool. Whether I actually want it in the current formation is a separate decision.
That became especially obvious with Catapult. It could carry entire stretches against groups, but its capacity cost also meant I was sometimes better off replacing one with several bodies against a boss that was deleting the formation too quickly.
War Raider created the same kind of question. Its hook can be useful against certain targets, but opening the card did not automatically make it more valuable than a Shaman, Witch Doctor or another Unit already doing important work.
So I keep pushing toward a nearby unlock when the army is still healthy, but I never confuse newly available with mandatory.
Dark Rebirth Is My Exit From Temporary Progression
Eventually the current run stops producing enough temporary value.
That is when I check Dark Rebirth.
Dark Rebirth clears the temporary army state and turns the completed cycle into Blight, which can buy upgrades that persist into future runs. I use the Dark Rebirth guide when I need to compare the current payout against the value still left in the run.
My first Dark Rebirth also introduced the Chieftain choice. When that screen appears, I pick for the active ability I want in the next cycle rather than choosing from the Bloodline name alone. The Chieftains and Bloodlines guide covers those abilities and the later Martyrdom decision.
Before ending the current cycle, the question is still:
Can this run reach something useful with a realistic amount of additional work?
If the next milestone is close and the army is still winning, I continue. More levels, more Gold earned and another unlock can all make the run more valuable before the reset.
If I am repeating the same wall and temporary spending no longer changes the result, permanent progress starts competing very well with one more farming cycle.
This keeps Dark Rebirth in its proper place. It is not what I do after every loss; it is what I do after the current run has stopped offering a better destination.
Warpath Is the Point Where Clean Wins Turn Into Faster Progression
Warpath is the progression system I pay the most attention to once it is unlocked through the Blight Tree.
Its trigger is specific.
I need to win a battle without losing any allied Units, and Level Auto-Progress must be enabled. When those conditions are met, the army can enter a Warpath.
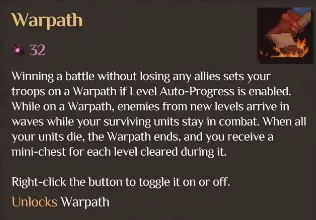
Warpath changes what happens after that clean victory. Instead of resetting the battlefield between levels, enemies from new levels arrive in waves while the surviving army remains in combat.
The run continues until the Warband can no longer survive. When all of my Units are gone, the Warpath ends and I receive one mini-chest for each level cleared during it.
That makes survival part of progression speed.
A formation that wins a difficult battle with one nearly dead survivor has technically cleared the level, but it is unlikely to travel far on Warpath. A slightly less explosive army with a stable frontline, healing and protected ranged damage can clear more levels overall because it arrives at each new wave intact.
Warpath can also continue into a boss level. That is useful when the formation is far stronger than the current area, but it can be a bad way to enter a boss that already sits near my progression wall.
I can stop Warpath manually when I know the next fight is likely to waste the whole formation.
I Farm Differently Once Warpath Is Working
Before Warpath, dropping back one level is often enough to create a predictable Gold farm.
After Warpath, I have another option: find a stretch where the army is clearly stronger than the enemies and let clean wins chain together.
This gives me progression, mini-chests and continuous combat without rebuilding the formation every level.
The catch is that Warpath is not automatically efficient just because it is active.
If the army spends a long time grinding through each incoming wave, I am not gaining much from the mechanic. The best Warpath stretches are the ones where enemies are disappearing quickly and the Warband is still healthy enough to keep moving.
That gives me a practical benchmark for build quality.
If the formation repeatedly starts Warpath and carries it through several levels, I am reluctant to make large changes just because a new Rare card appears.
If Warpath ends almost immediately, I look for the reason before spending more Gold. One fragile Unit, poor positioning or a lack of sustain can be enough to break the chain.
Level 60 Is Where My Spending Becomes More Selective
By Level 60, the run no longer feels like the opening.
The Portal pool is broader, rerolls are more expensive, and the army is using enough specialized pieces that generic spending begins to lose efficiency.
This is where I start paying much more attention to how individual Units behave during the fight.
A Witch Doctor can have plenty of healing available and still fail to save melee Units that immediately run out of its useful area. A ranged Unit with strong damage can lose most of its value if it is sitting where enemy area attacks keep reaching it. An expensive artillery piece can dominate normal waves, then become a liability when a boss destroys its single health pool before it has time to fire enough shots.
Level 60 is therefore less important to me as a magic number than as a transition.
If the army reaches this stage comfortably, I continue into the deeper roster.
If every level now requires indiscriminate spending, I stop and repair the structure of the build before trying to brute-force the next milestone.
Later Unlocks Expand the Roster Faster Than They Solve Walls
After War Raider, progression keeps adding more specialized options. Assassin, Dragon, Troll and eventually Juggernaut broaden the kinds of formations I can build.
The same rule keeps proving useful: a new unlock gives me another possible answer, not the answer.
Dragon is a good example. Reaching that part of progression did not instantly make older Units obsolete. In some runs the Dragon had the wrong support and consumed capacity without fixing the current problem; in others, a stronger rarity or useful enchantment gave it a clear role.
Assassin can create another highly specialized damage option, while Troll offers a much more obvious frontline function. Those differences matter more than their place in the unlock order.
Progression becomes easier once I stop replacing the army just to celebrate a newly opened card.
If the current Warband is still clearing cleanly, I let the unlock sit in the Portal pool until the run gives me a reason to use it.
Level 120 Is Worth Pushing Toward When the Run Is Already Close
Higher milestones matter most when reaching them changes the value of the current cycle.
One run had already accumulated a respectable expected Blight payout, but Level 120 was close enough that I kept pushing because crossing the next checkpoint would improve what the run was worth when I eventually reset.
That is how I use higher levels.
I do not stay in a dying run simply because the next round number looks satisfying. I stay when the army is capable of reaching the checkpoint and that checkpoint gives me something meaningful: another unlock, a stronger reset, or access to a system I am deliberately targeting.
If reaching Level 120 requires a long stretch of weak farming and repeated failures, the calculation changes. Permanent progress may improve the next attempt enough to reach it much faster.
Before extending the run for a higher milestone, I check what the extra Blight would actually buy. The Blight Tree guide helps me compare those permanent targets; if the next useful upgrade is already affordable, a long grind toward another level becomes much harder to justify.
Unlocking Every Recruitable Unit Does Not End Progression
Eventually I reached the point where Juggernaut unlocked and the game registered that every recruitable Unit was available.
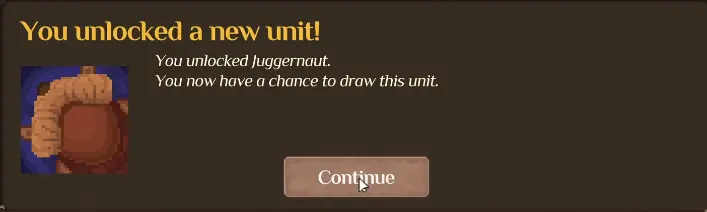
That milestone changes the question again.
Before it, a difficult wall may still be followed by a Unit I have never seen.
After it, waiting for “the next character” is no longer a progression plan.
The Blight Tree still contains much deeper permanent scaling, higher card rarities, cost reductions, Trials and other upgrades. Dark Rebirths keep improving the account, and the Portal can still produce much stronger versions of Units I already know.
At this stage, the bottleneck is usually one of three things: the current formation is poorly matched to the fight, the permanent account needs another upgrade breakpoint, or I have rolled a run that is simply weaker than what my existing progression should be capable of.
That is why late progression becomes less linear even though the level number keeps rising.
When I Come Back to a Stalled Run, I Diagnose It in This Order
I no longer need a long progression checklist once all of these systems are open. I look at the current failure and work outward.
If one lower level still dies quickly, I stay there long enough to buy a targeted temporary upgrade.
If Gold purchases are not changing the failure, I inspect the formation rather than buying every remaining stat. Positioning, Unit capacity and the balance between frontline, damage and sustain are covered in the build and formation guide.
If the build is coherent but the whole run has flattened out, I compare the next Dark Rebirth with the permanent target I want.
If Warpath will not start, I check for a clean win and Level Auto-Progress before blaming the army.
If Warpath starts but dies almost immediately, the problem is usually survivability, positioning or a formation that was built to scrape through one fight rather than remain intact across several.
If the normal progression loop is rebuilding comfortably and I want another permanent route, Trials become a separate challenge system rather than another main-level milestone.
That is enough to get me moving again without reducing the game to a fixed sequence.
The early run is driven by unlocks. The middle is driven by whether the current army can turn those unlocks into clean progression. Later on, permanent upgrades and better versions of the same core formations matter more than finding one final card.
The level counter keeps going up, but the useful question stays the same:
What is actually preventing this run from moving forward?