How I Build Ultimate Challenge Runs to Survive the Last Boss
Ultimate Challenges shorten the route and chain familiar bosses together. I build for the final fight, protect healing through the early bosses, and use them when the permanent reward is worth leaving the Gold grind.
Updated:
Quick Answer
When a friend in Tresna opens an Ultimate Challenge, I treat it as a chained-boss run.
I take one combat path that can keep scaling, spend early rooms building damage rather than relic value, and save enough healing for the boss at the end of the route. The relics I was carrying before entering are restored when I leave, so a valuable normal-run backpack is not the reason I postpone the challenge.
Ultimate Challenges look familiar at first.
The dimension is familiar. Several bosses are familiar. Many of the perks are familiar.
The job is different.
A normal expedition lets me make money, improve relics, fill the backpack, and decide whether to cash out.
An Ultimate Challenge compresses that loop until almost everything points toward one question:
Will this build still work when the last boss appears?
That changes what I take, when I heal, and how much damage I am willing to trade for a faster clear.
The Backpack Rule Changes the Run Before It Starts
I enter these challenges through the friend who asks for help in Tresna rather than treating them like another ordinary portal run.
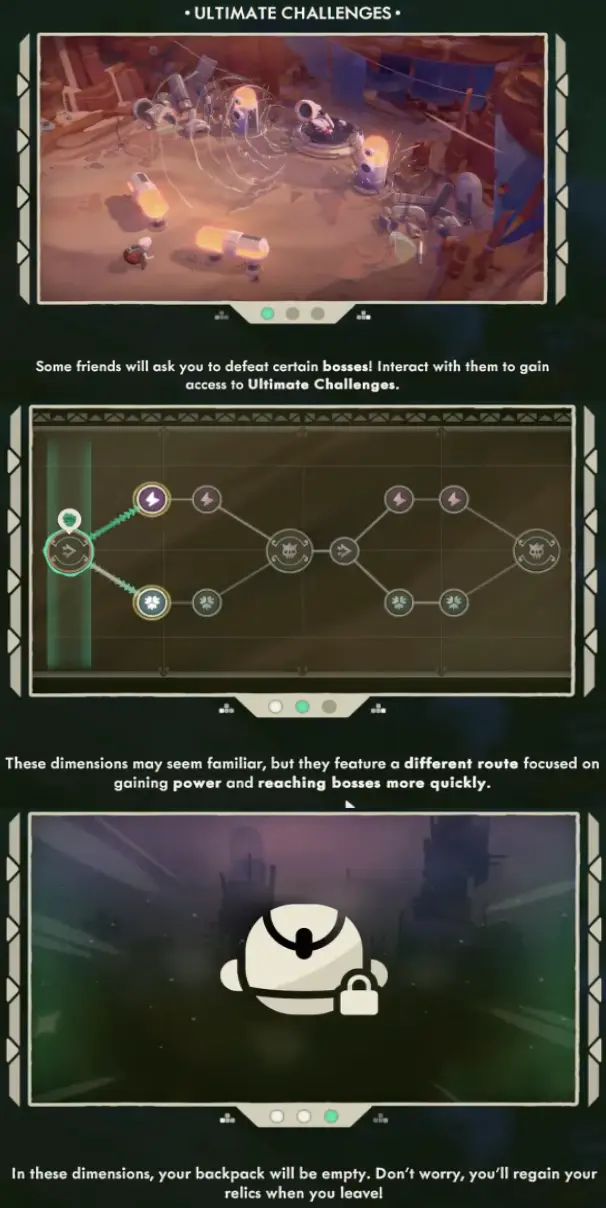
The game makes the structure clear before entry:
- the challenge uses a familiar dimension with a different route;
- rooms are arranged to build power and reach bosses faster;
- the backpack is temporarily emptied;
- the relics I had before entering return when I leave.
That last rule removes one of the normal expedition pressures.
I do not need to clear storage first.
I am not deciding whether one more boss is worth risking a high-Quality relic.
The run starts cleaner than that: build power, protect healing, finish the boss sequence.
The First Gallery Route Made the Build Choice Obvious
My first challenge pushed me back through a modified Gallery route.
The perk choices began leaning toward Poison, so I followed them instead of trying to keep several half-finished damage plans alive.
I added damage around that status path and kept gun support because ranged pressure made the boss sections safer.
One perk in that run caused a Volatile enemy to explode after four attacks, with the blast dealing 20% of the damage from those attacks to nearby enemies.
That was useful in rooms.
It was not automatically the best reason to shape the whole build around it.
The route is short enough that I care more about whether a perk helps the next boss than whether it makes one normal encounter look impressive.
Curator Is a Mid-Run Tax, Not the Finish Line
Curator arrived while the build was still developing.
That matters because the first boss can tempt me into spending resources as though the challenge ends there.
It does not.
The shield was still the first real check.
Dumping damage into Curator while the shield was controlling the fight did not make the run faster. I had to respect the ring pressure, create the opening, and deal with the shield before the build could do what it was designed to do.
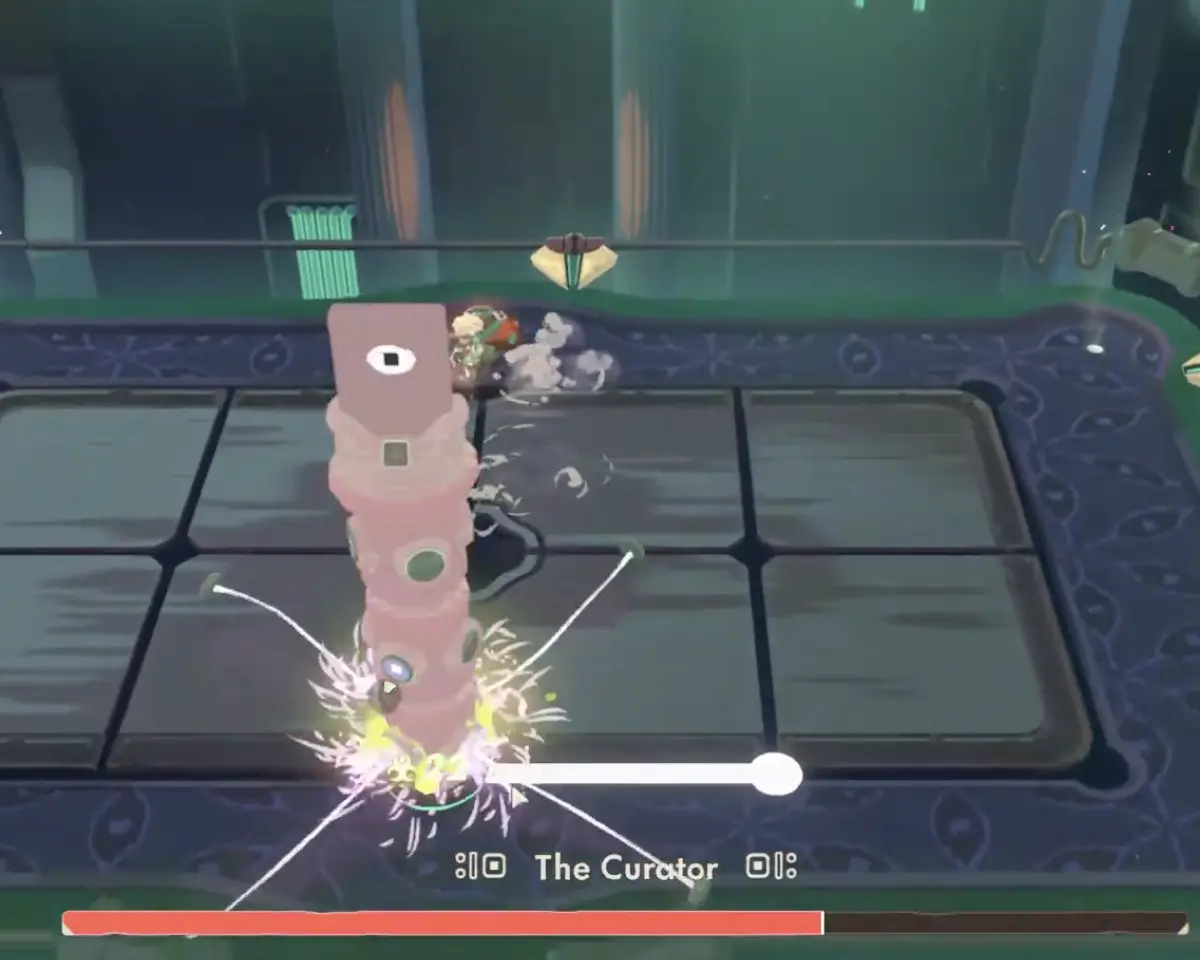
I used healing here.
That was not the mistake.
The mistake would have been treating every potion as available just because the current boss could take it from me.
After the kill, the route continued and I picked up Quantum Cord.
That was my reminder that Curator was a checkpoint, not the objective.
Four Potions at Tyke Still Wasn’t Comfortable
I reached Tyke with four potions.
On paper, that looked safe.
The fight still burned through more healing than I expected.
The opening that made the fight manageable was the projectile exchange. Tyke sends the attack back, I return it, then reposition before the next pattern removes the space I need.
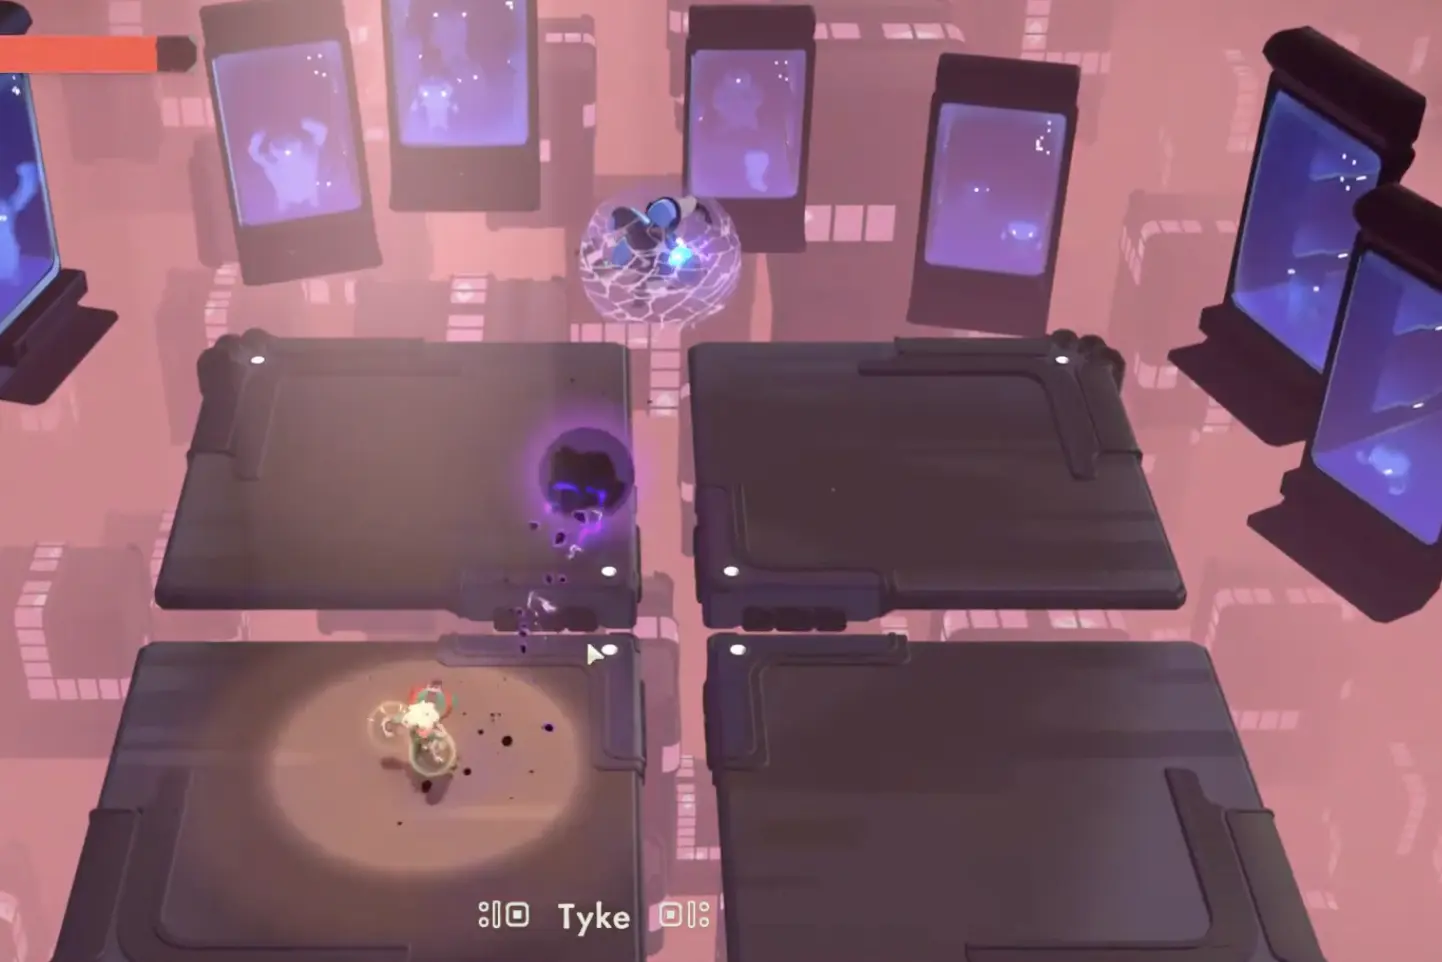
Running low on gun ammo made the encounter feel like a damage problem.
It was mostly a timing problem.
The safe opening was already there.
Trying to create another one between patterns cost more health than it saved time.
Once I stopped chasing those extra hits, the fight had a repeatable rhythm:
return the projectile → move → reset position → repeat.
That is enough.
A chained-boss run does not need every boss to die as quickly as possible. It needs every boss to leave enough resources for the one after it.
The Gallery Challenge Paid Out With the Protocol Breaker Recipe
The reason I do these challenges before the very end of the save is the reward.
After finishing the Gallery-side chain and returning to Tresna, the reward screen gave me:
NEW RECIPE — Protocol Breaker
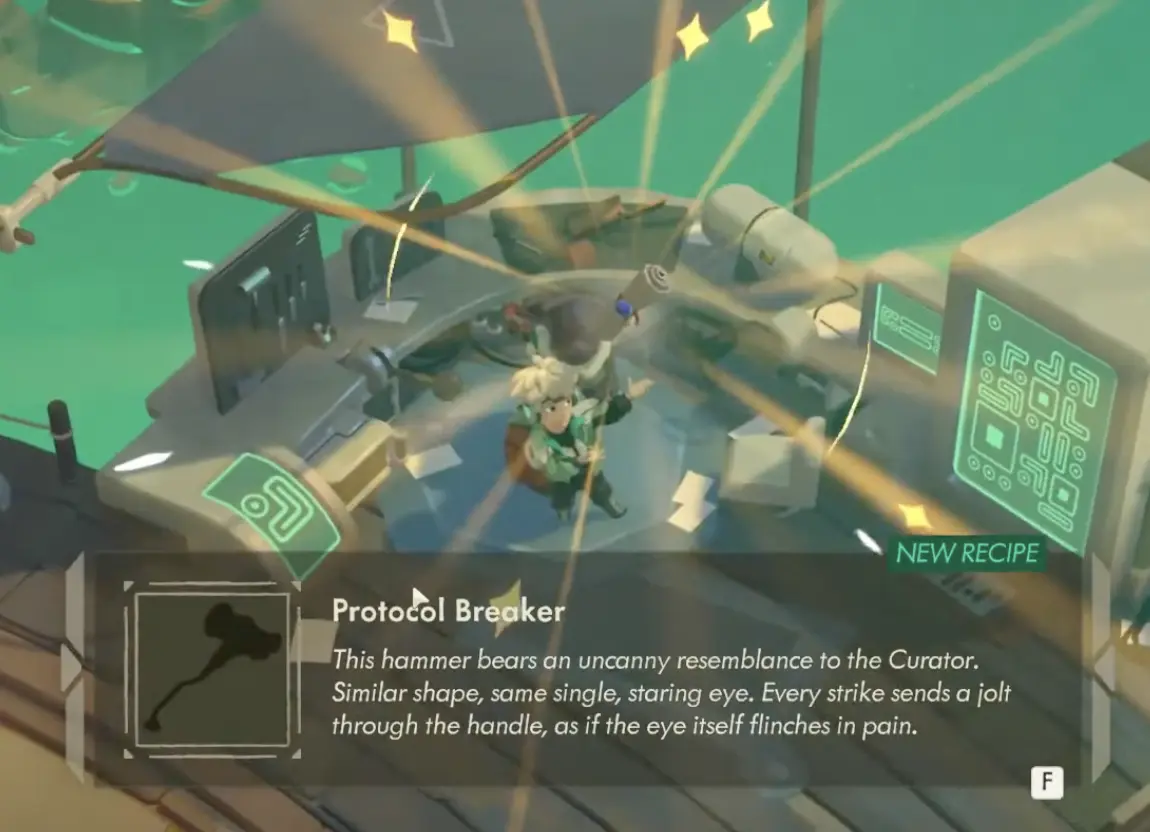
The description even calls out the hammer’s resemblance to the Curator.
That makes the route worth evaluating against the normal Gold grind.
If the next Endless Vault milestone is almost finished, I would rather close that gap first.
If the Vault is still far away, a challenge that adds a permanent weapon recipe can improve the runs I will be making while I earn the remaining Gold.
That larger spending decision stays in the endgame progression guide.
The Second Challenge Needed a Different Build
The next route did not reward me for copying the Gallery setup.
On the Aeolia-style challenge, I ended up leaning into Foam, Wound, critical chance, and gun support.
That is one reason I do not carry a single “best Ultimate Challenge build” from dimension to dimension.
The route gives enough perk density to build quickly, but the available effects and the bosses ahead still determine what is worth stacking.
A coherent second build is better than forcing the previous run’s identity onto a new challenge.
By the time I reached Monte, damage was no longer the thing deciding the attempt.
Movement was.
Monte Punishes the Instinct to Retreat
Monte’s bombardment is one of the mechanics that is easy to remember incorrectly.
The screen fills with enough pressure that backing away feels natural.
That was exactly what made the pattern worse for me.
Moving forward through the sequence created the room I needed to continue rather than letting the bombardment keep closing the arena from behind.
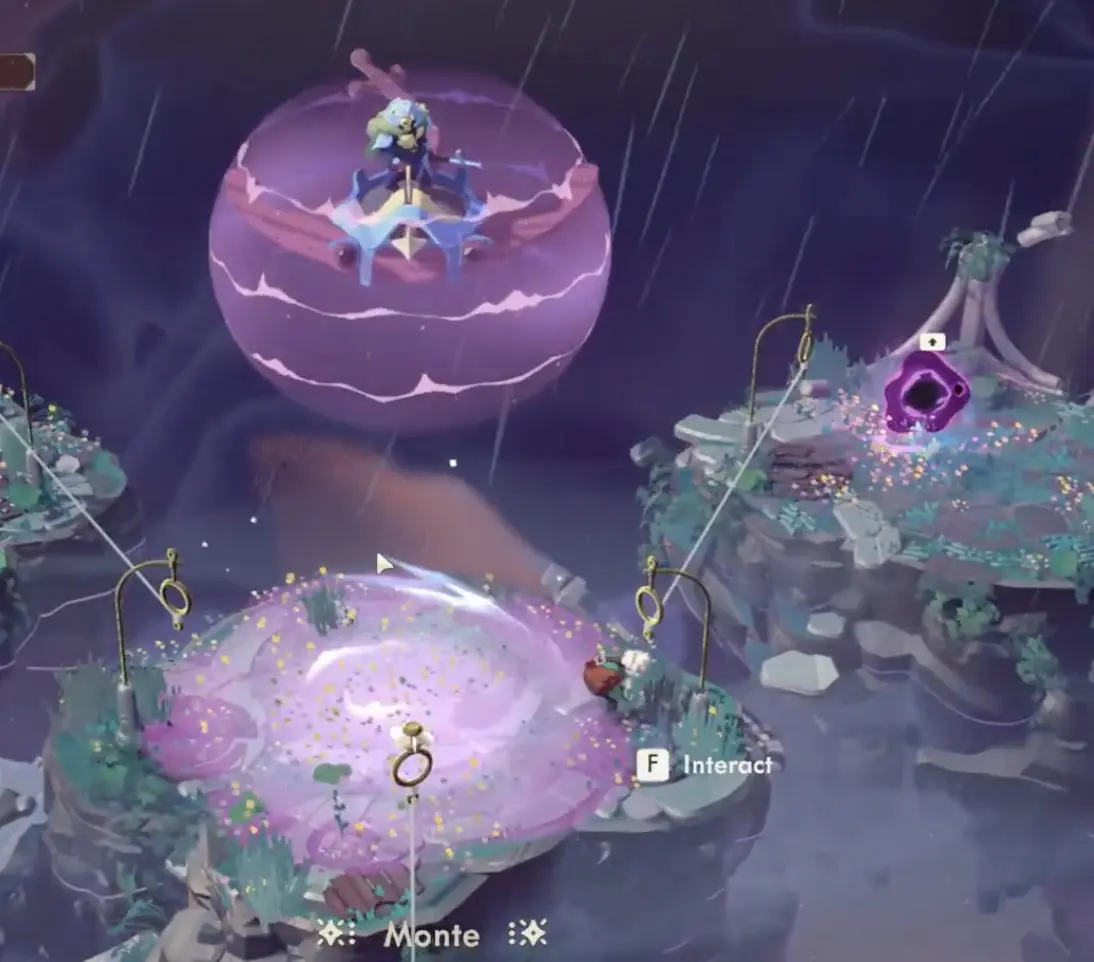
This was not a build failure.
More damage would not fix standing in the wrong part of the pattern.
The familiar boss was actually part of the trap. I remembered enough of the fight to feel comfortable, but not enough to immediately remember the one movement rule that mattered.
That is where Ultimate Challenges are useful beyond their rewards.
They expose which boss mechanics I actually learned and which ones I only survived once.
Healing Has a Different Value in a Chained-Boss Run
I am much less interested in finishing an early fight with a beautiful potion count than I am in reaching the final boss with enough recovery to absorb one mistake.
That changes when I drink.
Early chip damage does not always need to be healed immediately.
A boss pattern that I still do not understand can justify using one.
A dangerous section near the end of the route can justify using the last one.
The important part is that the potion is protecting the challenge clear, not a tidy inventory screen.
Curator taught me not to spend everything on the first checkpoint.
Tyke taught me that four potions can disappear quickly when I force bad openings.
Monte made the remaining healing valuable because the correct movement took priority over maintaining perfect damage uptime.
Those are three different reasons to lose health, which is why I do not use a fixed potion threshold for the whole mode.
When an Ultimate Challenge Beats Another Normal Run
The choice becomes easiest when I compare what the next thirty minutes can permanently change.
I take the challenge when:
- the friend quest is already available;
- its reward can add a permanent recipe or progression option;
- the next Vault target is still far away;
- I want concentrated boss practice without risking my normal relic haul;
- the shortened route lets me test a focused combat setup faster than a standard expedition.
I leave it for later when one shop shift or one normal run is likely to finish an important Vault milestone.
That is the split that keeps the two loops useful.
Normal expeditions build relic value, the shop, and the Endless Vault.
Ultimate Challenges take systems I already know, compress them around boss fights, and ask whether I can arrive at the last encounter with one build that still works and enough healing left to use it.