17 Quality Was the Point I Stopped Treating Every Relic the Same
Quality adds 5% value per point, so the real decision is where those points land. I feed strong relics, protect them from Burn and Overcharge, and stop before greed destroys the sale.
Updated:

Quick Answer
Every point of Relic Quality adds 5% to sale value.
That makes 20 Quality +100%, 28 Quality +140%, and 128 Quality +640%. I concentrate those gains on relics that are already worth protecting rather than spreading Quality evenly through the backpack.
Once Shock, Overcharge, or Burn puts the valuable relic itself at risk, I stop chasing another 5%.
The formula is the easy part.
1 Quality = +5% value.
The mistake is looking at that percentage without looking at the relic underneath it.
Twenty Quality on something cheap doubles a small number.
Twenty Quality on an expensive Rare, Epic, or Legendary relic doubles a much larger number.
That is why the best target in my backpack is rarely the relic with the lowest Quality.
It is the relic where the next Quality gain turns into the most Gold.
17 Quality Is Already an 85% Bonus
The first number that changed how I handled the backpack was 17.
Seventeen Quality means:
17 × 5% = +85%
At that point, a good relic has already accumulated enough extra value that a careless backpack interaction can erase a meaningful part of the run.
This also keeps rarity and Quality separate in my head.
Rarity affects the value I am starting with.
Quality increases that value.
So when two relics can receive the same +5, +10, or +20 Quality effect, I usually want it landing on the more expensive base item.
The Shop Screen Shows Exactly What 28 Quality Is Doing
The cleanest sale example I have is a relic at 28 Quality.
Twenty-eight points equals:
28 × 5% = +140%
The important part is how the numbers are separated.
I entered 700 Gold.
Quality supplied +140%.
Another active modifier supplied +40%.
The final value became 1,960 Gold.
So I do not rewrite my manual price to include Quality myself. I find the price I want to charge, and the game’s modifiers are applied around that value.
That is also why a large final sale number cannot be credited entirely to Quality. Shop bonuses, furniture and other effects can be working at the same time.
The Quality contribution itself stays predictable.
128 Quality Still Uses the Same Formula
The linear rule does not disappear when Quality gets extreme.
I had a relic reach 128 Quality.
That screen showed:
+640%
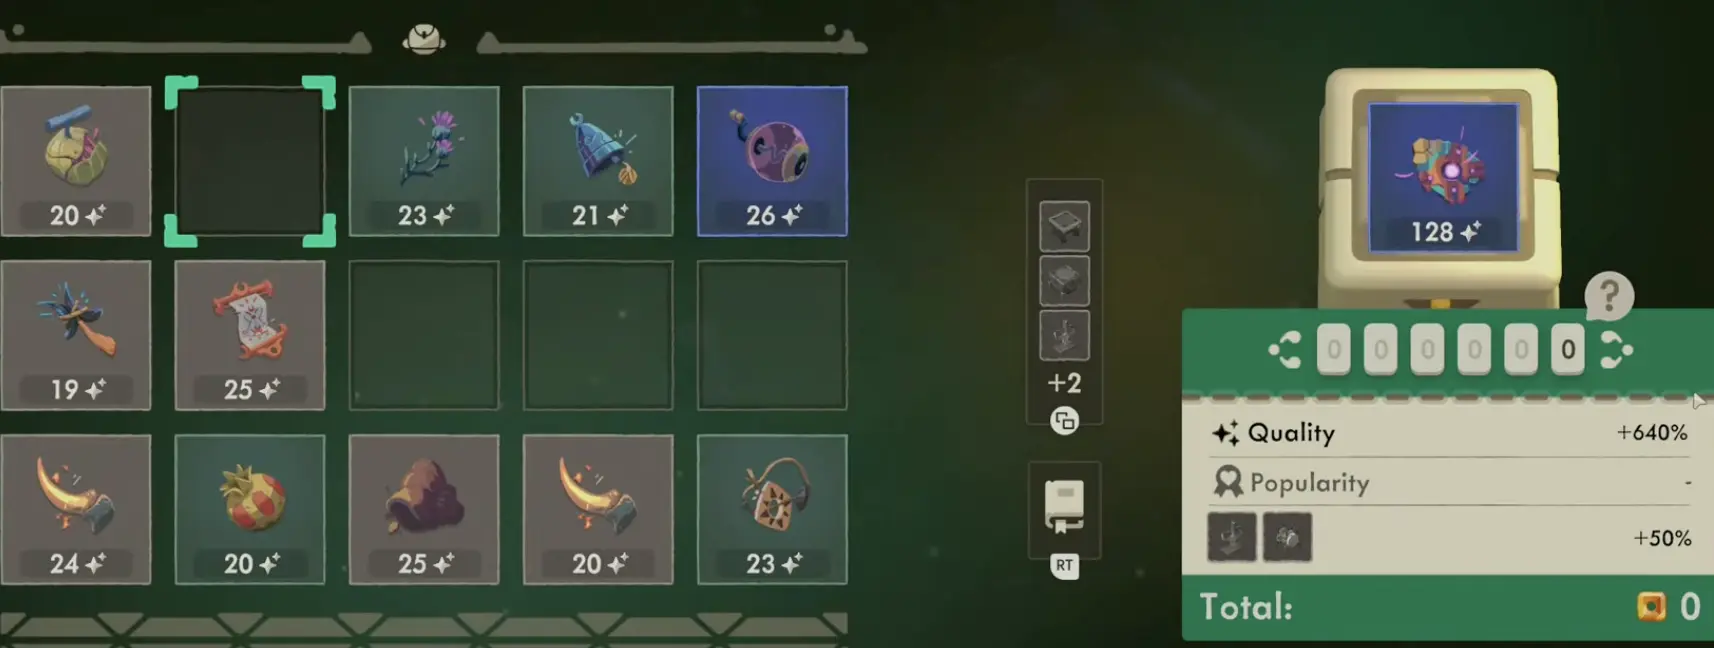
The math is still:
128 × 5% = 640%
There is no special high-Quality formula I need to learn.
What changes at numbers like this is the amount of value I am gambling if I trigger the wrong relic interaction.
A 128-Quality relic is no longer something I casually expose to an effect I have not checked.
The Daily Weapon Highlight Can Raise the Starting Quality of the Whole Run
Not all Quality comes from backpack manipulation.
One weapon is highlighted each day, and equipping that weapon grants higher-Quality relics.
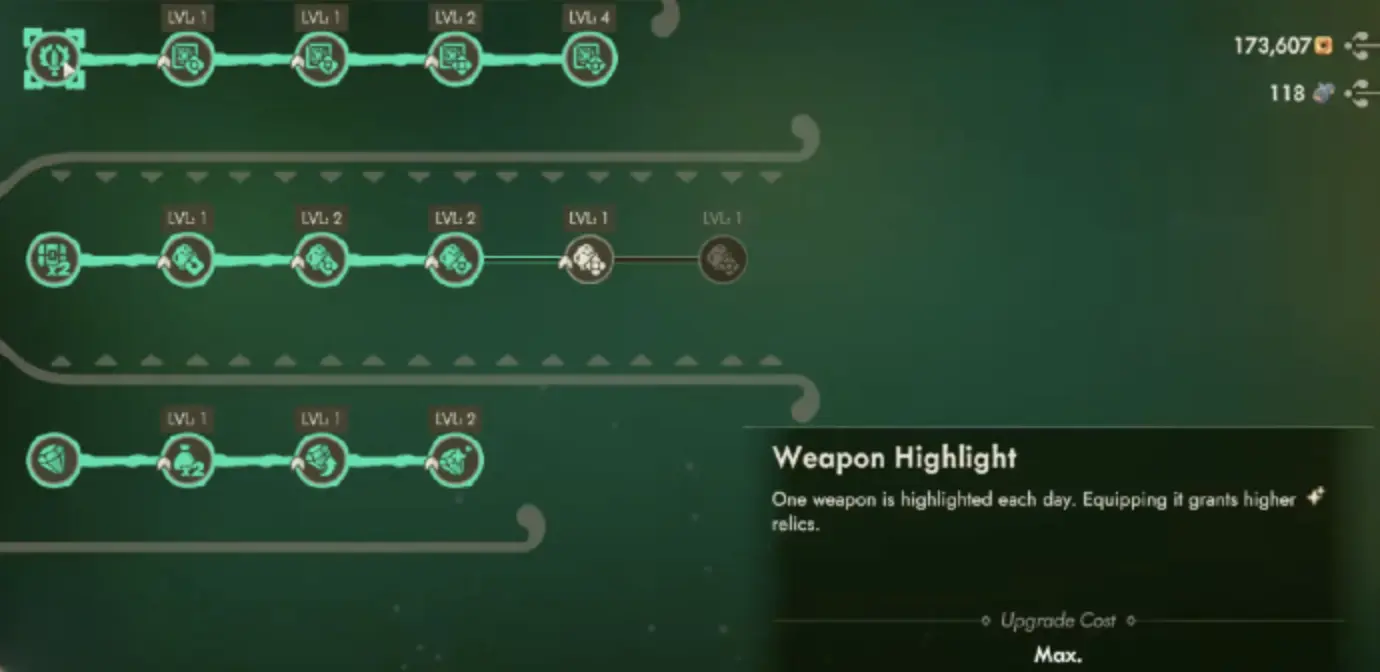
For a money-focused run, that can be more valuable than a small combat preference.
Higher starting Quality means I am improving an entire haul before any Shock, Burn, or other backpack chain happens.
I still need to survive the run.
If the highlighted weapon is so uncomfortable that I burn every potion early or fail to reach the good loot, the economic bonus has defeated itself.
When I need to compare the actual Sword, Spear, Gauntlet, and Great Sword mechanics, I make that choice in the Weapons guide.
Here, the attraction is straightforward: a weapon I can use comfortably enough can improve the Quality floor of the relics entering my backpack.
Gallery Is Where Quality Stops Being Passive
Gallery changed the way I thought about the stat because Shock lets relics affect one another.
A Shock can add Quality.
It can also create Overcharge.
And once Overcharge enters the backpack, blindly triggering the next effect becomes dangerous.
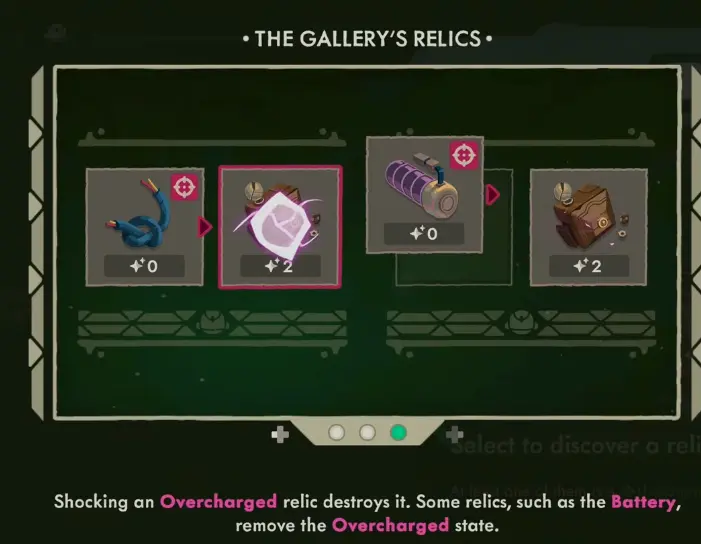
The risk is simple:
shocking an Overcharged relic can destroy it.
That means the best-looking Quality target can also become the item I most need to stop touching.
Before triggering another Shock, I look at where the effect points and what state the target is already in.
If the relic receiving the next interaction is the most valuable item in the bag, I want to know exactly what happens before confirming it.
Batteries Let Me Keep an Overcharged Chain Alive
Overcharge does not always mean I have to stop the entire setup.
Gallery Batteries gave me a way to remove that state and continue working with the relic afterward.
That creates better sequences than simply firing every Shock as soon as it becomes available.
Sometimes the useful order is:
build Quality → create Overcharge → use the Overcharged state for another effect → remove Overcharge → continue
The order matters because removing Overcharge too early can waste an effect that depended on it.
Waiting too long can put the relic one bad Shock away from disappearing.
This is where I spend more time reading the backpack than fighting.
The chain can be worth more than another combat room.
One Gallery Chain Added 20 Quality
A good example came from a sequence built around an Overcharged relic and an effect that could take 50% of the pointed relic’s Quality.
Instead of using each effect independently, I kept the valuable target in the right state until the larger transfer was ready.
The result was a 20-Quality gain.
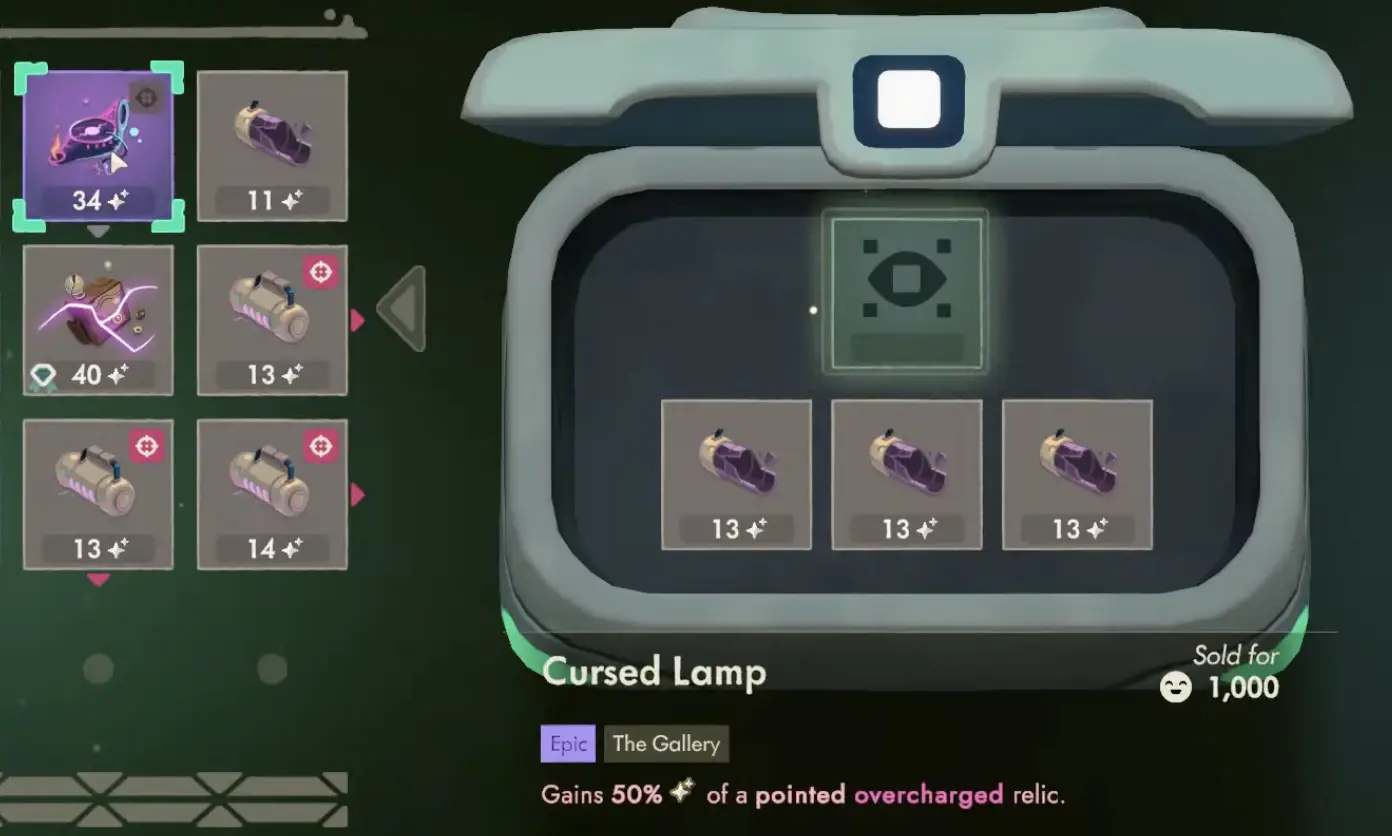
Twenty points is not a small refinement.
It is:
+100%
That is enough value for the sequence to justify planning the entire backpack around one target.
It also makes stopping harder.
After a relic has just gained another 100% in Quality value, the temptation is to push it one more time.
That is exactly when I become more conservative.
The next trigger is now gambling a more expensive item than the previous trigger was.
Burn Can Pay Without Consuming the Valuable Relic
Kalina creates a different version of the same problem.
Some relic effects want to Burn another relic.
If the target is valuable, destroying it just to trigger an effect can turn a profitable backpack into a bad trade.
Armor changes that.
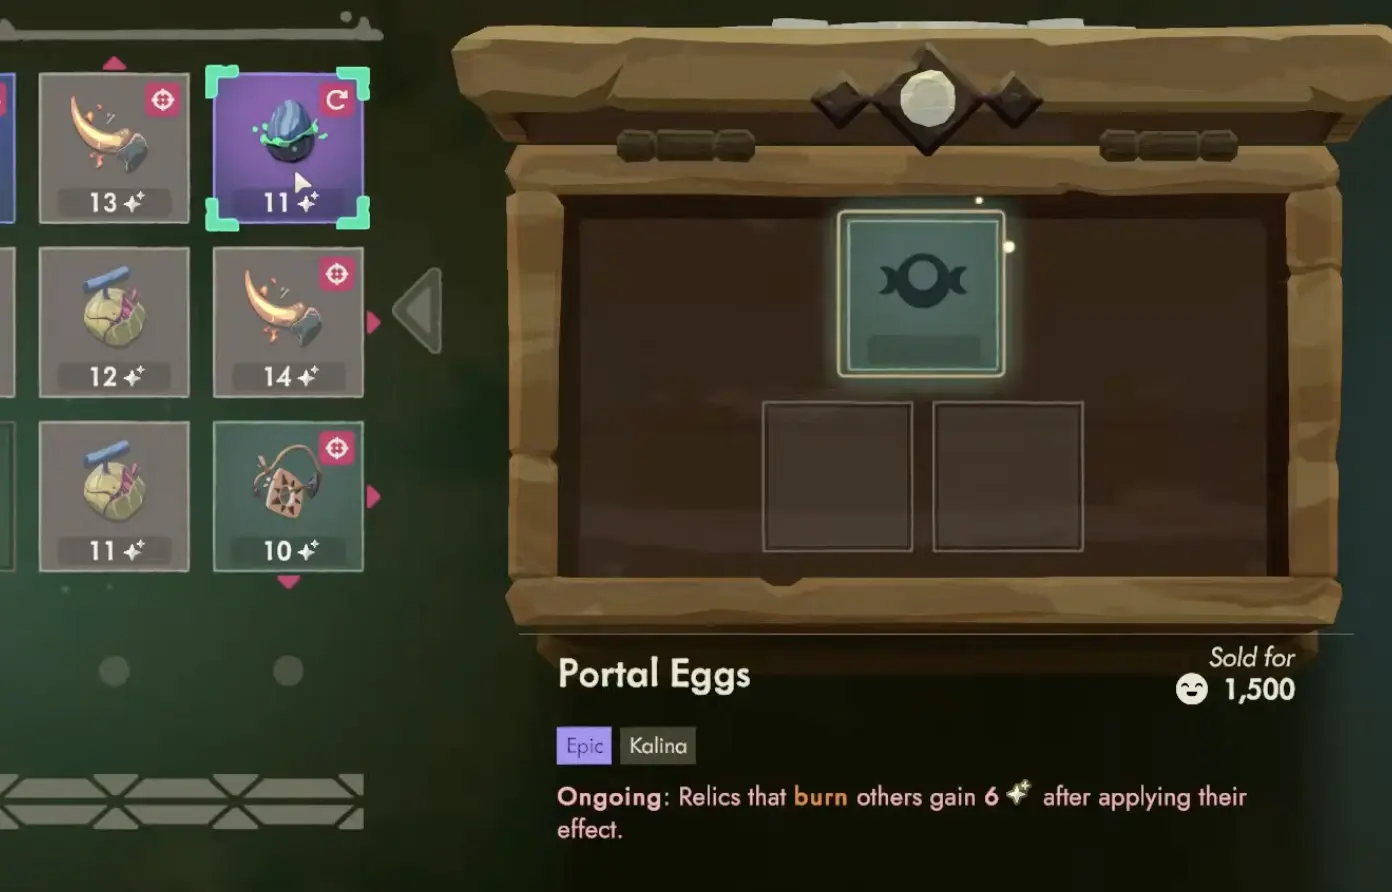
This gave me a better order:
protect the expensive target first → trigger Burn → lose the Armor instead of the relic
That is much more valuable than treating Burn as an automatic sacrifice.
A Quality setup does not have to end with the highest possible number.
Keeping the relic alive is part of the setup.
High Quality Makes Target Selection More Important, Not Less
A relic around 30 or 40 Quality can already carry a very large percentage bonus.
If another Shock becomes available, I do not automatically give it to the highest-Quality item.
I first ask what the effect does to that item.
If it is safe, concentrating more Quality on a valuable relic can be extremely profitable.
If the relic is already Overcharged, unprotected, or positioned where the next chain can destroy it, the mathematically best target can be the mechanically worst target.
That tension is what makes the system interesting.
The percentage alone keeps telling me to stack.
The backpack state tells me whether stacking is still safe.
250 Quality Is a Challenge Goal, Not My Normal Sale Target
There is an achievement for raising a relic to 250 Quality.
That is useful as proof that the system can be pushed far beyond ordinary sale numbers.
I do not use 250 as a standard target for normal runs.
At 5% per point, getting there means deliberately building an extreme Quality chain, and the relic has to survive every interaction along the way.
For ordinary Gold progression, a protected high-value relic at a much lower Quality can already be worth bringing home.
I would rather sell a successful 40-, 80-, or 128-Quality relic than destroy it because an achievement-scale number was still technically possible.
The Last 5% Is Often the Most Expensive One
Quality encourages greed because every successful trigger makes the next one look better.
The problem is that every successful trigger also makes the relic more valuable.
That reverses the risk as the chain grows.
Early on, losing a low-Quality relic is annoying.
Later, losing the relic can erase several successful interactions at once.
My stopping point usually arrives when one of three things becomes true:
- the next effect can destroy the relic I care about most;
- the remaining Quality gains can only land on weak filler;
- arranging another chain is making the run itself less likely to get home safely.
At that point, I am finished.
The 5%-per-point formula never changes.
What changes is how much I am putting at risk for the next five.