How to Get the Toe Biter Buggy in Grounded 2
Unlock the Toe Biter Buggy with the Gnarly Bark Aquatic Optical Disc, get a Toe Biter Egg, gather the Hatchery materials, and hatch it in 12 hours.
Updated:
Quick Answer
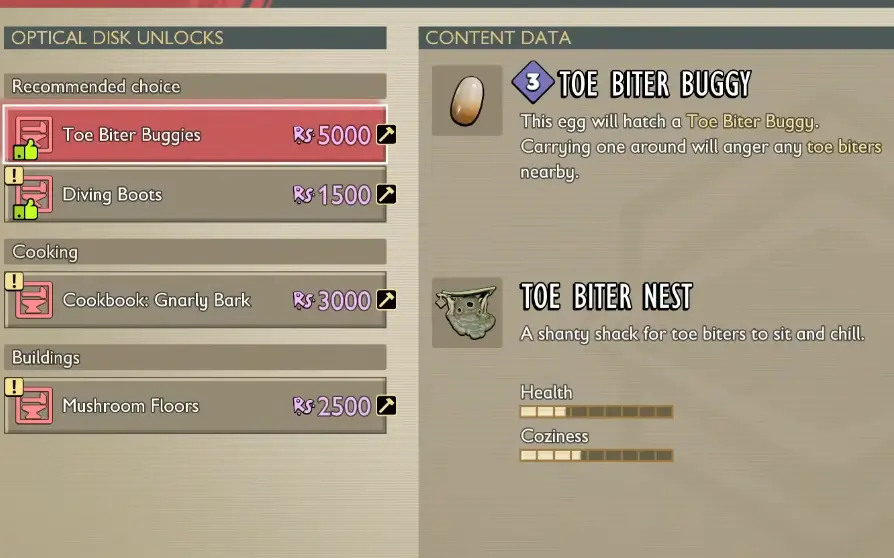
To get the Toe Biter Buggy in Grounded 2, I first return the Gnarly Bark Aquatic Optical Disc, then buy the Toe Biter Buggy unlock from the Science Shop for 5,000 Raw Science.
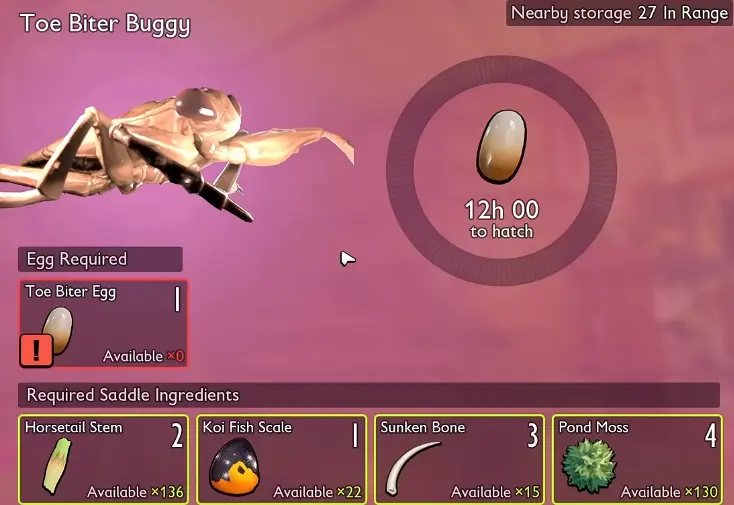
I also need a Toe Biter Egg and these Hatchery materials:
- 2 Horsetail Stem
- 1 Koi Fish Scale
- 3 Sunken Bone
- 4 Pond Moss
Once I load everything into the Hatchery, the Toe Biter takes 12 in-game hours to hatch.
If I still need the Egg, I get that separately from Papa Toe Biter before finishing the Hatchery materials.
The Toe Biter Buggy has more steps than most Buggy unlocks because finding the recipe is only the beginning.
I need the Optical Disc, enough Raw Science, an Egg, several Pond materials and the correct tool tiers before the Hatchery can actually start.
Once those gates are cleared, the payoff is a Buggy that is especially useful underwater.
How to Unlock the Toe Biter Buggy
The first requirement is the:
Gnarly Bark Aquatic Optical Disc
After I return that Disc, the Toe Biter Buggy appears in the Science Shop.
If the Buggy recipe is still missing, I do not start farming Eggs or Hatchery materials yet.
I finish the Aquatic Optical Disc progression first.
The Toe Biter Buggy Costs 5,000 Raw Science
Buying the Buggy unlock costs:
5,000 Raw Science
That is enough that I usually check whether I can actually complete the Hatchery recipe before spending it.
If I already have access to Papa Toe Biter, the necessary Tier 3 tools and the deeper Pond materials, I buy the unlock.
If several of those requirements are still far away, I keep the Raw Science until the rest of the route is closer.
There is one progression purchase I prioritize above the Buggy when resources are tight.
If the Diving Deck is still blocking me, I finish the Diving Suit first.
The Diving Suit opens the required progression gate.
The Toe Biter makes repeated underwater trips faster, but it is not required to open that door.
Get a Toe Biter Egg
The Hatchery needs:
1 Toe Biter Egg
I get the Egg from the Papa Toe Biter route inside Gnarly Bark.
I treat that as a separate trip because reaching the Egg involves its own location and boss sequence.
For the exact route to Papa Toe Biter, the fight and where I collect the Egg, I use the Grounded 2 Toe Biter Egg Guide.
Once I have one Egg safely back at base, I stop thinking about the boss and finish the remaining Hatchery materials.
I do not need to farm several Eggs just to get my first Buggy.
Toe Biter Buggy Hatchery Recipe
The complete Hatchery recipe is:
- 1 Toe Biter Egg
- 2 Horsetail Stem
- 1 Koi Fish Scale
- 3 Sunken Bone
- 4 Pond Moss
I use this list before starting the final resource run.
The quantities are small, but some ingredients are gated by deeper Pond access or higher-tier tools.
That is where most of the actual preparation happens.
Get 2 Horsetail Stem
The Buggy needs:
2 Horsetail Stem
I collect these before the deeper material run because Horsetail has a reliable farming area and does not need to be mixed into the Sunken Bone and Pond Moss trip.
If I need more, I use the Horsetail Stem Guide.
Two stems are enough for the Buggy Hatchery recipe.
I only collect extra if another current project also needs Horsetail.
Get 1 Koi Fish Scale
The Hatchery needs:
1 Koi Fish Scale
Because the quantity is only one, I check whether I already picked up a scale during normal underwater progression before making a separate trip.
I can encounter useful scales along Pond routes and around dead Ominent workers, so I do not automatically turn this ingredient into another large farming job.
If I already have one in storage, that requirement is finished.
Get 3 Sunken Bone
The Buggy requires:
3 Sunken Bone
Before going after them, I check my tool progression.
The important gathering requirement is the:
Tier 3 Omni Shovel
If I reach Sunken Bone but cannot collect it, I do not keep searching for a different deposit.
I upgrade the Shovel first.
This is a tool gate, not a location problem.
Get 4 Pond Moss
The final larger Hatchery ingredient is:
4 Pond Moss
For my original collection run, I make sure I have the:
Tier 3 Omni Clippers
If I can see Pond Moss but cannot harvest it, I check the Clippers before swimming farther into the Pond.
Once the Buggy exists, later Pond Moss farming becomes much easier because the Toe Biter itself can help with underwater cutting.
For the first Buggy, though, I still have to clear the normal resource gate.
Check the Tool Gates Before the Final Pond Run
The two tool checks I make are:
- Sunken Bone → Tier 3 Omni Shovel
- Pond Moss → Tier 3 Omni Clippers
This matters because having the Egg can make the project look almost finished.
It is not finished if I cannot harvest the remaining materials.
Before going deep, I also leave enough inventory space for the items I actually intend to bring home.
Once I have:
- 1 Toe Biter Egg;
- 2 Horsetail Stem;
- 1 Koi Fish Scale;
- 3 Sunken Bone;
- 4 Pond Moss;
I stop farming and return to the Hatchery.
How Long Does the Toe Biter Buggy Take to Hatch?
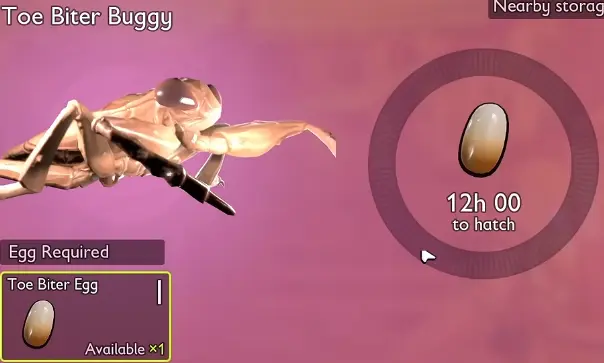
Once the Egg and all materials are loaded, incubation takes:
12 in-game hours
At this point, the progression work is finished.
I use the waiting time for something else instead of standing beside the Hatchery.
Usually I:
- repair armor and weapons;
- restock healing;
- clear inventory;
- organize Pond materials;
- prepare for the next underwater trip.
That way the Buggy is ready to be useful as soon as it hatches.
Do I Need the Toe Biter Nest Before Hatching It?
No.
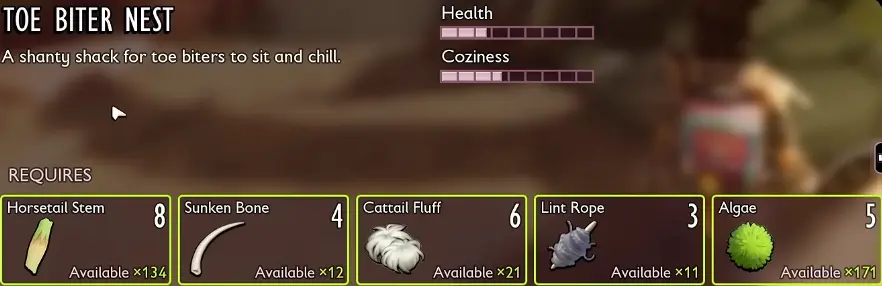
The Toe Biter Nest is a separate home structure.
It is not part of the Hatchery requirement.
The Nest uses:
- 8 Horsetail Stem
- 4 Sunken Bone
- 6 Cattail Fluff
- 3 Lint Rope
- 5 Algae
I hatch the Buggy first.
I build its permanent home afterward if I want one.
There is no reason to let the larger Nest material list delay the mount itself.
What Makes the Toe Biter Buggy Useful?
The Toe Biter works on land, but underwater travel is where I get most of its value.
It can:
- travel on land;
- swim through the Pond;
- fight beside me;
- help with underwater harvesting;
- travel into the Abyss.
Its normal combat sequence has three hits, and the final hit can apply Venom and Chill.
It also has a Sweep attack that helps when several creatures are crowding around me.
Those combat tools are useful.
The underwater mobility is why I keep bringing it back out.
Toe Biter Buggy Underwater Travel
Repeated Skunk Pond routes become much faster once I have the Toe Biter.
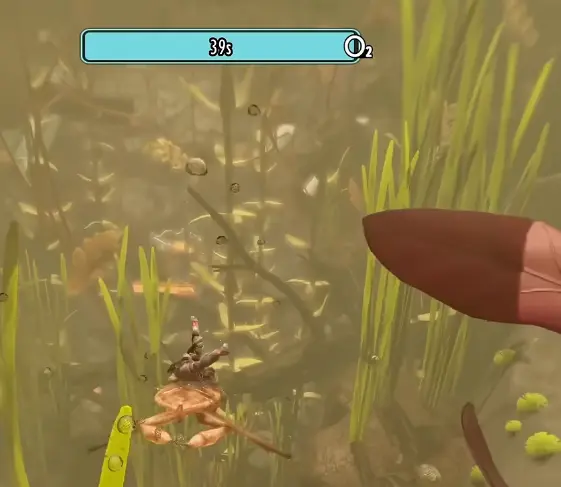
I use it when I am repeatedly returning for:
- deep-water resources;
- underwater landmarks;
- crafting materials;
- Abyss routes.
That is also when the 5,000 Raw Science cost starts making more sense.
For one early Pond trip, I can manage without it.
For repeated underwater progression, the time saved compounds quickly.
The Toe Biter Buggy Does Not Give Extra Oxygen
The Buggy can swim.
That does not mean the rider stops needing oxygen.
My character’s breathing timer still matters.
I do not use the Toe Biter as a replacement for:
- the Gill Tube;
- the Diving Suit;
- underwater consumables;
- other breathing preparation.
The mount gets me through the route faster.
It does not make a deep route survivable by itself.
The Toe Biter Can Harvest Underwater Resources
The Buggy can also perform underwater cutting jobs.
I use it on resources such as:
- Eelgrass
- Purple Jelly Fungus
- Pond Moss
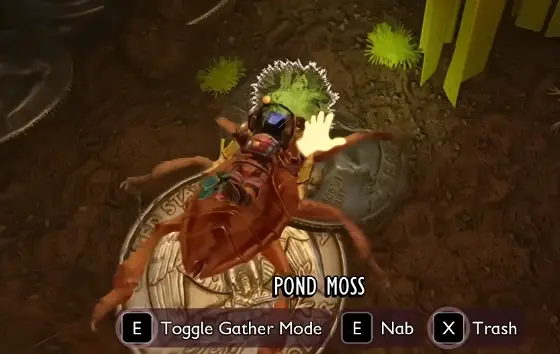
That makes the mount useful beyond simple transportation.
A repeat resource trip can combine movement, combat support and gathering without forcing me to approach every underwater material exactly as I did before owning the Buggy.
Why Is My Toe Biter Buggy Sinking?
If the Buggy suddenly hugs the bottom instead of floating normally, I check whether I am wearing:
Diving Boots
The Diving Boots counter buoyancy.
That effect also changes how the Toe Biter behaves while I am riding it.
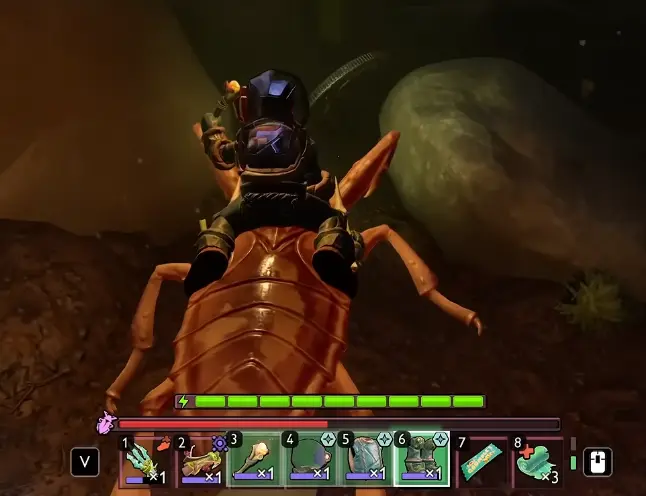
If I want normal underwater movement, I remove the Boots.
If I deliberately want to stay close to the bottom, the weighted behavior can actually be useful.
I do not reload the game or replace the Buggy before checking my equipment.
Can the Toe Biter Buggy Go Into the Abyss?
Yes.
I can bring the Toe Biter into the Abyss.
That gives me faster movement, combat help and gathering support on later deep routes.
The Buggy can still be affected by environmental pressure such as Chill, so I do not treat it as an invulnerable underwater vehicle.
More importantly, I do not wait for the Buggy before progressing if the Diving Suit is already complete and the route is open.
The Diving Suit is the gate.
The Toe Biter is an upgrade to the trips I make afterward.
For the route beyond the Diving Deck, I use the Into the Abyss Guide.
When the Toe Biter Buggy Is Worth Getting
The Buggy becomes most valuable when the Pond changes from somewhere I am visiting once into somewhere I keep revisiting.
I prioritize it when I am repeatedly:
- crossing Skunk Pond;
- farming deep-water resources;
- returning to the Abyss;
- gathering Pond Moss or other underwater materials.
I wait when:
- I still cannot get the Egg;
- the Hatchery materials are inaccessible;
- the Tier 3 tools are missing;
- the Diving Suit is still competing for progression resources.
Once those blockers are gone, the route is straightforward:
Gnarly Bark Aquatic Optical Disc
→ buy the 5,000 Raw Science unlock
→ get 1 Toe Biter Egg
→ gather 2 Horsetail + 1 Koi Fish Scale + 3 Sunken Bone + 4 Pond Moss
→ start the Hatchery
→ wait 12 in-game hours
→ use the Toe Biter for repeat underwater progression