ReStory Device Repair Index: What Trips Me Up on Each Device
Find the ReStory device on your bench and check its specific teardown, hidden part, screw, cleaning, soldering, or reassembly trap before guessing.
Updated:
Quick Answer
I use this page when I already know which ReStory device is causing trouble. The biggest model-specific traps in my runs are: fully disassemble the Nony PMP before using its 13-part list; salvage the correct Atari CX40 button and cord; secure and rotate the Autorolla Razor before blaming the next part; check the Brick Game screen from the back; finish inspecting the Simsons M65 before ordering; use the Nony PlayMachine 10-part list; clean and solder the Sony PlayStation before replacing good parts; and stop searching for normal phone-style screws on the Paloid Camera.
I use the same basic repair controls across ReStory.
The devices themselves are not the same.
One hides dirt on the reverse side.
Another looks completely disassembled when there is still another layer.
Another refuses the correct part until I tighten one screw.
A camera can make me search for a normal screw pattern that is not useful at all.
That is what this page is for.
If I already know the model on my bench, I want the shortest reminder of:
what is unusual about this exact device?
I do not use this page for the general repair loop.
That belongs in the ReStory Repair Guide.
And if my exact problem is:
the correct part will not attach
I use Can’t Reassemble a Device?.
Quick Device Lookup
| Device | What I Check First | Main Trap |
|---|---|---|
| Hashimoto’s Phone | Flip removed parts and inspect both faces | Hidden dirt on the reverse side |
| Atari CX40 | Decide which joystick I am actually saving | Cleaning or rebuilding donor parts I do not need |
| Flashlight | Follow the donor-device route | Treating it like a normal direct-parts repair |
| Nony PMP | Finish the teardown | Rebuilding before the full 13-part list appears |
| Autorolla Razor | Battery, Antenna, screws and camera angle | Correct part appears not to fit |
| Xi Box Controller | Keep the short screw sequence clean | Overthinking a relatively simple rebuild |
| Brick Game | Screen and Control Board | Missing the screen from the current viewing side |
| Simsons M65 | Inspect every layer before shopping | Long component chain hides the last missing piece |
| Nony PlayMachine | Keep the 10-part list visible | Losing track of frame, board, memory, cable and drive layers |
| Sony PlayStation | Check dirt before replacing parts, then inspect soldering | A repair can be cleaning + board work rather than a parts problem |
| Paloid Camera | Stop expecting normal phone-style screws | Unusual teardown and many internal pieces |
| Guitar Legend Controller | Cord, panels and screw-heavy rebuild | Missing a small part after a long assembly |
| TV | Account for the Camera Tube and internal wiring | Story progression waits for the repair |
If I know the device name already, I use browser Find and jump directly to it.
Hashimoto’s Phone — Flip Parts Before Calling Them Clean
The first phone is mechanically simple compared with later devices.
Its important lesson is visibility.
I remove the shell, screws, battery, frame, buttons, speaker and other internal pieces.
Some of them look clean.
Then I flip them.
They are not.
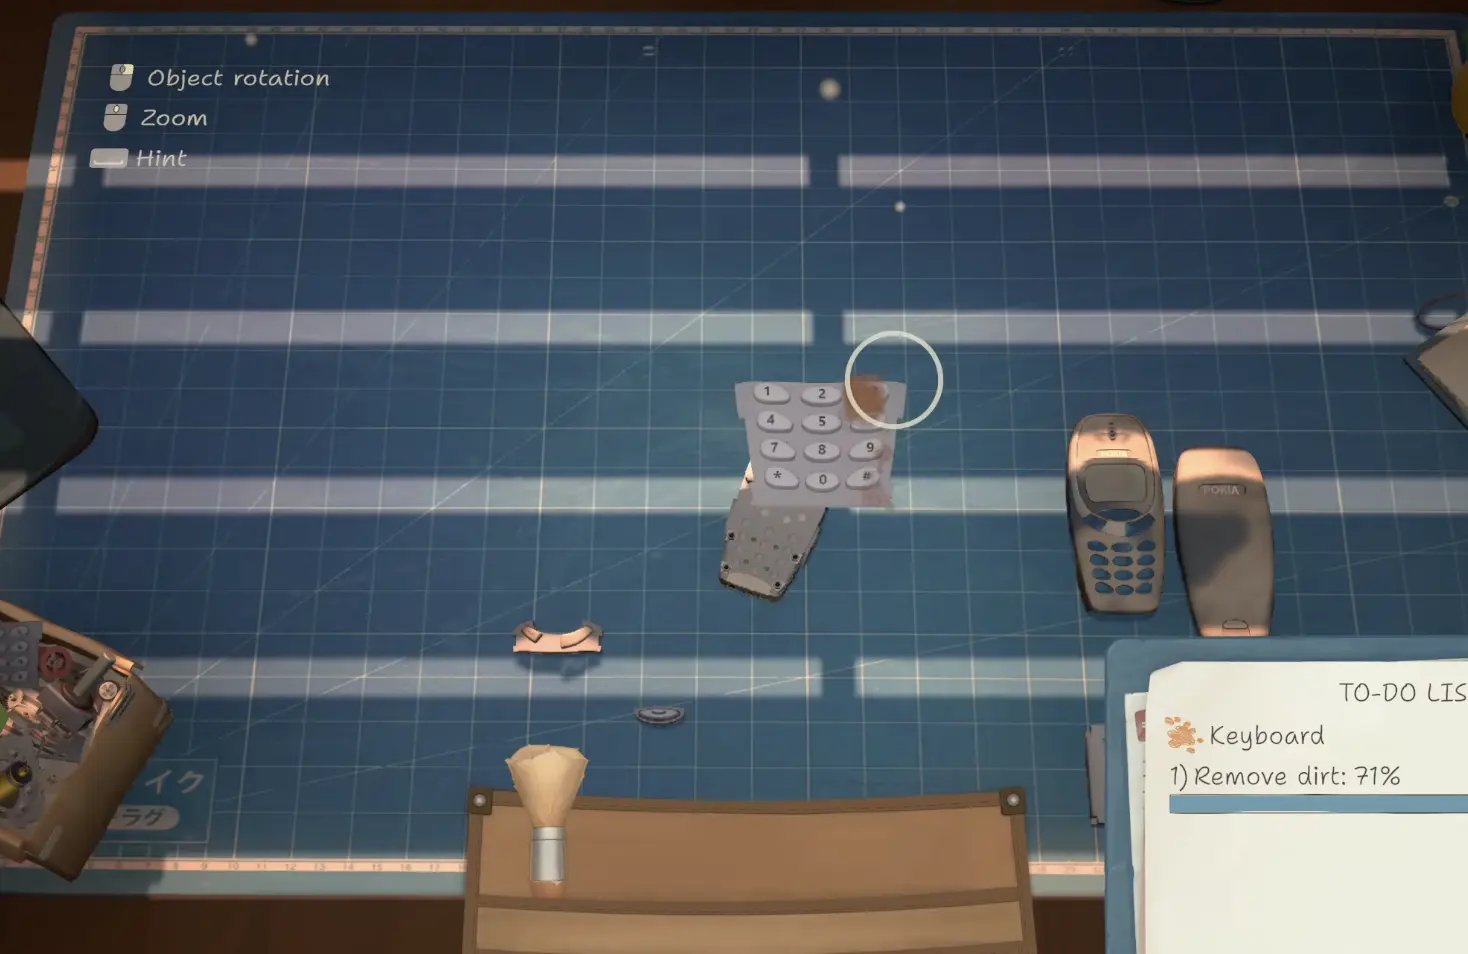
So my model-specific check is:
remove → rotate → inspect both faces → clean → rebuild
If the first phone is almost clean but the order still will not finish, I inspect the reverse sides before searching for a replacement component.
That habit carries into almost every later device.
Atari CX40 — I Pick One Joystick to Save
The Atari CX40 is one of the clearest donor repairs.
I have two damaged joysticks.
I do not need to restore both.
I choose which one is becoming the finished device.
Then I use the other for the working components I need.
In my repair, the important failures included:
Action Button
and:
Cord
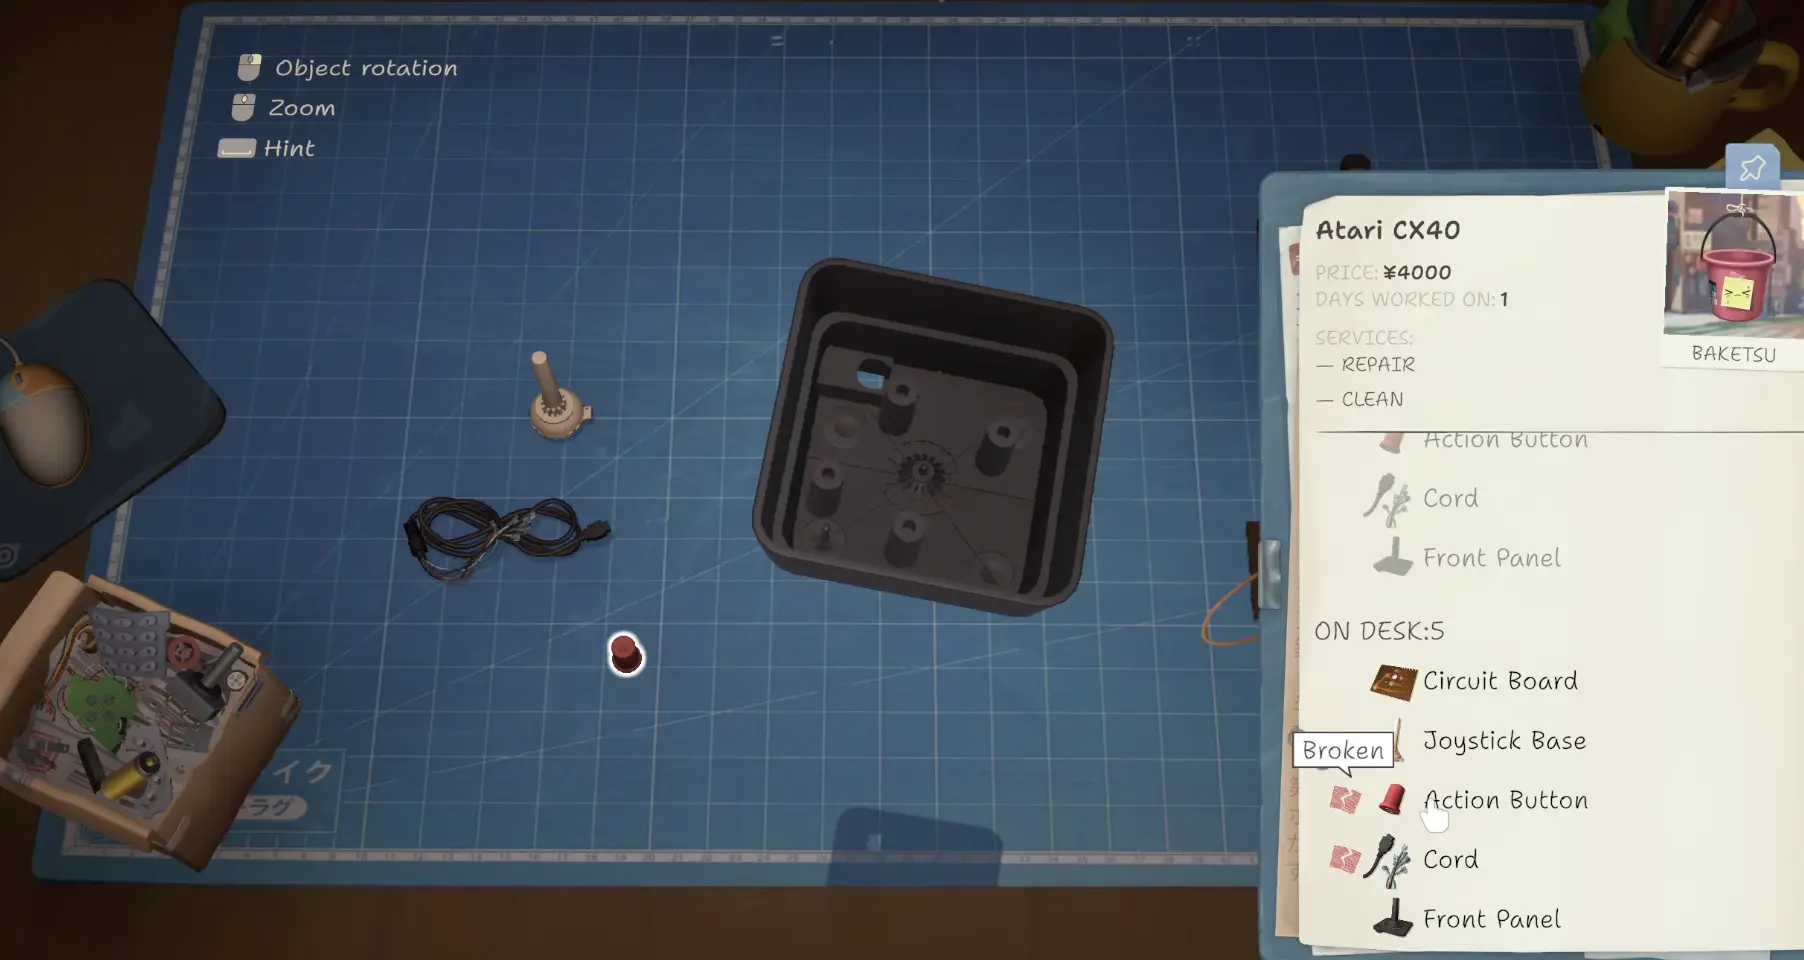
That changes how I handle the donor.
I do not clean every component just because I can.
If I already know a piece will never go into the repaired joystick, polishing it does not help the repair.
I take the usable parts I need.
I keep useful leftovers.
I move on.
I Check Which Copy of the Part I Picked Up
The other CX40 trap is condition.
I can have:
two Action Buttons
or:
two Cords
with one good and one broken.
The component name can be correct while the actual copy is wrong.
If the game warns that I installed a broken component, I check the part I grabbed before questioning the entire assembly order.
Flashlight — I Follow the Donor Route
The flashlight changed one of my early assumptions.
I was used to thinking:
broken component → Parts supplier → buy replacement
The flashlight repair instead points me toward a donor device.
That means I treat the donor as part of the repair route rather than an optional money strategy.
Once I open the donor, I identify the useful internals.
My component check included pieces such as:
- Circuit Board;
- Bulb;
- Cup.
I transfer the working components into the flashlight I actually want to finish.
The device-specific lesson is:
do not spend time searching the normal supplier route when the job itself is steering me toward a donor.
The broader question of whether a normal repair should use donor parts or direct purchases belongs in the Marketplace Guide.
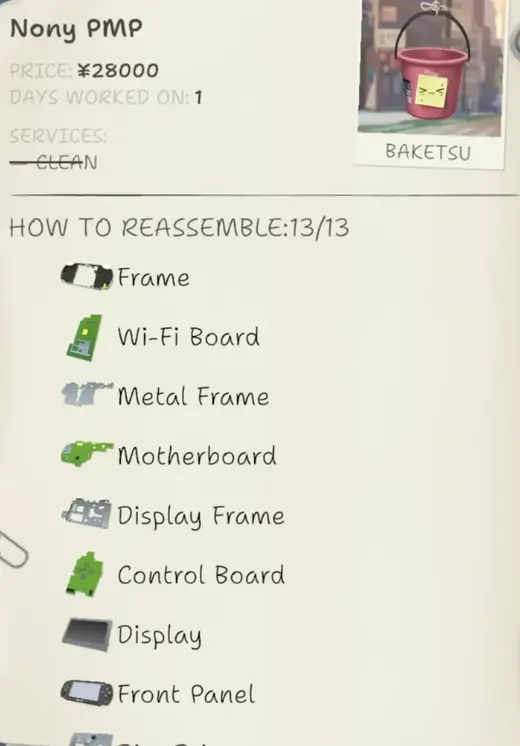
Nony PMP — Fully Disassemble It Before Rebuilding
The Nony PMP caused one of my longest genuine repair stalls.
The confusing thing is that it looks ready to rebuild before it actually is.
I already had many parts sitting on the table.
I started trying to put them back.
The sequence did not make sense.
The problem was:
I had not finished the teardown.
Once the PMP was fully disassembled, the notebook finally showed:
HOW TO REASSEMBLE: 13/13
The visible sequence includes layers such as:
- Frame;
- Wi-Fi Board;
- Metal Frame;
- Motherboard;
- Display Frame;
- Control Board;
- Display;
- Front Panel;
followed by the remaining outer pieces.
The important thing is not memorizing all 13.
I keep the notebook visible and work through it.
If the PMP List Looks Wrong, I Keep Disassembling
This is the device-specific signal I care about.
If the PMP sequence seems impossible, I ask:
Did I actually reach the complete list?
If not, I rotate the device and inspect for another:
- screw;
- frame;
- board;
- casing layer.
I do not start buying parts simply because the half-finished rebuild looks impossible.
Autorolla Razor — Check the Screws Before the Next Part
The Autorolla Razor has caused several different stalls for me.
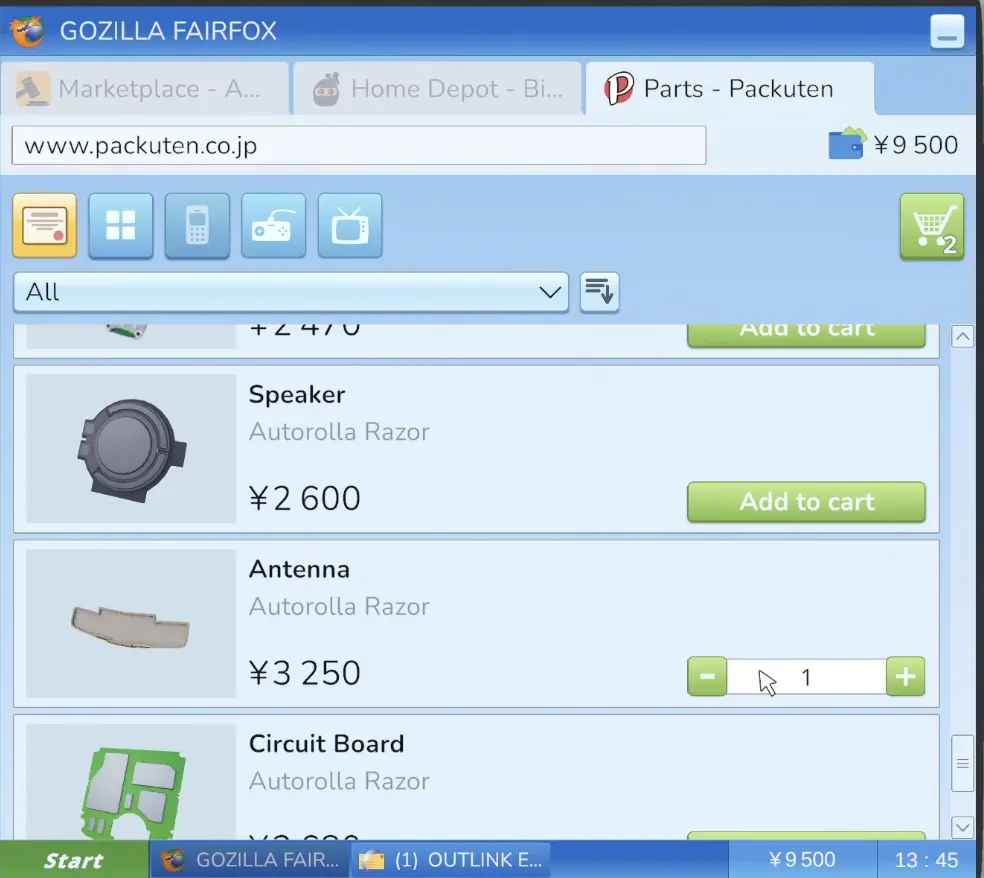
One repair had straightforward missing parts:
Battery
and:
Antenna
When that is the complete problem, I can solve it directly.
The more confusing Razor problem happens during reassembly.
I place one layer correctly.
Then the next component refuses to attach.
The missing step is:
secure the previous layer with its screws
Once I tighten it, later pieces become valid.
The Correct Razor Part Can Also Look Wrong From One Angle
I hit another false failure around the display/frame area.
The correct component would not attach.
Changing the orientation fixed it.
So my Razor-specific reminder is:
place → check screws → secure → try next piece → rotate before blaming the part
If multiple devices start giving me this exact symptom, I move to the dedicated reassembly troubleshooting guide.
Xi Box Controller — I Keep This One Simple
The Xi Box Controller became one of my easier repeat repairs.
Compared with the PMP or larger console builds, the screw structure is less intimidating.
Once I know the controller, familiarity does most of the work.
I do not turn it into a giant teardown puzzle.
I open it.
Diagnose the broken or dirty components.
Replace what is actually needed.
Then rebuild through the short sequence.
This is a good example of why I do not treat every new device as equally difficult.
A model becomes dramatically faster once I stop having to rediscover the layout.
Brick Game — Check the Screen From the Back
Brick Game looks simple enough that I can get careless.
That is the trap.
During one repair I thought the rebuild still needed something.
The missing component was the:
Screen
I had not noticed it properly from the side I was viewing.
Once I checked the back, the problem became obvious.
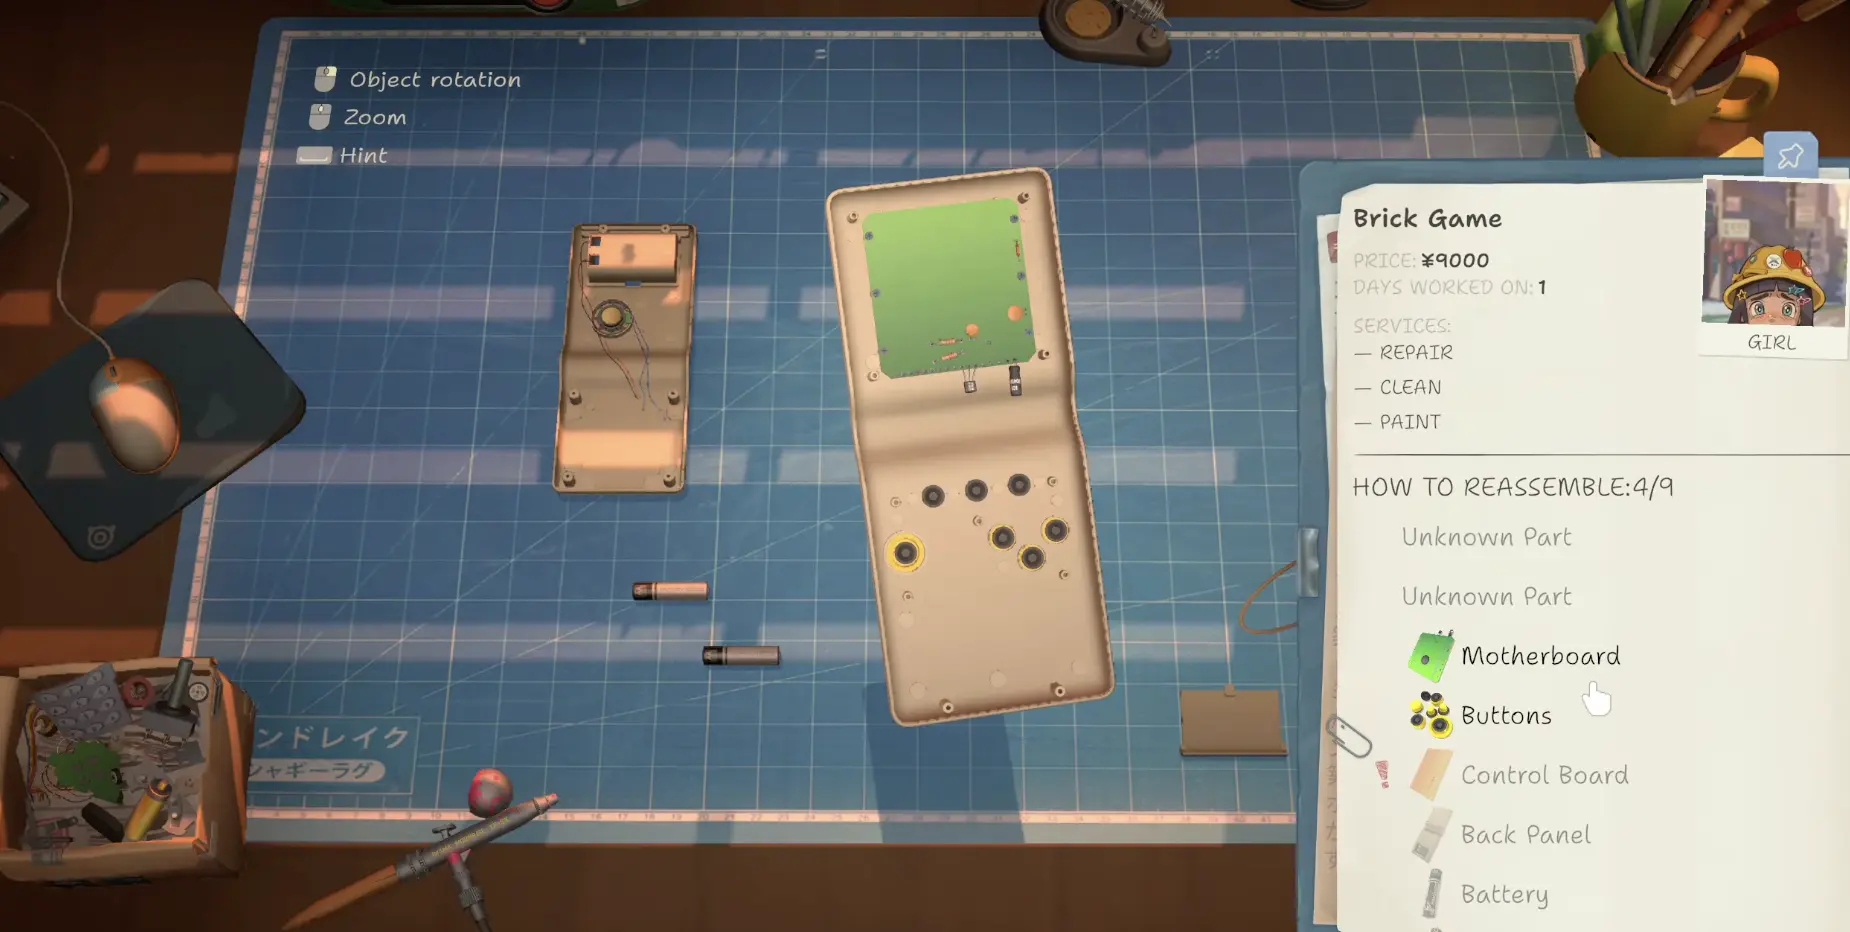
Another repair specifically came down to:
Control Board + Screen
So those are the first two pieces I remember when a Brick Game appears almost complete but still feels wrong.
Familiarity Eventually Makes Brick Game Very Fast
Once the device layout became automatic for me, Brick Game also became one of my preferred competition devices.
I later completed one timed assembly in about:
19 seconds
That number is not a repair requirement.
It just shows how much faster this model becomes once the normal part order is familiar.
The actual timed progression belongs in the Assembly Competition Guide.
Simsons M65 — Inspect Everything Before Ordering
The Simsons M65 is not difficult because of one bizarre mechanic.
It is difficult because there are enough components for me to overlook one.
I have worked through pieces including:
- Screen;
- Metal Frame;
- Keyboard;
- Joystick;
- Front Panel;
- Frame;
- Camera;
- Camera Frame;
- Back Panel;
- Battery;
- Battery Cover.
And after working through that long chain, the part I still needed was the:
Bumper
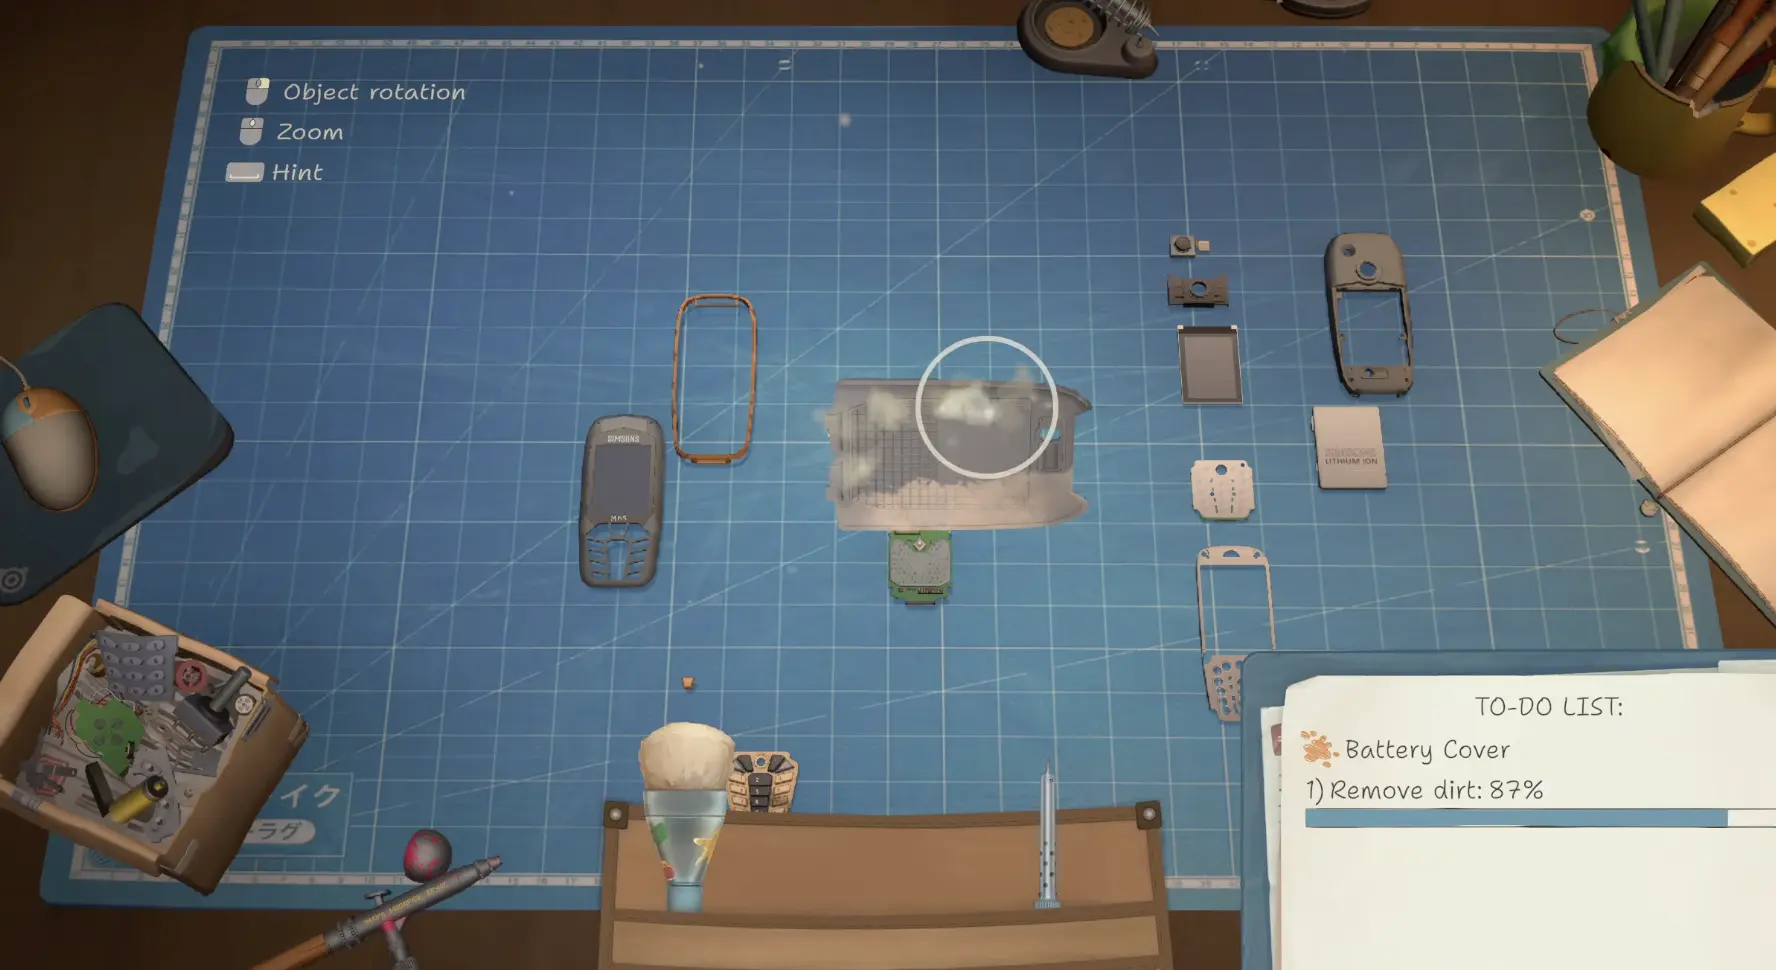
That makes my M65 rule simple:
finish the whole inspection first
then:
make one parts order
I do not want:
part → store → return → second missing part → store again.
This is one of the best devices for teaching me the difference between a quick repair and an incomplete diagnosis.
Nony PlayMachine — Keep the 10-Part List Open
The Nony PlayMachine is one of the larger console-style rebuilds I have handled.
The notebook shows:
HOW TO REASSEMBLE: 10/10
and includes components such as:
- Back Panel;
- Bottom Frame;
- Motherboard;
- Frame;
- Memory Slots;
- Power Card;
- Cable;
- Disc Drive.
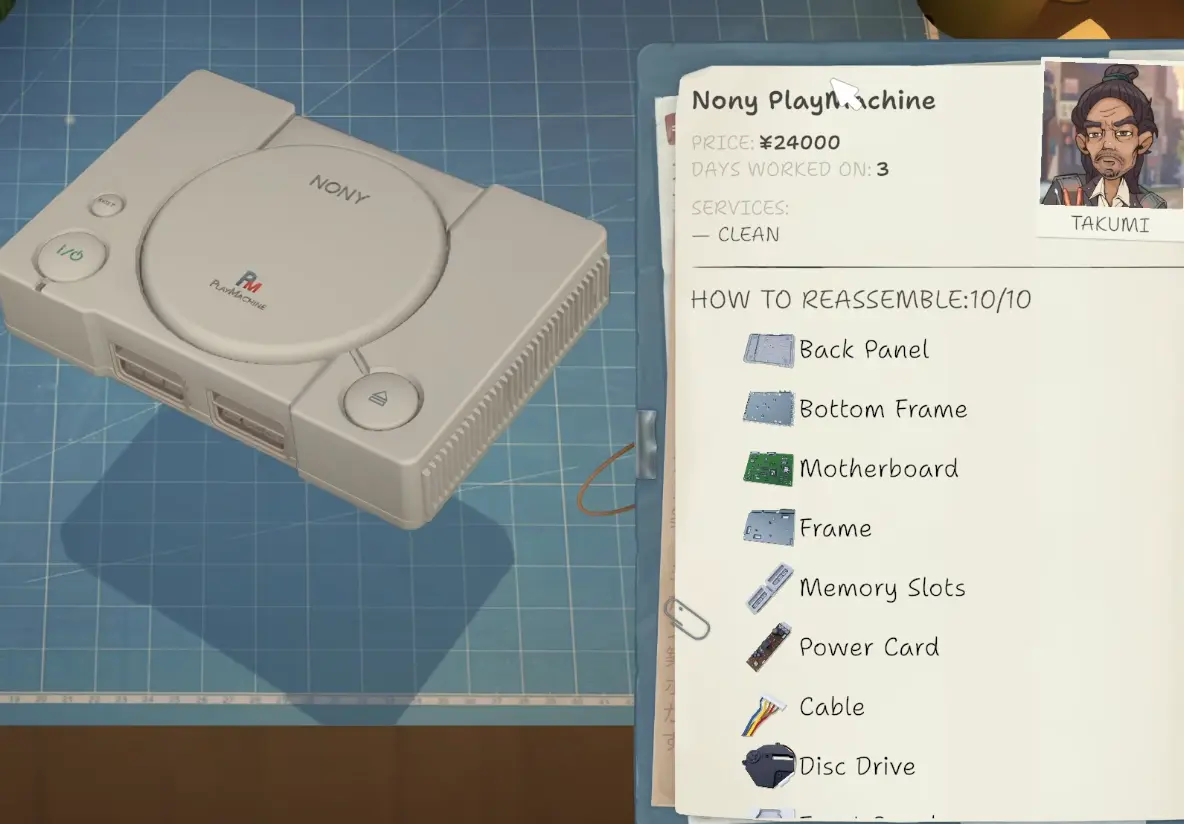
The difficulty is layer tracking.
Several internal components sit close together in the rebuild.
If I think I have unscrewed everything but the next layer will not move, I rotate the console and check the currently interactive section.
I do not switch to random parts.
The notebook is more reliable than my memory.
Sony PlayStation — Check Dirt and Soldering Before Buying Parts
The Sony PlayStation gave me a different kind of repair.
At first glance I expected to find obvious replacement needs.
Instead, much of the hardware looked usable.
What I did find was:
dirt
and:
board work that needed soldering
So before turning the repair into a parts-shopping problem, I clean the dirty areas and inspect the electronics.
In that run I cleaned the dirty components, soldered the affected points, then rebuilt the console.
The repair worked without me replacing every component that looked suspicious.
That gives me a useful PlayStation rule:
clean first → verify soldering problems → replace only what is actually broken
This is different from a device where the game clearly marks several components as dead.
A dirty console with a repairable board should not automatically become a large parts order.
Paloid Camera — Stop Looking for Normal Phone Screws
The Paloid Camera is one of the strangest devices in my current repair set.
My first mistake was expecting it to behave like another phone or console.
I kept wondering:
Where are the normal screws?
That expectation wasted time.
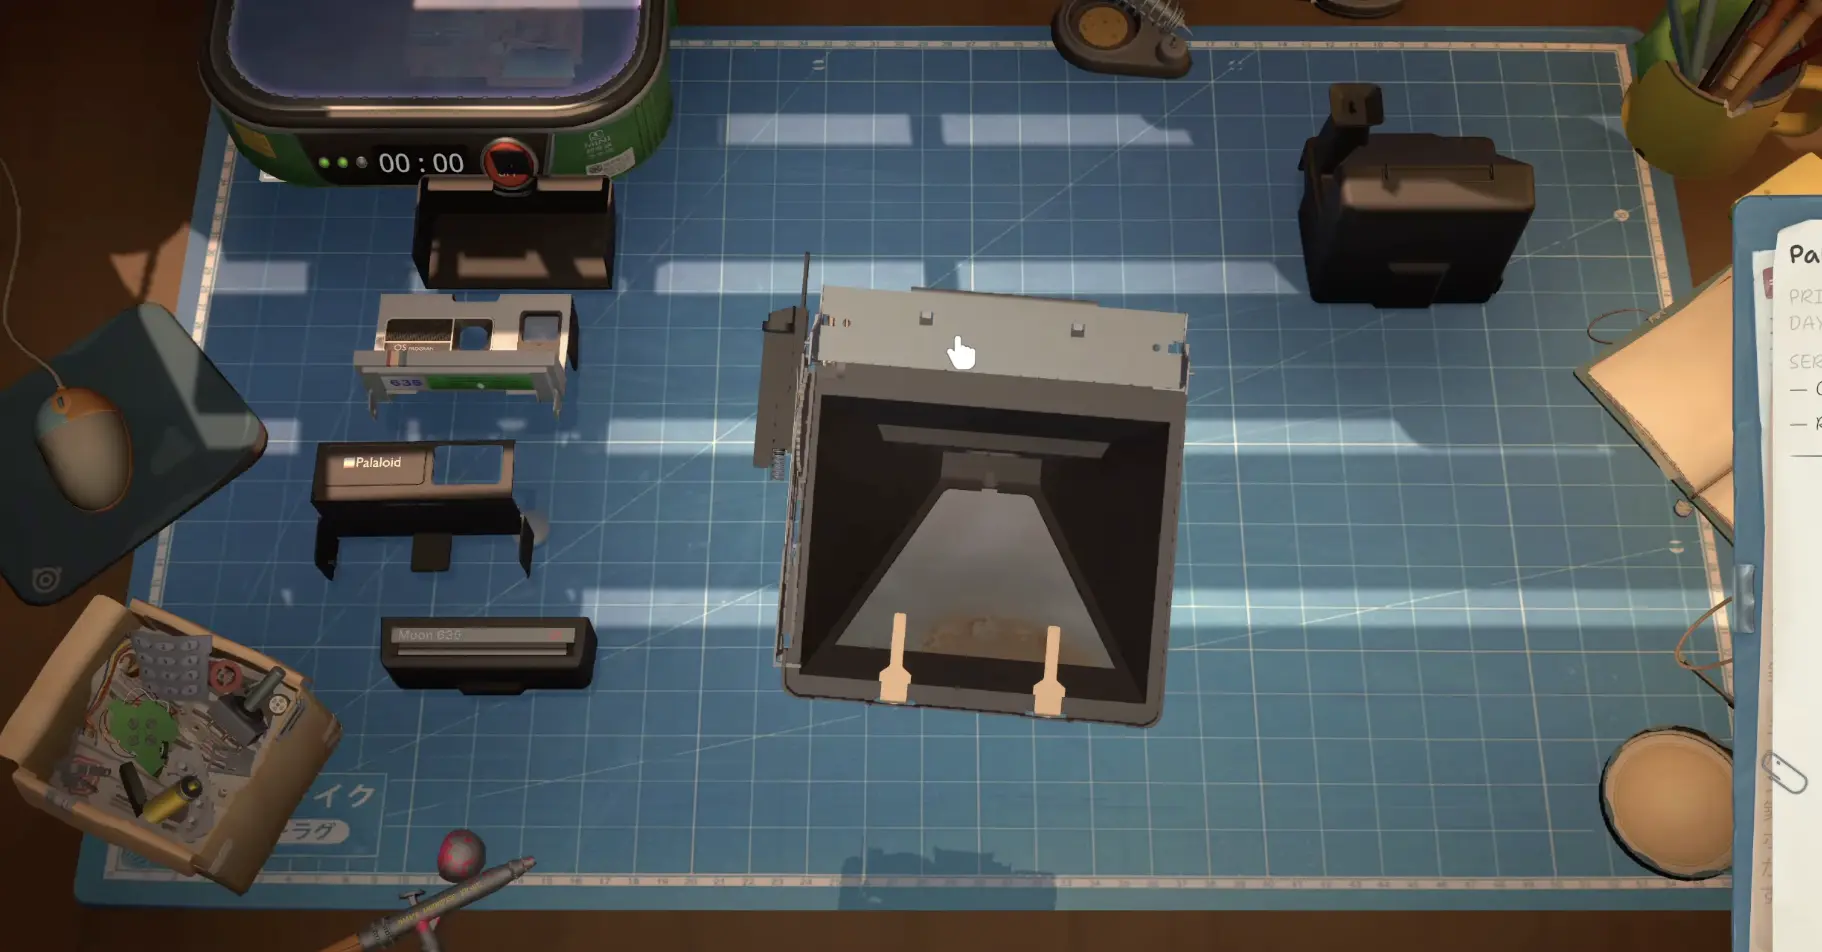
Once I stop forcing the phone logic onto it, the teardown makes more sense.
I work through the available layers and then inspect the internals.
Across my Paloid repairs I have encountered replacement needs involving parts such as:
- Mirror Cover;
- Circuit Board;
- Shutter Blades;
- Switch;
- Shutter Release Button;
- Shutter Housing.
That is enough complexity that I do not buy the first part I notice.
I finish the inspection first.
Paloid Can Be a Long Rebuild
Later runs reinforce the same point.
There are many small camera mechanisms and side pieces.
I treat it as a model where remembering one previous phone sequence does not help very much.
My Paloid rule is:
follow the camera’s own interactive order
rather than:
search for the screw or panel I expect from another device
Guitar Legend Controller — Watch the Cord, Panels and Screws
The Guitar Legend-style controller is another device where the shell can look close to finished while one smaller piece is still unresolved.
During my repair I specifically had to keep track of pieces such as:
Cord
and:
Back Panel
The rebuild also has enough screws that I can lose track of one attachment point while moving quickly.
At one point I was nearly finished and still had to stop and ask what was missing before spotting the remaining component.
That makes my check:
cord → panels → small missing component → remaining screws
before I declare the controller complete.
Some jobs can also add another service such as painting, so once the physical device is done I still reread the customer request.
I do not use this section to explain the broader paint/order workflow.
That stays in the Repair Guide.
TV — The Camera Tube Matters, and the Story Is Waiting
The TV is different from an ordinary repeat repair because it can be a story blocker.
During the Repair Master Competition storyline, progression pauses while an important broken device has to be fixed.
In my route, that includes the TV.
Once it reaches the bench, one component I specifically keep track of is the:
Camera Tube
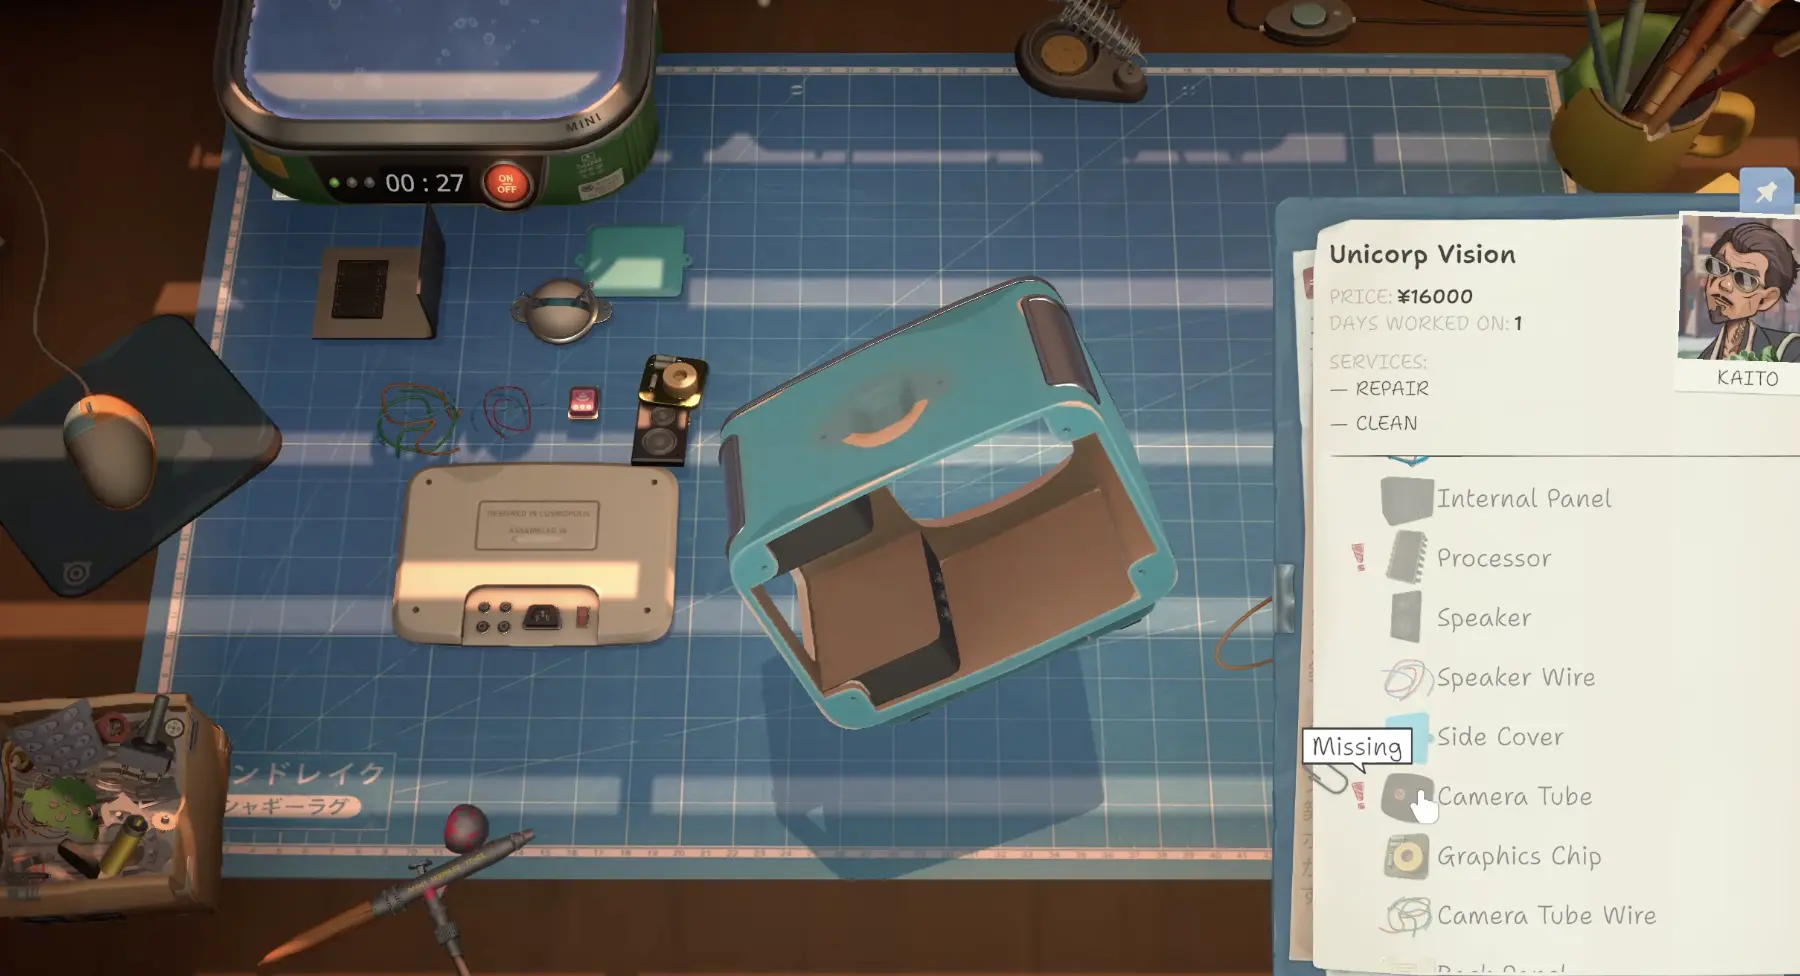
The later assembly includes components such as:
- Internal Panel;
- Processor;
- Speaker;
- Speaker Wire;
- Side Cover;
- Camera Tube;
- Graphics Chip;
- Camera Tube Wire;
- Back Panel.
This is another device where I do not rebuild from vague visual memory.
There are too many internal pieces close together.
The TV Is Also a Progression Check
If my competition route appears to stop while the TV repair is active, I do not keep grinding another timed assembly.
I finish the TV.
The detailed championship progression stays in the Assembly Competition Guide.
For this index, the important model-specific fact is:
the TV is not just another payout device when it appears in that story sequence.
I Do Not Add a Device Just Because I Bought Its License
ReStory gives me many device licenses.
That does not mean every license immediately deserves another section here.
To add a device to this index, I want at least one concrete reason a player would search for that model.
For example:
PMP won’t reassemble
Razor part won’t fit
Brick Game missing screen
Paloid teardown confusing
PlayStation needs soldering
That is useful.
A paragraph that only says:
this device exists and I repaired it
is not.
When I Keep the Answer Here and When I Split a Device Into Its Own Guide
For now, these devices stay inside this index.
A model only deserves a separate page when two things happen:
players are actually searching for it
and:
I have enough unique repair detail to answer that search better than this section can
Until then, a dedicated URL would mostly duplicate this page.
So if a future search starts appearing around something like:
ReStory Paloid Camera repair
or:
ReStory Nony PMP reassembly
I already have the underlying repair route documented here.
I can expand that model later without inventing content in advance.
How I Decide Which ReStory Guide I Need
I use three different pages for three different problems.
If I do not yet know what is wrong with the repair, I use the Repair Guide.
That page owns:
inspect → diagnose → clean → repair/replace → finish services → rebuild
If I know the part is correct but it will not attach or stays red, I use Can’t Reassemble a Device?.
That page owns:
wrong order → missing screw → wrong angle → wrong side → dirty/broken copy
If I already know:
this exact model is what is confusing me
I stay here.
This page owns the model-specific answer.
The Device Pattern I Use When I Meet Something New
When another unfamiliar device reaches my bench, I try to classify the problem.
Hidden dirt
Rotate the parts and inspect both faces.
Incomplete teardown
Keep removing layers before starting the rebuild.
Long ordered rebuild
Keep the notebook visible.
One or two genuinely missing parts
Finish inspecting, then source the exact components.
Correct-looking part refuses to attach
Check the previous screws and viewing side.
Electrical or board problem
Verify whether soldering is the actual repair instead of replacing good parts.
Unusual shell
Stop assuming it opens like the device I repaired before it.
That is why I keep a Device Repair Index instead of trying to build an encyclopedia.
The useful question is not:
How many ReStory devices can I list?
It is:
When this particular device reaches my bench again, do I already know the thing most likely to waste my time?
FAQ
Is this every device in ReStory? +
No. I only list devices I have repaired far enough to identify a useful model-specific problem. I would rather document a real teardown, missing-part, cleaning, soldering, or reassembly trap than fill the page with device names.
What should I do if my device is not listed here? +
If the problem is general repair flow, I use the Repair Guide. If a correct-looking part stays red or will not attach, I use the reassembly troubleshooting guide. I only add a device here once I have something specific to say about that model.