Can't Reassemble a Device? What I Check in ReStory
My ReStory troubleshooting order for parts that stay red, will not attach, seem missing, or leave a device stuck even when the pieces look correct.
Updated:
Quick Answer
When a ReStory part will not attach or stays red, I check the repair in this order: finish the teardown → follow the notebook order → secure the previous layer → rotate or flip the device → check the other side → verify the part is clean and working → confirm any missing replacement is actually available → reread the job requirements. If several later parts all fail at once, I usually go back one step instead of trying them randomly.
The most frustrating ReStory repair is not always a broken device.
Sometimes I already know what the next part should be.
It is sitting on the desk.
The shape looks right.
The notebook seems to agree.
And the game simply will not let me attach it.
My first reaction used to be:
Maybe I have the wrong part.
That was often wrong.
Most of my reassembly stalls came from something earlier in the sequence:
the teardown was incomplete
the previous layer was not secured
I was looking from the wrong side
I had picked up a dirty or broken copy
Once I started checking those in a fixed order, I stopped brute-forcing loose parts around the device.
My Reassembly Troubleshooting Order
When a device refuses to go back together, I use this sequence:
1. Make sure disassembly is actually complete.
2. Read the notebook reassembly order.
3. Check whether the previous layer needs screws.
4. Rotate, flip and change the viewing angle.
5. Check the opposite side for another component or attachment point.
6. Verify the part is clean and working.
7. Confirm a genuinely missing replacement is actually available.
8. If the shell is complete, reread the customer requirements.
I only start wondering about an unusual device-specific problem after those checks.
1. I Make Sure the Teardown Is Actually Finished
This caused my biggest early reassembly stall.
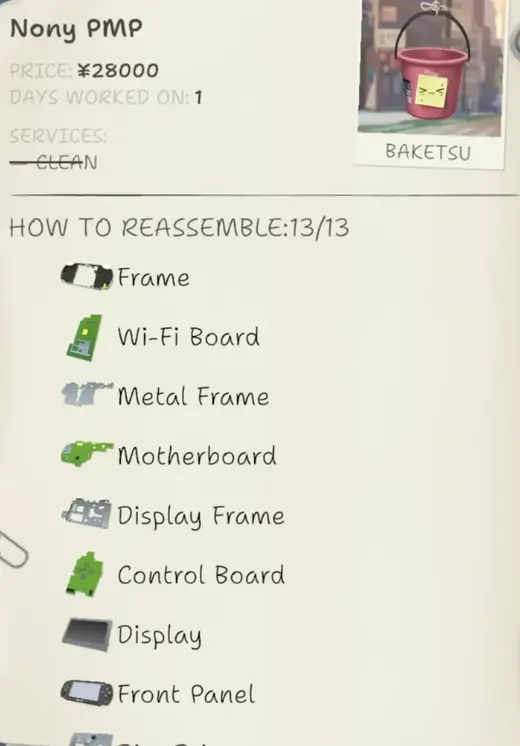
The Nony PMP looked ready to rebuild.
A lot of parts were already sitting on the workbench.
I thought I had reached the bottom of the device.
But the reassembly sequence still made no sense.
The real problem was:
I had not finished taking it apart.
Once I removed the remaining layers, the notebook gave me a complete reassembly reference.
That gives me my first rule:
If several parts all refuse to attach, I check whether the device can still be disassembled further.
I look for:
- another cover;
- another screw;
- an internal frame;
- a board;
- a panel on the opposite side;
- any remaining removable layer.
A device can look almost empty without actually being fully stripped.
An Incomplete Notebook List Is a Teardown Warning
The notebook is also a useful diagnostic signal.
If the reassembly information still feels incomplete, I do not force the rebuild.
I inspect the device again.
On the PMP, the full teardown eventually gave me a complete multi-part sequence.
Before that point, trying to reconstruct the device from memory only created confusion.
My rule is:
incomplete reassembly reference → inspect teardown again
not:
incomplete reassembly reference → guess harder
For exact model layouts, I keep the device-specific notes in the Device Repair Index.
This page only owns the reason the rebuild has stopped.
2. I Treat the Notebook as an Order, Not Just a Parts Checklist
Once the teardown is complete, I stop thinking of the notebook as:
a list of things that belong somewhere inside the device
and start treating it as:
the sequence I should rebuild through
That distinction matters on layered electronics.
The PMP sequence includes components such as frames, boards, display layers and outer panels.
If I try to jump ahead because one loose part looks visually obvious, the game may refuse it.
When the next piece will not attach, I ask:
What does the notebook expect immediately before this part?
If that previous layer is not correctly installed, nothing later will work.
3. I Check the Screws on the Previous Layer
This is one of the easiest mistakes to miss.
I place a component.
It looks correct.
Then I grab the next layer.
Nothing attaches.
The problem can simply be:
the previous layer still needs screws.
Until those screws are secured, ReStory does not consider that assembly step finished.
My rhythm is now:
place
→ check screw points
→ tighten
→ continue
not:
place
→ immediately grab another loose part
A single forgotten screw can make every later component look wrong.
If Five Parts Stop Working After One Successful Placement, I Go Back One Step
This pattern is extremely useful.
Suppose one component fits.
Then:
- the next part stays red;
- another part stays red;
- another one refuses to attach;
- nothing on the table seems valid.
I do not test every remaining component repeatedly.
I inspect the last thing I successfully placed.
Usually I find one of these:
it still needs screws
it was the wrong copy of that component
the next attachment point is on another side
The more later pieces that fail together, the more suspicious I become of the previous step.
4. I Rotate the Device Before Deciding the Part Is Wrong
The most misleading reassembly failure I hit was caused by the camera angle.
I knew which display-area part belonged next.
It would not attach.
I tried another part.
Still nothing.
The solution was:
rotate the device
The original part was correct.
The attachment point was simply much easier to trigger from another orientation.
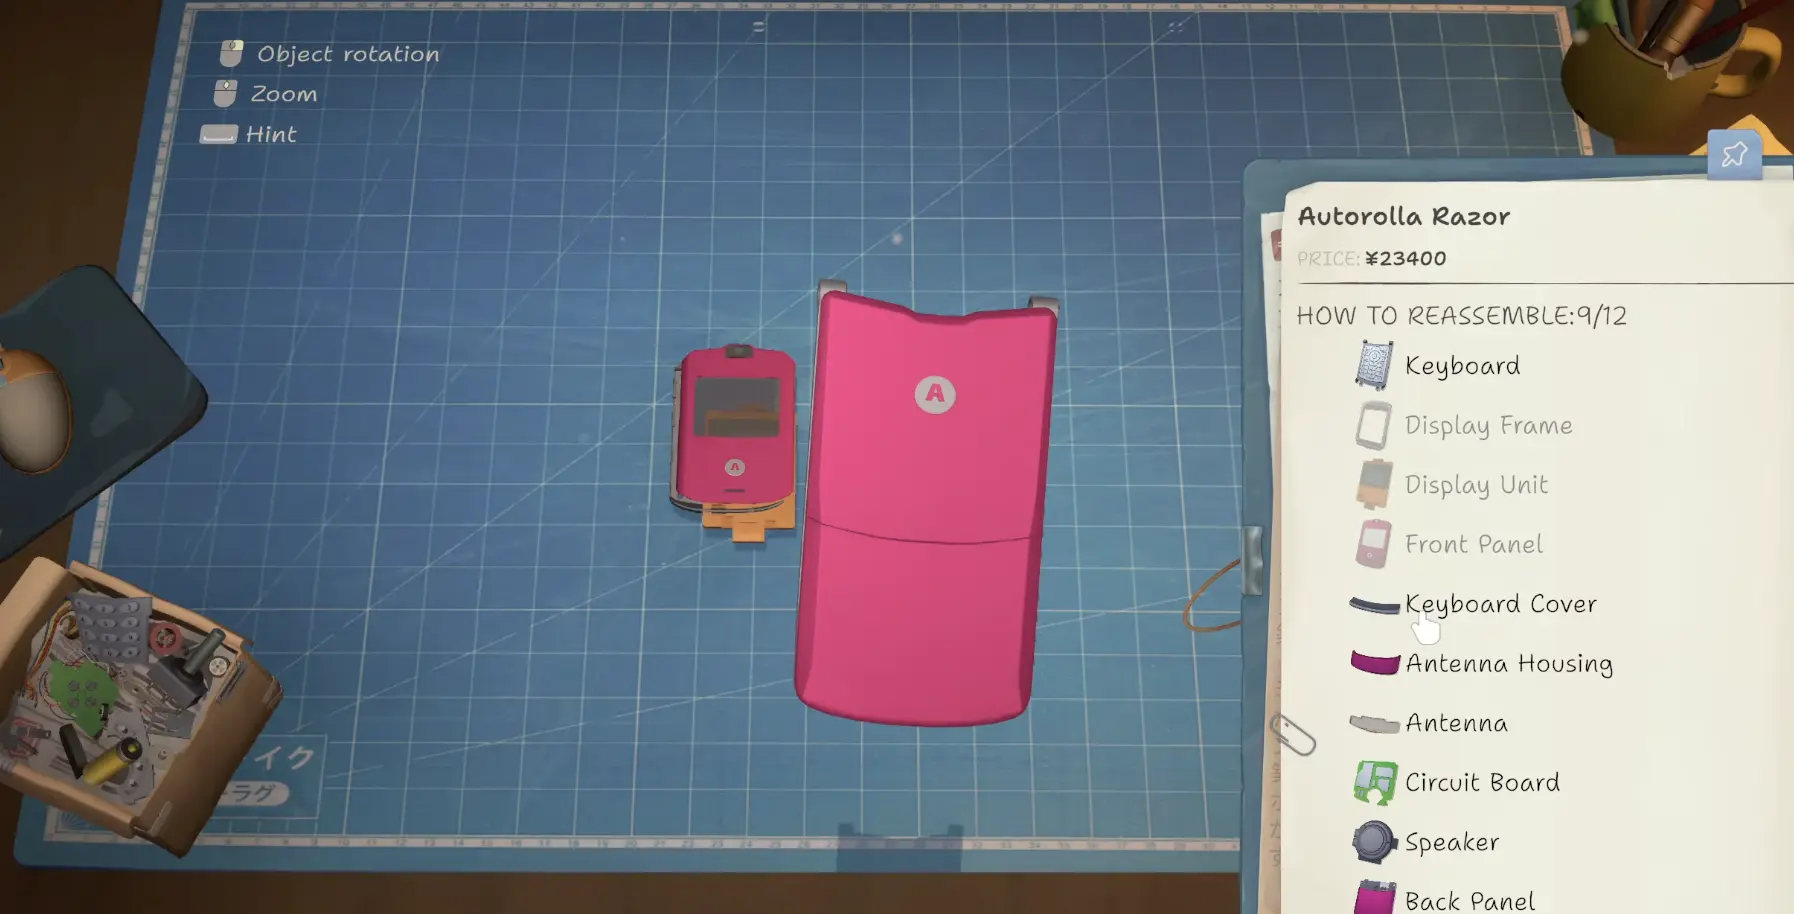
So before I replace anything, I try:
rotate left
rotate right
flip the device
move the camera
zoom closer
If the part is correct, one of those views may expose the placement target.
I Use Zoom After I Find the Correct Side
Zoom helps, but I do not use it blindly.
My order is:
correct part
→ correct step
→ correct side
→ zoom
If I zoom into the wrong side of the device, I only make the wrong problem larger.
Once I know where the attachment should be, zoom helps with:
- tiny screw points;
- narrow frames;
- small edge connectors;
- overlapping interaction areas.
5. I Check the Other Side Before Calling a Part Missing
Some components are easy to mentally lose because they belong on the back or under another layer.
I have reached a rebuild and thought something was missing, only to realize the next component belonged on the opposite side.
One repair route, for example, places a speaker on the back rather than in the area I was currently looking at.
That is enough to change my missing-part check.
Before I buy anything, I inspect:
front
→ back
→ both edges
→ under the current visible layer
A device that looks finished from the front may still be incomplete on the back.
That is particularly deceptive after installing a large panel because the device suddenly looks much closer to finished than it really is.
I Do Not Call Something Missing Until the Reassembly Sequence Confirms It
There are two very different situations.
The part exists but I cannot place it
That is usually:
- order;
- screws;
- angle;
- side;
- condition.
The required component genuinely is not available
That is a sourcing problem.
I do not mix the two.
If a component is sitting on the bench and will not attach, buying another copy is rarely my first move.
If the notebook expects a component and I genuinely do not have a usable one, then I confirm what is missing.
This prevents me from spending yen to solve what was actually a positioning problem.
6. I Stop Immediately if a Dirty Part Was Installed
ReStory can warn:
A dirty part has been installed.
That means the component may physically fit while still being wrong for the finished repair.
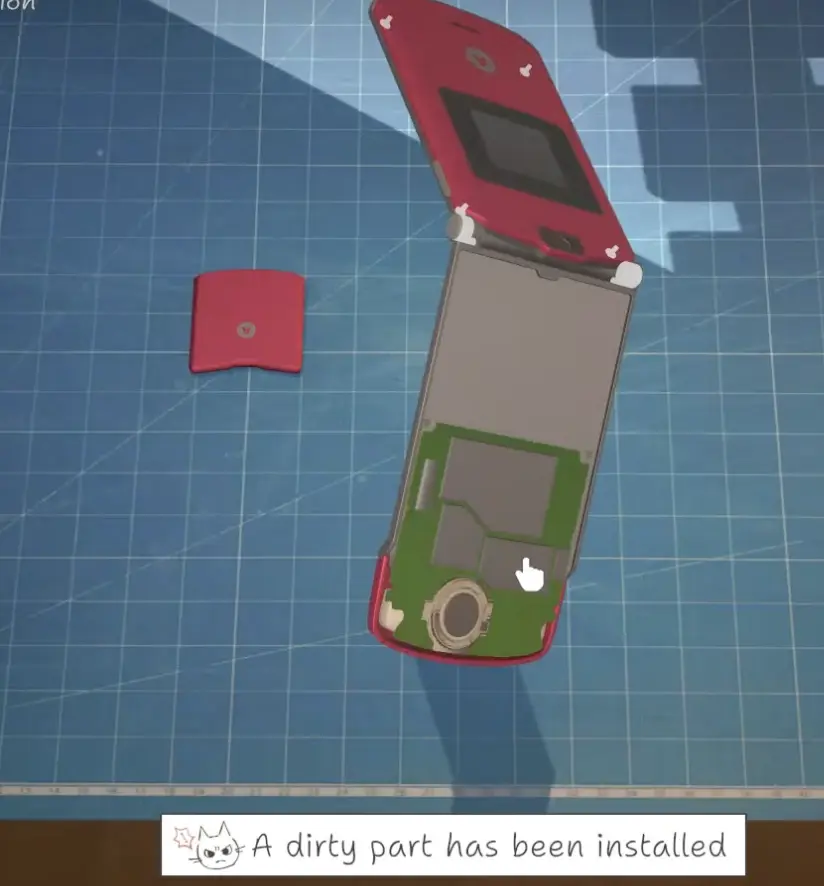
When I see that warning, I stop.
I remove the part.
Clean it.
Then return to the same point in the assembly sequence.
I do not keep closing the shell and plan to fix it later.
Otherwise I may have to remove several perfectly installed layers just to reach that dirty component again.
The key distinction is:
part fits
does not automatically mean:
part is ready to stay in the device
A Broken Copy of the Correct Part Can Cause the Same Confusion
The donor and spare-parts systems make this especially easy.
I can have two components with the same name.
One works.
One is broken.
They look like the same answer to the reassembly puzzle.
ReStory can warn:
A broken part has been installed.
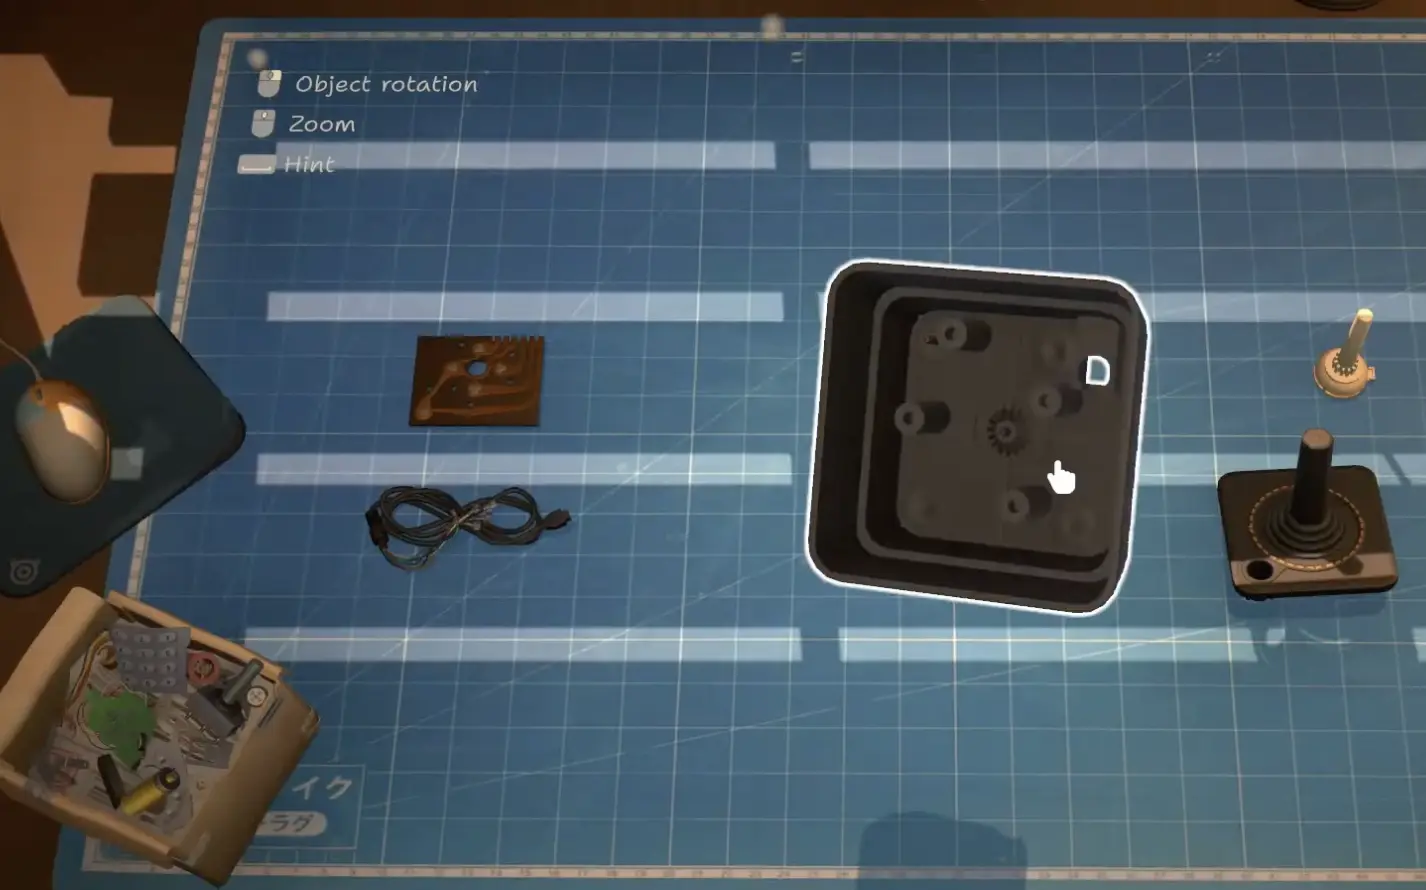
If that happens, I remove it immediately.
I do not assume the assembly order is wrong.
The slot can be correct.
The part type can be correct.
The condition can still be wrong.
I Check Part Condition Before Pulling the Device Apart Again
This saves a lot of unnecessary teardown.
If the notebook sequence makes sense and the component clearly belongs there, I check whether I accidentally grabbed:
the dirty copy
or:
the broken copy
before undoing earlier layers.
That becomes increasingly important once my inventory contains several versions of common components.
7. If a Part Is Really Missing, I Confirm I Actually Bought It
There is one reassembly problem that begins at the computer rather than the bench.
I identify a missing part.
Add it to the cart.
Return to the repair.
Then wonder:
Where is it?
Adding a part to the cart is not the same thing as completing the purchase.
If a replacement I expected to have is completely absent, I check whether I actually finished checkout.
Before I wait another day or disassemble the device again, I verify:
- correct device category;
- correct part;
- checkout completed;
- every missing component was included.
This is still relevant to this troubleshooting page because the symptom is:
I know what should go here, but the replacement is nowhere to be found.
The economic question of whether I should buy individual parts or use a donor device belongs in the Marketplace Guide.
I Make the Full Missing-Parts List Before Ordering
When one component is missing, I inspect the rest of the open device before placing the order.
I have had phone repairs where the missing list included several exterior pieces such as:
front panel
back panel
bumper
That is exactly the situation where buying the first missing item and returning to the bench would create another stop.
So once I know the problem is genuinely missing parts, I finish the diagnosis first.
Then I source the full list.
The general diagnose-before-spending workflow belongs in the Repair Guide.
If I Do Not Have the Parts Yet, I Park the Device
A device does not have to be finished immediately.
If I confirm that the reassembly is blocked because required parts genuinely are not available, I stop forcing it.
I can put the repair aside and return when the replacements arrive.
That is different from:
a correct part sitting on the bench but refusing to attach
The first is an inventory problem.
The second is a reassembly problem.
Keeping those separate saves a lot of pointless dragging.
8. If the Device Is Together but the Job Still Will Not Finish, I Reread the Request
This final case is not really a reassembly failure.
It only looks like one.
I can physically rebuild the entire device and still have ReStory reject the job because the customer asked for another service.
I have had this happen when the missing requirement was:
Paint
So if the shell is complete, I stop pulling parts back out.
I reread the order.
I check for:
- Clean;
- Repair;
- Paint;
- soldering-related work;
- another requested service.
If one of those is incomplete, the physical reassembly is already solved.
The problem belongs to the order requirements.
How I Tell a Reassembly Problem From a Repair Problem
This distinction keeps these guides from overlapping.
If I am asking:
What is dirty?
What is broken?
What work does the customer want?
that belongs in the Repair Guide.
If I am asking:
Why won’t this correct part attach?
Why is this part staying red?
Why won’t the next layer go in?
Why does the device refuse to go back together?
that belongs here.
And if I am asking:
How does this exact phone, console or controller come apart?
that belongs in the Device Repair Index.
What I Check When a Part Stays Red
If the exact symptom is a red or unavailable placement, I use a shorter checklist.
Is the teardown complete?
If not, I keep removing layers.
Is this actually the next part in the notebook?
If not, I go back to the sequence.
Does the previous component still have screws?
I secure it.
Am I on the correct side of the device?
I rotate and flip it.
Is the attachment point difficult to target?
I change angle and zoom.
Is this a dirty or broken copy?
I check its condition.
Only after those checks do I conclude that I may genuinely have the wrong part.
What I Check When a Part Seems Missing
For a missing-part symptom, my order is slightly different.
Check the notebook.
Confirm what component should be next.
Check both sides of the device.
Make sure I have not mistaken a hidden placement for a missing component.
Check the bench and inventory.
I may already own the part.
Check condition.
The only copy I have may be broken.
Check the purchase.
If I ordered one, make sure checkout actually happened.
Once I confirm that the component truly does not exist in usable inventory, I source it.
What I Check When Everything Suddenly Stops Fitting
This is the symptom that most strongly points backward.
If one part attaches successfully and then everything after it fails, I inspect that last step.
I check:
screws
orientation
wrong copy
wrong side
I do not assume five later components all became invalid at once.
Usually one earlier layer is unfinished.
My ReStory Reassembly Checklist
When I am completely stuck, I run this exact sequence.
1. Can I still remove another part?
If yes, the teardown may not be complete.
2. Is the notebook list complete and what does it expect next?
I follow that order.
3. Did I secure the previous layer?
I check every screw point.
4. Am I looking from the correct angle?
I rotate, flip and move the camera.
5. Is the next step on the opposite side?
I inspect front, back and edges.
6. Is the part clean and working?
I do not trust the component name alone.
7. If the part is genuinely missing, do I actually have the replacement?
I check inventory and checkout.
8. If the physical device is complete, is another customer requirement still unfinished?
I check the job instead of dismantling the device again.
Only after those checks do I treat the problem as something unusual about that specific model.
Most of the time, ReStory has not stopped recognizing the device.
One earlier step simply is not finished yet.
FAQ
Why won't a part attach in ReStory? +
I first check whether disassembly is complete, whether I am following the notebook reassembly order, whether the previous layer still needs screws, and whether rotating or flipping the device exposes the correct attachment point.
Why does a ReStory part stay red even though it looks correct? +
A red or non-attaching part usually means the current assembly step is not valid yet. I check the previous layer, screws, viewing angle, device side and part condition before assuming I need a different component.
Why is my ReStory device assembled but the order still is not complete? +
If every physical part is back in place, I stop treating it as a reassembly problem and reread the customer requirements. Cleaning, painting, soldering or another requested service may still be unfinished.