Minecraft Dungeons II Best Builds: What Gear Should You Use?
Build around the weapon's strongest attack pattern, from Warhammer basic attacks and Mace jumps to Pickaxe cancels, Awesome Axe Strength, and sustain setups.
Updated:
Quick Answer
For straightforward melee damage, use Warhammer + Lightning Surge and keep using basic attacks. A Mace performs much better when you repeatedly jump-attack, while a Pickaxe benefits from a two-hit jump-cancel pattern.
If you have Awesome Axe, its Strength proc gives it a much higher conditional damage ceiling. Add burst Artifacts only when your Soul economy can support them; otherwise use one defensive slot and keep the build running through longer fights.
The biggest build mistake in Minecraft Dungeons II is choosing a weapon from its damage number and then attacking with it the same way as everything else.
Warhammer, Mace, Pickaxe, and Awesome Axe can all perform well, but they reach that performance through different inputs. Warhammer wants uninterrupted basic attacks. Mace gains heavily from repeated jump attacks. Pickaxe gets more from a short cancel pattern. Awesome Axe becomes exceptional when its unique Strength effect is active.
The comparisons below use weapons at roughly 101–104 item power. That is item power, not character level. The values are useful for comparing attack patterns under similar conditions; modifiers, unique effects, buffs, enemy defenses, and later item-power increases can all change the final numbers.
| Setup | Attack pattern | Measured damage | Main reason to use it | Main limitation |
|---|---|---|---|---|
| Warhammer + Lightning Surge | Basic attacks | ~500 DPS | High damage with almost no input complexity | Slower repositioning than lighter weapons |
| Mace + Lightning Surge | Repeated jump attacks | ~420 DPS | Large improvement over its normal combo | Loses value if you keep defaulting to basic attacks |
| Pickaxe + Lightning Surge | Two-hit jump cancel | ~371 DPS | Cancel meaningfully improves its normal output | Requires consistent input timing |
| Awesome Axe + Lightning Surge | Cancel pattern | ~353 DPS, around 700 with Strength active | Unique effect can roughly double the damage window | Damage ceiling depends on Strength being active |
| Sustain setup | Weapon’s safest efficient pattern | Varies | Keeps healing, Souls, and defense available across long fights | Gives up some peak burst damage |
Warhammer + Lightning Surge: Use Basic Attacks
Warhammer is unusually simple because its strongest tested pattern does not require a jump loop or cancel.
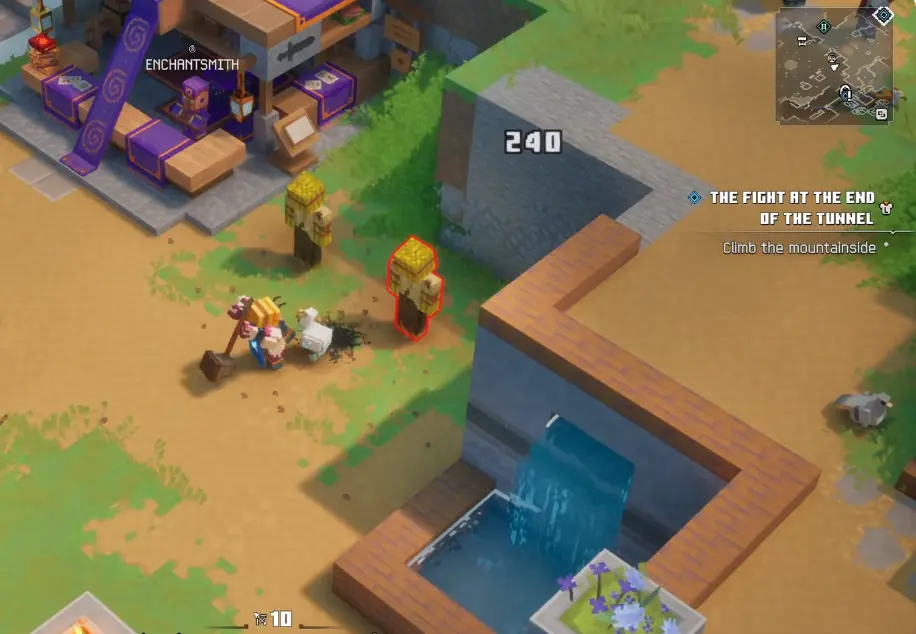
At the tested item power, it dealt about 240 damage per hit at roughly 1.1 hits per second. That produced about 263 DPS before the wave contribution.
With Lightning Surge added, ordinary attacks reached roughly 500 DPS.
Jump attacks remained competitive at about 480 DPS, but the slower jump rhythm was still behind simply continuing the normal attack sequence. A jump-cancel pattern fell farther, to roughly 414 DPS with Lightning Surge.
For this weapon, adding mechanical complexity lowers output.
The practical rotation is therefore:
attack continuously → move only when the encounter forces you to reposition → resume basic attacks
Lightning Surge works especially well because Warhammer can trigger its wave consistently without giving up its strongest attack rhythm. Before spending more points on it, compare the rank values and trigger rules.
Mace: Jump Attacks Change the Weapon Completely
Mace tells the opposite story.
Its standard three-hit sequence reached about 182 DPS unenchanted and roughly 255 DPS with Lightning Surge in the comparable test. That puts the normal combo well below Warhammer.
Repeated jump attacks raised the figures to approximately:
- 221 DPS before the wave contribution
- 420 DPS with Lightning Surge
A longer cancel sequence managed only about 302 DPS with the wave effect.
So a Mace should not be played like a Warhammer.
Use:
jump → attack → land → jump again
The gain is large enough that repeatedly reverting to the normal ground combo removes much of the reason to choose the weapon.
Pickaxe: Use a Two-Hit Jump Cancel
Pickaxe starts from relatively modest basic damage but responds well to cancelling.
Its measured patterns were approximately:
- basic: 190 DPS
- basic + Lightning Surge: 264 DPS
- jump: 177 DPS
- jump + Lightning Surge: 336 DPS
- cancel: 236 DPS
- cancel + Lightning Surge: 371 DPS
The cancel setup is therefore the strongest of those tested patterns.
A jump cancel uses the jump animation to interrupt part of the normal attack recovery and insert a jump attack into the sequence. For a two-hit cancel, the rhythm is essentially:
ground attack → jump during the recovery → jump attack → repeat
The purpose is not to jump as often as possible. It is to remove downtime without breaking the attack pattern that produces the better result.
If the timing is inconsistent and the cancel keeps failing, the theoretical 371-DPS setup loses its advantage. In that case, the simpler jump-wave pattern is still stronger than ordinary basics.
Awesome Axe: Strength Creates the Highest Conditional Ceiling
Awesome Axe starts from a solid but not extraordinary baseline.
At around item power 101, the comparison produced roughly:
- basic attacks: 204 DPS
- basic + Lightning Surge: 300 DPS
- jump attacks: 152 DPS
- jump + Lightning Surge: 288 DPS
- cancel: 250 DPS
- cancel + Lightning Surge: 353 DPS
Its unique effect is what changes the result.
Attacks have a 70% chance to grant Strength on hit.
During the Strength window, the observed damage roughly doubled. A cancel + Lightning Surge pattern around 353 DPS can therefore move toward approximately 700 DPS while Strength is active.
That does not mean every Axe reaches 700 DPS. The number depends on having the Awesome Axe unique effect, maintaining Strength, and using the stronger cancel pattern.
An ordinary Axe should not be evaluated as though it has the same ceiling.
Awesome Axe is found in the Sift, so it arrives later than many basic melee options. If the weapon has not dropped yet, keep progressing instead of waiting for it; the Sift route opens as the story advances.
What a Jump Cancel Actually Does
Jump cancelling matters because attack speed is not just the number printed on a weapon.
Some melee animations include recovery time after a hit or combo. A jump can replace part of that recovery and insert a jump attack, effectively creating a different attack sequence.
Two common patterns are:
Two-hit cancel:
one ground hit → jump attack → restart.
Longer / four-hit cancel:
more of the normal combo is allowed to play before the jump is inserted.
The longer pattern is not automatically stronger. Wave enchantments complicate the result because two eligible wave triggers can occur too close together, preventing the second wave from activating as expected.
That is why Pickaxe benefits from its cancel while Warhammer does not.
Use cancels when the measured attack cycle improves. Do not add them simply because the technique exists.
Burst Build: Fighter’s Flute + Warrior Drums
Once all three Artifact slots are open, a burst setup can pair Fighter’s Flute with Warrior Drums.
The resource cost is the part that determines whether this works:
- Fighter’s Flute: 45 Souls
- Warrior Drums: 45 Souls
- combined activation: 90 Souls
- base Soul capacity: 100
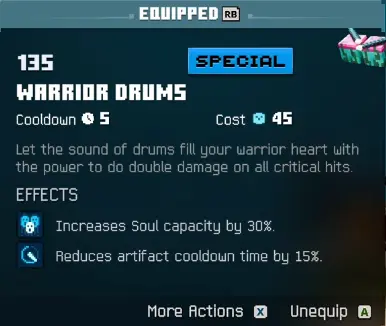
That leaves only 10 Souls from a full default bar.
Use the double activation when the extra damage has time to matter: bosses, elite groups, or another sustained damage window. Spending 90 Souls to remove a few ordinary enemies leaves the next encounter with a resource problem that did not need to exist.
A build that repeatedly uses this pair needs Soul recovery rather than merely a larger opening reserve.
If the setup keeps running out of Souls or defensive uptime, compare the Artifact and Talisman effects before changing the weapon.
Burst Damage Is Not Useful if the Soul Bar Never Recovers
A full Soul bar can hide a weak resource economy.
The first Fighter’s Flute + Warrior Drums activation works because the character starts with 100 Souls. The actual test comes afterward: can the setup rebuild enough Souls for another important window?
If not, adding a third expensive Artifact makes the problem worse.
Use Soul-gain modifiers or a Soul-focused Talisman when repeated Artifact activation is part of the build. Extra capacity is useful when the opening cost is the blocker; increased Soul income is more useful when the bar stays empty after that opening.
This distinction matters more in long boss fights and postgame activities than in short Overworld encounters.
Sustain Build: Fix the Resource That Runs Out First
A sustain setup becomes more efficient than another damage boost when the character reaches dangerous encounters already depleted.
A typical failure sequence looks like this:
- normal mobs force an early potion;
- Artifacts consume most of the Souls;
- another elite group appears before either resource has recovered;
- the boss starts with healing or defensive tools unavailable.
That character does not primarily need another damage multiplier.
Keep the weapon’s efficient attack pattern, then use one defensive Artifact and support the resource that is collapsing. Turtle Master’s Mandolin favors steady protection, while Warding Chimes provides a stronger defensive window but places more pressure on cooldown and Soul management.
For potion-heavy setups, cooldown support becomes more useful. For Artifact-heavy setups, Soul gain becomes more useful.
The detailed Artifact and Talisman choices belong in best Artifacts and Talismans; the build decision here is whether damage, healing, Souls, or defensive uptime is actually causing the loss.
Useful Gear Modifiers for a Damage Build
A good ordinary item can outperform a poorly rolled higher-rarity piece when its modifiers support the actual attack loop.
Strong modifier values seen on melee and armor include:
- +30% melee damage
- +30% critical damage
- +45% Souls gained
- 20% potion cooldown reduction
- 20% Artifact cooldown reduction
- 20% less damage taken
- 50% increased healing
- 30% increased Soul capacity
Do not try to collect all of them on one character.
A Warhammer burst setup benefits from melee damage and Soul support. A defensive Artifact setup gains more from Artifact cooldown reduction. Potion-based sustain becomes stronger when potion cooldown or healing improves.
A modifier is valuable because it supports the build’s limiting resource, not because its percentage happens to be large.
Do Not Treat Talisman Percentages as Fixed Values
Talismans improve as they level.
That means a Talisman name should not be reduced to one permanent percentage. For example, Twisted Tooth can show +40% Souls gained at Level 1 and increase further as it levels. Fist of Iron likewise becomes stronger at higher levels.
So when choosing between two Talismans, compare the values on the copies currently equipped rather than copying a late-game percentage onto an early-game character.
For exact roles and observed level values, use Minecraft Dungeons II best Artifacts and Talismans.
When Should You Start Farming a Finished Build?
During the early and middle game, item power changes too quickly to justify perfect-roll farming.
Invest more heavily once several conditions begin lining up:
- the weapon’s attack pattern is already proven;
- new drops are no longer replacing it every few minutes;
- the enchantment supports that attack pattern;
- modifiers reinforce damage, defense, or resource recovery;
- the character is approaching late-game or postgame activities.
Before then, obvious upgrades are usually enough.
After the story, Soul Storms can produce gear with an additional modifier, raising the ceiling to as many as three modifiers on endgame equipment. Rifts, Dungeons, Soul Corrupted mobs, and Echo Shards also become part of the upgrade loop.
Once the campaign ends, use the post-story loop to decide whether Soul Storms, Rifts, or Dungeons should get your time first.
Which Build Fits the Problem You Have?
Use the failure state from the fight rather than changing every slot at once.
You want strong damage with simple inputs:
Use Warhammer + Lightning Surge and stay with basic attacks.
You naturally prefer jump attacks:
Mace converts that playstyle into substantially stronger damage than its normal combo.
You are comfortable with cancels:
Pickaxe gets a meaningful gain from its two-hit cancel pattern.
Awesome Axe dropped:
Use its cancel pattern and take advantage of the Strength proc rather than treating it like an ordinary Axe.
Fighter’s Flute + Warrior Drums empties the Soul bar:
Keep the burst pair only if Soul recovery can rebuild the 90-Soul spend.
The build reaches bosses with no potion or Souls:
Remove one burst component and add sustain before farming more raw damage.
The story route, rather than combat, is still the blocker:
Continue the Minecraft Dungeons II walkthrough instead of farming a finished setup too early.