My Complete Endacopia Walkthrough to Ending A
I follow the clean Endacopia route from CHESHIRE through the missing senses, Office reassessment, all three bosses and Ending A.
Updated:
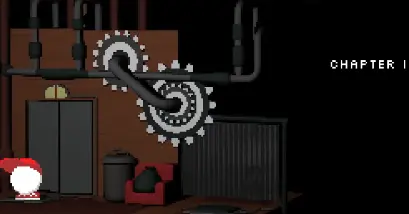
Quick answer: Get the password CHESHIRE, recover Melo’s senses in the order Hands → Mouth → Eyes, and request a reassessment until the Office assigns Remote Solutions Advisor. Complete the five calls, open the water cooler, enter Green → Yellow → Black → Red and defeat the AI. Restore Scribbly with all eight paper pieces and give Roger the map. In Chapter 2, finish the Misery Town item chain, defeat the Trapezist and open Henry’s Saw Box with 471. Take the dummy saw, enter 4 → 1 → 3 → 9 → 8 behind the Chapter 3 waterfall, defeat the Chameleon, avoid the obvious single door and follow Tip to Ending A.
This route reaches:
ENDING A: FAMILY!
It follows the direct battle solutions for the AI, Trapezist and Chameleon.
I complete every puzzle and item chain required for the main story, but I leave full fishing, optional gambling, achievement cleanup and unresolved underground secrets for another save.
Jump to:
Opening House ·
Missing Senses ·
Office ·
AI ·
Scribbly ·
Misery Town ·
Trapezist ·
Saw Box ·
Chameleon ·
Ending A
Main Route at a Glance
- Obtain the Cheese and two coins.
- Pay Wall Bank and learn
CHESHIRE. - Unclog the toilet and start Chapter 1.
- Recover Hands, Mouth and Eyes.
- Become a Remote Solutions Advisor.
- Complete all five Office calls.
- Raise productivity and water the founder’s plant.
- Trade the Flower for the Wrench.
- Open the water cooler and take the Core key.
- Enter
Green → Yellow → Black → Red. - Defeat the AI.
- Find all eight Scribbly paper pieces.
- Restore Scribbly and obtain the map.
- Give the map to Roger to start Chapter 2.
- Solve the dead-clown puzzle.
- Use the Scalpel to recover the Bingo Ball.
- Complete Bun and Boon’s chain.
- Free the microphone and reach the Trapezist.
- Defeat the Trapezist.
- Open Henry’s Saw Box with
471. - Save and take the dummy saw.
- Give the dummy saw to Roger to start Chapter 3.
- Complete the Timesville investigation.
- Recreate the reference room and obtain the VHS Tape.
- Enter
4 → 1 → 3 → 9 → 8. - Defeat the Chameleon.
- Return to Roger and continue after he rejects the dummy saw.
- Avoid the obvious single door.
- Accept Tip’s boost.
- Win the final confrontation.
- Invite every resident to the marshmallow gathering.
Opening House: Get the CHESHIRE Password
The opening house contains several small puzzles, but the main objective is to reach the toilet with the correct password.
Get the Cheese
I move through the bedroom and vent route while avoiding Henry.
At the fridge puzzle, I place the available shapes into their matching slots.
When the key appears, I take it and open the fridge compartment.
The reward is:
Cheese
The puzzle is finished once the Cheese can be collected.
Use the Cheese and Get Two Coins
I return to the area containing the suspicious mouse or cockroach spot and use the Cheese.
The creature appears.
I continue interacting until Melo crushes it and collects the money underneath.
The inventory should now contain:
Two coins
Those two coins are enough for Wall Bank.
Pay Wall Bank
Wall Bank is hidden behind the wall picture.
I give him the two coins and ask for the secret.
He reveals:
CHESHIRE
I write down the complete eight-letter word.
The common wrong answers are:
SHINE;SHIRE;- a shortened form of Cheshire.
The full password and its wrong-answer behavior are covered in the Endacopia Puzzle Solutions Guide.
Complete the Combat Tutorial
The opening also introduces the combat system:
- right click activates defense;
- I move the guard toward the incoming direction;
- left click attacks during an opening;
- attacking repeatedly drains stamina.
I use one or two attacks and then reset my guard.
The AI, Trapezist, Chameleon and final Ending A encounter all reuse these controls.
Unclog the Toilet
I collect the Plunger, return to the clogged toilet and use it.
The toilet character asks Melo whether he wants to go on an adventure and provides the password card.
I enter:
CHESHIRE
The sequence sends Melo below the house and begins Chapter 1.
Chapter 1: Recover Melo’s Missing Senses
Melo begins Chapter 1 without:
- his hands;
- his mouth;
- his eyeballs.
The three routes remain available in any order, but I use:
Hands → Mouth → Eyes
Hands remove the largest number of physical interaction locks. Mouth restores dialogue and Tip’s advice. The eyes route is mostly self-contained, so I leave it until last.
The full route logic is covered in the Endacopia Eyes, Hands and Mouth Guide.
Recover the Hands in Misery Town
From the Chapter 1 hub, I go north into Misery Town.
I continue through:
- the early circus route;
- the chase;
- the ride or train transition;
- the shifting-wall section;
- the final newly opened passage.
The chase is not the end of the route.
Whenever the game says:
The walls have shifted.
I recheck the nearby corridors.
A passage that was blocked before the message may now be open.
The final passage leads to Melo’s hands.
Once the game confirms they have been recovered, I leave Misery Town rather than trying to complete every booth and clown puzzle immediately.
Recover the Mouth in the Corporate Route
I return to the central hub and take the west route.
The corporate word-button room uses two phrases in sequence.
First, I enter:
LET ME GO
This removes the access restriction and opens the route to the right.
After continuing, Tip directs Melo back to the button room.
I return and enter:
LET ME TALK
This restores Melo’s mouth.
Melo can now speak with NPCs and ask Tip for location-specific advice.
Recover the Eyes in Timesville
I take the south route into Timesville and enter the strange bear house near the graveyard side of town.
Inside the house:
- I climb as the rooms become darker;
- I reach a completely black staircase;
- I stop continuing in the same direction;
- I turn around;
- the balcony event appears;
- ghost footprints lead outside;
- I follow them to the graveyard;
- I enter the grave route;
- I collect Melo’s eyeballs.
The black staircase is a direction puzzle.
It does not require a flashlight or another town item.
Fishing, hide-and-seek and the police activities are not required for recovering the eyes.
Chapter 1: Complete the Office Route
With all three senses restored, I return to the corporate area and begin the Office route.
Melo especially needs his hands for the assessment station, desk, handset, items and water cooler.
The full Office route is covered in the Endacopia Office and Call Center Guide.
Get the Remote Solutions Advisor Role
I pay for the assessment and complete the interview.
The job result required for the main route is:
Remote Solutions Advisor
The result sends Melo to the unoccupied Client Relations virtual desk located two doors down the hall.
That desk contains the five required calls.
What to do after getting another department
A different department does not lock the main story.
I return to the assessor and choose:
Request a reassessment
I take the questionnaire again on the same save.
I do not restart Chapter 1 or reload an earlier save.
Strategic Probability Analysis detour
One alternate result is Strategic Probability Analysis.
It leads to the above-or-below-three game-show area.
This department is not the five-call job, but it contains two useful Office items:
- the Vacation Ticket;
- the Transparent Mug.
I can collect those items first and then return to the assessor for another reassessment.
If I receive another non-Remote Solutions Advisor role without an immediately useful item, I return to the assessor instead of searching that department for the Call Center desk.
Complete the Five Calls
At the Client Relations workstation, I pick up the handset before entering any number.
| Call | Phone number | Main answer |
|---|---|---|
| Marriage Advice | 559-2915 | Use the disguise-and-flirt route |
| Bank Problems | 331-7891 | The written PIN clue leads to the Bible |
| Stuck in LVL 3 | 865-9961 | Defeat the 110 HP Goblin Lord |
| How to Do Homework | 968-5213 | Use 2 → 12 → 5 → 600 |
| Looking 4 Love | 926-1396 | Decline the package and use the reflective route |
The phone keypad does not have a separate Call button.
If a correct number produces nothing, I check whether Melo has picked up the handset.
Marriage Advice
For the shortest main route, I use the disguise-and-flirt solution.
The murder suggestion creates another phone call about hiding a body.
That branch is optional and is not required for the Core key.
Bank Problems
I ask about the caller’s password and the place where it may have been written.
The correct book is:
Bible
The solution happens entirely through the phone conversation.
Stuck in LVL 3
The Goblin Lord begins with:
110 HP
The caller begins with:
80 HP
I use the Lightning Scroll early for 40 damage.
When the Goblin Lord takes a strange stance and prepares a serious attack, I choose:
Guard
After the blocked heavy attack, the Goblin Lord becomes too tired to move, giving me a safer attack turn.
The Healing Potion restores 10 HP, so I do not use it while nearly full.
How to Do Homework
The answer sequence is:
2 → 12 → 5 → 600
I complete the full question sequence instead of assuming the early arithmetic questions are the entire call.
Looking 4 Love
I decline the paid conversation package on the direct route.
I ask whether the caller genuinely believes the negative things he says about himself, then steer the conversation toward his mother’s criticism and the cycle it created.
The insult branch leads to a much darker result and is not required for main progression.
Buy the Access Items
After completing the calls, I prioritize:
- Blue Key Card;
- Red Key Card;
- Yellow Key Card;
- Stress Toy.
The reader light on each door matches the card color required to open it.
I leave the Energy Drink until after the permanent access items.
It does not replace:
- the Transparent Mug;
- ordinary water;
- the Flower;
- the Wrench.
Help the Employees
I use the employee items on the person whose dialogue describes the matching problem.
The important pairings include:
- Vacation Ticket for the employee who needs a break;
- Stress Toy for the employee overwhelmed by stress.
I help the workers directly.
The productivity display reports progress but does not increase productivity when repeatedly clicked.
Water the Founder’s Plant
I use the Transparent Mug to collect ordinary water.
I take the filled mug to the founder’s plant and water it once.
The Energy Drink is not a substitute.
Completing the plant interaction gives me access to the Flower needed for the Wrench trade.
Get the Wrench
I keep the Flower before entering the side area containing the Wrench holder.
The relevant entry can cost 50 credits, so I do not pay before the Flower is ready.
Inside, I trade the Flower for the:
Wrench
This avoids paying to enter the area again.
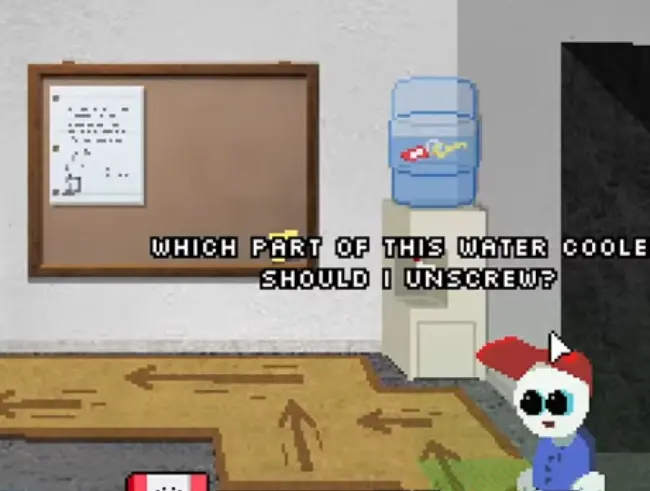
Open the Water Cooler
The Core key is visible inside the Office water cooler, but it cannot be collected through the casing.
I select the Wrench and use it on the cooler.
After unscrewing the panel, I take the:
Core key
Chapter 1: Enter the Core and Defeat the AI
I take the Core access items to the Core and use the eye scanner.
The final color sequence is:
Green → Yellow → Black → Red
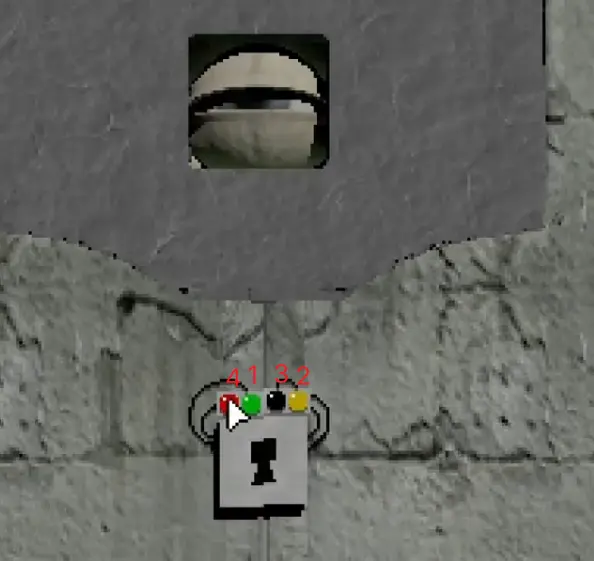
The complete puzzle explanation is in the Endacopia Puzzle Solutions Guide.
After entering the sequence, I continue into the distorted gallery.
Defeat the AI
My direct AI strategy is:
- keep the guard near the center;
- wait for the attack direction to commit;
- block through the impact;
- attack once during the clear opening;
- return the guard to center;
- let stamina recover when it becomes low.
I do not spend the final part of the stamina bar on speculative attacks.
Defeating the AI unlocks:
System Override
The detailed attack timing is in the Endacopia Boss Fights Guide.
Chapter 1: Restore Scribbly and Get the Map
After the Core route, Roger asks Melo for a map of the house.
This opens the Scribbly chain.
Collect the Flashlight and Pencil
I make sure I have access to:
- a charged Flashlight for the dark route;
- the Pencil for restoring Scribbly’s face.
The Pencil is not the object that keeps Melo safe in the darkness. The Flashlight is the limiting resource during the paper search.
Find All Eight Paper Pieces
The instruction booklet near Scribbly is missing:
8 paper pieces
After collecting the first piece, the objective reports that seven remain.
I search the dark route while watching the Flashlight charge.
If the Flashlight runs out, Melo is returned from the area, but the paper pieces already collected remain saved.
I recharge and continue with only the missing pieces.
Draw Scribbly’s Face
Once all eight pieces are restored, I use the Pencil on the faceless figure.
The drawing does not need to be a perfect trace.
I copy the main features:
- head outline;
- eye positions;
- mouth;
- largest identifying lines.
If the drawing is rejected, I correct the major shapes rather than filling every small mark.
Enter the Name SCRIBBLY
After the face is restored, the figure asks for its name.
The nearby return box provides the answer:
SCRIBBLY

I ask Scribbly to draw a map of the whole place.
Scribbly produces the map.
Give the Map to Roger
I return to Roger and hand him the map.
This ends Chapter 1 and begins:
Chapter 2
Chapter 2: Complete the Misery Town Item Chain
Chapter 2 sends me back to Misery Town.
The stage route remains blocked until I complete the Scalpel, Bingo Ball, Bun, Boon, Plushie and microphone chain.
Solve the Dead-Clown Puzzle
The clown toy asks which clowns can no longer tell jokes.
I compare the film outcomes with the colored seats and clown targets.
I hit:
Yellow → Pink → Purple → Red
I leave these four alone:
- Green;
- Orange;
- Light Blue;
- Blue.
The important distinction is whether the character actually died, not whether the scene looked painful.
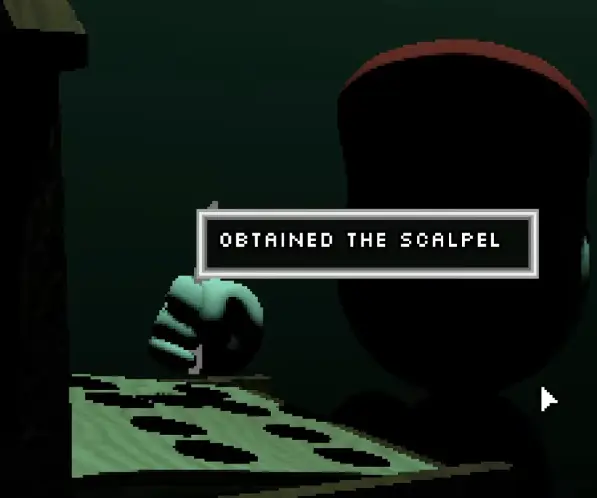
Completing the correct set awards the:
Scalpel
Use the Scalpel to Recover the Bingo Ball
I return to the patient who asks for something sharp and use the Scalpel.
This begins an Operation-style mouse maze.
I guide the tip of the Scalpel through the channel without touching the walls.
The route contains several stages.
I move slowly through corners because contact with an edge fails the attempt.
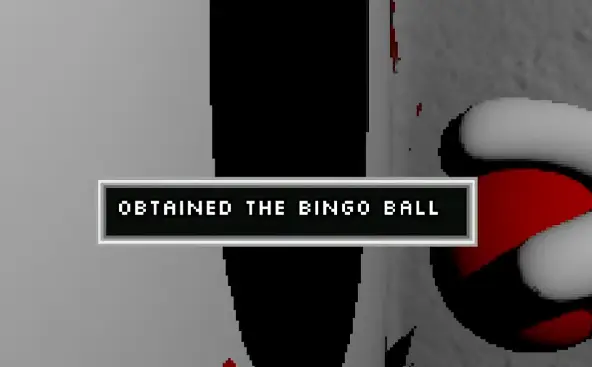
Near the end, I collect the missing red:
Bingo Ball
Complete the Five-in-a-Row Game
I return to Bun’s board and insert the missing red ball.
The objective is:
Five balls in one row
After winning, I ask Bun what makes Boon feel insecure.
The answer can vary between saves.
Possible clues include:
- age;
- voice;
- smell.
I use the exact answer Bun gives in the current save.
Make Boon Cry
I return to Boon and choose the insult matching Bun’s clue.
When the correct insecurity is used, Boon gives Melo the:
Cute Plushie
If Boon dismisses the insult, I return to Bun’s clue instead of choosing random options.
Deliver the Plushie
I take the Cute Plushie to the mime girl near the bouncy-castle side of Misery Town.
She asks Melo to deliver it to the microphone worker.
I give him the gift.
He leaves to speak with her, freeing the microphone.
Clear the Crowd
I use the microphone and tell the crowd to leave.
The crowd moves away and exposes the Trapezist stage route.
Chapter 2: Defeat the Trapezist
The Trapezist route begins with a performance-input sequence.
I wait for each visible cue.
Pressing before the next cue appears can restart the sequence.
Near the final transition, I reposition for the side change rather than leaving the cursor at the previous edge.
After clearing the performance, I continue into the direct confrontation.
Trapezist Battle
My strategy is:
- block the committed directional attack;
- strike back the clearly returnable object;
- use one counterattack during a safe opening;
- stop attacking when stamina becomes low;
- do not assume every block creates an opening.
Defeating the Trapezist unlocks:
Fatal Performance

I use the exit route and return to Roger.
Roger now asks Melo for a handsaw.
Chapter 2: Open Henry’s Saw Box
The Saw Box route begins in Melo’s bedroom.
Move the Reflection
I interact with Melo’s reflection in the mirror.
I use the intimidating response and tell it to move.
The reflection leaves, opening the path through the mirror.
Get Henry’s Floppy Disk
I speak with Henry and ask about the figures on his shelf.
After enough questions, Henry gives Melo a:
Floppy Disk
I take it to the computer, enter Henry’s profile and open:
PASSWORDS.TXT
The Saw Box entry uses:
471
444 belongs to the Brown Box and does not open the Saw Box.
The complete password list is in the Endacopia Puzzle Solutions Guide.
Save Before Selecting a Saw
The Saw Box contains:
- a working saw;
- a dummy or toy saw.
I can take only one.
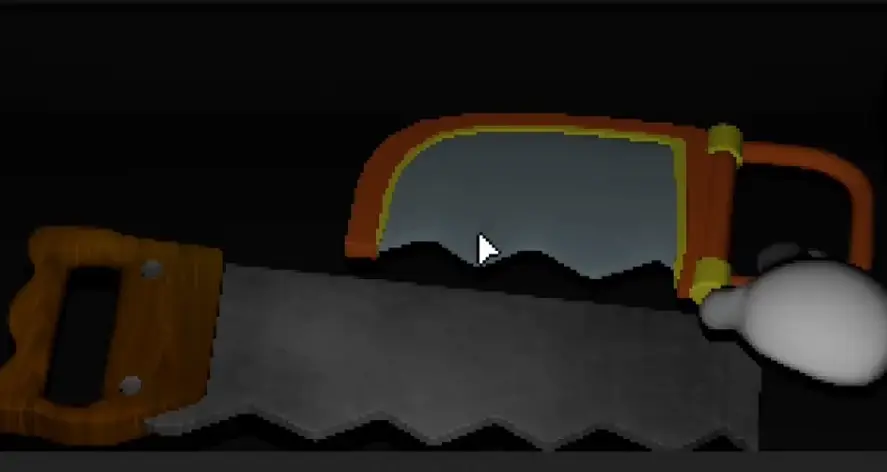
For this route, I take the:
Dummy saw
I give it to Roger.
This begins:
Chapter 3
The working-saw route is covered in the Endacopia Ending A and B Guide.
Chapter 3: Begin the Serial-Killer Investigation
Chapter 3 changes the central hub and returns the main objective to Timesville.
Residents have been displaced, and the new investigation does not begin from ordinary town side quests.
I return to the police, prison, shed and reference-room locations.
Reach the Maximum-Security Prisoner
I use Timesville’s day-and-night cycle to enter the police route while the guard is unavailable or asleep.
I continue through the hazardous interior until I reach the maximum-security prisoner.
The wall drawings and dialogue point toward:
- a key;
- a shed;
- eggs;
- looking upward;
- late-night timing.
I treat those drawings as location and timing instructions.
Use the Shed Clues
I advance the town clock to the required late-night period and return to the shed area.
I inspect the upper area indicated by the egg and key imagery.
Following the clue chain produces the reference information needed for the room reconstruction.
I save before moving the room objects.
Recreate the Reference Room
The reconstruction puzzle requires matching both positions and object states.
The details I check include:
- table position;
- microwave position;
- microwave door;
- food or bowl state;
- thermometer setting;
- fan state;
- nearby movable objects.
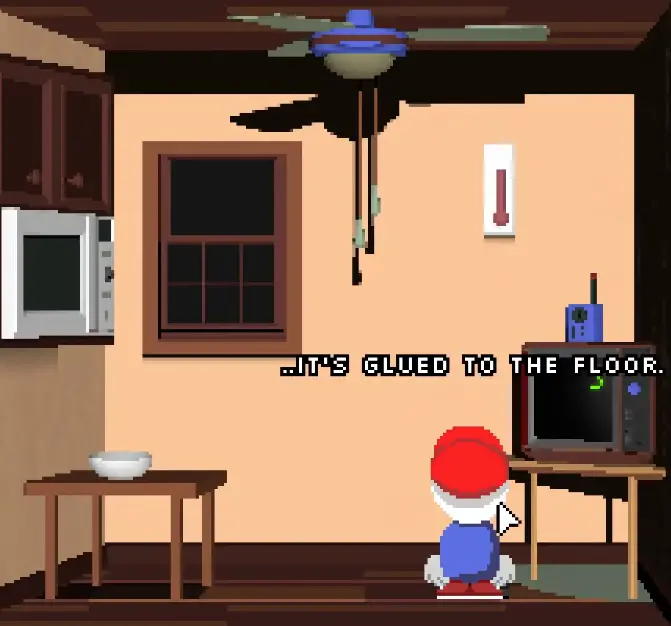
The microwave is the easiest detail to miss.
I make sure the prepared item and microwave door match the reference rather than simply placing the bowl nearby.
When every state matches, the room awards the:
VHS Tape
Play the VHS
I take the VHS Tape to the large television room and insert it into the player.
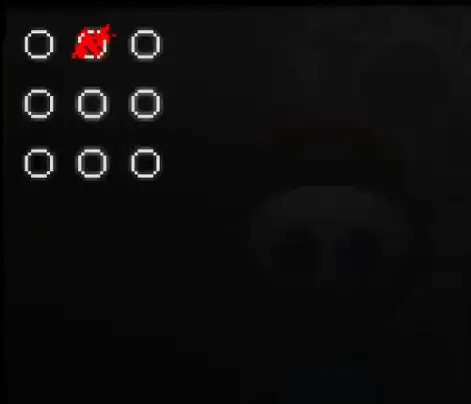
The sequence reveals five grid positions.
Counting the three-by-three grid from left to right and top to bottom, the code is:
4 → 1 → 3 → 9 → 8
I record the sequence before returning to the waterfall.
Enter the Waterfall Code
At the hidden input behind the waterfall, I select:
- middle-left;
- top-left;
- top-right;
- bottom-right;
- bottom-middle.
These are positions:
4 → 1 → 3 → 9 → 8
The hidden entrance opens into the film set.
Chapter 3: Enter the Film Set and Defeat the Chameleon
I continue past the VHS tapes and bodies until I meet the Chameleon.
The conversation can lead to an alternate identification route.
For the direct battle route, I fail to supply the correct identity and allow the confrontation to begin.
The Chameleon turns Melo into a puppet and attacks through two bodies.
Chameleon Battle
My priority is:
- watch the body that begins moving;
- identify its committed attack direction;
- block through the hit;
- counter once;
- return the guard toward center;
- check the second body;
- preserve stamina.
I do not change guard direction because the inactive body twitches.
Once one attacker is defeated, the remaining part becomes much easier to read.
Defeating the Chameleon unlocks:
No Strings Attached
The complete two-attacker strategy is in the Endacopia Boss Fights Guide.
Return to Roger
After the Chameleon route, I return to Roger.
He recognizes that Melo gave him a toy instead of the working saw he requested.
Roger says the deal is over and claims that the house and everything below it are dying.
I continue.
His rejection is part of the Ending A route and is not a failed ending.
Ending A: Take the Alternate Route
After leaving Roger, I eventually reach:
- one conspicuous single door;
- another less obvious opening.
I avoid the single door.
I take the alternate passage instead.
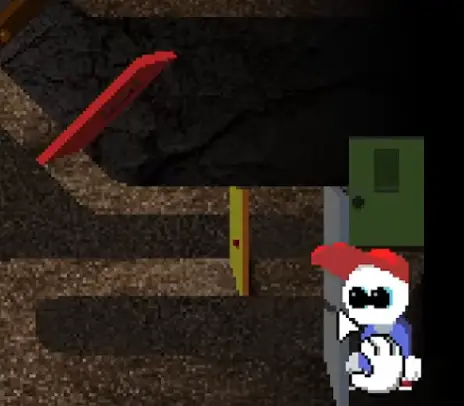
I save before choosing in case I enter the door accidentally.
Accept Tip’s Boost
The alternate route leads to Tip.
Tip cannot climb higher, but he offers to boost Melo.
I accept and climb onto him.

Tip asks Melo not to look back.
I continue forward.
Win the Final Multi-Sense Confrontation
The final encounter combines several threats:
- hands that stop or grab Melo’s hands;
- a mouth-based attack;
- directional strikes;
- overlapping animations;
- stamina pressure.
I identify the threat that is actively completing an attack.
I finish the required defensive response before countering.
When stamina becomes low, I stop attacking and preserve enough for the next defense.
After the confrontation, Melo wakes in a new house with Tip and the rescued residents.
Invite Everyone to the Marshmallow Gathering
Tip proposes a marshmallow gathering.
I speak to every resident before starting it.
I search:
- the ground floor;
- kitchen and side rooms;
- shower or bathroom area;
- upstairs rooms;
- outside the house;
- the upper exterior route.
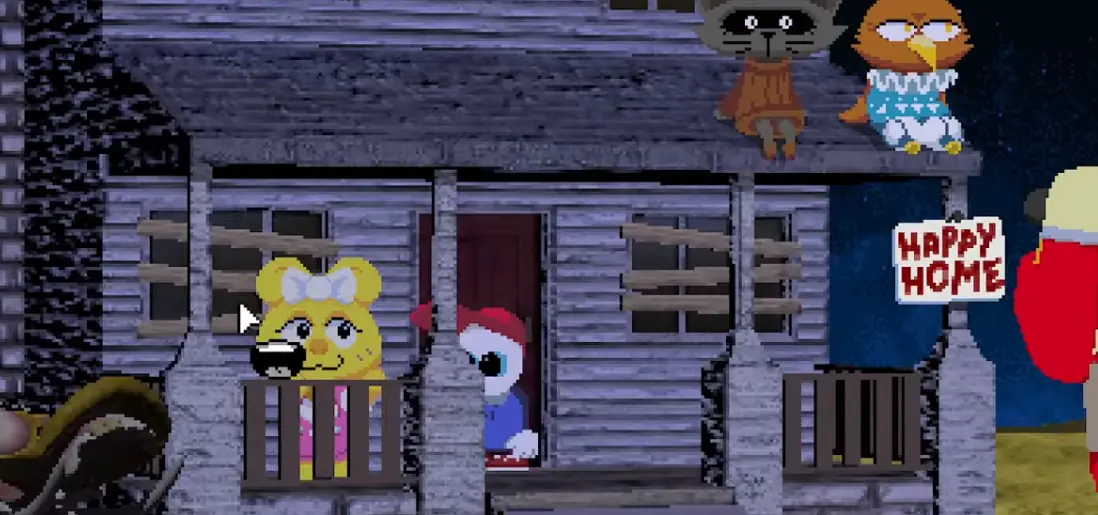
The last residents are easy to miss because some are stargazing away from the central gathering.
Once everyone has accepted, I return to the gathering trigger.
Ending A Result
The game displays:
YOU GOT ENDING A: FAMILY!
The hidden achievement unlocked for the route is:
Escape
Ending A is complete.
FAQ
What do I do if the Endacopia assessment gives me the wrong department? +
Return to the assessor and choose Request a reassessment. The main Call Center route requires the Remote Solutions Advisor result. A different result does not lock the save or require restarting Chapter 1.
Do Scribbly's paper pieces reset when the flashlight runs out? +
No. Paper pieces already collected remain in the booklet. Recharge the flashlight and return for the missing pieces until all eight have been found.
Why does Boon's correct insecurity differ between playthroughs? +
Bun's clue can change between saves. I have seen age, voice and smell used as the answer, so I always choose the insecurity Bun reveals in the current save.
Can I get Ending B without replaying the whole game? +
Yes. Keep a manual save before selecting a saw from Henry's Saw Box. Use the dummy saw for Ending A, then reload that save and take the working saw for the Ending B route.