How I Beat Every Endacopia Boss
I beat the AI, Trapezist and Chameleon with route checks, readable attack tells, safe stamina timing and separate battle-achievement saves.
Updated:
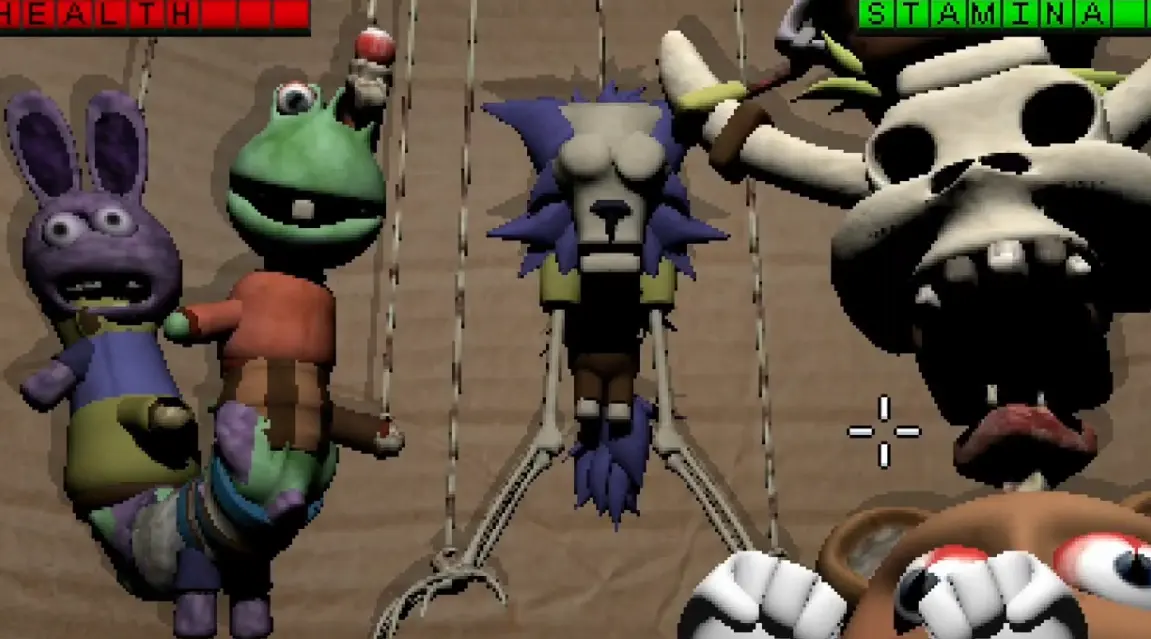
Quick answer: I beat all three bosses by keeping enough stamina for the next defense, holding the guard until the damaging hit actually connects and countering only during a confirmed opening. The main differences are that the AI has one fast attacker, the Trapezist mixes blocks with a returnable object, and the Chameleon attacks through two puppet bodies.
This guide covers the direct battle route against:
- the AI in the Core;
- the Trapezist in Misery Town;
- the Chameleon inside the hidden film set.
Each boss also has a separate non-combat achievement:
- AI battle: System Override
- AI avoided: Short Circuit
- Trapezist battle: Fatal Performance
- Trapezist avoided: Cut The Act
- Chameleon battle: No Strings Attached
- Chameleon avoided: Case Closed
I make a separate save before the last conversation or interaction that starts each encounter. That lets me test the other resolution without repeating a long puzzle chain.
The Three Combat Rules I Use
I only carry three universal rules between the fights.
Hold the block through impact
Moving the guard toward the correct side is not enough.
Several attacks have an early animation followed by a delayed damaging frame. I keep the defensive input held until the attack lands, then move back toward the center.
Counter once unless the enemy is clearly disabled
A single clean hit makes progress without committing all of my stamina.
After that hit, I reset my cursor and check the enemy again. I only continue attacking when the target is still visibly stunned or inactive.
Preserve the final part of the stamina bar
I never use the last part of the bar to test whether an opening is real.
When stamina is low, I defend through one complete enemy sequence and allow it to recover. Missing one possible counter is safer than entering the next directional attack unable to block.
Boss Order and Route Requirements
My battle order was:
- AI;
- Trapezist;
- Chameleon.
The broader areas can be explored flexibly, but the final fights require specific progression.
The AI needs the Office and Core route.
The Trapezist needs the Misery Town clown, microphone and stage sequence.
The Chameleon needs the Timesville investigation, VHS reconstruction and hidden waterfall input.
How to Reach the AI Boss
The AI route begins in the Office.
I complete the company tasks until I can obtain the wrench, then return to the water cooler and unscrew its casing. The Core item is already visible inside the cooler, but Melo cannot collect it before removing the casing.
The full route through the job assessment, five calls, employee items and water cooler is covered in the Endacopia Office and Call Center Guide.
After collecting the Core access items, I travel to the Core and use the eye scanner.
The final four-control puzzle is based on heartbeat speed.
I enter the controls from slowest to fastest:
Green → Yellow → Black → Red
The four-color input opens the encounter. It does not award the battle achievement by itself.
How to Beat the AI
The AI is the simplest boss to read because there is only one active attacker.
Its difficulty comes from short pauses and fast directional changes, not from tracking multiple targets.
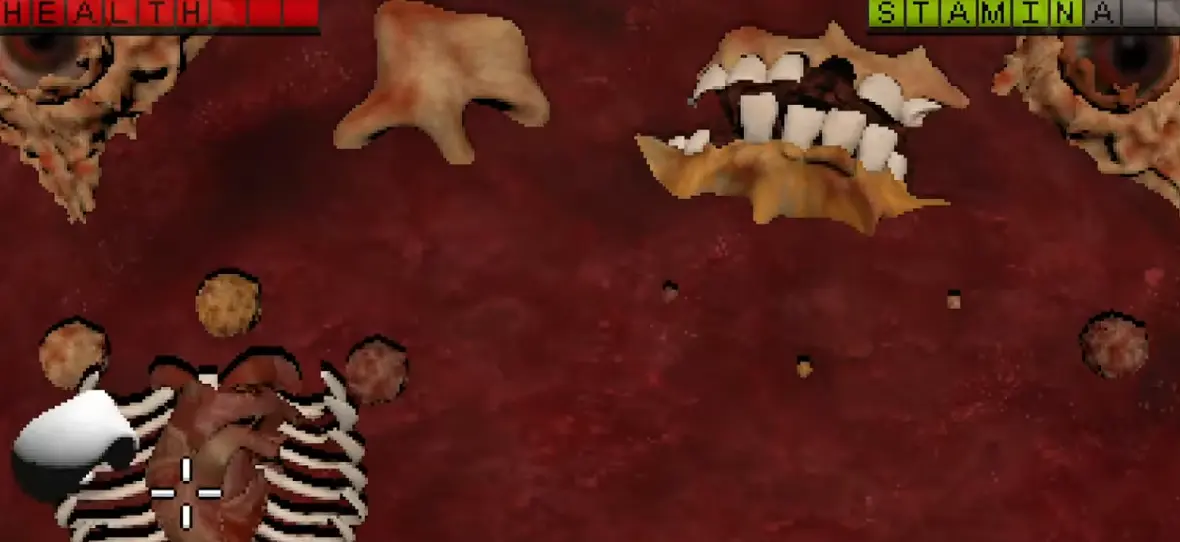
The AI tells I watch
I separate its behavior into three states.
Committed attack: the movement continues toward a clear side. I align the guard with that angle and hold it through contact.
Real opening: the attack has ended and the AI remains unresponsive long enough for one hit.
False opening: the AI pauses briefly but immediately begins another directional movement. I skip the counter and defend again.
The first movement is not always the damaging frame. Releasing the block as soon as the animation looks finished caused more failures than choosing the wrong side.
My AI-specific rhythm
I start with the cursor near the middle of the screen.
When the direction becomes clear, I move once to that angle rather than circling around the target.
After the hit lands:
- if the AI remains inactive, I attack once;
- if it immediately begins moving, I do not attack;
- if my stamina is low, I use the next pattern only to recover.
I return the cursor toward the center after every exchange.
This matters more against the AI than trying to squeeze in a second punch. The fight is short enough that consistent single hits are sufficient.
Why I kept losing to the AI
My failed attempts came from treating every pause as a guaranteed opening.
I would attack twice, empty the stamina bar and then receive a fast attack from the opposite side.
The correction was not faster reactions. It was reducing the number of unconfirmed attacks.
AI failure and retry behavior
A failed attempt returns me to the current encounter rather than requiring the Office calls, water cooler and heartbeat sequence again.
I still keep the manual save before the final Core resolution because a combat retry does not give me the separate avoidance achievement.
System Override versus Short Circuit
Defeating the AI in battle unlocks:
System Override
Avoiding the fight unlocks:
Short Circuit
For the battle route, I continue until the combat HUD appears and defeat the AI normally.
For the avoidance route, I reload the save made before the final Core resolution and take the non-combat branch. I do not overwrite this save after entering battle.
I would not publish a guessed dialogue combination here: the achievement confirms that an alternate resolution exists, but the precise Short Circuit choice chain should be added only after it has been completed and checked in game.
How to Reach the Trapezist
The Trapezist route begins in Misery Town after Melo has recovered the missing senses.
The crowd blocks the main attraction, and the microphone worker initially refuses to let Melo use the microphone.
My required item chain is:
- solve the dead-clown film puzzle;
- collect the Scalpel;
- use it in the Operation-style route;
- obtain the missing Bingo Ball;
- make five balls line up in Bun’s game;
- ask Bun for Boon’s current insecurity;
- use that exact insecurity on Boon;
- receive the Cute Plushie;
- deliver the gift between the mime girl and microphone worker;
- use the freed microphone to clear the crowd.
Bun’s answer is not fixed between every route. I have encountered different insecurity answers, so I use the clue given in the current save rather than copying one answer from another playthrough.
Once the crowd leaves, I enter the stage.
Complete the Trapezist Performance
The performance is separate from the boss battle.
A failed input can restart the performance from the beginning, so guessing ahead saves less time than waiting for the visible cue.
Near the end, the required input moves to another side of the screen.
I reposition after clearing the previous cue instead of waiting at the edge and trying to cross the whole screen after the next symbol appears.
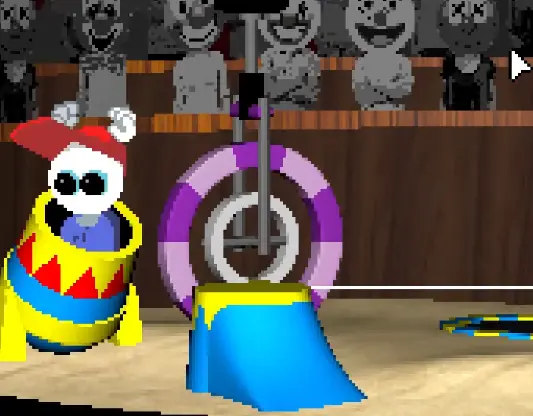
Completing the performance reaches the conversation with the Trapezist.
It does not unlock Fatal Performance.
How to Beat the Trapezist
The Trapezist introduces the first important split between attacks that should be blocked and an object that should be struck back.
I decide from the object’s movement, not from the Trapezist’s position.
Ordinary directional attacks
When an attack is already travelling toward Melo from a clear side, I block.
I follow the incoming angle and hold until contact.
I do not throw a punch just because an object entered the screen. Swinging at a normal attack wastes stamina and leaves the following angle undefended.
The returnable object
The returnable object has a clearer approach toward Melo and a visible moment when it enters striking range.
I let it come close enough for one deliberate hit.
Attacking while it is still far away caused my swing to finish before the object reached Melo.
After a successful return, I stop pressing attack and watch what the Trapezist does next.
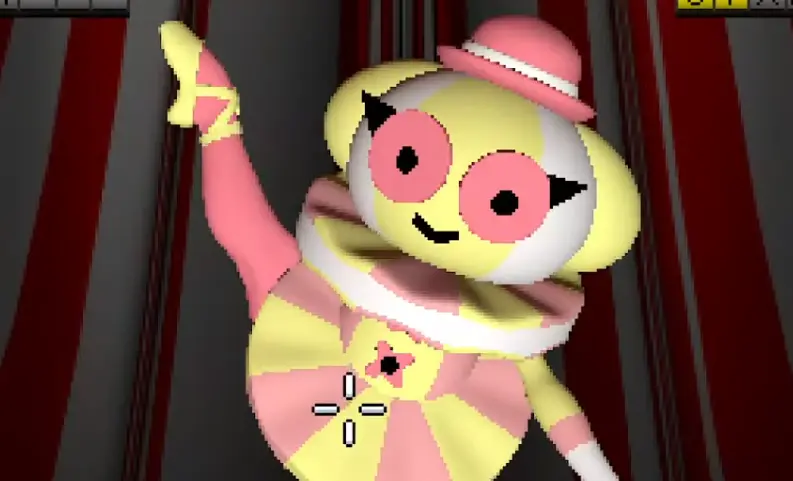
The Trapezist-specific decision loop
For each object, I make one decision:
- clear normal trajectory toward Melo: block;
- clear return window close to Melo: attack once;
- unclear movement: keep defending.
After a return hit, I check stamina before trying anything else.
If the bar is low, I block the next normal pattern and let the bar recover. The fight does not require constant aggression.
Why the Trapezist kept damaging me
My main mistake was trying to strike every visible object.
The fight uses objects both as attacks and as counter opportunities. They do not all accept the same response.
The second mistake was releasing the block after moving it into position but before the object actually connected.
Trapezist failure and retry behavior
Missing a cue before the confrontation restarts the stage-input sequence.
Losing after the battle begins returns to the active encounter rather than removing the Scalpel, Bingo Ball, plushie or completed microphone route.
Because the performance and fight are different checkpoints, I do not confuse a performance reset with lost story progress.
Fatal Performance versus Cut The Act
Defeating the Trapezist unlocks:
Fatal Performance
Resolving the confrontation without battle unlocks:
Cut The Act

I save after finishing the performance but before committing to the final conversation.
For Fatal Performance, I select the branch that continues into the combat HUD.
For Cut The Act, I reload that save and pursue the non-combat resolution. If the combat HUD appears, I know I have already committed to the battle branch and reload instead of finishing it again.
The exact Cut The Act dialogue chain should remain separate from the verified battle instructions until every choice has been tested. One compassionate question by itself is not proof that the complete non-combat chain has been selected.
How to Reach the Chameleon
The Chameleon requires the longest setup.
I begin with the Timesville serial-killer investigation.
The required progression includes:
- reaching the maximum-security prisoner;
- interpreting the shed, egg, key and nighttime clues;
- using the correct town time;
- recreating the reference room;
- receiving the VHS Tape;
- playing the tape on the large television;
- recording five grid positions;
- returning to the waterfall;
- entering the sequence;
- following the opened route into the hidden film set.
The room reconstruction checks object states as well as positions.
The microwave door, prepared bowl, temperature and fan can prevent the VHS from appearing even when the furniture looks correct.
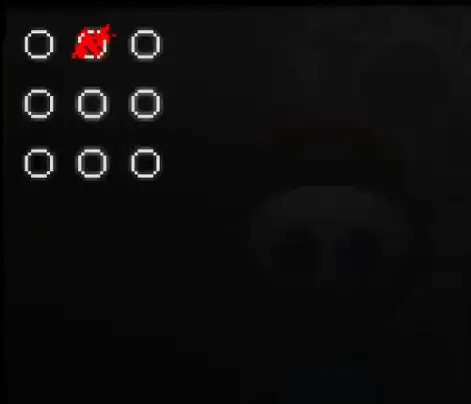
The VHS reveals five positions on a three-by-three grid.
Numbering the grid from left to right and top to bottom, my sequence is:
4 → 1 → 3 → 9 → 8
At the waterfall input, that means:
- middle-left;
- top-left;
- top-right;
- bottom-right;
- bottom-middle.
I save before speaking to the figure inside the film set.
That conversation controls whether the scene becomes a battle or an alternate resolution.
How to Beat the Chameleon
The Chameleon turns Melo into a puppet and attacks through two puppet bodies.
This is the hardest fight because the screen can look quiet while the second body is already beginning its attack.
Track one committed attacker at a time
I prioritize:
- the body whose movement continues;
- its attack direction;
- Melo’s stamina;
- the second body after the first exchange ends.
I do not try to watch Melo, the Chameleon and both bodies with equal attention.
The Chameleon himself is not the immediate directional cue. The active puppet is.
Do not react to the first twitch
One puppet may move without immediately delivering the damaging hit.
If I switch the guard every time either body twitches, the real attack lands from the side I just abandoned.
I wait for a body to continue into a committed motion, then guard that angle through impact.
Check the second body before countering
After blocking the first attacker, I look at the other body before throwing a punch.
This is the key difference from the AI.
Against the AI, a completed attack leaves only one possible threat.
Against the Chameleon, the second puppet may already be starting its own sequence.
I counter only when:
- the first attack has ended;
- the second body is not committing;
- and I have enough stamina to defend afterward.
The fight becomes easier after one puppet falls
Once one body is removed, the number of attack sources drops from two to one.
At that point, I return to the simpler rhythm:
- wait for the committed direction;
- block through impact;
- use one confirmed counter;
- reset.
I do not become more aggressive simply because only one body remains. The remaining attacker can still punish an empty stamina bar.
Why I kept dying to the Chameleon
My first failure came from staring at the body I had just blocked.
While it was recovering, the other body began moving.
I attacked the first target, missed the second cue and entered the next exchange at low health.
The solution was to treat every completed block as a signal to check the other side, not as an automatic counter prompt.
Chameleon failure and retry behavior
After losing, the encounter returns to the Chameleon conversation and battle area.
I do not have to reconstruct the VHS room or re-enter the waterfall sequence.
This makes the fight safe to practise, but I still preserve the manual save for the alternate achievement branch.
No Strings Attached versus Case Closed
Defeating the Chameleon in battle unlocks:
No Strings Attached
Correctly resolving his identity without combat unlocks:
Case Closed
In my battle route, answering that he was the serial killer led into the puppet fight.
That answer describes his crimes, but it does not correctly identify who he is.
For No Strings Attached, I continue with that wrong or hostile identification and defeat both puppet attackers.
For Case Closed, I reload the pre-conversation save and use the correct identity resolution rather than accusing him generically.
I do not overwrite the save until the intended achievement appears.
Battle Achievements Checklist
After the direct battle route, I verify these three achievements:
- System Override — defeated the AI in battle;
- Fatal Performance — defeated the Trapezist in battle;
- No Strings Attached — defeated the Chameleon in battle.
The corresponding avoidance achievements are separate:
- Short Circuit — avoided battling the AI;
- Cut The Act — avoided battling the Trapezist;
- Case Closed — avoided battling the Chameleon.
Solving the preceding puzzle or watching the ending scene is not enough for a battle achievement.
The game must register the boss as defeated through combat.
Do Boss Choices Change the Endings?
The boss decisions and ending decisions are related parts of the same route, but they are not the same branch.
I reached later ending content after taking the direct boss-battle routes.
The major Ending A and Ending B decision occurs later around Roger’s handsaw request:
- the dummy or toy saw supports the Ending A route;
- the working saw supports the Ending B route;
- later door decisions also matter.
Therefore, I do not replay an entire save because I defeated a boss and later want a different saw ending.
I only reload the individual pre-boss saves when I want the paired avoidance achievements.
Difficulty and Controls
I did not find a separate combat difficulty selection in the route covered here.
The practical difficulty comes from mouse precision, attack recognition and stamina management rather than a chosen Easy, Normal or Hard setting.
This guide uses:
- right click for the defensive stance;
- cursor movement to align the guard;
- left click for attacks and returning the Trapezist object.
I keep normal mouse sensitivity during the fights.
Very high sensitivity made the Chameleon harder because small corrections could move the guard past the intended side. Very low sensitivity made the Trapezist’s late performance cue harder to reach.
I do not provide controller button mappings because I have not verified a controller version of these interactions.
When I Reload and When I Keep Going
I reload when:
- I wanted an avoidance achievement but the combat HUD appeared;
- I completed the wrong boss-resolution branch;
- I overwrote a save made before the final conversation;
- the intended achievement failed to appear after the resolution.
I keep going when:
- I missed one safe counterattack;
- stamina is low but Melo still has enough health to defend;
- the Chameleon has removed one puppet and only one threat remains;
- a failed attempt returns me to the current encounter.
Most boss failures came from rushing a recoverable attempt, not from entering the fight with permanently bad progress.
The safest clear is rarely the fastest one.
FAQ
Can I earn both boss achievements from one Endacopia save? +
I use a separate manual save before each final boss conversation. The battle and avoidance achievements belong to opposite resolutions, so I reload the pre-conversation save after one achievement unlocks instead of replaying the entire Office, Misery Town or Timesville route.
Does fighting an Endacopia boss lock me out of Ending A or Ending B? +
No. I reached the later ending routes after defeating the bosses. The major Ending A and Ending B split happens later around Roger's saw request and the following door choices, not when I choose System Override, Fatal Performance or No Strings Attached.
What happens when I lose an Endacopia boss fight? +
The failed attempt returns to the active encounter or its immediate conversation rather than deleting completed area puzzles and key items. I still save before the branch because a retry does not replace a separate save for collecting both the battle and avoidance achievements.
Should I use a controller for Endacopia boss fights? +
This guide uses keyboard and mouse. Directional guarding, cursor recentering and striking moving objects are designed around mouse input, and I do not use unverified controller mappings.