Daugavpils Map Guide: Positions, Player Split & Push Routes
Daugavpils is easier to control once I treat Alpha as an isolated pocket, the center as a shared vision fight and the high-rises as strategic terrain.
Updated:
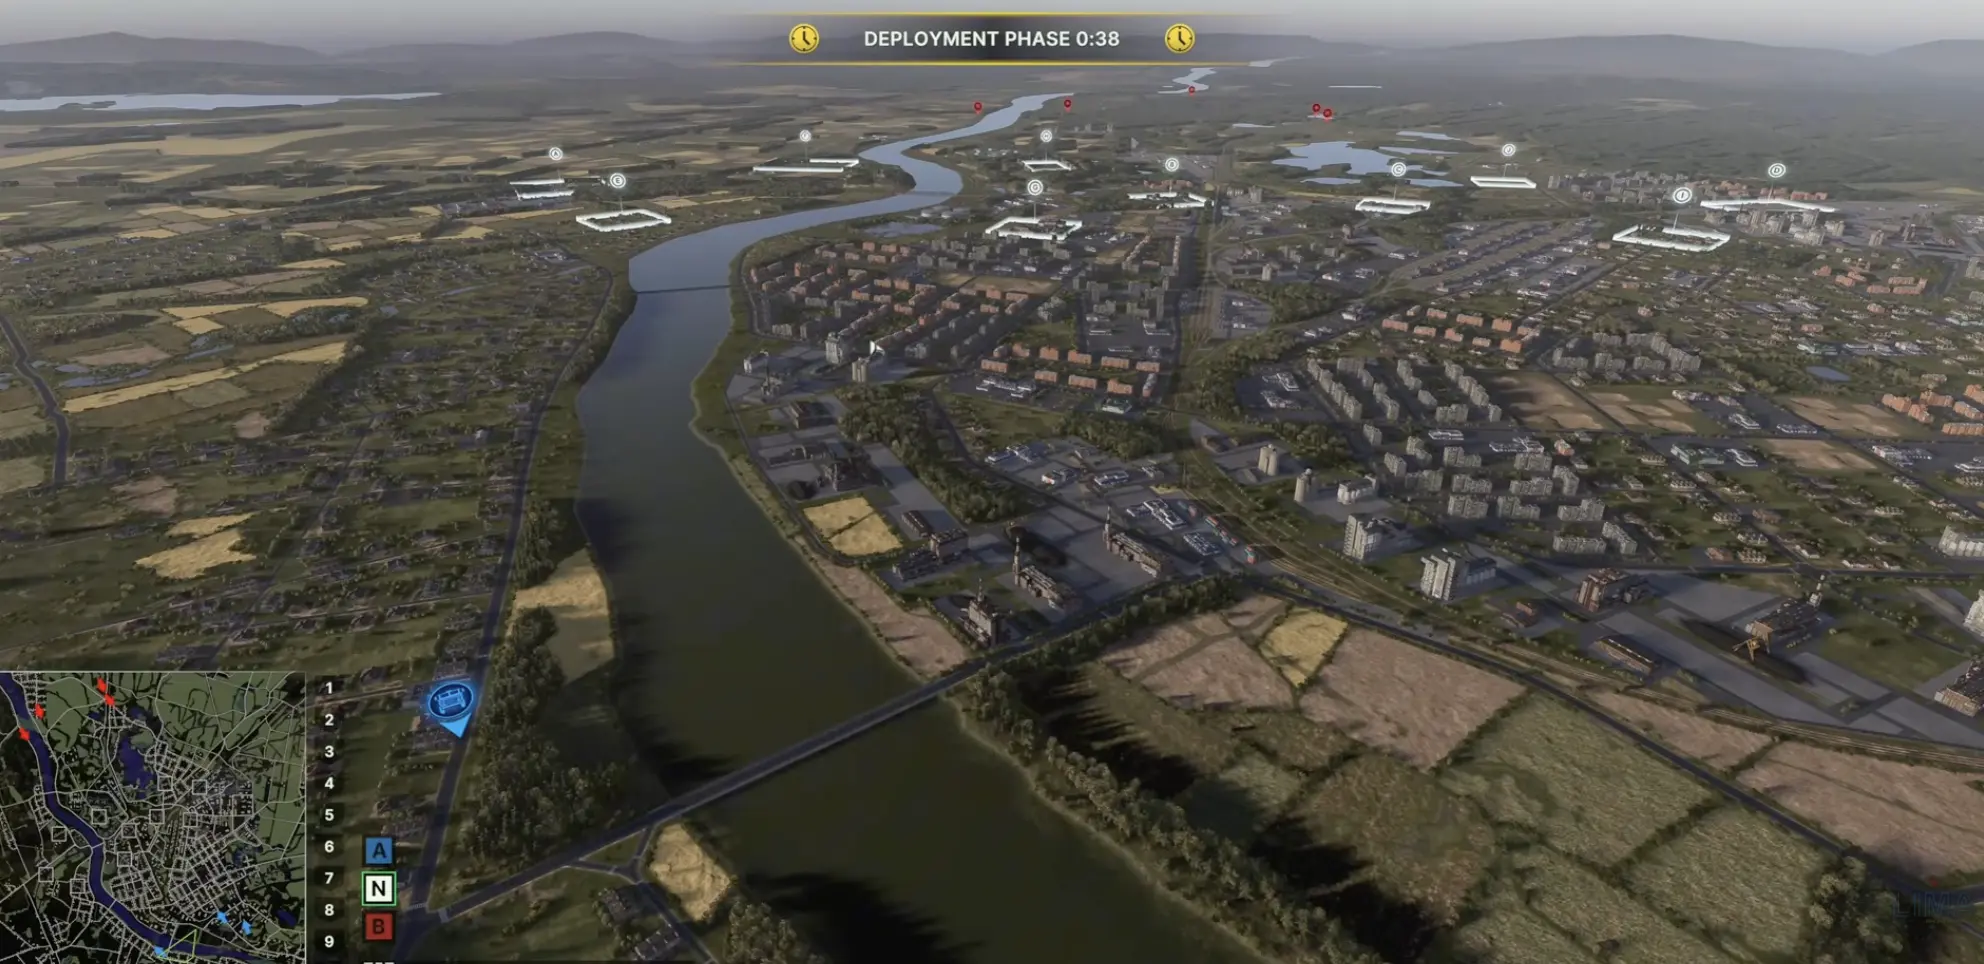
Quick answer: In 5v5, I usually leave one player on the isolated Alpha/Echo side, concentrate more force around Bravo, Charlie and the central high ground, and give the high-rise/Delta-India side two players who can also influence the middle. I secure firing positions before capture zones, cross the bridge only after another threat has pulled defenders away, and turn a successful breakthrough sideways whenever that creates a better crossfire than another exposed push forward.
Daugavpils is not five objectives connected by five neat lanes.
The river breaks some routes apart. Tall buildings connect fights that look separate on the ground. Alpha can become almost self-contained, while a squad in the right central building may affect two or three sectors without standing inside any capture zone.
That makes player allocation more important than simply matching one teammate to one letter.
My starting question is:
Which position lets this player affect more than the square directly in front of them?
That one question changes how I handle most of the map.
If you are looking for the PvE mission rather than the multiplayer layout, the Assault on Daugavpils walkthrough covers sabotage, mission objectives, counterattacks and the later observer phase.
Give the Alpha-Echo Pocket One Clear Owner
Alpha sits far enough away from the central interaction that I normally assign one player to the whole pocket rather than treating Alpha and Echo as separate jobs.
The useful terrain is around the zone.
Buildings and forest edges can watch the approaches while anti-vehicle weapons sit far enough behind them to punish a fast push.
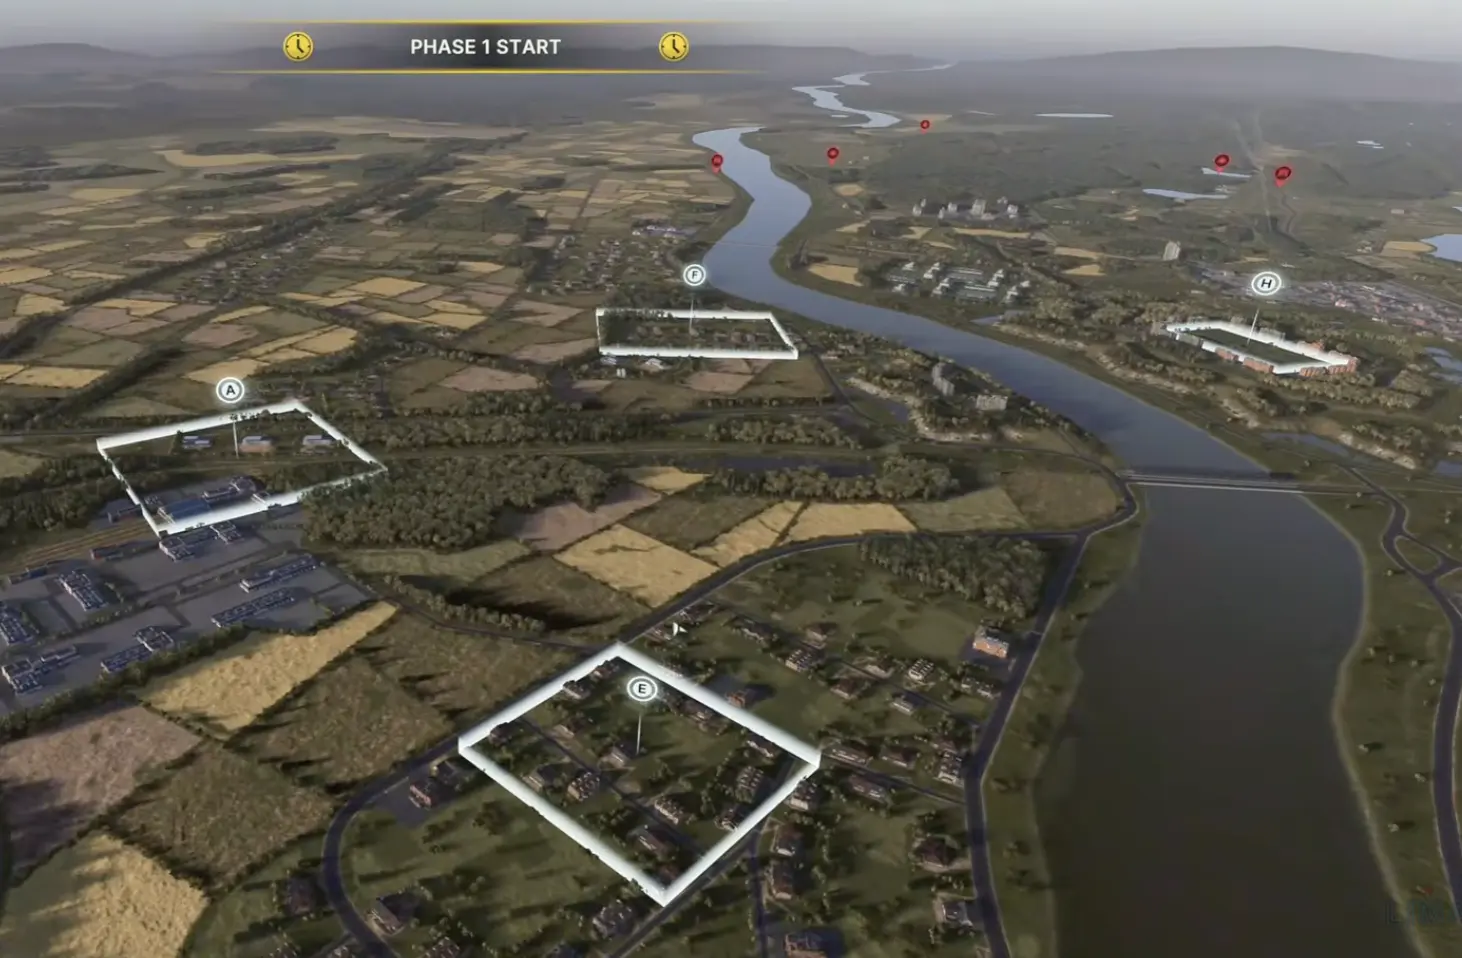
I want three things before I call Alpha stable:
- infantry occupying the useful approach cover;
- enough anti-vehicle pressure to stop a quick drive through the sector;
- vision beyond the capture zone so the next reinforcement wave does not arrive unseen.
The capture marker itself gets only the presence required to score.
Putting everything directly on Alpha makes artillery more efficient without improving control of the approach.
After Alpha is secure
This side reaches diminishing returns quickly.
If one player can deny the recapture, I would rather send the next meaningful investment toward the center than add another expensive unit to a pocket that is already difficult to break.
A second tank at Alpha may improve an already favorable local fight.
The same tank helping Bravo or threatening a side angle can change the match.
A Win on Alpha Has Two Exits
Breaking the isolated side open creates a decision that should happen immediately.
There are two useful directions:
continue deeper into the enemy backline, or
turn toward the neighboring fight and create a flank.
I keep going deeper when the opponent has genuinely collapsed and their next reinforcement cannot reach the next objective before I can.
I turn toward the center when:
- the following objective is already being rebuilt;
- the adjacent teammate is still in an even fight;
- my new position gives me a side or rear angle into that engagement;
- continuing forward would force another exposed crossing.
The sideways option is often more valuable because the units that just won Alpha arrive in the next fight from a direction the defender was not originally facing.
Instead of winning one lane twice, I can make another lane much easier to win once.
The Bridge Works Better as a Threat Than an Opener
The bridge is an obvious connection.
Its geometry also makes it easy to prepare against.
A vehicle crossing it has limited freedom to change direction, while buildings and tree lines on the far side can generate several firing angles into the same narrow movement.
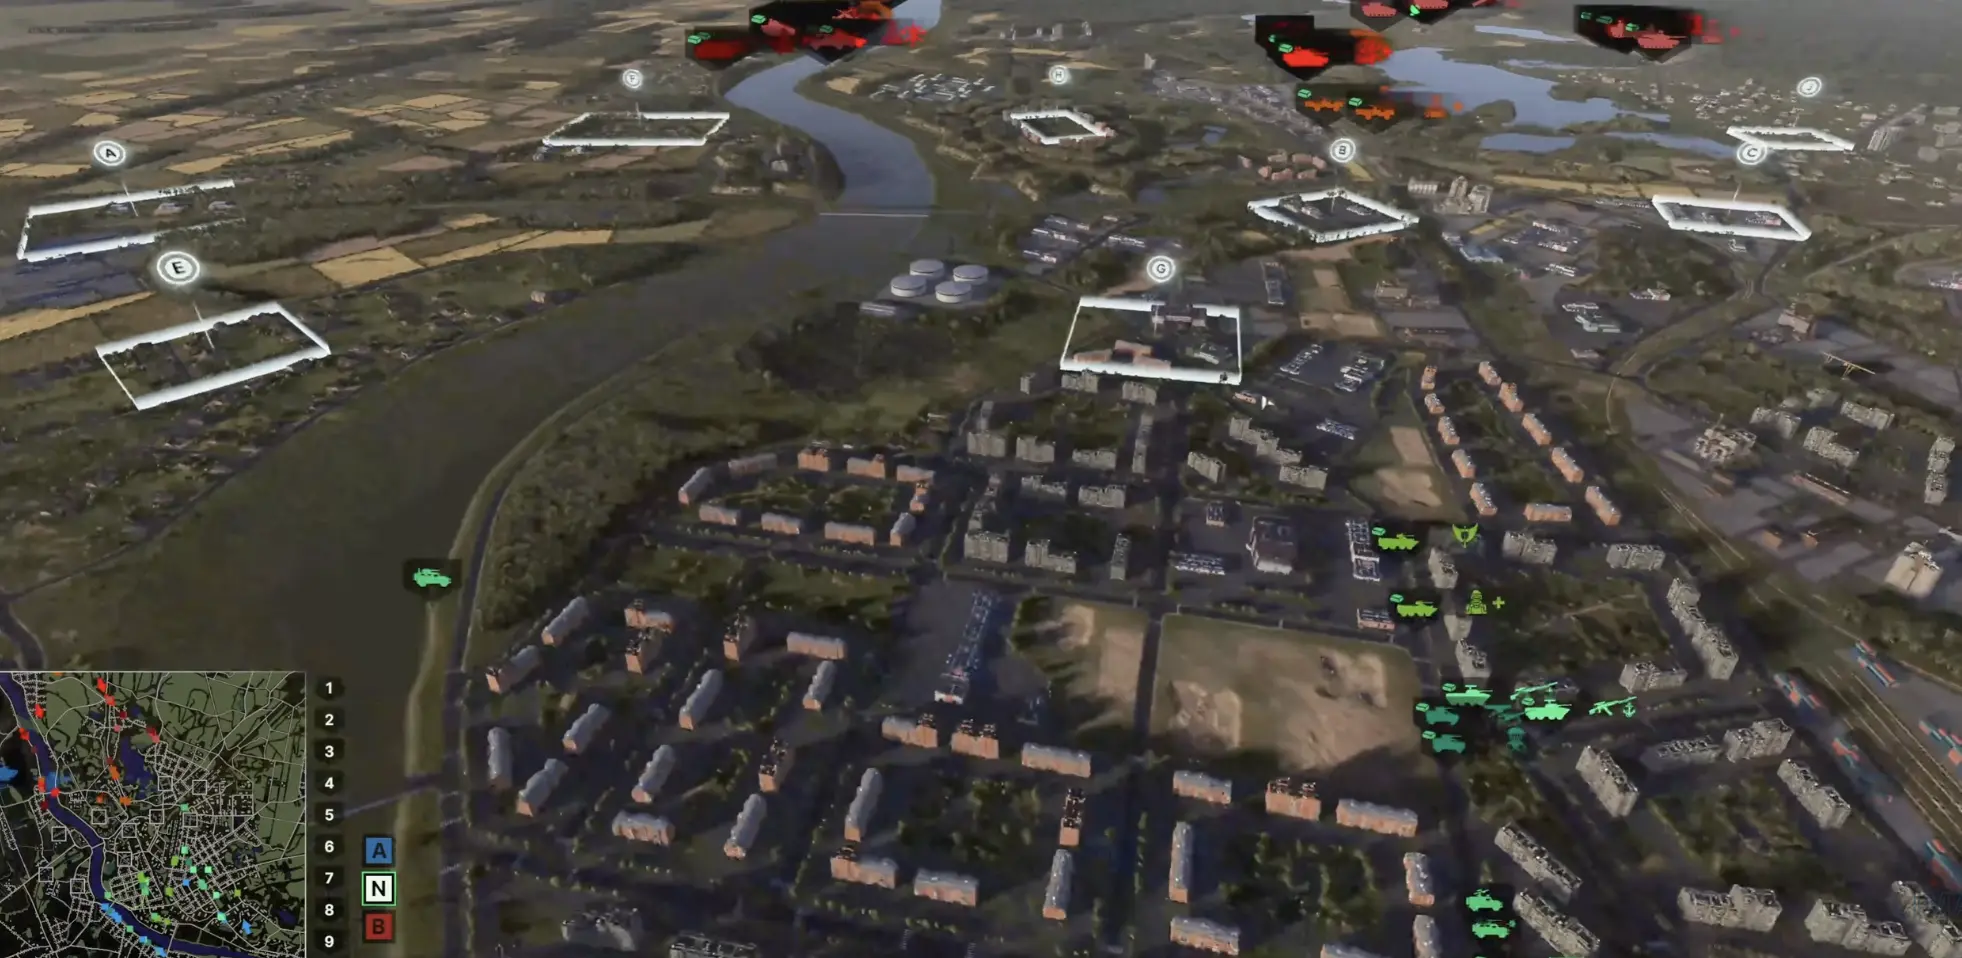
I want activity beside the bridge before activity on the bridge.
A good crossing window looks like this:
- the neighboring objective is already under pressure;
- recon has located at least the obvious anti-vehicle positions;
- one major sight line is covered by smoke;
- artillery or air has displaced a defender;
- enough force is ready to cross together rather than arriving one vehicle at a time.
Then the bridge becomes a connector between two problems.
If the defender can spend full attention on the bridge, I leave it closed.
There is no prize for being the first player to prove that the crossfire works.
Bravo Is a Vision Fight Before It Is a Capture Fight
Bravo sits near terrain that can influence a much larger part of the center.
I therefore spend early effort on the high ground and useful buildings around it.
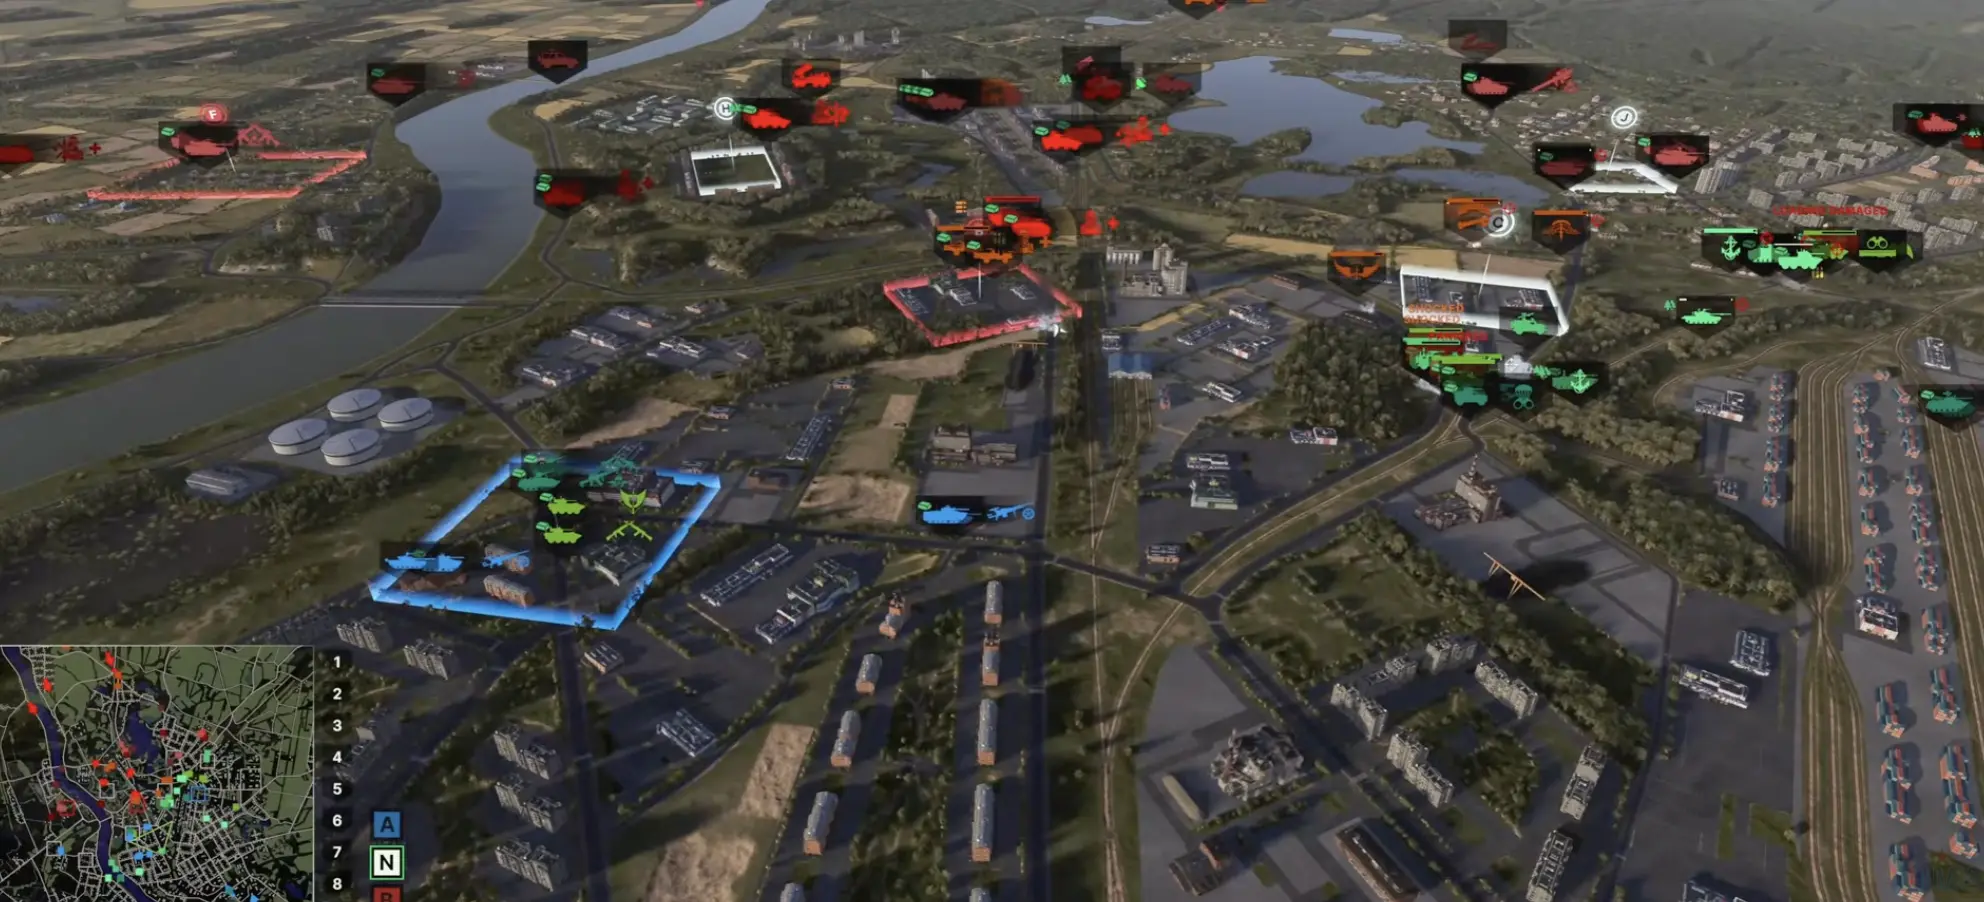
Recon earns a lot of value here.
A squad placed high enough can reveal movement toward Bravo before it reaches the objective. Snipers and long-range AT can use the same geometry to pressure units that believe they are approaching behind cover.
I am comfortable leaving Bravo neutral while I improve that sight picture.
Neutral ground with favorable vision can be better than a captured objective surrounded by enemy firing positions.
Once the high ground is mine, the marker becomes much easier to enter.
Charlie Needs a Side Position Before a Capture Unit
Charlie presents open approaches on both sides.
That makes the nearby buildings the first pieces I care about.
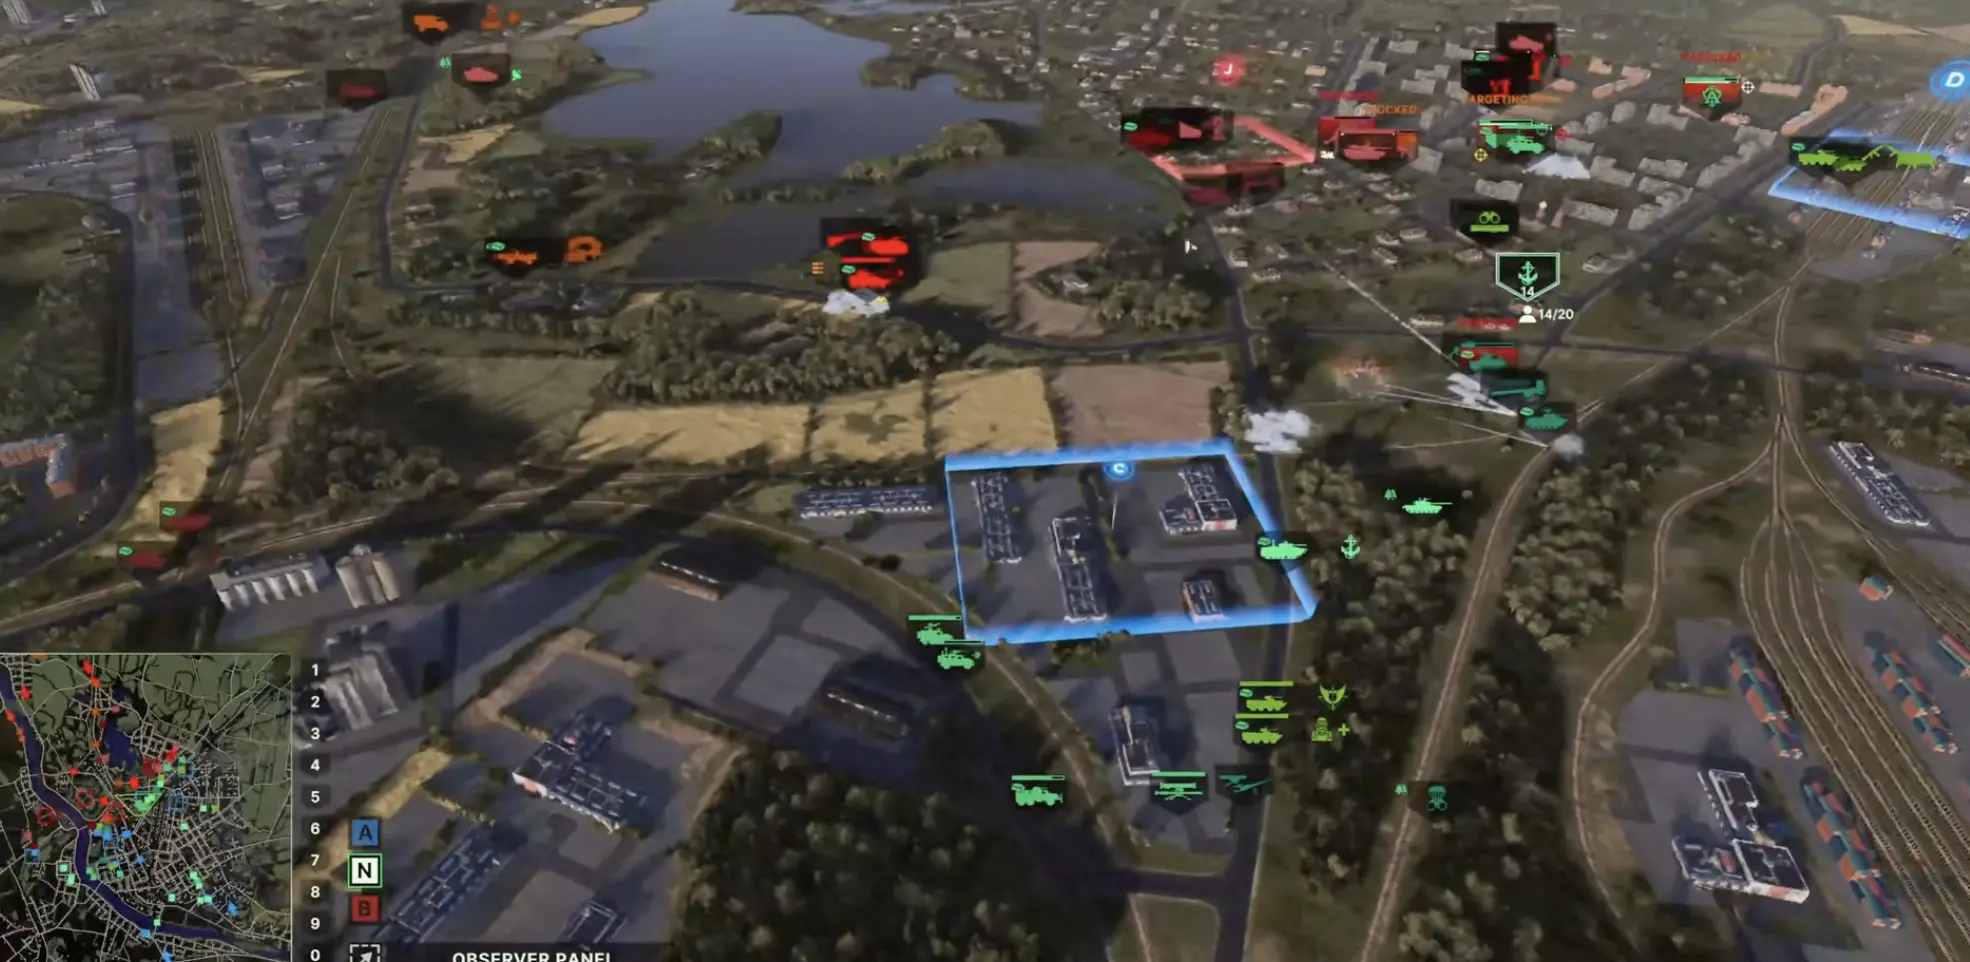
I normally build the Charlie fight outward from one flank structure.
Recon checks the objective and the surrounding buildings.
Infantry occupies the structure that gives the best side angle.
A sniper, ATGM or another long-range unit begins watching the approach.
Smoke covers the exposed final movement.
Only then does a squad enter the zone.
The important advantage survives even if the capture fails.
I still own a forward building that gives the next wave a shorter route and a firing position into the objective.
Sending the capture squad first produces the opposite result: I may briefly own Charlie while the other team still owns every place that shoots into it.
The High-Rises Function Like an Extra Objective
Some of the best ground in Daugavpils does not score anything directly.
The tall central buildings can see deep enough into the map that a reconnaissance squad, sniper or long-range AT team may influence several routes from one position.
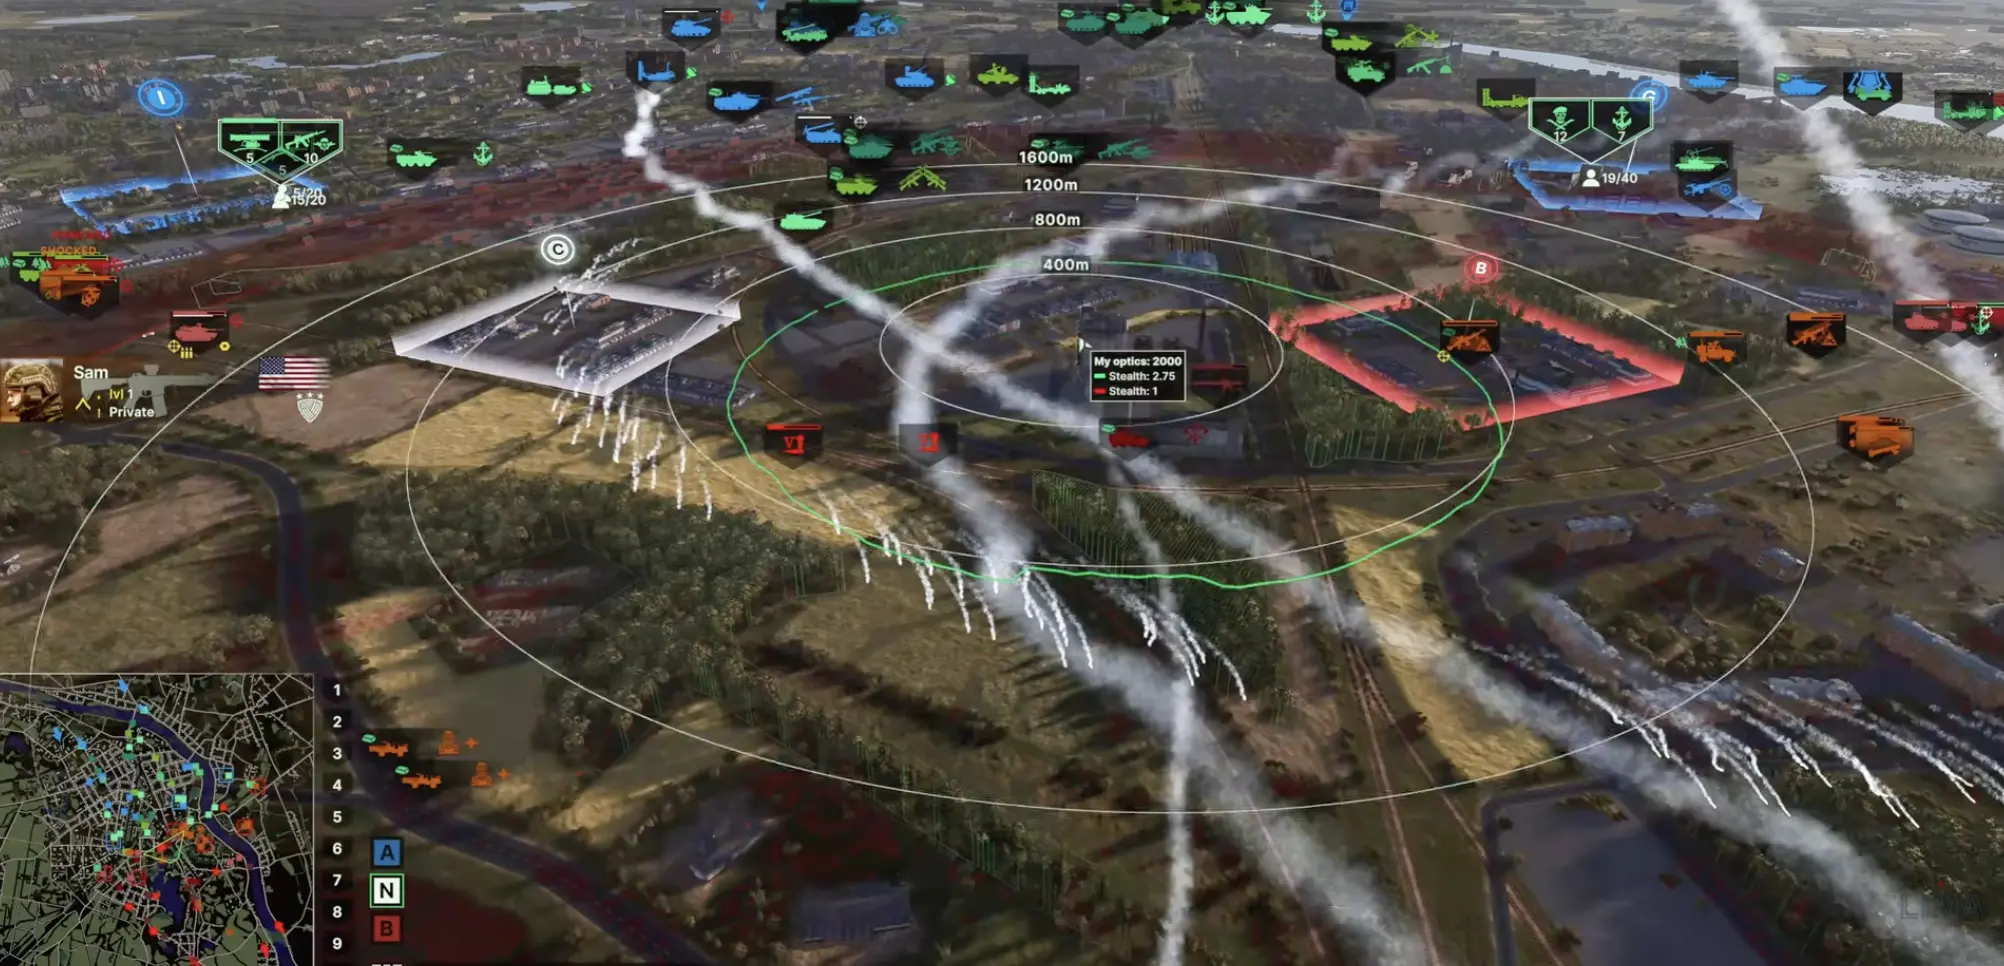
I spend on these buildings when the position answers more than one question.
Can it watch reinforcements approaching Bravo?
Can it see movement toward Delta?
Can the same observer support artillery aimed at a neighboring lane?
If yes, the building is already producing value without a capture icon underneath it.
High-rise occupancy should rotate
A valuable tower becomes an obvious artillery target once it has fired or spotted enough important units.
I avoid putting every expensive squad into the same structure.
Recon may use one building.
A sniper or AT unit takes another.
If one position has been active for too long, I move the important unit before the opposing artillery finishes the argument.
High ground multiplies information.
It also multiplies how obvious the position becomes once the enemy understands what is inside it.
Delta Favors the Player Who Is Already There
Delta’s rail, container and building layout produces short, awkward firing lanes.
Vehicles entering directly can face infantry with RPGs or close-range weapons from angles that are difficult to inspect before the contact begins.
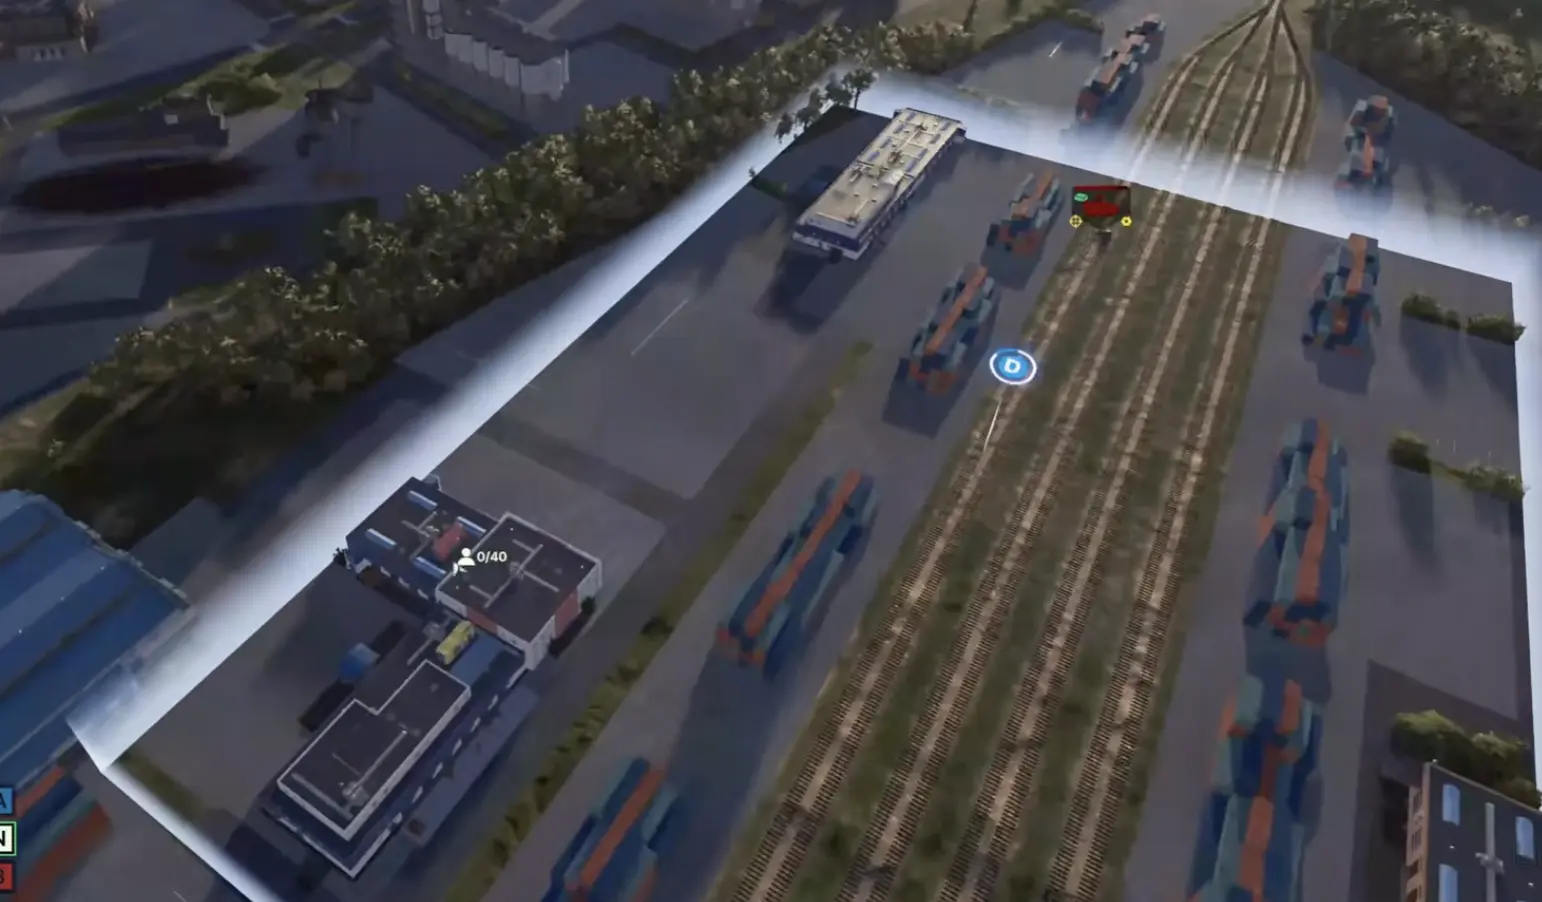
As the defender, I use that friction.
CQB and RPG infantry stay spread among the short-range positions.
Longer-range AT sits farther back where it can fire into vehicles already distracted by the close fight.
I make the attacker spend the expensive tools needed to clear the sector.
As the attacker, I am willing to leave Delta unresolved.
A dug-in player occupying good container and building geometry can absorb a lot of points without giving me much access to the rest of the map.
Sometimes pinning that player cheaply is enough.
India Gives the Delta Side Somewhere Else to Spend
The Delta side becomes more useful when I stop seeing Delta as the only forward direction.
Pressure toward India or the central high ground can force the defender to divide attention and may open a route that influences the middle much more directly.
This is especially useful when Delta has settled into a CQB stalemate.
I leave enough force to keep the defender honest.
The remaining points go where their movement changes another sector.
A pinned Delta defender is still occupied.
I do not need to remove every enemy unit from the sector before taking advantage of that.
My 5v5 Shape Starts as 1-2-2
I find five equal solo assignments inefficient on this map.
My starting distribution is closer to:
1 player — Alpha/Echo pocket
This player wins the isolated side, establishes a defendable position and releases attention once the sector stops requiring major reinforcement.
2 players — Bravo, Charlie and central high ground
These players share reconnaissance and fire support rather than treating Bravo and Charlie as sealed fights.
2 players — high-rise / Delta-India side
One can handle the short-range Delta problem while the other works the taller buildings, India approach or a supporting angle toward the center.
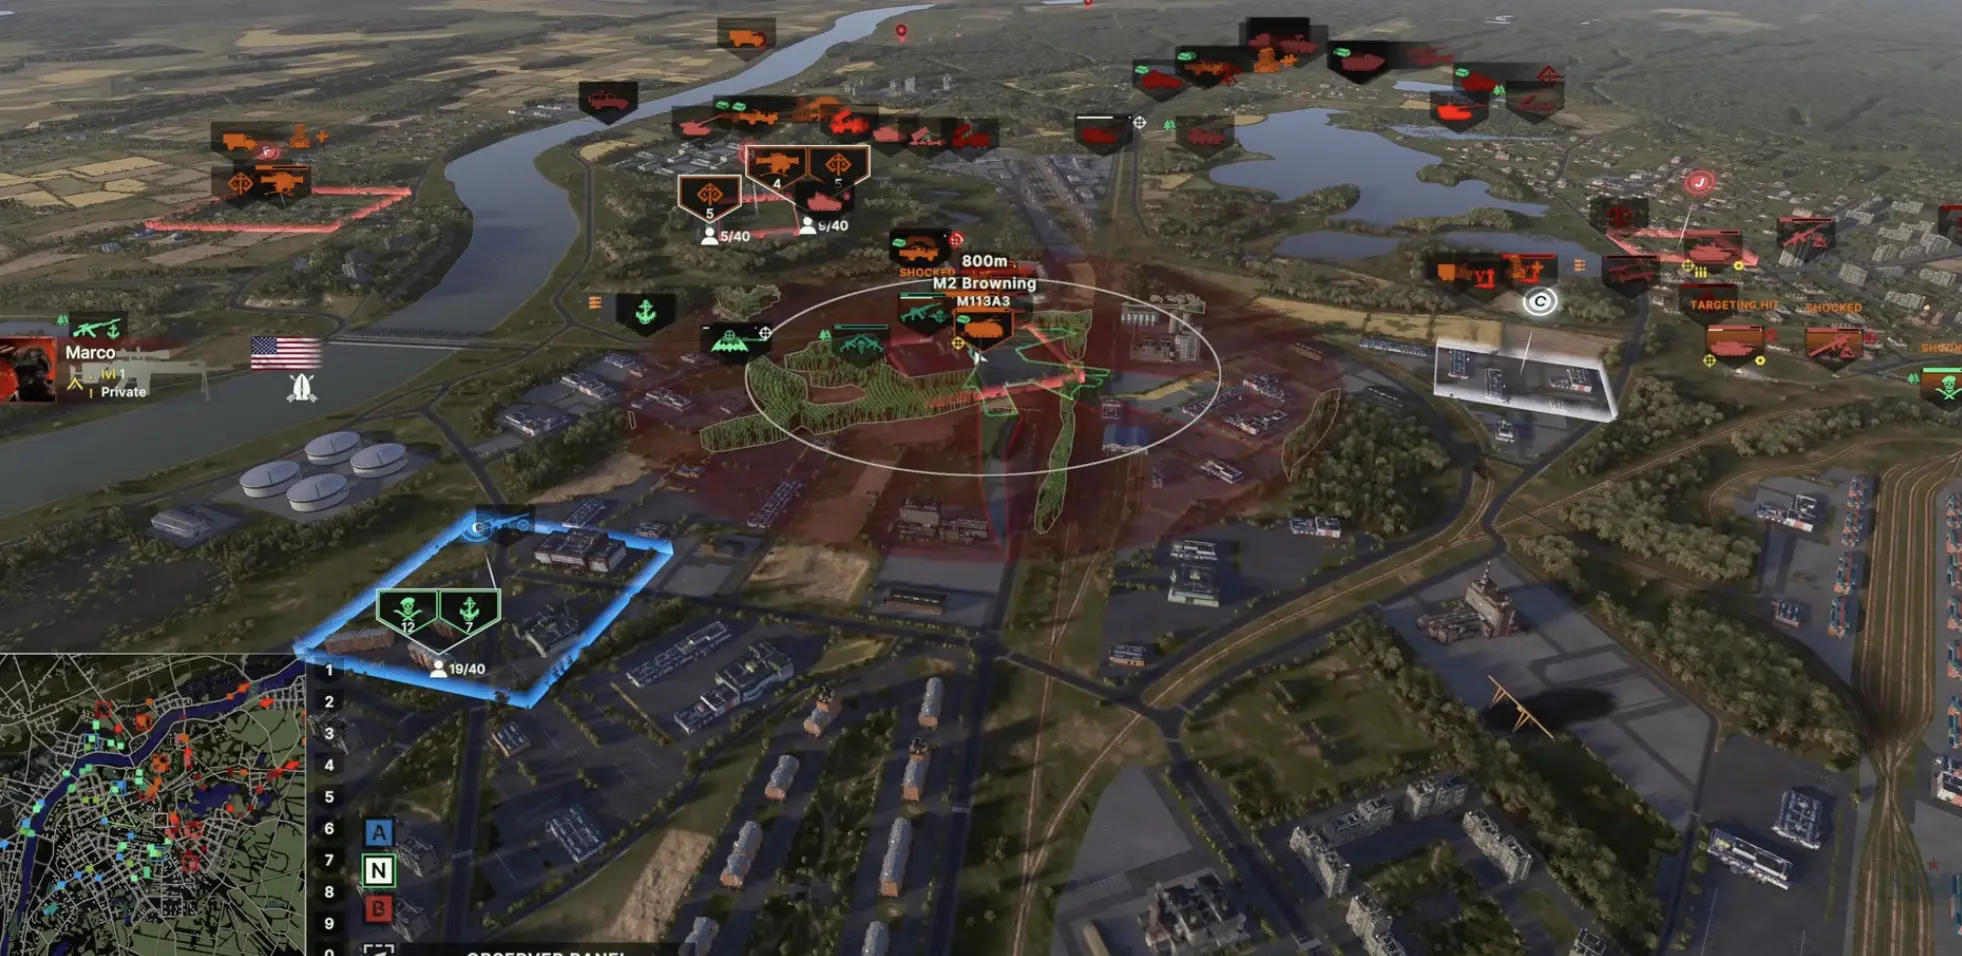
This is a deployment concept, not a formation I preserve for the whole match.
An enemy stack changes the distribution.
A won Alpha side releases a player.
A Delta stalemate can release points.
A high-rise position producing deep vision may justify support from somebody who originally spawned elsewhere.
The structure should move as soon as the map gives me new information.
The Middle Benefits Most From Shared Support
Bravo, Charlie and the high-rise side are close enough in influence that I try to avoid duplicating expensive support there.
One useful recon position can inform both central players.
One artillery system may be able to punish defenders around more than one objective.
A long-range AA system can sometimes protect several valuable positions from a central location, while mobile AA follows whichever ground group is currently advancing.
This is where Daugavpils differs most from a strict lane map.
The second player near me does not necessarily need another copy of everything I already bought.
Shared coverage leaves more points available for the actual breakthrough.
After a Breakthrough, Reinforcement Distance Decides the Direction
A successful push creates a short window before the defender rebuilds the map.
I use that window for one of two outcomes.
Go deeper
Depth is attractive when:
- the next objective has little established defense;
- enemy reinforcements still have a long enough route that I can arrive first;
- my supply can follow without crossing exposed ground;
- the breakthrough threatens artillery, AA, supply or another valuable backline asset.
In that situation, stopping at the first capture can waste the advantage.
Turn across the map
I prefer the cross-map option when:
- the next objective is already entrenched;
- my teammate beside me is still fighting an even engagement;
- my current position creates a useful flank into that fight;
- advancing deeper would require crossing another bridge, road or exposed area.
The sideways attack usually arrives against units facing the wrong direction.
Daugavpils gives me enough diagonal connections that a breakthrough can become a crossfire surprisingly quickly.
I try to exploit that before the opponent resets the line.
Four Positions Where I Refuse a Blind Push
Different sectors produce the same warning in different forms.
The bridge is still fully covered.
Without secondary pressure, smoke and recon, the crossing is simply a narrow target lane.
Bravo is capturable but the high ground is not.
Entering the marker first lets the defender keep the positions that control it.
Charlie is open and I own no flank building.
The squad on the objective will be isolated from the firing positions needed to keep it there.
Delta is full of unseen infantry.
Vehicles entering container and rail terrain without information are paying to discover weapons at point-blank range.
Alpha has its own version: the pocket is already won, but I keep advancing because enemy icons still exist farther ahead.
In every case, the warning is the same.
The next terrain favors the defender more than my current terrain favors me.
That is enough reason to hold.
What I Want From Each Part of Daugavpils
By the middle of a good match, I am not asking every sector to push.
I want Alpha/Echo to become inexpensive to hold.
I want the bridge to stay available as a threat that becomes dangerous when the defender turns elsewhere.
I want Bravo surrounded by better vision than the opponent has.
I want Charlie approached from its flank structures rather than the exposed center.
I want at least one high-rise producing information that several teammates can use.
I want Delta either controlled or cheaply pinned.
I want the India side available as an alternative when Delta becomes too expensive to crack.
Once those conditions exist, the map becomes much less about winning five separate lanes.
The team with the better positions can move pressure between objectives faster than the team still assigning every player to one letter.