Alchemy Factory Progression: What to Do Next From Level 1 to 9
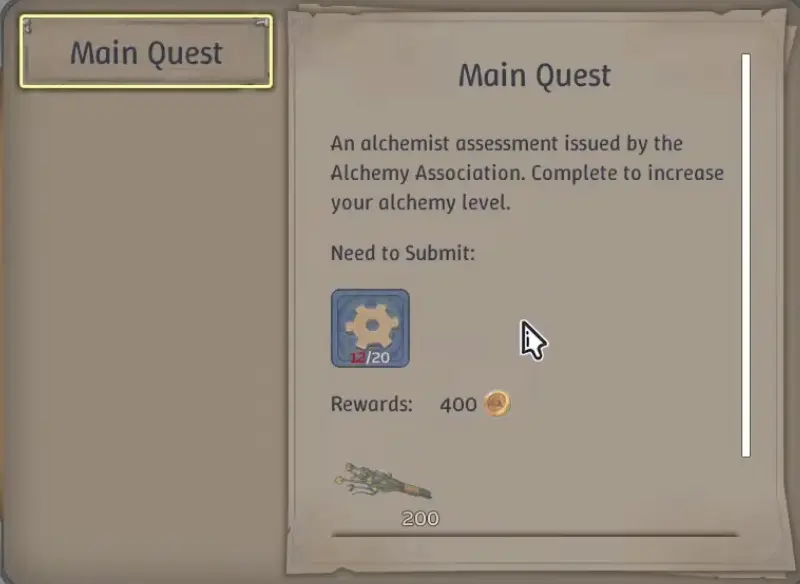
When the factory gets busy enough that I lose track of progression, I return to the Alchemy Association Main Quest. This route follows the important level gates from the tutorial through Level 9, while showing when to pause, rebuild and let side systems run in the background.
Updated:
Quick Answer
If I do not know what to build next, I open the Alchemy Association Main Quest before touching the Research Tree. Completing that assessment raises Alchemy Level, which opens the next research tier. My usual rhythm is to finish the current assessment, check what the new level unlocked, repair the production bottleneck that objective exposed, and only then commit resources to the next large system.
The Main Quest Tells Me Whether the Factory Is Actually Progressing
Alchemy Factory is generous with things that feel productive. I can spend a long session filling Contracts, improving Shop Recognition, buying land, doing Random Quests, upgrading equipment or rebuilding a production block and still finish at the same Alchemy Level I started with.
The Association assessment is different. Its description explicitly states that completing it increases Alchemy Level, and those levels are what open the gated portions of the Research Tree.
That gives me a useful distinction throughout the game. Main Quest production moves the run forward; most other systems make that production easier, more profitable or less manual. I still use all of them, but I do not let a side system consume the exact materials blocking the current assessment.
My Level 1–9 Route at a Glance
| Stage | Progression focus | What usually changes in the factory | What I avoid doing too early |
|---|---|---|---|
| Tutorial → Level 2 | Finish the opening Association tasks | Basic wood, storage and first processing | Designing a permanent factory around tutorial machines |
| Level 2 → 3 | 50 Linen Rope | Flax becomes a multi-step production chain | Scaling Rope far beyond the quest requirement |
| Level 3 → 4 | 100 Healing Potions | Flax and Sage processing become the bottleneck | Spending heavily before the potion line is supplied |
| Level 4 → 5 | Vitality Potion progression | Liquids, Quicklime and longer upstream chains arrive | Rebuilding the whole factory before the next research tier opens |
| Level 5 | 100 Transformation Potions | Advanced Fertilizer, filtering, Steel and larger layouts become relevant | Treating Level 5 as a sandbox pause |
| Levels 5–7 | Stabilize the new production economy | Farming scales, Steel supports better equipment, Jupiter appears | Keeping every permanent chain inside the starter footprint |
| Level 7 → 8 | Higher relics and resource chains | Expensive upstream materials need cleaner separation and buffers | Feeding every new product directly with no reserve |
| Levels 8–9 | World Tree, advanced metals, high relics | Production shifts toward large late-game chains | Expanding every system equally instead of following the active requirement |
| Completion | Finish the remaining Main Quest chain | Philosopher’s Stone and final high-tier production | Assuming reaching Level 9 automatically means the run is finished |
The details inside each stage can become complicated, but the progression itself is much easier to read when I keep those transitions visible.
Tutorial to Level 2: Get Through the Lessons Before Building for the Future
The opening sequence exists to teach the basic factory loop: gather or buy a resource, process it, move the output, store it and sell or submit the result. I keep the first setup disposable because the machine mix changes quickly once Level 2 opens.
The first Association completion raises the run from Level 1 to Level 2. New materials such as Flax Seeds and Limestone begin to matter, and Stone processing becomes more useful as construction and production start sharing the same supply.
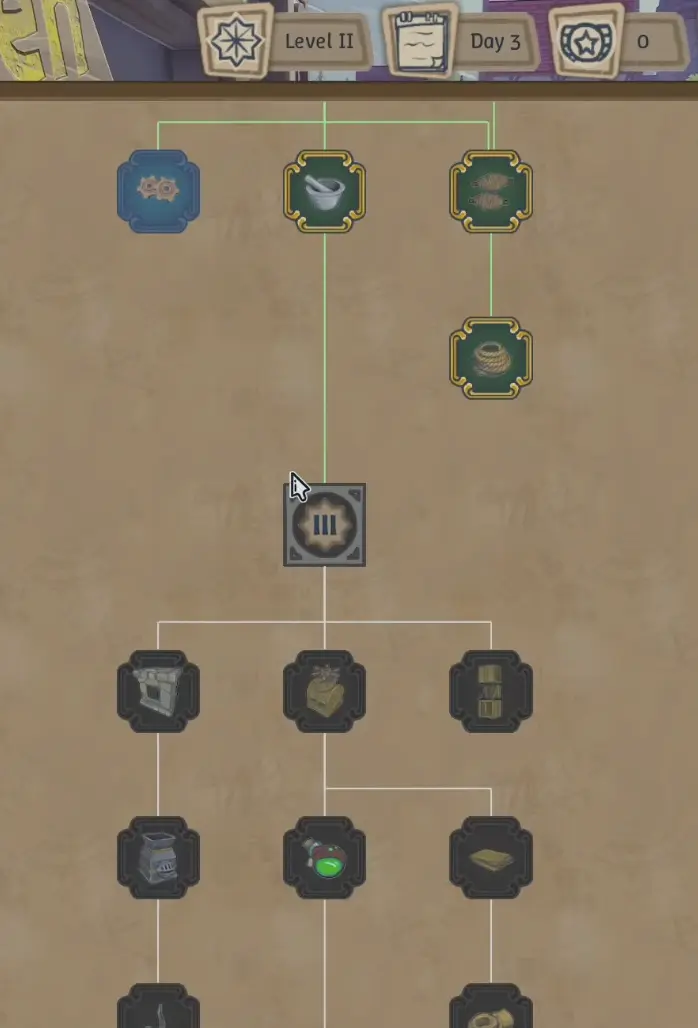
This is also where I stop buying research simply because the icon is available. The next Main Quest tells me which branch deserves attention now.
For opening-shop choices, land purchases and the first automation decisions, I use the beginner guide. Once the Association starts asking for larger production batches, the route becomes much more linear.
Level 2 to 3: Make 50 Linen Rope, Then Let the Flax Supply Change Jobs
The first meaningful production gate is 50 Linen Rope. Flax now has to pass through several intermediate stages before becoming the item the Association wants, so this is the first assessment where continuous input matters more than manually crafting a few finished goods.
I build enough capacity to reach 50 without babysitting every step, but I stop enlarging the Rope branch as soon as the target is secure. That restraint matters because the next level immediately asks the same Flax economy to support something more important.
The Levels 1–4 guide has the actual Rope chain and early machine decisions. At this level, the progression lesson is simpler: finish the batch without turning an early quest product into permanent overproduction.
Keeping Flax flexible makes the jump into Level 3 considerably smoother.
Level 3 to 4: The 100 Healing Potions Are Worth Prioritizing
Level 3 gives the Association a much larger target:
100 Healing Potions.
The Healing Potion line consumes processed Flax Fiber and Sage Powder, which means the Rope economy I just built now competes with the current progression objective. If fresh Flax is still disappearing into an oversized Rope line, the potion count can crawl even though every machine appears to be functioning.
I therefore shift crop output toward the potion chain and push the assessment ahead of most optional expansion. This is one of the places where finishing the Main Quest has an immediate practical payoff, because Level 4 brings the Automatic Cashier into the run.
The Levels 1–4 route covers the Healing Potion throughput and the exact early bottlenecks. Here, the only decision that matters is that the 100-potion gate usually deserves priority over making the starter factory larger.
Reaching Level 4 Does Not Mean I Immediately Need More Machines
Level 4 is the first point where I deliberately spend a little time checking the existing factory before opening another production front.
By now, wood and Stone should be replenishing without repeated emergency runs. The Automatic Cashier should be taking pressure off the shop, and old production such as Linen Rope should no longer be consuming most of the resources needed by current objectives. I also want some clean space left for longer chains; having enough total land is less important than having one area where the next system can be assembled without cutting through everything already running.
This is not a major rebuild. It is a maintenance pass that prevents a weak early supply line from becoming buried underneath several new systems.
Once that base is healthy, the route turns toward Vitality Potions.
Level 4 to 5: Finish Vitality Potions Before Committing to the Mid-Game Layout
Vitality Potion production is where the early factory starts showing its age. The recipe pulls in Fruit Wine and Quicklime Powder, which means the objective reaches backward into liquid processing and Stone-derived materials instead of staying inside a single crop chain.
That broader dependency is why I do not redesign everything the moment Level 4 research becomes available. The next tier contains better farming and logistics options, so a giant permanent Basic Fertilizer setup can become dead weight almost as soon as it is finished.
My sequence through this handoff is straightforward: get the Vitality Potion requirement supplied, finish the Association objective, open the next Alchemy Level, and only then decide which newly unlocked systems deserve long-term space.
That order keeps progression moving while avoiding a rebuild designed around equipment I am about to replace.
Level 5 Changes the Scale of the Factory
At Level V, the active Main Quest in my route asks for:
100 Transformation Potions.
That objective arrives at roughly the same time the factory starts opening systems with much larger consequences than another isolated recipe. Advanced Fertilizer changes the viability of automated farming. Rotten Logs introduce mixed-output processing. Filter Splitters make those outputs easier to separate. Steel begins feeding improved machinery and construction. Jupiter gives the growing wood economy a large downstream consumer.
This is the stage where factory organization begins affecting progression speed as much as individual recipes do.
The Levels 5–7 guide covers that rebuild in detail. For the broader route, I use Level 5 as a signal to stop extending every early line indefinitely. New permanent production needs enough room to be inspected, buffered and expanded without passing through three older systems first.
Contracts Can Keep Running While the Association Moves Forward
The Dispatch Portal has its own sense of progression. Sample Requests unlock it, Contracts can ask for substantial quantities, and cumulative delivery requirements can open later products.
That progression is useful, but it does not raise Alchemy Level.
If a Contract consumes a product I already make in excess, I let it run in the background. A buffered Bandage line feeding Dispatch while I build the Main Quest chain is exactly the kind of parallel work I want from the system.
The priority changes when both systems want the same scarce input. I protect the current Association requirement first rather than slowing the next Alchemy Level for a large wholesale target.
The Contracts guide covers the Sample Request, Dispatch Portal and bulk-delivery route.
Recognition Works Best When the Shop Is Selling Genuine Surplus
Shop Recognition is another useful system that can quietly pull the factory away from progression. Its milestones improve shop reputation and profit, but they depend on customer-facing sales and can ask for meaningful quantities of items I might also need elsewhere.
I push Recognition when the production line already has room to supply it.
When a milestone asks for something I have stacked in storage, selling through the requirement is productive. When the active Association chain is short on the same wood, crop or processed material, forcing Recognition output simply creates a new shortage.
The Shop Recognition guide covers its milestones, claim costs and the difference between shop sales and Dispatch. In the progression route, I use Recognition as a reward for spare capacity rather than as a reason to delay the next level.
Levels 5–7 Are Where Permanent Factory Structure Starts Paying Off
The mid game introduces enough simultaneous demand that the old one-room approach becomes difficult to diagnose. Farming grows, Stone and wood develop more downstream uses, Steel joins construction and advanced production, and filters change how mixed outputs should be routed.
This is when I start separating major systems instead of merely finding another empty patch of ground.
I care less about whether the factory looks organized and more about whether a shortage can be traced quickly. If Stone production occupies one coherent area, fertilizer has its own inputs and Steel is buffered before distribution, a stalled late recipe can be traced backward without dismantling half the layout.
The actual floor, wall, stair and support mechanics are covered in the Building Tool guide.
Steel and Jupiter Mark the Shift Into Heavier Mid-Game Production
Once Steel starts flowing, several things become easier at once. Better machinery and construction components no longer depend on hand-crafting the occasional Ingot, and I can begin replacing temporary equipment before laying out the permanent version of a production floor.
Jupiter introduces the same lesson on the wood side. What previously looked like excessive Plank output gains a large downstream use, so buffering becomes more valuable than repeatedly shutting the wood economy down whenever storage fills.
This is the pattern that continues through the rest of the game: an output that seems excessive in one tier can become a bottleneck in the next. I preserve expensive or high-volume materials whenever storage space is cheaper than rebuilding their entire upstream chain.
Cauldron Changes the Production Options Without Replacing Everything at Once
Cauldron research arrives as the mid game becomes more complex. I treat it as another production method entering the toolbox rather than a signal that every conventional line should disappear.
The factory still needs dependable inputs, buffers and ordinary production while I learn where Cauldron conversions are actually useful. That matters especially after the 1.0 changes, because older setups cannot be assumed to behave exactly as they did before the recipe changes.
When the Cauldron becomes available, I give it enough space to experiment without routing quest-critical production through it immediately. A stable conventional line is more useful than an elegant new setup whose input and output behavior I have not yet incorporated into the rest of the factory.
From Level 7 Onward, Upstream Capacity Matters More Than Individual Machine Count
The later relic sequence brings in products such as Saturn and Mars on the path toward Level 8. By this point the question is rarely whether I can afford one more Grinder or Assembler.
The important question is whether the earlier factory can support another expensive branch without collapsing.
A late chain may draw on materials that already feed shop stock, metals, fertilizer, construction or previous relic production. Building the final machine first is therefore often the least useful part of the job. I check its inputs backward, make sure expensive materials have buffers, and only then scale the new output.
That habit turns late progression into a capacity problem instead of a routing crisis.
Levels 8–9 Shift the Factory Toward World Tree and High-Tier Production
Once the run reaches Level 8, the focus moves away from incremental improvements to the starter economy. The late game centers increasingly on World Tree production, higher relics, advanced metals and the Philosopher’s Stone.
Milestones appearing through this stretch include the World Tree Nursery, Venus, Perfect Diamond, Level 9, Silver, later relics such as Luna and Sol, and eventually completion of the remaining Main Quest chain.
At this stage I stop expanding every system at the same pace. The active Association requirement decides where capacity goes. If the next objective depends on one high-tier metal or World Tree material, that chain gets the space and upstream stock first while mature systems continue running at whatever level is already sufficient.
That keeps the late factory from becoming enormous for its own sake.
Reaching Level 9 is another important milestone, but it is not automatically the end of the run. I still follow the remaining Association requirements through the final high-tier production until the Main Quest chain itself is complete.
When Progression Stops, I Trace the Requirement Backward
A stalled factory is much easier to fix if I resist the urge to expand first.
I start with the Main Quest. If the requested item is not being produced, I confirm that its recipe and required machine are actually unlocked. Then I inspect the final producer and trace each empty input backward until I reach the first line that is not replenishing.
Only after that do I look at competing consumers. Shop sales, Recognition, Contracts and Random Quests can all quietly consume a resource the Association needs. Temporarily reserving that stock is often enough to finish the objective without adding another entire production block.
| What is happening | What I check first | What usually fixes it |
|---|---|---|
| Research will not open any further | Current Association Main Quest | Complete the assessment and raise Alchemy Level |
| Final quest machine sits idle | Its immediate inputs | Trace the empty input one stage upstream |
| Several machines wait on the same material | Shared upstream production | Increase or buffer that resource rather than duplicating every final machine |
| Main Quest stock keeps disappearing | Shop, Recognition, Contracts and Random Quests | Reserve the progression-critical output temporarily |
| A new level opens but the factory immediately jams | Old permanent chains | Stabilize the weakest upstream system before adding the next recipe |
| Late relic production keeps draining older lines | Expensive shared materials | Build reserve stock before scaling the new branch |
| Factory has space but shortages are hard to understand | Layout and routing | Separate major systems so each input path can be traced cleanly |
The Route Is Easier to Remember as a Sequence of Production Problems
From a fresh save, the progression I keep in mind is:
Tutorial → Level 2 → 50 Linen Rope → 100 Healing Potions → Level 4 → Vitality Potions → Level 5 → 100 Transformation Potions → Levels 5–7 factory expansion → higher relic production → Level 8 and World Tree progression → Level 9 → final high-tier Main Quests.
The list itself is less important than what happens between those objectives. Every Association assessment exposes a weak part of the factory, then the new Alchemy Level gives me better tools to solve the next version of that problem.
Early on, that weakness is usually crop supply or one missing processor. In the middle of the game it becomes fertilizer, filtering, Steel and floor space. Later it becomes the ability of several mature upstream systems to feed one expensive product without starving everything around it.
Once I read progression that way, I spend much less time wondering which Research Tree icon I am supposed to chase next. The Main Quest supplies the destination; the factory tells me what has to be fixed before I can reach it.