Alchemy Factory 1.0 Guide: Progression, Automation and What to Prioritize
Alchemy Factory 1.0 gets much easier once I separate the next real progression gate from systems that can wait. I use the Main Quest to set direction, keep the shop and Contracts from draining scarce stock, rebuild only when the starter layout stops scaling, and add later systems when they solve a problem I actually have.
A good opening is less about building everything and more about keeping the first few systems easy to feed. I keep the factory compact, let the Main Quest decide what comes next, use the shop for cash without letting it drain progression stock, and work toward Level 4 before spending heavily on expansion.
The opening levels reuse the same materials more than they first appear to. I build enough Stone and Flax to clear 50 Linen Rope, preserve that Flax for 100 Healing Potions, then use the Level 4 payout on the Automatic Cashier instead of another premature expansion.
Contracts become useful when production starts outrunning the shop. I unlock Dispatch through the 50-Bandage Sample Request, keep the 2,000-Bandage Gloom Spore requirement moving with surplus stock, and only accept the lower wholesale margin when it solves a real factory problem.
Levels 5–7 are where my starter factory finally stops scaling cleanly. I finish the Vitality Potion gate, rebuild farming around Advanced Fertilizer, get Steel online before locking in the new layout, then use filters and spare wood to prepare for Transformation Potions and Jupiter.
Shop reputation works differently in Alchemy Factory 1.0. Recognition now comes from specific customer sales, then has to be claimed for a fee. I use those milestones when production can support them, without letting the shop consume stock needed for the next Main Quest.
If walls, floors or a second floor seem impossible to build, the missing step is usually the Workbench. I use the Building Tool upgrades first, then plan support, stairs and floor openings before moving production upstairs.
When the factory gets busy enough that I lose track of progression, I return to the Alchemy Association Main Quest. This route follows the important level gates from the tutorial through Level 9, while showing when to pause, rebuild and let side systems run in the background.
Most of the 55 achievements fit naturally into a normal factory, but the last stretch does not. I clear progression and production on my main save, let the long counters run in the background, then isolate the Cauldron oddities and three restrictive completion challenges.
When the factory starts pulling me in five directions at once, I put the Alchemy Association Main Quest back at the center. It raises Alchemy Level and opens the next research tier. The shop, Recognition, Contracts, land, construction and later logistics all matter, but I push them hardest when they support the current production bottleneck instead of competing with it. If the Main Quest order itself is unclear, start with the full progression route.
The Best Next Upgrade Depends on What Is Actually Stopping the Factory
Alchemy Factory 1.0 is not difficult because it hides one perfect build order. It becomes difficult because several systems begin asking for the same money, materials, floor space and production capacity at the same time.
A Main Quest may want one finished product while Shop Recognition asks customers to buy another. Dispatch can absorb hundreds of units from a line that also feeds construction. A new piece of research can look attractive while the factory underneath it is still short on Stone. Later, even having enough raw output stops being sufficient because the machines are spread far enough apart that moving material becomes its own problem.
I get better results by identifying the bottleneck before choosing the upgrade.
What is blocking me
What usually matters next
Where I go for the full route
Everything is manual and money disappears quickly
Compact opening, basic buffers, sensible research and shop size
The useful part of this approach is that it stops every new unlock from becoming an immediate construction project.
On a Fresh Save, I Want Spare Capacity More Than a Big Factory
The opening punishes breadth surprisingly quickly. Selling another item sounds useful until it needs another shelf, another supply route and another product I have to restock. Extra land feels like growth until I realize the machines on the original plot are idle because their inputs are missing.
A compact factory avoids that problem. Wood and Stone need to recover on their own, important intermediates deserve small buffers, and the active Association requirement determines which new chain receives attention.
The beginner route covers the opening decisions in detail. The breakpoint I keep in sight is Level 4, because that is where the Automatic Cashier begins removing routine checkout from the list of jobs competing for my attention.
Until then, a smaller shop backed by dependable production is easier to run than a wide catalog sitting on unstable inputs.
Early Progression Rewards Reusing Supply, Not Freezing It Into Old Products
The first few Alchemy Levels repeatedly reuse materials that already have another job. That is why an early line can become a bottleneck even though the product it makes was useful ten minutes earlier.
The clearest example is the transition from Linen Rope into Healing Potions. Flax does not stop mattering when the Rope requirement is complete; the next stage wants part of that supply again in a different form.
The Levels 1–4 route handles those exact production chains. My broader rule is to stop scaling an assessment product once I have enough of it and leave upstream capacity available for the next level.
This becomes increasingly valuable later. A full storage box is not always a sign that a resource is overproduced; sometimes the next tier simply has not revealed its largest consumer yet.
Main Quest, Shop and Dispatch Should Not All Get First Claim on the Same Item
Once the shop matures, the factory has several valid destinations for the same output.
The Association can need it for Alchemy progression. Customers can need it for money or Recognition. Dispatch can turn it into wholesale income and move a long contract requirement forward.
Those three uses are not equal at every moment.
If the current Association assessment is blocked, I reserve what it needs. Once that quantity is secure, retail can take enough stock to keep the useful shelves moving. Dispatch becomes strongest after production has gone beyond both of those demands and storage begins staying full.
That hierarchy is especially useful because the systems reward different kinds of selling. Shop Recognition advances through customer-facing retail milestones, while Contracts use the Dispatch route and can deliberately trade some per-unit margin for bulk throughput and later unlocks.
Treating both as outlets for available capacity keeps them useful without letting either one hijack the factory.
The Mid Game Starts When Layout Quality Affects Production Speed
There is a point where another conveyor stops being the cheap fix.
Longer potion chains arrive beside farming, fertilizer, heat, metals and more demanding logistics. A route that once crossed one other belt now needs to pass through several older production areas, and diagnosing a shortage becomes harder because one input may have travelled halfway across the building before reaching the final machine.
Once permanent production starts competing for the same ground-floor routes, additional vertical space makes each major system easier to supply, expand and troubleshoot.
That is where Levels 5–7 becomes the more important transition than simply buying another plot. Advanced Fertilizer changes farming, mixed outputs make filtering useful, Steel starts supporting better machinery and construction, and larger production chains finally justify more permanent organization.
If the obstacle is the construction system itself rather than production, the Building Tool route covers the Workbench upgrades, floors, walls, support and stairs.
1.0 Split Progression Between the Research Tree and the Workbench
One of the easiest ways to waste time after 1.0 is assuming every missing unlock must be somewhere deeper in research.
Production technology still belongs in the Research Tree, but many non-production devices and personal upgrades moved to the Workbench. That includes the Building Tool path along with equipment such as Inventory and Potion Belt upgrades.
So when I can see the right Alchemy Level but still cannot find the construction piece or character-side upgrade I expected, buying unrelated research nodes is not my next move. I check the Workbench.
That distinction matters even more once the factory starts growing vertically, because construction progression can become the missing link even when production research itself is already far ahead.
Wagons Become Valuable When the Transport Route Is the Problem
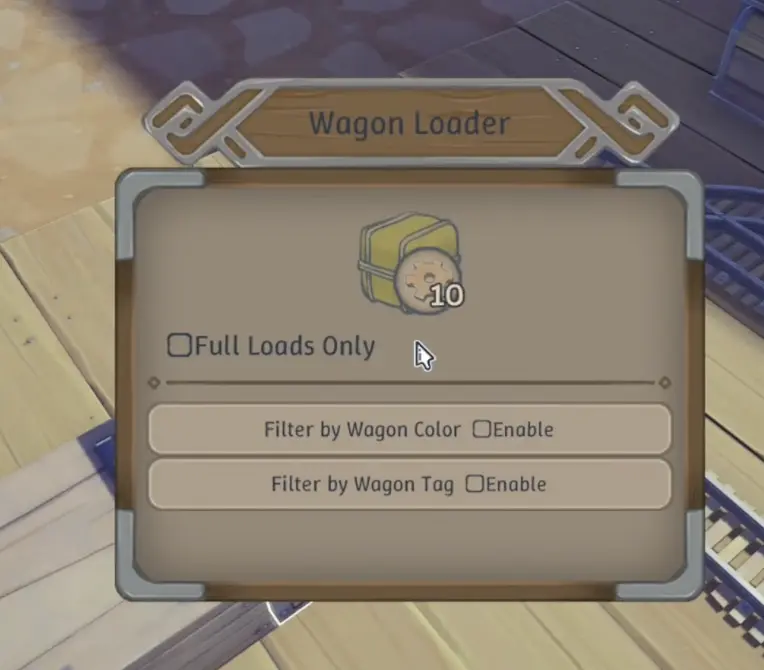
The Wagon system adds rail-based logistics with greater transport capacity than conveyor belts, but the tradeoff is more infrastructure and more planning. It also has dedicated loading, unloading and track-handling pieces rather than behaving like a belt with a different texture.
That makes Wagons a poor reason to tear up a compact early factory.
Belts still make sense for a machine feeding storage a few tiles away, or for several machines living inside one production block. The Wagon question appears later, after production areas have separated far enough that a high-volume item needs to cross a meaningful distance repeatedly.
Rail logistics become more attractive when bulk materials need to travel between production areas that are no longer close enough for another long belt to feel clean.
A practical split is:
short, local, simple route → conveyor
repeated high-volume movement across separated areas → consider Wagons
The second case is where the extra setup cost starts paying for itself.
The Grand Portal Helps Sales Only After Supply Can Handle More Customers
The Grand Portal solves a completely different kind of bottleneck.
Its description says it connects distant cities so customers from across the land can quickly reach the shop. In other words, it increases access to customer traffic rather than producing or transporting more stock.
There is also an important limitation: building additional Grand Portals does not increase customer traffic further.
The Grand Portal is useful when the factory can already supply more buyers. Building extra portals does not stack additional customer traffic.
That makes the purchase much easier to judge.
When production is filling storage faster than customers can empty the shelves, increasing shop traffic can turn excess stock into money more quickly. When the store already spends half the day empty, more customers merely arrive to discover the same shortage.
The useful order is therefore supply first, demand second. I want a shop that can comfortably survive its existing customers before paying to bring in more.
Blueprint Becomes Useful After a Production Block Has Proven Itself
Large rebuilds eventually create another kind of repetitive work: the layout already functions, but recreating the same block somewhere cleaner means placing and reconnecting many familiar pieces again.
That is when Blueprint functionality becomes worth checking. It can help duplicate a working section instead of rebuilding the whole arrangement piece by piece.
I find it most useful after the original block is already stable. Copying a bad layout only produces a larger bad layout; copying something whose inputs, outputs and footprint are understood can save a large amount of reconstruction time.
For the first version of a production line, I would still build and test it normally. Blueprint has more value once repetition becomes the expensive part.
Returning From Early Access? Check Cauldrons Before Repairing Everything Else
An older save can still contain a large amount of useful infrastructure, but 1.0 changed recipes enough that Cauldron-heavy factories deserve immediate inspection.
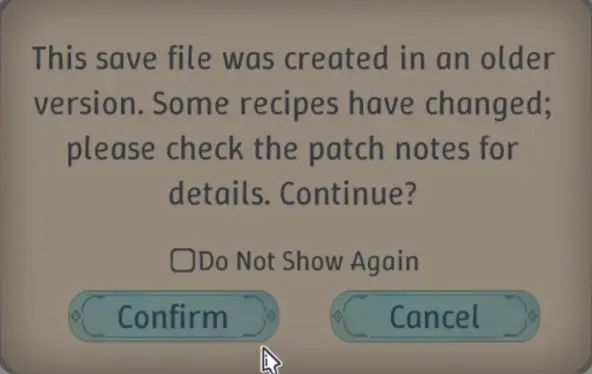
Older saves can display a warning that some recipes have changed. In a large previous-version factory, Cauldrons that had been producing one material were outputting something different after the update, and downstream production—including Panacea chains—stopped because the old assumptions no longer matched the new recipe set.
When loading an older factory in 1.0, I check Cauldron outputs before diagnosing downstream shortages because changed recipes can make the old routing behave very differently.
A small older save may still be easy to repair. I would inspect the affected lines, confirm what each Cauldron now outputs and reconnect whatever has genuinely changed.
A huge save built around dozens of old Cauldron conversions can be a different calculation. If repairing those chains takes longer than establishing the new 1.0 progression from scratch, a fresh factory becomes a reasonable choice.
Cauldron Changes the Logic of a Production Line
Once Cauldrons enter progression, ordinary machine chains are no longer the only way to think about material conversion.
The system works around a point-based transformation model, which opens more flexible and sometimes deliberately unusual conversions. That is useful, but it does not mean every conventional process should immediately be replaced.
I keep reliable machine production running while I learn where a Cauldron conversion provides a real advantage. Stable raw inputs and spare buffers matter here because experimentation is much easier when one new recipe cannot starve everything downstream.
The 1.0 recipe changes make that caution even more valuable. Old combinations should not be carried forward from memory without checking the current output.
Cauldrons also matter beyond ordinary production because several achievement requirements ask for unusual transformations. That gives the system value even when a strange conversion would never make sense as permanent factory infrastructure.
Levels 8–9 Shift Attention Toward World Tree and High-Tier Materials
Late progression stops feeling like another expansion of the early potion factory.
Around Levels 8–9, the important milestones move toward World Tree production, advanced metals, higher relics and the Philosopher’s Stone. The route includes milestones such as the World Tree Nursery, Venus, Perfect Diamond, Level 9, Silver, later relics including Luna and Sol, and completion of the remaining Association requirements.
I do not treat that as a rigid recipe list where every named item must be mass-produced the moment it appears. The active Main Quest still determines where capacity goes.
That matters because late products can draw from expensive chains that already have several consumers. A large reserve of a high-tier input is often more valuable than immediately attaching another final machine to it.
The Level 1–9 progression route keeps the late milestones in context, while the achievement checklist is more useful once the question becomes which rare production goals remain after normal progression.
Some Systems Are Better Left Until the Factory Creates a Reason for Them
1.0 offers enough technology that unlocking something and needing it are very different events.
A Grand Portal can wait while shelves are empty. Wagons can wait while every important route is local. Recognition can wait while its product is still progression-critical. Another land purchase can wait while the real problem is raw supply. A large Cauldron conversion can wait while its conventional production line is already reliable.
The reverse is equally important. Once storage stays permanently full, Dispatch has a job. Once customers cannot clear stock quickly enough, demand upgrades begin to matter. Once a production block has to move across the property every minute, rail logistics become easier to justify. Once belts and machines can no longer coexist cleanly on the starter floor, vertical construction starts paying for itself.
The game gives me more useful choices when I stop treating availability as urgency.
For 100% Completion, Keep the Long Counters Alive Before the Factory Goes Quiet
A normal progression save is also the best place to absorb most achievements. Level milestones, metals, relics, Recognition, land expansion and production goals already align with a factory that is becoming larger and more capable.
The long counters benefit particularly from beginning before the final Main Quest is over. Random Quests, million-item production goals, Level 100 and the 365-day requirement are far easier to tolerate while the save still has useful work to do.
The achievement route separates those normal-save goals from the unusual Cauldron actions and the three restrictive completions: finishing quickly, completing the game without customer sales and completing it without buying land.
Those restrictions reward a very different factory from the one I use for ordinary progression, so I do not compromise the main save around them from Day 1.
What I Prioritize When Several Systems Need Attention at Once
When everything appears important, the order I use is based on consequences rather than menu order.
First: unblock the active Association requirement if Alchemy Level is stopping progression.
Next: repair whichever upstream material is starving several systems at once. One weak Stone, crop, heat or metal line can make half the factory look broken.
Then: remove manual work that keeps interrupting production, whether that means shop automation, better logistics or a cleaner production layout.
After that: use spare capacity for Recognition, Contracts and economic growth.
Finally: add technologies such as Wagons or the Grand Portal when the factory has reached the scale where their specific advantage matters.
That order is not a rigid speedrun route. It is a way to avoid solving the wrong problem.
A factory short on raw material does not need more final machines. Empty shelves do not need more customer traffic. A short local route does not need rail infrastructure. And a locked research tier usually does not need another hour spent reorganizing the shop.
Once the bottleneck is named correctly, Alchemy Factory becomes much easier to read—and the next useful build is usually much more obvious.