How to Review Matches in Teamfight Manager 2
A practical Teamfight Manager 2 match review guide explaining how to diagnose losses, separate AI limits from tactical mistakes, review draft, objectives, carry protection, damage balance, and make one useful change after each loss.
Updated:
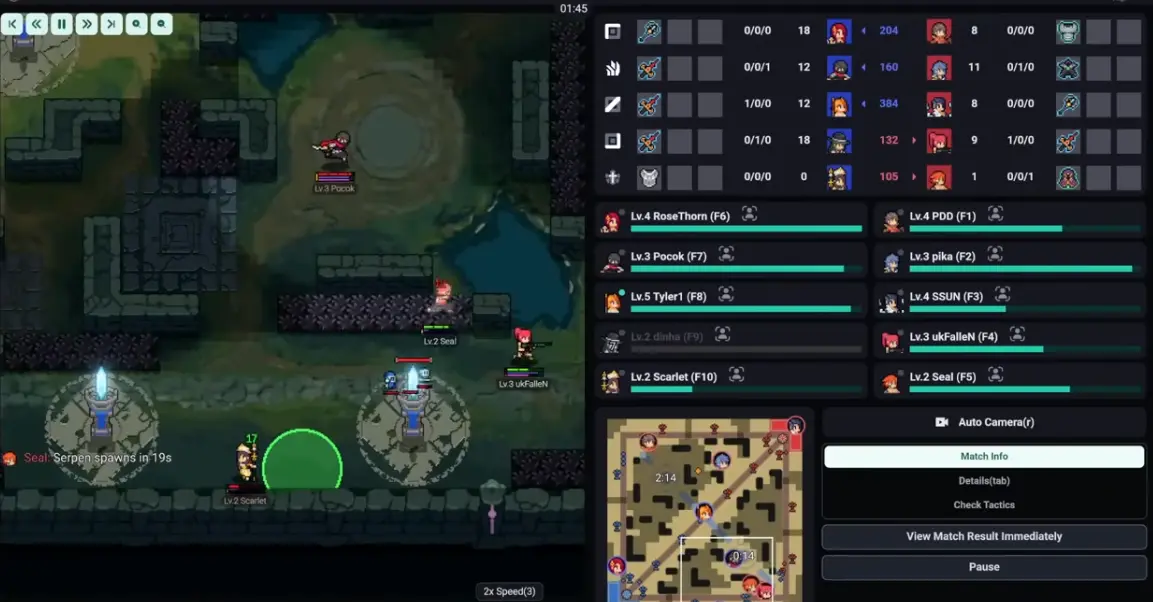
Quick Answer
To review a Teamfight Manager 2 match, do not start by blaming one player. First separate AI limits from tactical mistakes, then check the draft, first Serpen or Morgard setup, damage structure, carry protection, objective conversion, and closing decisions. After the review, make one clear change for the next match.
Start With This: AI Limits vs Tactical Mistakes
Teamfight Manager 2 is a management sim. You do not manually control every movement, target, jungle decision, or objective call during the match. Some strange behavior may come from AI execution, Early Access tuning, or a one-off decision that your settings did not fully control.
That does not mean review is useless. It means you should separate repeatable tactical problems from one-off AI behavior.
| What you saw | More likely AI / execution limitation | More likely tactical problem |
|---|---|---|
| One player walks strangely once | Possible one-off AI behavior | Only review if it happens repeatedly |
| Jungler ignores one obvious chance | Possible AI decision issue | Tactic may be wrong if it happens every objective |
| Team contests Serpen late every game | Less likely one-off | Early Serpen setting or draft timing is probably wrong |
| Carry dies first in every fight | Less likely one-off | Draft lacks peel, frontline, or safer objective setup |
| Team wins Morgard but never pushes | Less likely one-off | Objective Finish or Closing Out setting may be wrong |
| Team has CC but kills nobody | Not an AI bug | Draft lacks damage or follow-up |
| Team keeps forcing before scaling | Not an AI bug | Objective setting is too aggressive for the comp |
Do not over-correct after one strange play. Look for repeated patterns before changing your whole strategy.
Two-Minute Quick Diagnosis
If you lost and do not know why, start from the first major breakpoint instead of reviewing every small moment.
Ask this first:
At the first important Serpen, Morgard, or major teamfight, was my team ready for the fight it took?
We were not ready but still fought
Review objective settings, jungle tactics, and whether the draft was too greedy for that timing.
We were ready but could not kill anyone
Review damage balance. You may have too much control and not enough reliable damage.
Our carry was strong but died first
Review carry protection, frontline, peel, and whether the carry was the only damage source.
We won fights but gained no map pressure
Review Objective Finish, Morgard conversion, tower pressure, and Closing Out settings.
The same champion keeps beating us
Review ban priority, counter-picks, and Personal Tier List notes.
The same role keeps failing
Review roster, role fit, player condition, training, or scouting needs.
One Change After a Loss Template
Before you start a long review, set one rule for yourself: the next match should test one main change, not five changes at once.
Copy this template into your notes:
Match review note:
The biggest problem was: ________
The first moment it appeared was: ________
This is probably a: draft / tactic setting / player / AI-execution / roster issue
Next match, I will only change: ________
I will know it worked if: ________
Examples:
| Review note | One change |
|---|---|
| We contested Serpen before Sniper was ready | Set Early Serpen Attempt to delay or give |
| We had CC but no kills | Draft more reliable damage |
| Ninja reached our carry every fight | Ban Ninja or draft more peel |
| Morgard win did not become towers | Adjust Objective Finish or Closing Out |
| Same mid player lost every draft | Review role fit, training, or scouting |
| One strange AI movement caused one death | Note it, but do not change the whole strategy yet |
Tactic Setting Names Used in This Guide
Use the same names in your notes every time. This makes it easier to compare losses across matches.
| Setting name | Use this name for |
|---|---|
| Early Jungle Style | Early jungle risk, pressure, safety, or lane support |
| Early Serpen Attempt | Whether to contest, delay, give, or trade early Serpen |
| Objective Setup | How the team prepares and positions before objectives |
| Objective Combat Strategy | How the team fights around Serpen, Morgard, or other objectives |
| Objective Finish | Whether the team focuses the objective or turns to fight |
| Morgard Buff / Side Assignment | How the team uses Morgard pressure and side-lane assignments |
| Closing Out | How safely or aggressively the team tries to end after gaining pressure |
Where to Look During Review
The exact data available can vary by Early Access build. Use the best information your current version gives you.
| Review question | Where to look | What to check |
|---|---|---|
| Did the draft have a plan? | Draft screen or match setup | Win condition, damage source, frontline, peel, objective plan |
| Did Serpen or Morgard go wrong? | Objective result, replay, fight timeline, or tactics screen | Who arrived, who died first, whether the team fought or finished |
| Did the carry get protected? | Fight replay or damage/death timeline | Whether the carry died before dealing meaningful damage |
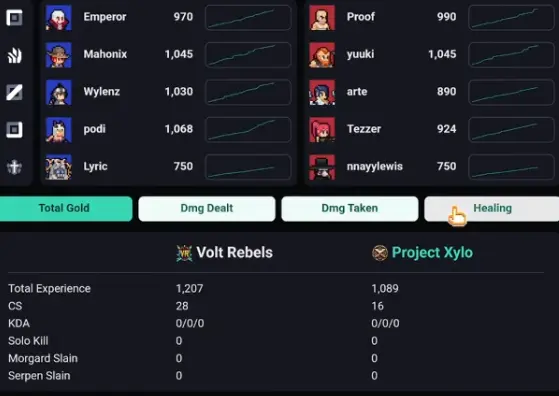
| Did we lack damage? | Post-match stats and fight result | Damage dealt, kills converted, whether CC led to kills |
| Did Morgard fail to convert? | Tower damage, map progress, objective result | Whether the buff became towers, pressure, or a missed window |
| Did the tactic setting match the comp? | Tactics screen | Early Jungle Style, Early Serpen Attempt, Objective Combat Strategy, Objective Finish, Closing Out |
| Was it a roster issue? | Player stats, condition, role fit, match history | Stress, focus, role mismatch, repeated poor performance |
Step 1: Review the Draft Plan
Before judging player performance, check whether the draft had one clear plan.
| Draft check | What it tells you |
|---|---|
| Main win condition | Who was supposed to win the game for you |
| Damage source | Whether the team could actually finish kills |
| Frontline or peel | Whether the carry had space to deal damage |
| Engage or poke plan | Whether the team wanted to start fights or soften enemies first |
| Serpen plan | Whether the team could fight early or should delay |
| Morgard plan | Whether the team wanted to force, pick first, trade, or siege |
| Backup plan | What happens if the main carry dies |
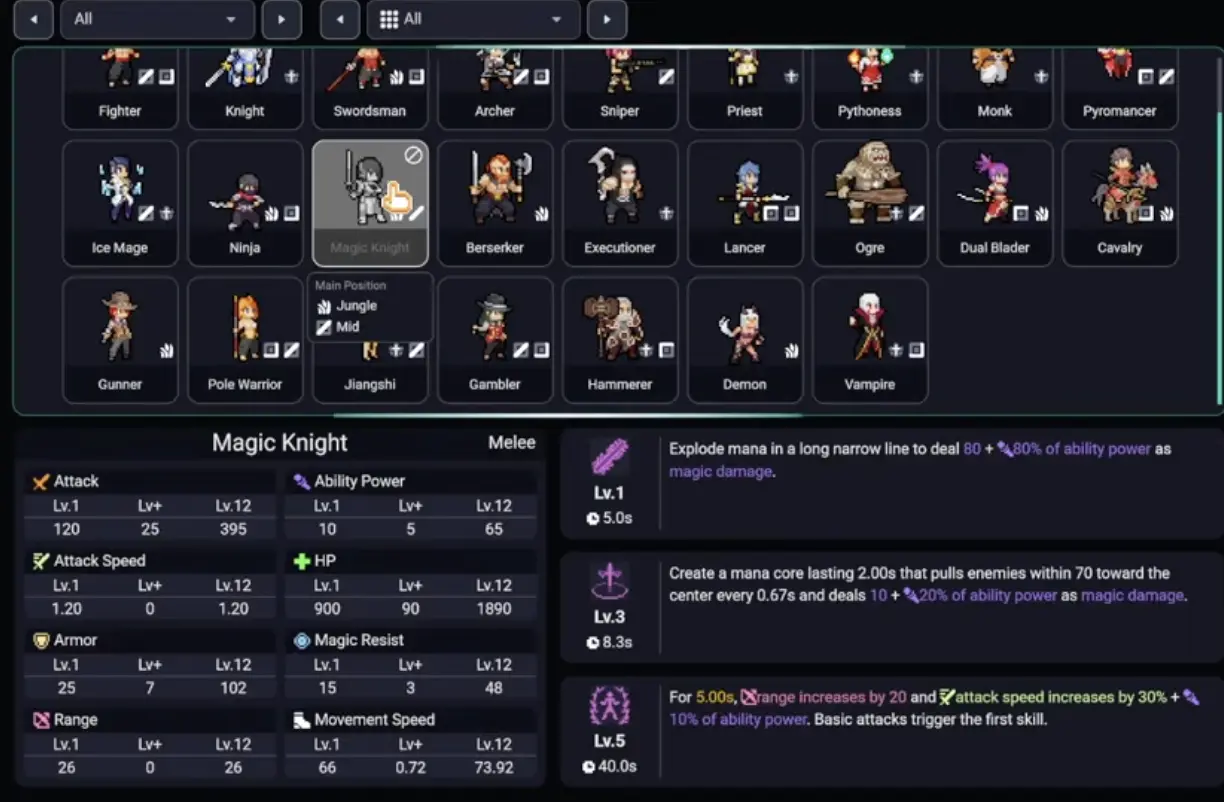
If you cannot explain how the comp was supposed to win, the loss may have started before the match.
Step 2: Review the First Major Objective
Do not review every small moment first. Start with the first objective that changed the game.
For most matches, that means first Serpen, first Morgard, or the fight that decided map control.
| Objective review point | Good sign | Bad sign |
|---|---|---|
| Jungler position | Jungler is nearby and ready | Jungler is late, dead, or on the wrong side |
| Lane movement | Nearby lanes can join | Lanes are stuck, low, or farming far away |
| Carry timing | Main damage source can fight | Carry is weak, dead, or split away |
| Fight plan | Team fights according to comp style | Poke comp hard-engages or scaling comp flips early |
| Objective finish | Team finishes or turns clearly | Team splits focus and loses both fight and objective |
| Conversion | Objective leads to tower, gold, pressure, or reset | Objective win creates no follow-up |

Step 3: Review Jungle and Objective Tactics
This section is not about manually pathing the jungler. It is about checking whether the tactic settings matched the draft.
Look at the same tactic setting names you use in your notes:
- Early Jungle Style
- Early Serpen Attempt
- Objective Setup
- Objective Combat Strategy
- Objective Finish
- Morgard Buff / Side Assignment
- Closing Out
| If this happened | Likely setting issue | Next match adjustment |
|---|---|---|
| Jungler took early risk and died | Early Jungle Style too aggressive | Lower early jungle risk |
| Team contested Serpen before ready | Early Serpen Attempt too aggressive | Delay or give early Serpen |
| Team started objective but did not finish | Objective Finish unclear or wrong | Choose clearer finish or turn behavior |
| Team won Morgard but did not push | Closing Out or Morgard usage too passive | Adjust Morgard Buff / Side Assignment or Closing Out |
| Team walked into fair 5v5 as a pick comp | Objective Combat Strategy too direct | Use pick-first or cautious setup |
| Scaling comp fought too early | Objective plan too aggressive | Protect carry and wait for timing |
Step 4: Review Team Damage Structure
Damage balance is about the whole comp, not just whether the carry did well.
| Fight result | Likely issue | Fix |
|---|---|---|
| Team stuns enemies but kills nobody | Too much control, not enough damage | Add a real carry or secondary damage |
| Team has damage but dies instantly | Not enough frontline, peel, or control | Add protection or safer fight setup |
| Frontline survives but enemy never dies | Damage source is missing or too late | Draft more reliable DPS |
| Fight starts well but objective is lost | Damage or finish timing is poor | Review Objective Finish and objective damage |
| One carry death ends every fight | Damage is too concentrated | Add secondary damage or more peel |
If the issue is not total team damage but how the enemy reached your main carry, go to Step 5 and review carry protection instead.
Step 5: Review Carry Protection
Use this step only after you know the team had enough damage on paper, but the main carry could not safely play the fight. Carry protection is about who reached the carry, how quickly it happened, and whether your draft had tools to stop it.
Carry survival
Did the carry die before the real fight started?
If yes, the draft or objective setup may lack peel, frontline, or safer positioning.
Did the enemy reach the carry too easily?
If yes, review bans, anti-dive tools, and support assignment.
Did the carry deal damage but still lose?
If yes, check whether the team lacked secondary damage, objective conversion, or closing discipline.
Step 6: Review Objective Conversion
Winning a fight or objective is only useful if it creates something after.
Check whether your team converted wins into:
- tower damage,
- gold advantage,
- map control,
- enemy jungle denial,
- safe reset,
- Morgard pressure,
- closing window.
| What happened | Review focus |
|---|---|
| Won fight but no tower damage | Closing Out or siege plan may be weak |
| Won Morgard but enemy defended easily | Objective Finish or Morgard usage may be wrong |
| Killed enemy jungler but took nothing | Objective conversion was missed |
| Chased kills instead of pushing | Team may need safer Objective Finish or Closing Out settings |
| Took objective but lost next fight | Reset timing or overextension problem |
| Gave objective but got side pressure | Trade may be acceptable if map value was real |
Step 7: Review Player and Role Problems
Not every loss is draft or tactics. Sometimes the same role keeps failing because the player is not suited for the job.
Same role loses every match
Review player stats, role fit, training, and scouting needs.
Same player throws stable drafts
Check stress, focus, mental, personality, and champion assignment.
Good player fails in one role
The role fit may be wrong even if the raw stats look good.
Prospect is not ready
Protect them with training, safer matchups, or bench time instead of forcing carry duty.
If the problem is repeated across multiple drafts, treat it as a roster or role issue instead of a one-match mistake.
Step 8: Update Your Personal Tier List
After the review, update your notes. Do not rewrite the entire tier list after one match.
Update one label if the match clearly proved it:
| Match lesson | Tier list update |
|---|---|
| Champion wins lane or fights without much support | Mark as safe pick |
| Champion carries only with heavy protection | Mark as scaling / needs peel |
| Champion controls Serpen or Morgard well | Mark as objective pick |
| Champion looks strong but fails early timing | Mark as risky or comp-dependent |
| Champion gets countered by common dive or CC | Add matchup warning |
| Champion only works after enemy reveals draft | Mark as counter-pick only |
| Champion keeps beating you | Add ban priority or tested counter note |
Diagnosis Router: What to Read Next
Use this to move through the guide cluster.
| Review symptom | Go to | What to check there |
|---|---|---|
| Draft has no clear win condition | Ban Pick Guide | Example comps, replacement picks, counter logic |
| Serpen or Morgard settings feel wrong | Jungle Guide | Early Jungle Style, Early Serpen Attempt, Objective Combat Strategy, Objective Finish |
| Scaling carry gets strong but team loses | Safe Picks vs Scaling Picks | Carry protection, early safety, objective discipline |
| Same champion keeps confusing you | Personal Tier List Guide | Safe pick, trap pick, counter-pick, must-ban labels |
| Same role is always the weak link | Scouting and Transfer Guide | Role upgrades, prospects, veterans, transfer timing |
| You do not know if the problem is basic flow | Beginner Guide | First season, roster review, training, finance, facilities |
Common Review Traps
These are habits that make review worse.
Blaming the last death first
The last death may only be the final symptom. Start from the first major objective or first fight that changed the game.
Calling every strange movement an AI bug
Some behavior may be AI-limited, but repeated failures usually point to draft, tactic settings, role fit, or objective timing.
Overrating damage numbers
High damage is useful only if it wins fights, creates objectives, or converts into map pressure.
Ignoring objective conversion
A team can win fights and still lose if those fights do not become towers, Morgard pressure, or safe resets.
Changing too much after one match
One review should produce one main adjustment. More than that makes the next result harder to interpret.
FAQ
How do I review a match in Teamfight Manager 2? +
Start with the first major objective or first big fight. Check whether the draft had a clear plan, whether the objective setting matched the comp, whether the carry was protected, and whether the team converted wins into towers or map pressure.
How do I know if I lost because of draft or AI behavior? +
If the same problem happens repeatedly with the same draft or setting, review the tactic. If the team makes a strange one-off decision that does not match any setting, treat it as a possible AI limitation and avoid over-correcting after one game.
Where should I look for match review data? +
Use the post-match stats, objective results, damage numbers, gold swings, tower progress, tactics screen, and replay or fight timeline if available. If your Early Access build has limited data visibility, rely on observable fight timing and objective conversion.
Why does my carry get strong but I still lose? +
A fed carry still needs frontline, peel, objective discipline, and a second plan if they die. If every fight collapses when the carry is pressured, the issue is usually protection or draft structure.
Should I change my whole strategy after one loss? +
No. Pick one change: one draft adjustment, one tactic setting, one player role change, or one champion rating update. Changing everything makes it harder to know what fixed the problem.
How do I know if my jungle strategy worked? +
Check three things after the match: whether the team followed the intended risk level, whether Serpen or Morgard attempts matched the draft timing, and whether objectives created tower pressure, map control, or a clean closing window. If the team fought at the wrong time or failed to convert objectives, adjust Early Jungle Style, Early Serpen Attempt, Objective Combat Strategy, Objective Finish, or Closing Out before blaming the champion.