How to Survive Blood Moons and Entity Assaults
Blood Moon survival starts before the attack. Here is my fast two-lane setup, Arsenal timing, and response to each confirmed threat.
Updated:
Quick Answer
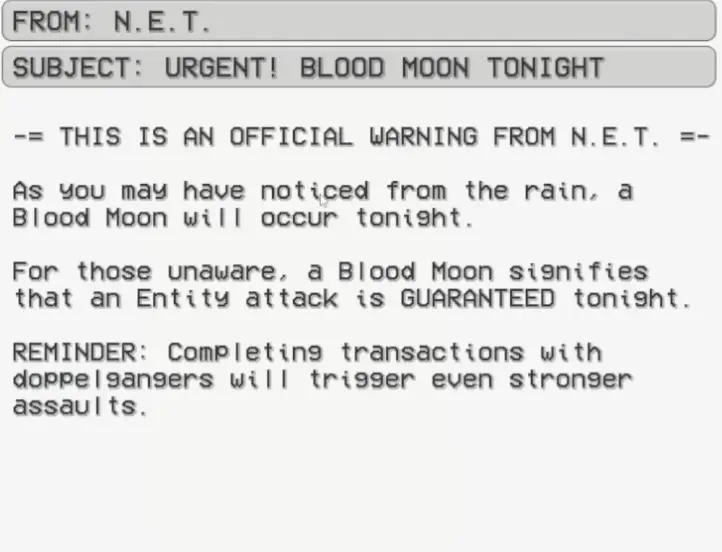
A Blood Moon guarantees an Entity attack. Before the fight, I place one reusable Shock Trap on the rear route, cover the front or center lane with an explosive, keep one firearm and healing accessible, and leave one retreat path open between both entrances. Once the attack starts, customers, drivers, restocking and cleanup all wait.
I use this page for the shared Blood Moon and Entity Assault workflow rather than pretending every Entity follows the same combat rules. The Demented and the Jack-in-the-Box Music Box use separate mechanics and have their own full guides.
Blood Moon, Hunt and Entity Assault Explained
The game uses several related terms.
- Blood Moon: a warning condition that guarantees an Entity attack that night.
- Hunt: the broader combat term used by achievements such as Still Breathing and Relentless.
- Entity Assault: the large attack sequence described by Blood Moon and other warnings.
I use Assault for the large incoming wave and Hunt when discussing the game’s general combat phase or achievement wording.
I have not confirmed that every Hunt is a Blood Moon Assault. A normal Hunt can happen without the same weather warning or delayed weapon-wall setup.
Accepting a Doppelganger is therefore more than a customer-verification mistake on a Blood Moon night. It may strengthen the coming attack.
I still avoid shooting on a weak guess. Killing a real human damages income, and that can also hurt the pet-surgery route in Story Mode.
My Fast Pre-Assault Route
As soon as I read the Blood Moon warning, I use one short route:
Computer → shop → rear entrance → center lane → front entrance → checkout
This is not a promised speedrun timer. It is the fastest repeatable setup route that worked once I already knew my shopping priorities and store lanes.
1. Read Every Special Warning First
I check whether the same night also includes:
- the Demented;
- the Jack-in-the-Box Music Box;
- delayed Emergency Weapon Arsenal access;
- a blackout;
- the Dentist;
- another special Story Mode threat.
A normal Blood Moon loadout cannot replace a special mechanic.
If the Demented warning appears, I prepare its trap lane before opening the store. If the Music Box warning appears, I keep low floor areas visible so I can search quickly later.
2. Buy One Complete Loadout
I prepare:
- one dependable firearm;
- enough ammunition for the opening wave;
- one reusable Shock Trap for the rear route;
- one landmine or explosive for the second route;
- healing;
- boards only when an entrance needs extra delay.
I do not keep refreshing the shop while waiting for a perfect shotgun. One usable weapon, enough ammo, two covered lanes and healing are worth more than a fancy gun with no actual defense behind it.
3. Split the Defense Between Two Routes
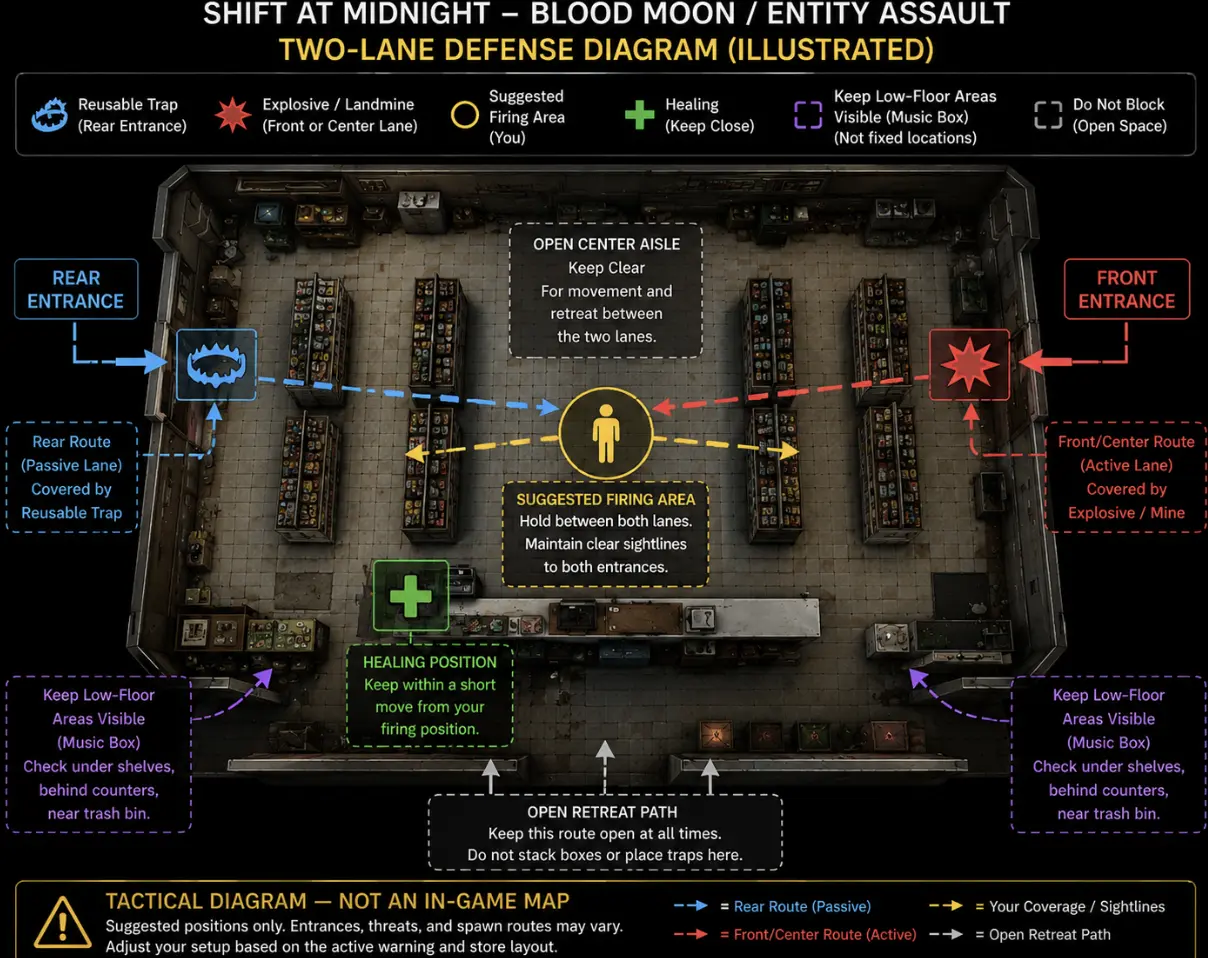
My basic layout is:
- Rear entrance: reusable Shock Trap.
- Front or center lane: landmine or explosive.
- Between both lanes: my main firing area.
- Reachable but outside the lane: healing.
- Center aisle: open retreat path.
I do not stack every trap at one doorway. If the first wave enters through the other route, the entire setup becomes floor clutter instead of protection.
4. Clear One Retreat Path
I remove only objects that affect movement:
- meat chunks in the center aisle;
- stock boxes beside a trigger;
- dropped weapons near the checkout;
- trash bags blocking the rear route;
- clutter that hides floor-level threats.
I am not trying to make the store perfect. I am creating one clean path between the front and rear defenses.
Why the Emergency Arsenal Changes My Plan
On one Blood Moon, the Emergency Weapon Arsenal did not open immediately.
The screen showed:
- Emergency Weapon Arsenal
- 40 seconds
- Lay Traps & Hide
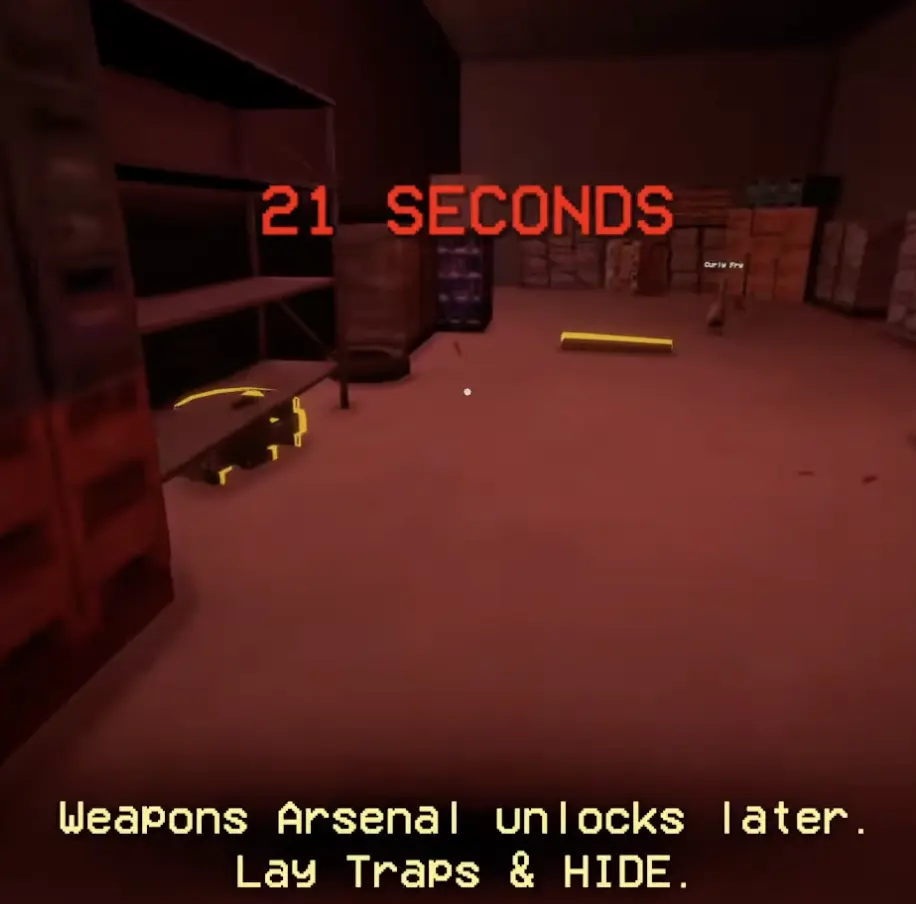
That means I cannot build the entire plan around grabbing an emergency gun as soon as the fight begins.
My starting loadout must already be capable of:
- controlling the first entrance;
- surviving the first attacker;
- holding the second route long enough for the wall to open.
I have not confirmed whether the Arsenal always opens after exactly 40 seconds or whether some encounters use wave progress instead of a fixed timer.
I also treat the Arsenal delay as a positioning reminder. If I know the wall is not immediately available, I stay closer to my prepared two-lane setup instead of drifting too far into the store during the opening seconds.
Entity Response Guide
| Threat | Coverage | Immediate response | Full details |
|---|---|---|---|
| Blood Moon wave | Confirmed | Cover two lanes and survive until the Arsenal opens | This guide |
| Baby Entities | Confirmed | Let the rear Shock Trap control the spawn route | This guide |
| Ceiling crawler | Observed | Look up, create distance and use normal weapons | This guide |
| Demented | Confirmed | Freeze it with sight and guide it through a prepared trap | Demented Guide |
| Jack-in-the-Box | Confirmed | Stop the current task, find it and complete the rewind | Music Box Guide |
| Dentist | Warning confirmed | Run, remain silent and do not look back | This guide |
| Shrieking Doll | Not isolated | No guaranteed weapon or route published yet | Achievement condition only |
| Marionette | Not encountered clearly | No reliable response published yet | Achievement condition only |
This table separates what I can execute consistently from what still needs a clean encounter. I would rather leave a route marked unconfirmed than attach the wrong name to a loud or unusual enemy.
How I Handle the Main Assault Wave
The opening seconds matter more than the cleanup afterward.
My sequence is:
- identify the first entry direction;
- let the prepared trap activate;
- use one explosive while the opening targets are grouped;
- hold the cleared center route instead of chasing enemies through the shelves;
- keep one answer ready for the second lane;
- use the Emergency Arsenal once it opens;
- confirm that no special Entity remains before returning to normal work.
In one Assault, a large attacker absorbed roughly three grenades before the Emergency Arsenal became available.
That does not prove three grenades are always required. What it does prove is that I should not dump every explosive into the first silhouette I see when a second route and a later Baby wave may still be active.
Why I Put the Reusable Shock Trap at the Rear Entrance
The rear entrance is where the reusable Shock Trap gave me the most value.
During one Blood Moon, multiple Baby Entities entered through the back route. The trap caught much of the group before they could scatter into the aisles.
I do not leave the main firing area to chase the first Baby I see unless it is already attacking me.
My order is:
- control the large attacker first;
- check whether the rear trap has triggered;
- shoot only the Babies that survive the trap;
- turn back toward the front or center lane;
- recover the trap after the Assault is actually over.
Once the rear route is covered, I spend the remaining setup on the front lane, ammunition or healing instead of stacking another trap in the same trigger area.
Solo and Co-op Setup
Solo
Solo defense works best when I simplify the store into one active lane and one passive lane.
My setup is:
- reusable Shock Trap at the rear entrance;
- explosive covering the front or center route;
- main weapon between both lanes;
- healing within one short movement of my firing area;
- center aisle kept open.
I do not try to stand directly on both entrances. I actively watch the lane that needs my aim and let the rear Shock Trap warn me when something enters behind me.
I also avoid overboarding the store. Boards can delay an approach, but sealing too much of the store can trap me in a narrow room when the Music Box starts or an Entity enters from the wrong side.
Three-Player Co-op
In a three-player group, I divide the jobs like this:
- Front player: controls the main entrance and grouped attackers.
- Rear player: watches the Shock Trap and Baby spawns.
- Roamer: handles the Music Box, healing, ammo and whichever lane starts to lose control.
The Roamer is not just a third damage dealer. That role exists to solve the second problem:
- the Music Box begins;
- the rear trap is consumed;
- another Entity enters;
- a teammate needs healing;
- the first lane becomes blocked.
The most useful callouts are short:
Front active.
Rear trap triggered.
Music Box.
Arsenal open.
Store clear.
If the team is still debating jobs once the Assault has started, the setup was late.
Ceiling Crawler During a Blackout
The ceiling threat requires the opposite search pattern from the Music Box.
For the Music Box, I lower the camera and search the floor. After a blackout, I check above:
- the checkout;
- the tops of shelves;
- the center aisle;
- the wall and ceiling near the active route.
In one solo encounter, the attacker moved across the ceiling immediately after the power dropped.
My response is simple:
- stop the current transaction;
- look above the normal customer sightline;
- create distance from the wall beneath it;
- draw a normal firearm;
- keep the center route open;
- return to store work only after the attacker is gone.
I have not confirmed a separate trap, sound or observation mechanic for this threat, so I treat it as direct combat rather than inventing a special counter.
How I Respond to the Dentist
The Dentist warning gives a different set of instructions from a normal gunfight:
- do not hide;
- do not speak;
- do not look back;
- run.
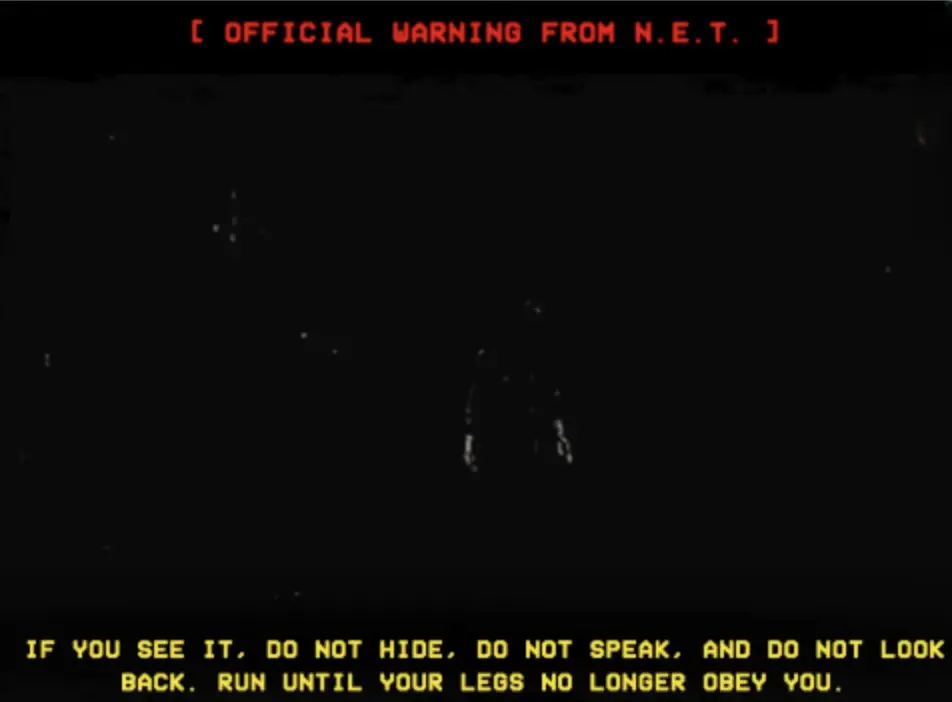
I do not stop to fight, hide, investigate or wait for better equipment. I keep moving until the threat is over.
Do Not Mistake the Break-Room Corpse for the Dentist
A displayed corpse in the break room can look like an active story threat. The related note describes it as something placed to ward off Doppelgangers.
Without a chase, warning or new interaction, I treat the warning-driven Dentist encounter and the displayed break-room body as separate situations.
When I Stop and Resume Store Tasks
I stop normal work immediately when:
- the Assault begins;
- the Jack-in-the-Box song starts;
- the Demented enters the route;
- a blackout attacker is active;
- an Entity blocks the checkout or center aisle;
- the Emergency Arsenal countdown begins and my opening lane is not ready.
During the preparation phase, I may finish one transaction only when:
- the customer is already verified;
- the sale takes only a few seconds;
- no active Entity is present;
- the transaction does not require trusting a suspected Doppelganger.
I resume store tasks only after:
- both entrances have been checked;
- the Music Box is no longer active;
- the Demented or other special Entity is gone;
- the store route is open again.
What the Entity’s Patience Bar Tells Me
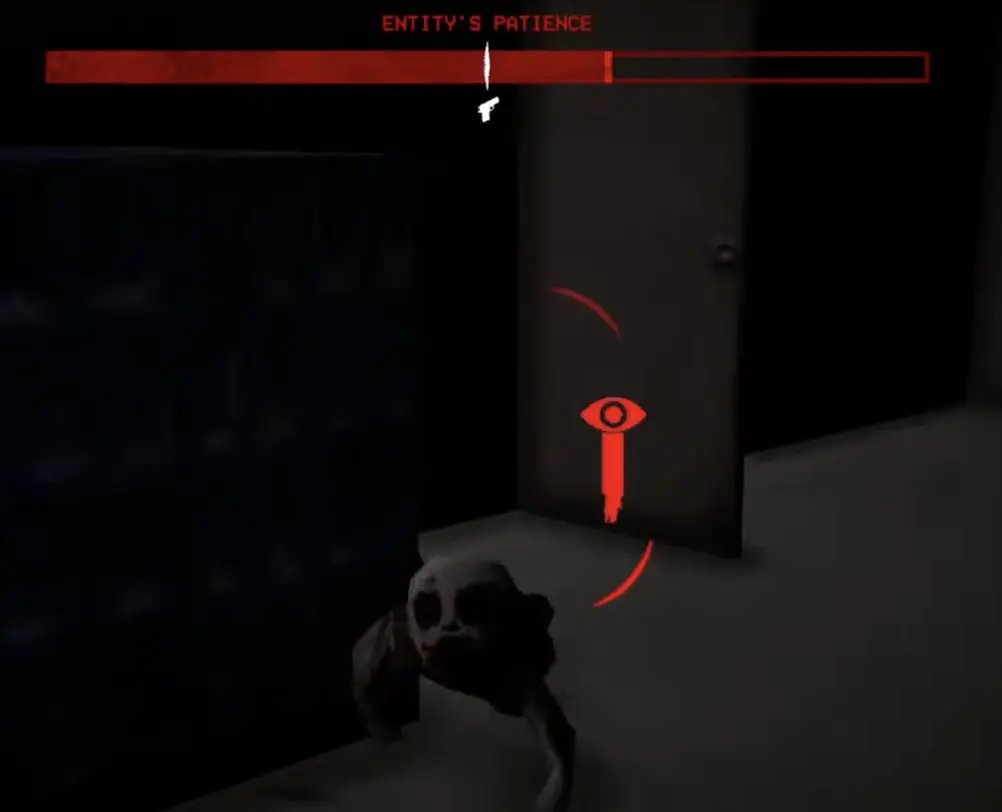
I use the Entity’s Patience bar as one sign that the Assault is still active.
If the bar is still present, I do not assume the store is safe even if the nearest attacker is dead. I still check both entrances and special warnings before returning to customers.
I have not confirmed whether the bar is a strict wave timer, whether it tracks all remaining threats, or whether special mechanics like the Music Box and Demented interact with it. I use it as a warning signal, not as the only all-clear condition.
My first cleanup pass is functional. I remove meat, boxes or trash only when they block movement, hide a small Entity or interfere with the counter.
How I Prepare for Relentless
The Relentless achievement requires finishing a Hunt within 30 seconds.
In one successful first Hunt, the attacker entered at about 44:23 and was dead by roughly 44:41. That gave an observed combat window of about 18 seconds.
I use that as a preparation benchmark rather than claiming every fast Hunt automatically unlocks the achievement unless the achievement itself is confirmed in that run.
The result came from preparation, not a complicated damage combo.
My fast-Hunt route is:
- place traps before the Hunt;
- hold the likely first entrance;
- let the opening trap activate;
- use an explosive while targets are grouped;
- finish survivors with the prepared firearm;
- ignore cleanup and optional tasks until the Hunt ends.
I only attempt Relentless when both lanes are prepared and no special mechanic, such as the Demented or Music Box, is already disrupting the opening.
The full achievement route is covered in the Achievements Guide.
Final Assault Checklist
- Cover the rear route with a reusable Shock Trap.
- Cover the front or center route with an explosive.
- Keep one retreat path open.
- Save one answer for the second lane.
- Switch immediately to any special Entity mechanic.
- Resume store work only after both routes and active warnings are clear.
What to Read Next
- Read the Demented Guide for its observation, trap positioning and Freed achievement route.
- Read the Jack-in-the-Box Music Box Guide for the three-song warning, floor search route and rewind interaction.
- Read the Solo Guide for customer, driver, shopping and Hunt priorities across all 13 shifts.
- Read the Achievements Guide for Relentless, Silenced, Freed and the other confirmed unlock conditions.
FAQ
Does a Blood Moon always cause an Entity attack? +
Yes. The Blood Moon warning states that an Entity attack is guaranteed that night. It also warns that completing transactions with Doppelgangers can trigger a stronger Assault.
Does accepting more Doppelgangers make the Assault progressively stronger? +
I have confirmed that accepted Doppelganger transactions can strengthen the Assault, but I have not confirmed whether each additional transaction increases the wave or whether one mistake activates a single stronger state.
How long does the Emergency Weapon Arsenal take to open? +
In one Blood Moon, the Arsenal displayed a 40-second delay and told me to lay traps and hide. I have not confirmed that 40 seconds is universal or whether other Hunts use a different timer.
Are the Shrieking Doll and Marionette covered in this guide? +
Their achievement conditions are known, but I have not isolated reliable spawn and kill routes for either Entity. I list them honestly without publishing a guaranteed method that the current runs do not support.
Can I keep serving customers after the Assault warning appears? +
I can finish a short, already verified transaction during the preparation phase. Once the attack starts, the Music Box begins, or an Entity blocks the store route, I abandon normal service immediately.