Shift At Midnight Achievements Guide and 100% Roadmap
I route all 10 achievements through three Story Mode outcomes, then use clean Hunts for Relentless, Silenced, Freed, Last Performance and weapon cleanup.
Updated:
Quick Answer
Shift At Midnight has 10 achievements. My safest 100% route uses three Story Mode outcome runs for the three endings while I collect the seven non-ending achievements along the way. I do True Ending first because it has the strictest late-game condition, use a lower-pressure run for risky combat achievements such as Last Performance, and leave Empty Home for final cleanup.
I do not treat the achievement list as ten separate playthroughs.
Most of it fits naturally into Story Mode.
The useful question is:
Which achievements should I force now, and which ones should I wait to collect when the correct encounter appears?
That distinction saves a lot of unnecessary restarts.
All 10 Shift At Midnight Achievements
| Achievement | Requirement | My planning rule |
|---|---|---|
| First Blood | Kill your first customer | Use a confirmed Doppelganger instead of sacrificing a real human |
| Still Breathing | Survive your first Hunt | Let this unlock naturally on the first properly prepared Hunt |
| Silenced | Kill a Shrieking Doll | Watch for the doll-like threat and use its confirmed blood weakness |
| Freed | Kill a Demented | Use its observation mechanic and prepared damage route |
| Relentless | Finish a Hunt within 30 seconds | Attempt only when traps, weapon and firing lane are ready before contact |
| Last Performance | Kill a Marionette | Deliberately take the Marionette route only when prepared to finish the fight |
| Locked And Loaded | Complete the required Weapons Arsenal purchases | Track each unique weapon once instead of buying duplicates |
| True Ending | Save both Clyde and the pet | Do this first because it has the strictest ending requirement |
| Grave Decision | Trade Clyde for the pet | Use this run for riskier combat cleanup |
| Empty Home | Keep Clyde alive but lose the pet | Leave this as the easiest final outcome cleanup |
The three ending achievements have their own decision tree.
I do not repeat that tree here.
This page owns:
achievement planning, combat achievement timing, weapon collection and the 100% route
while the Endings Guide owns the exact final choices and money checks.
My Safest 100% Roadmap
Without relying on an untested save rollback, I plan around three outcome runs.
Run 1: True Ending + Safe Achievements
This is the run I protect the most.
I aim to collect:
- First Blood
- Still Breathing
- Relentless if a clean Hunt appears
- Silenced if I get a clearly identified Shrieking Doll
- Freed if the Demented route appears cleanly
- missing Locked And Loaded purchases
- True Ending
I do not deliberately create a dangerous Marionette fight late in a strong True Ending run unless I already have the encounter completely prepared.
The strict ending route matters more than forcing one optional combat achievement.
Run 2: Grave Decision + Riskier Combat Cleanup
This is where I prefer to chase:
Last Performance
and any combat achievements I skipped the first time.
I am more willing to risk restarting a Shift because I am no longer combining the run with my strictest ending route.
I also keep buying any missing unique Weapons Arsenal items.
Run 3: Empty Home + Final Cleanup
By the third run, I want the achievement list to be nearly finished.
I use this run for:
- any missing Entity kill;
- any missing unique weapon;
- another Relentless attempt if necessary;
- the final ending achievement.
I do not intentionally destroy the whole run just to force the ending result.
I still complete Shifts normally.
First Blood: I Wait for a Confirmed Doppelganger
First Blood requires:
Kill your first customer.
I do not use a random human for this achievement.
There is no benefit.
A wrong human kill can cost:
- the transaction;
- income;
- time;
- late-story financial flexibility.
A confirmed Doppelganger gives me the achievement without deliberately creating that penalty.
So I let First Blood happen during normal customer verification.
If I am not confident the person is fake:
I wait for another customer.
There are plenty of opportunities across three Story Mode runs.
Still Breathing: I Do Not Overcomplicate the First Hunt
Still Breathing requires surviving the first Hunt.
I do not build a special achievement strategy around it.
Before the Hunt I make sure I have:
- a usable weapon;
- ammunition;
- healing;
- a clear movement route;
- the active warning handled.
Then I stop doing store work until the danger is over.
The complete shared Hunt and Blood Moon preparation belongs in the Entities Guide.
For Still Breathing, survival is enough.
Speed does not matter yet.
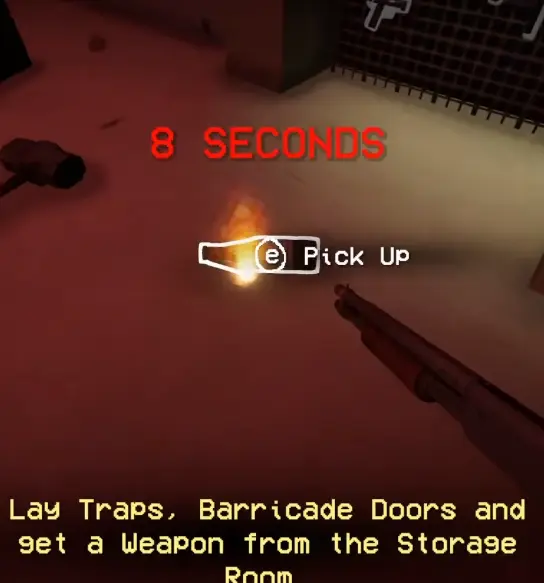
Relentless: Finish a Hunt Within 30 Seconds
Relentless is one of the achievements I deliberately prepare for.
The requirement is:
Finish a Hunt within 30 seconds.
That means the important part happens before the first attacker reaches me.
If I begin looking for traps, ammunition or a firing lane after combat starts, I have already wasted too much of the window.
The Setup I Use
Before the Hunt begins, I want:
- one prepared control point;
- immediate damage ready;
- no boxes or bodies blocking the firing lane;
- ammunition already beside me;
- healing available without searching the store.
Then I commit to the fight.
I ignore:
- checkout;
- restocking;
- cleaning;
- dropped loot;
- optional tasks.
In one successful fast Hunt, the combat itself lasted roughly 18 seconds.
That gives me a useful benchmark.
I do not need a frame-perfect kill.
I need to remove the setup delay.
When I Do Not Attempt Relentless
I wait for another Hunt if:
- the Music Box is already demanding attention;
- the Demented has created a separate positioning problem;
- my equipment is scattered;
- I have no clean firing lane;
- I am already one hit from death;
- the opening route is not prepared.
Trying to force the achievement in a bad Hunt usually costs more time than waiting for a clean one.
Silenced: Kill a Shrieking Doll
Silenced requires:
Kill a Shrieking Doll.
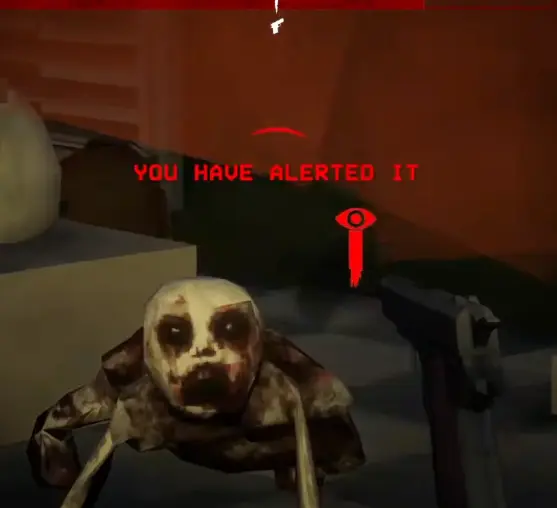
The warning I encountered describes a:
small leaping creature that resembles a children’s doll
and gives one especially useful combat fact:
it is extremely vulnerable to blood.
I keep this route conservative because I have not verified one universal:
- spawn Shift;
- spawn position;
- exact blood-item sequence;
- fixed health value.
When I clearly identify the Shrieking Doll, I stop ignoring the small floor-level threat and take the kill opportunity.
I do not confuse it with every Baby Entity that happens to enter during a Blood Moon.
The achievement needs the Shrieking Doll specifically.
Freed: Kill a Demented
Freed requires killing the Demented.
I only keep the short achievement reminder here:
look at it to control its movement → position the damage route → break eye contact so the kill can happen
The important trap placement, invulnerable/frozen state and failed-attempt fixes belong in the Demented Guide.
I do not spend an achievement run shooting repeatedly at a frozen Demented and wondering why the attempt is going nowhere.
Once I see that warning, I switch to the dedicated mechanic.
Last Performance: Kill a Marionette
Last Performance requires:
Kill a Marionette.
The achievement route deliberately conflicts with the safe Music Box route.
Normally I want to resolve the Music Box and prevent the situation from getting worse.
For Last Performance, I intentionally allow the route to reach the Marionette and then kill it.
That is why I do not force this achievement whenever a Music Box appears.
I first ask:
Am I actually equipped to finish the Marionette fight?
If not, I solve the Music Box normally and take the achievement later.
I also do not rely on one fixed Shift number.
I wait for the relevant Music Box encounter instead of assuming the Marionette must appear on one universal night.
The complete trigger, preparation and accelerating movement mechanic belong in the Marionette Guide.
For this page, the achievement rule is simply:
preventing the Marionette does not earn Last Performance; killing the Marionette does.
Locked And Loaded: Weapons Arsenal Checklist
Locked And Loaded is the collection achievement I actively track across runs.
The required unique purchases in my checklist are:
- □ Brick
- □ Baseball Bat
- □ Sledgehammer
- □ SMG
- □ Shotgun
- □ Flamethrower
The Pistol is already available and is not one of the six unique purchases I need to chase through the shop.
I check the computer shop at the beginning of each Shift.
If a missing weapon appears and my immediate survival needs are already covered:
I buy it once.
Then I stop spending money on duplicates just because the same weapon appears again.
My Purchase Priority
I use:
required survival item → missing unique Arsenal weapon → duplicate or convenience purchase
I do not skip:
- necessary ammunition;
- healing;
- a required trap;
just because I am missing one collectible weapon.
A failed Shift costs more than waiting another night for the weapon to appear.
Weapon purchases use the store-shopping economy rather than directly spending the personal balance used in the final pet route.
They still compete with other store supplies, so I never treat them as free.
The Three Ending Achievements
The remaining three achievements are:
- True Ending
- Grave Decision
- Empty Home
I deliberately keep their details short here.
True Ending
This is the strictest outcome.
I do it first while I am still playing the cleanest and most financially disciplined run.
Grave Decision
This is the outcome I pair with riskier achievement cleanup because its route is less dependent on preserving the same final financial condition as True Ending.
Empty Home
I leave this one for the third run.
By then I want the rest of the list finished or nearly finished.
The exact Clyde choice, final surgery check and three outcome conditions belong in the Endings Guide.
Which Achievements I Combine
I do not assign one run to each trophy.
My normal grouping is:
Opening Story Mode
→ First Blood
→ Still Breathing
Any clean normal Hunt
→ Relentless
Correct special Entity appears
→ Silenced
→ Freed
Prepared Marionette opportunity
→ Last Performance
Every shop visit
→ check one missing Locked And Loaded weapon
End of each Story run
→ one of the three ending achievements
This keeps achievement hunting attached to things I am already doing.
I do not abandon a strong Story Mode run just because one optional Entity did not appear at the perfect time.
Co-op Achievement Planning
I am conservative with co-op credit.
I have not confirmed that every connected player always receives:
- Silenced;
- Freed;
- Last Performance;
from one teammate’s kill.
So when one specific player needs an achievement, I let that player take the decisive role whenever possible.
For example:
Silenced
→ let the player who needs it handle the identified Shrieking Doll.
Freed
→ let that player finish the Demented route.
Last Performance
→ let that player lead the Marionette kill.
After the encounter, I check the achievement immediately.
I would rather discover missing credit now than finish the whole campaign and assume everybody received it.
The Achievement Mistakes I Avoid
Killing a random human for First Blood
I wait for a confirmed Doppelganger.
Trying Relentless after the Hunt has already become chaotic
I prepare before contact.
Assuming every small creature is the Shrieking Doll
I wait for a clearly identified doll encounter.
Repeating the full Demented fight from memory
I use the dedicated observation-and-trap route.
Solving the Music Box while expecting Last Performance
The safe Music Box route prevents the Marionette achievement opportunity.
Forcing the Marionette with poor equipment
I wait for a run I am willing to risk.
Buying duplicate weapons
I track the six unique Locked And Loaded purchases.
Protecting a collectible weapon purchase over survival
The achievement can wait for another shop roll; a dead run wastes the whole Shift.
Assuming one ending can be freely rewound into the other two
I plan three outcome runs unless I have personally tested a working save restore.
The 100% route becomes much simpler once I separate:
achievements I can collect naturally
from:
achievements that require me to deliberately create risk.
I take First Blood and Still Breathing when they come.
I prepare Relentless when the Hunt is clean.
I wait for the correct special Entities.
And I save the most dangerous cleanup for the outcome runs where losing one Shift hurts the least.
FAQ
Can I use one save to unlock all three ending achievements? +
I have not verified a reliable backup-and-restore route around the final choice across local saves, Steam Cloud and co-op hosting. I plan for three Story Mode outcome runs unless I have personally tested restoring that exact save.
Do all co-op players automatically receive Entity-kill achievements? +
I have not confirmed shared credit for every combat achievement. When one player specifically needs Silenced, Freed or Last Performance, I let that player handle the decisive kill and verify the unlock afterward.