How I Build Spells That Stay Useful Through a Run
My spellcrafting process for choosing a reliable base Spell, adding Memories that work now, upgrading duplicates, reshaping the Canvas, and using extra sockets without breaking a good build.
Updated:
Quick Answer
My safest spellcrafting rule is make the base Spell reliable first, then add Memories that strengthen something it can already do. I do not take a Freeze, Burn, critical or Trigger payoff just because it could become strong later. I want to know what activates it now. Once the core Spell works, I look for identical Memory upgrades, solve Canvas space problems, and only rebuild around a new Form or socket when it gives me a clear combat advantage.
Echoes of Mystralia became much easier for me once I stopped treating every new Memory as an upgrade.
The system gives me enough freedom to make something complicated very quickly.
That is not the same as making something good.
A rare Memory can be exciting.
A new Spell Form can look stronger.
An empty Canvas socket can make me feel like I should put something there.
But my best runs usually start from a much simpler question:
What does this Spell already do well?
Then:
What can I add that makes that job easier, faster or safer?
That is the order I use throughout a run.
I Judge the Base Spell Before I Judge the Memories
The first thing I check is not rarity.
It is the Spell itself.
I want to understand:
- how far it reaches;
- how quickly it comes back;
- whether I can use it while moving;
- how naturally it hits groups;
- and whether its existing behavior already supports a status or positioning strategy.
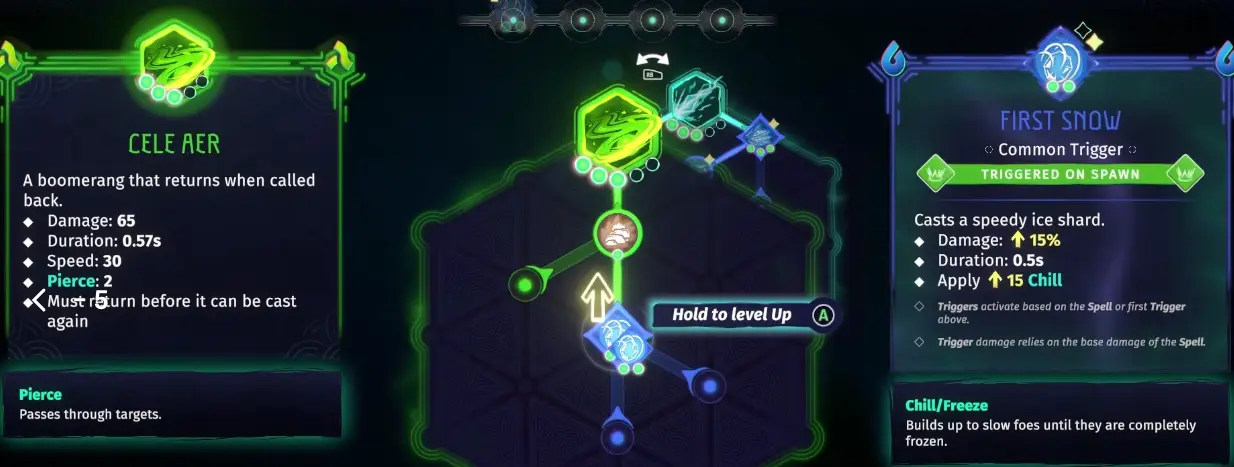
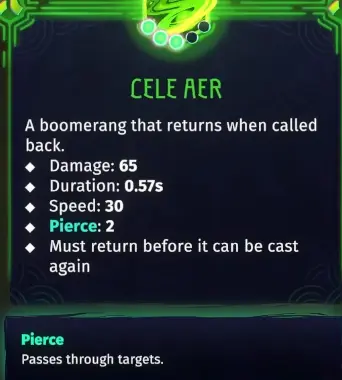
A good example is Cele Aer.
The version I used showed:
- 65 Damage
- 0.57s Duration
- 30 Speed
- 2 Pierce
It behaves like a boomerang and has to return before I can cast it again.
That immediately gives me useful information.
If I am already hitting several enemies because of Pierce 2, another effect that rewards repeated multi-target hits becomes more interesting.
If the return cycle is the part making combat awkward, I care more about anything that improves how safely I use that pattern.
If the Spell already reaches enemies reliably, I do not spend the next several rooms trying to solve a range problem I do not have.
This is why I start with the base Spell.
A Memory only makes sense in the context of what it is modifying.
I Build Around an Interaction I Can Activate Now
The easiest way for me to waste a good run is to build from the payoff backward.
I see something that says:
more damage against Frozen foes
or:
trigger an additional effect when an enemy Burns
and I immediately imagine the finished build.
The problem is that I may not actually have the first half of that combination.
I made this mistake with Freeze.
I found an effect that looked useful once a target froze.
At that point I did not have a reliable way to Freeze enemies.
I took it anyway because I assumed the missing piece would appear later.
Sometimes that gamble works.
Sometimes I spend several rooms carrying a Memory that is doing almost nothing.
My rule now is:
An effect I can activate immediately usually beats a theoretically stronger effect that still needs two lucky drops.
I will speculate when the current build is already strong.
I do not speculate when the build is still trying to become functional.
That keeps the spell useful even if the perfect follow-up Memory never appears.
Trigger Wiring Is a Different Problem From Build Choice
There is one point where I deliberately stop troubleshooting on this page.
I still need to know whether a Memory belongs in the build.
But if the question becomes:
Why is this Trigger affecting the wrong branch?
or:
Why did moving this Modifier change the result?
I am no longer deciding what to build.
I am debugging the Canvas.
That belongs in my Triggers and Memory Order guide.
For spellcrafting, I use a simpler check:
Can I explain what this Memory contributes to the finished Spell?
If yes, I consider keeping it.
If I cannot explain what the piece is doing, I do not keep adding more layers until the first one makes sense.
I Upgrade a Memory That Is Already Carrying the Build
One of the strongest upgrades I found was also one of the least complicated:
another copy of a Memory I was already using.
Two identical Memories at the same level can be combined to increase the Memory’s level.
That means a duplicate is not automatically a disappointing reward.
If the original Memory already fits the build, the duplicate can be exactly what I want.
In one run, combining an identical ice Memory increased its output from 3 ice fragments to 4.
The upgrade also improved its damage and Chill.
There is one restriction I check before planning around the upgrade:
the two Memories need to be identical and at the same level.
I do not assume two similar-looking icons are mergeable.
I check the actual Memory.
A version already producing four fragments is not the same upgrade piece as the three-fragment version I am trying to combine.
That detail matters because I do not want to choose a duplicate reward expecting a level-up that cannot happen.
When I Take the Duplicate
I usually value the duplicate highly when the Memory is already doing one of the main jobs in my build.
That could mean:
- applying the status the rest of the spell uses;
- adding projectiles that actually connect;
- increasing a damage source I rely on every room;
- or improving an interaction that has already proved consistent.
The more central the Memory is, the more attractive the upgrade becomes.
I do not need another new mechanic when the mechanic I already have is working.
When I Pass on the Duplicate
The duplicate loses priority when it does not solve the problem in front of me.
For example, I am more willing to leave it when:
- the spell is already killing quickly but is awkward to aim;
- I need another enabling effect before the build works;
- my Canvas cannot use the upgrade cleanly;
- or another choice fixes a much more obvious weakness.
I do not level a Memory simply because I can.
I level the parts I already trust.
Canvas Space Becomes Part of the Build Later
Early on, I mostly think about the Memories themselves.
Later, I run into another limitation:
Where do I actually put everything?
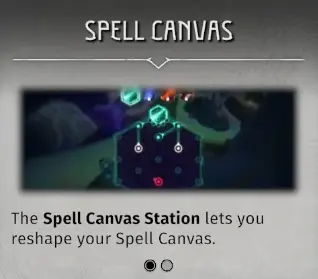
The Spell Canvas Station lets me reshape the Canvas.
It can also let me move a Spell to a different input.
I did not immediately remap everything the first time I reached one.
My existing input already felt natural.
Changing it would have forced me to relearn controls without fixing an actual combat problem.
That gave me another rule:
A Canvas change needs to buy me something.
I reshape when it gives me:
- room for an interaction I already want;
- a cleaner path through the Canvas;
- access to a socket that was otherwise awkward to use;
- or a better input for the way I actually cast the Spell.
If the existing layout already supports the build, I leave it alone.
There is real value in muscle memory during a long run.
I Do Not Fill a Canvas Just Because Space Exists
This became more important as the Canvas expanded.
An empty socket looks unfinished.
That does not mean it is bad.
If I only have a Memory that:
- needs a condition I cannot produce;
- interferes with the way I already use the Spell;
- or turns a simple reliable interaction into something I cannot predict;
I would rather leave the build alone.
More icons do not automatically mean more damage.
And more damage does not automatically mean a better run if the Spell becomes harder to use safely.
The Canvas is a constraint I work within.
It is not a checklist I need to fill.
I Compare Spell Forms by Their Job, Not Their Novelty
Once I have more Spell Forms available, I do not automatically switch to the newest one.
Different Forms can change the basic behavior I am building around.
I encountered options that could:
- reach farther;
- charge into a larger or longer-lasting attack;
- control space;
- or pull enemies together.
Those differences matter more to me than the fact that the Form is newly unlocked.
The actual unlock progression and Ancient Lessons decisions stay in my Basic Spells and Watcher Mastery guide.
Here I only care about what happens after the Form is available.
My question becomes:
Does this Form make my current Memories easier to use?
A pull effect becomes more attractive when I already have area damage.
A longer-range Form matters when close positioning is the thing getting me hit.
A chargeable attack can be awkward if the current build depends on constant movement and rapid casts.
That is why I avoid calling one Spell Form universally “best.”
The best Form is the one that fixes a problem or strengthens an interaction I actually have.
I Keep a Familiar Spell When the New Form Does Not Solve Anything
I used to feel like unlocking something new meant I should immediately use it.
That is a good way to break a strong run.
If the current Spell:
- clears normal encounters;
- reaches enemies safely;
- applies the status I need;
- and feels natural to control;
I need a reason to replace it.
A new Form has to offer something meaningful.
Maybe it gives me range I lacked.
Maybe it works much better with a Memory I already have.
Maybe the current Spell has stopped scaling into the next region.
If none of those are true, I keep what is working.
Unlocking a new option and rebuilding the current run are two separate decisions.
Permanent Progression Is Not the Same as Spellcrafting
I also keep the Lotus outside this decision.
Spellcrafting answers:
How do I make this current build work better?
The Lotus answers:
How do I make future attempts start from a better position?
Mixing those together made my decisions less clear.
If I am choosing permanent survivability, starting resources or long-term progression, I use my Lotus Upgrades guide.
On this page I stay focused on the spell I am currently carrying.
Therakan Gives Me More Canvas to Work With
Defeating Therakan was the first time the shape of my active build expanded in a really obvious way.
After the fight, I gained a temporary Memory socket for the continuing run.
The socket lets me expand the current Spell Canvas.
But there is an important catch:
the socket needs to be connected.
The game explicitly warns me to make sure temporary Memory sockets are connected before leaving the station.
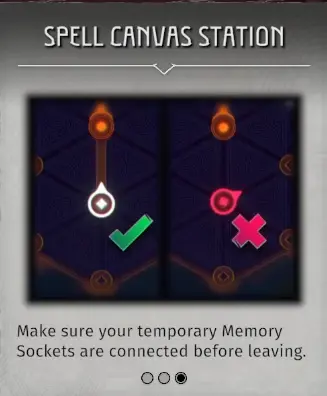
The first time I placed one, orientation mattered.
I could put the socket beside the Canvas and still get nothing useful if it was facing the wrong direction.
So I do not treat the reward as:
I have another slot now.
I treat it as:
I have another slot if I can integrate it into the build correctly.
That is a much more useful distinction.
The Therakan fight itself stays in my Therakan boss guide.
For spellcrafting, the important part is what the victory changes afterward.
I Do Not Rebuild the Whole Spell Just Because I Got Another Socket
A new socket creates temptation.
Now I can fit another Memory.
That does not mean the entire structure needs to change.
I first look at the spell that just carried me through the Guardian.
Then I ask:
What is already doing the most work?
Which part is currently constrained by space?
Is there a Memory I wanted but could not fit before?
If I can answer one of those clearly, the socket has an obvious job.
If not, I do not dismantle a successful build trying to justify the new space.
I can expand without starting over.
My Spellcrafting Order During a Run
I use almost the same decision order every time now.
First, I choose the Spell I can use reliably
I care about practical range, movement, return behavior and how naturally I can land hits.
I do not choose the base Spell from damage alone.
Then I add one interaction that already works
I want an effect whose condition I can activate now.
I test it before I build another layer around it.
Then I strengthen that interaction
That may mean:
- an identical Memory level-up;
- another compatible effect;
- better status application;
- more projectiles;
- or another improvement that makes the existing idea more consistent.
Then I solve the build’s real weakness
If damage is fine but I keep missing, I stop chasing more damage.
If the Spell reaches enemies safely but kills too slowly, then damage becomes the problem.
If the payoff rarely activates, I improve the enabler first.
Then I use Canvas expansion
Extra space is most valuable when I already know what I want to put there.
Only then do I chase speculative pieces
This is where I am willing to take the strange Memory that could become absurd if another perfect reward appears later.
I enjoy those combinations.
I just do not ask them to carry a weak run from the beginning.
The Spellcrafting Mistakes I Avoid Now
Most of my bad builds did not fail because one Memory was terrible.
They failed because I stopped asking what each piece was supposed to accomplish.
Building around a payoff I cannot activate
A Freeze payoff without Freeze is still waiting for another reward.
Taking rarity as proof that something fits
Rare does not mean useful for this Spell.
Filling every open socket
Empty space can be better than a Memory that adds noise without solving a problem.
Rebuilding a comfortable Spell for novelty
A new Form has to improve the run, not simply look different.
Ignoring duplicate upgrades
An identical Memory I already rely on can be stronger than another unrelated effect.
Expanding the Canvas without checking the connection
A temporary socket is only useful when it actually joins the active structure.
Treating a wiring problem like a build problem
If a Trigger or Modifier should work but clearly does not, I stop swapping the entire loadout and check the actual Memory order instead.
What I Want Before I Commit to the Next Guardian
I do not need a perfect build.
I want one I understand.
Before I commit, I ask three questions.
Can I clear normal encounters with this Spell consistently?
If the answer is no, more theoretical damage is not fixing the right problem.
Can I explain the main interaction in one sentence?
Something like:
This Spell pierces several targets and the rest of the build rewards those repeated hits.
or:
This setup applies its status reliably, then uses that status for the payoff.
If I cannot explain the build, it usually has too many unrelated ideas.
Does the main interaction work without one more lucky drop?
If the answer is no, I keep improving what I already have rather than pretending the missing piece is guaranteed.
That is the point where spellcrafting became much more consistent for me.
I stopped hoping the next room would rescue the build.
I started deciding which part of an already useful Spell deserved the next upgrade.