What to Unlock Next in Chop Chop Inc
This is the progression route I use through Chop Chop Inc, from the first bridge and city projects to Hamsters, Batteries, Snowy Mountain and the Work Hall.
Updated:
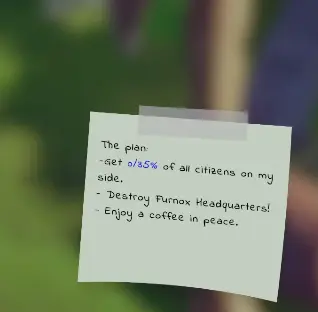
Quick answer: I make the fastest progress by prioritizing things that permanently open the game. After Chester’s opening loop, I repair the first bridge, set up city progression and open useful target audiences. In the midgame I prioritize the Hamster Cage and broken elevator, open the Corrupted Fields, return to the Tech Bridge only after Batteries are unlocked, then push into Snowy Mountain for Crystal Wood and the Crystal Axe. I build the Work Hall later, when repeated production rather than access has become my main bottleneck. My long-term compass is the Plan objective to get 35% of the city’s citizens on my side.
Chop Chop Inc starts with a very simple economic loop:
chop → process → craft → sell
That loop never disappears.
What changes is what I use the money and resources for.
Once the world opens up, I can have city projects, character quests, new regions, machines, special trees and several locked structures visible at the same time.
I have had 14 active missions sitting on the screen together.
Trying to finish all of them in order made my progression slower, not faster.
The question I use instead is:
Which objective changes what I can do next?
A bridge, new target audience, traversal system, recipe family or automation system usually matters more than another ordinary furniture order.
My Chop Chop Inc Progression Order
This is the overall order I use:
- finish Chester’s opening production loop;
- repair the first bridge instead of overfarming the starter area;
- set up city progression and prioritize projects that expose new audiences;
- build the Hamster Cage when that progression becomes available;
- use a Hamster to repair the broken elevator;
- open and explore the Corrupted Fields;
- leave the Tech Bridge alone if Batteries are still locked;
- unlock the Electronics Press and return with the required electronics;
- repair the Tech Bridge and enter Snowy Mountain;
- unlock Crystal Wood and the Crystal Axe;
- continue city, Cannon and regional progression toward the 35% support goal;
- build the Work Hall when repeated production becomes the bottleneck.
That is not a strict quest-by-quest walkthrough.
Small missions can appear in different combinations, and several larger systems overlap.
I use this order to decide what deserves my resources now and what I can safely leave for later.
1. Finish Chester’s Opening Loop, Then Stop Farming
I keep the opening simple.
Chester teaches me how to:
- cut trees;
- process wood;
- build furniture;
- sell what I make;
- turn those sales into the next unlock.
My early goal is not to become rich.
It is to get enough production working to fund the first permanent progression projects.
Once I have the materials and money for the next access structure, I build it.
I do not keep clearing the starter forest just because every tree is easy to reach.
I use the same rule for early Axe upgrades.
Better Axes matter, but I do not turn every new Grindstone level into my main objective.
The full upgrade order and later Crystal Axe choices belong in my Axe Upgrades Guide.
2. Repair the First Bridge
The first bridge is my first clear signal that I should stop treating the starting area as the whole game.
Once the bridge objective appears, I put resources into opening it instead of building a large reserve of basic furniture.
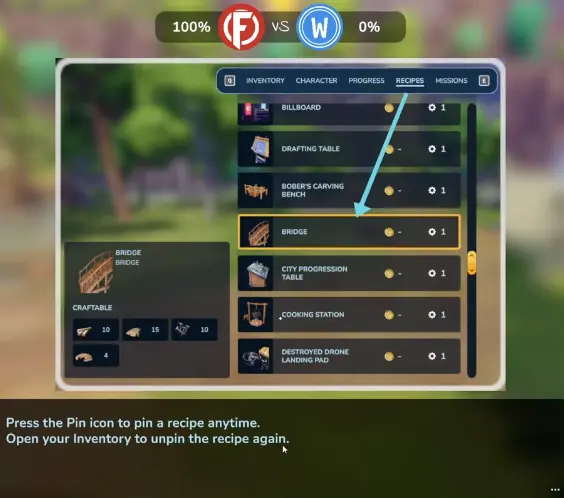
This becomes one of my main progression rules:
Access usually beats inventory.
If one project opens a new part of the map and another only gives me more ordinary money, I normally choose access first.
3. Set Up City Progression Early
Once city progression starts appearing, the game stops being only about Chester’s production loop.
I build and use the city progression table as soon as that system becomes relevant.
From this point, the loop I care about is:
city project → new audience or access → new missions → permanent unlock
That is much more useful than:
mission → money → another random mission
The city system gives me a reason to be selective.
4. Prioritize New Target Audiences
Some city projects are more valuable because they expose another group of people.
The Television Tower is a good example.
Completing it opens additional target audiences.
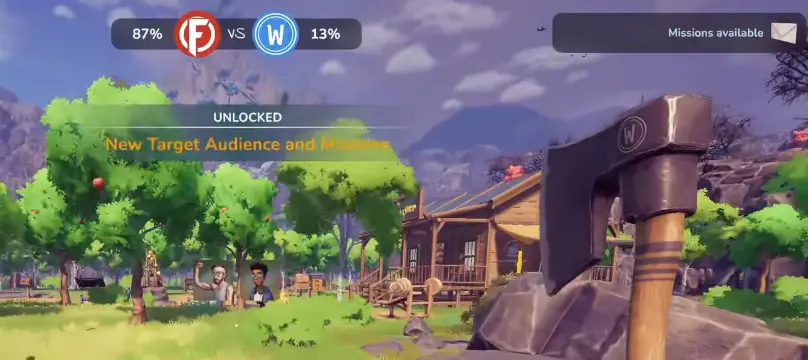
When my mission list becomes crowded, I rank objectives like this:
First: something that opens a region, audience or permanent system.
Second: a requirement directly blocking that unlock.
Third: a side mission I can finish naturally with materials I am already collecting.
Anything expensive that changes nothing can wait.
5. Build the Hamster Cage When It Appears
The Hamster Cage is more important than it first looks.
When I completed it, the game immediately started pushing the hamster progression forward.
The sequence exposed a new hamster-related recipe and then gave me:
Repair the broken elevator

That changes how I value the Hamster Cage.
If I still have several ordinary missions available but the Cage is ready to finish, I prioritize the Cage.
It opens something new.
Another standard furniture contract usually does not.
6. Use a Hamster for the Broken Elevator
After the Hamster Cage is running, the broken elevator becomes a real progression objective.
The elevator itself needs a Hamster.
That means finishing the Cage without actually securing a Hamster does not finish the route.
I get the Hamster I need and return to the elevator.

I do not build a huge Hamster reserve at this point.
I get enough to satisfy the progression need in front of me.
Later systems ask for more Hamsters, but I deal with those when they become active objectives rather than farming all of them in advance.
7. Scout New Regions for What They Unlock
As more fast travel and world routes become available, the map starts offering several destinations.
These can include:
- Corrupted Fields;
- Snowy Mountain;
- Castaway Cove;
- Whisper Cave;
- Ozville Forest.
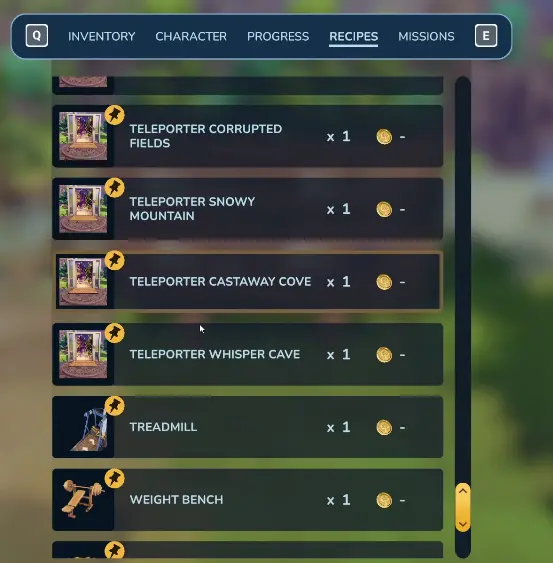
My first visit to a region is reconnaissance.
I look for:
- a resource I have never seen before;
- an NPC chain that changes progression;
- a traversal system;
- a permanent machine or recipe;
- a requirement that clearly belongs to a later stage.
The last one is important.
Finding a locked machine does not mean I missed something five metres away.
Sometimes the game is simply showing me where I will return later.
8. Open the Corrupted Fields and Collect Electric Wood
The Corrupted Fields become important because they introduce a new resource tier and one of the game’s most misleading progression gates.
Once I can open the route, I start seeing Electric Trees and collecting Electric Wood.
That is useful.
It does not mean every electrical recipe is now unlocked.
This was where I initially made the wrong assumption.
I had Electric Wood, so when I found an electrical structure I assumed I should already be able to complete it.
Not necessarily.
The resource and the recipe unlock are separate progression checks.
The exact Electric Wood locations and processing details belong in the Special Wood Guide.
9. Leave the Tech Bridge If the Battery Is Still Locked
The Tech Bridge is the best example of Chop Chop Inc showing me a future objective early.
It asks for electrical components, including a Battery.
I reached the bridge before I knew how to make one.
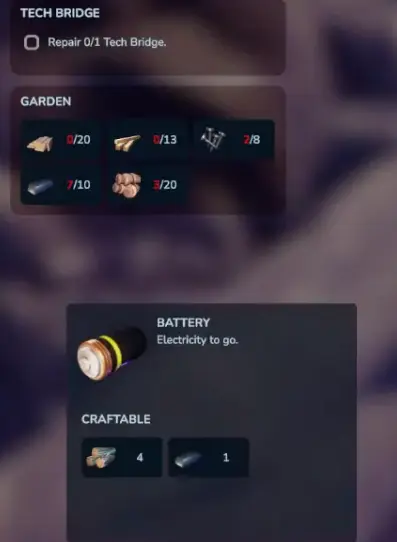
At that point, I leave.
I do not:
- repeatedly check the bridge;
- chop more Electric Trees hoping the Battery appears;
- search every shop;
- assume the save is broken.
The Battery has its own progression chain.
I continue the Corrupted Fields story until that system opens.
The full Lewis route, Electronics Press unlock and Battery recipe belong in my Battery and Electronics Press Guide.
This page only needs the progression decision:
If the Battery recipe is missing, the Tech Bridge is not my next objective.
10. Return to the Tech Bridge After the Electronics Press Unlock
Once the electronics chain is actually available, I change my priority.
Now the Tech Bridge is no longer a future marker.
It is a real access project.
I craft the electronics I need, make sure I have the other required bridge component and return.
Repairing the Tech Bridge opens the way toward Snowy Mountain.
This is exactly the kind of project I spend resources on immediately because it changes the world available to me.
I would rather fund this access route than buy several optional furniture recipes at the same point.
11. Snowy Mountain Unlocks Crystal Wood
Snowy Mountain is another clear resource-tier jump.
When I first arrive, the cold itself becomes part of navigation.
Nearby campfires help me push farther up the route.
I also start finding Crystal Trees, which unlock Crystal Wood.
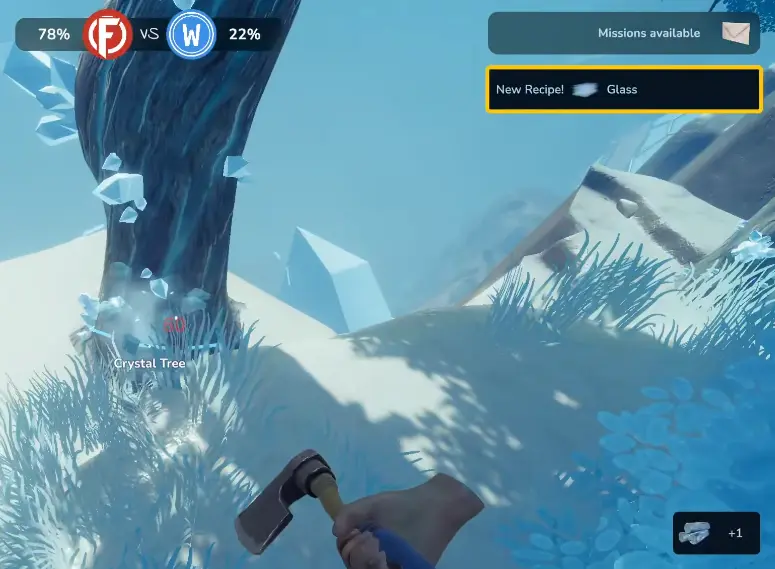
That is the main reason I value the Tech Bridge highly.
It is not only another place to explore.
It moves me into another material tier.
12. Upgrade the Grindstone for the Crystal Axe
Farther into the Snowy Mountain progression, I reach another meaningful Axe upgrade.
After upgrading the Grindstone, the Crystal Axe becomes available.
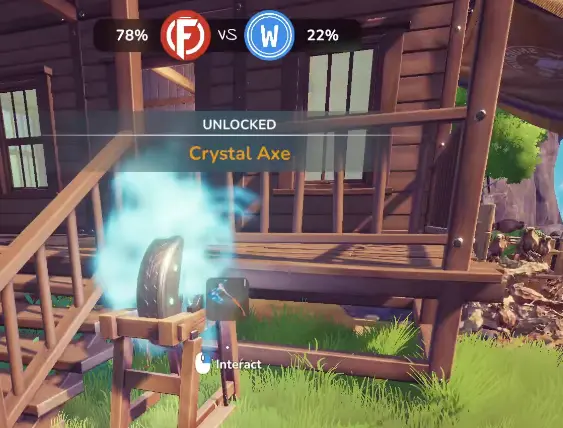
I do not duplicate the exact upgrade costs here.
Those numbers and the question of how far I upgrade the Axe belong in my Axe Upgrades Guide.
For progression, the important judgment is simpler:
I upgrade when tree-clearing speed has become a real material bottleneck.
If I am still blocked by access, a missing recipe or a city project, the Axe can wait.
If I am repeatedly farming advanced wood for major builds, the upgrade becomes much easier to justify.
13. Keep the Cannon as Its Own Progression Branch
The Cannon can overlap with the Hamster, metal and city progression.
I do not treat it as the one mandatory next step every time its objective is visible.
If my immediate blocker is:
- a new region;
- the Battery chain;
- a target audience;
- another permanent city unlock;
I finish that first.
When the Cannon itself becomes the objective I want to push, I switch to the Cannon Quest Guide.
That page owns its requirements, upgrades and specific blockers.
The Progression Guide only needs the decision:
A visible Cannon objective does not automatically outrank an access or production unlock.
14. Start Automation Before the Work Hall
Automation does not begin only when I build the Work Hall.
By the midgame, Bobber can already remove some repeated crafting from my own workload.
That becomes useful when I notice I am spending too much of a session repeating the same low-level production instead of advancing a city or region objective.
At this stage I start letting automation handle repeatable production while I continue doing the progression work that cannot be automated.
I do not turn this page into an automation setup guide.
The exact Bobber recipe configuration, production amount and what I automate first belong in my Automation Guide.
15. Build the Work Hall When Production Becomes the Bottleneck
Later, the Work Hall becomes the larger automation checkpoint.
I do not rush it simply because it sounds like advanced technology.
I build it when the problem has changed from:
“I cannot reach the next system”
to:
“I can reach it, but I am spending too much time manually producing the materials it keeps asking for.”
That is when the investment starts paying for itself.

The Work Hall also exposes the Inventory and Distribution Center, described in-game as a pipe-based system for distributing goods between machines and accessing them through a smart inventory system.
That is a genuine step up from simply asking Bobber to make one repeated item.
It is why I treat the Work Hall as a late progression system rather than an optional decorative building.
The exact machine layout and automation strategy stay in the Automation Guide.
16. Use the 35% Citizen Goal as the Long-Term Compass
Eventually the Plan screen gives me the clearest long-term number:
35% of the city’s citizens on my side
This changes how I look at my mission list.
I am no longer trying to make every available request disappear.
I am trying to use:
- city expansion;
- target audiences;
- permanent systems;
- regional progression;
to move the larger Furnox plan forward.
That gives me a much better tie-breaker when several objectives compete for resources.
If one project opens another audience while another only gives me cash, I usually choose the audience.
What I Spend Money On First
My spending rule is:
Buy the thing that removes a real progression blocker.
I am willing to spend when the purchase completes:
- a bridge or fast-travel route;
- a city project that opens another audience;
- a permanent production system I now need;
- a required component for the next area.
I become more conservative when the purchase:
- only saves a little gathering time;
- finishes an ordinary side contract;
- unlocks furniture I do not currently need;
- consumes advanced resources without opening anything.
That matters more as the material tiers increase.
I would rather make another batch of ordinary furniture for money than sell advanced materials and immediately have to farm them again for a progression build.
When I Grind and When I Stop
I grind resources when I can name the exact permanent unlock they are funding.
Examples:
- the bridge I am about to repair;
- the current city project;
- the production machine I have already unlocked;
- the Work Hall once automation is the bottleneck.
I stop grinding when I am collecting material “just in case.”
That usually means I have lost track of the active progression objective.
At that point I reopen the Plan or mission list and decide what I am actually trying to unlock next.
My Stuck Check
When progression feels stalled, I run through the same checks.
Is this actually my main objective?
A side mission can sit on the screen for a long time without being the route I should be following.
I identify the unlock I currently want first.
Does a city project open another audience?
If yes, that often matters more than an ordinary contract.
Is the missing recipe actually unlocked yet?
This is the lesson I learned from the Battery.
Having the material does not prove I should already have the recipe.
Did I recently unlock a permanent system?
If yes, I revisit old gates.
The Tech Bridge only became worth revisiting after the electronics progression caught up with it.
Am I spending without knowing what the purchase unlocks?
If I cannot answer that question, I usually stop buying.
What I Leave for Later
Chop Chop Inc puts optional systems directly beside normal progression.
That makes them easy to mistake for requirements.
The Sacrifice Bowl is a good example.
It can produce useful and strange outcomes, but I do not use it as a progression compass.
Its verified combinations belong in the Sacrifice Bowl Guide.
I treat collectibles the same way.
If a Rubber Duck, photograph or other secret is directly on my route, I take it.
I do not stop an important region or city unlock to sweep the entire map unless I am deliberately doing completion cleanup.
What I Prioritize Once Everything Opens Up
By the time I have multiple regions, advanced wood, several target audiences and the Work Hall available, Chop Chop Inc becomes much less linear.
At that point I use three priorities:
- move the 35% citizen-support objective forward;
- finish permanent unlocks that remove genuine access or production bottlenecks;
- clean up side quests and secrets while I am already travelling through their area.
That is the progression rule that stayed useful for my whole run.
Finding a new object early often means:
remember this and come back later
not:
stop everything and solve this now.
FAQ
Can I cancel a Chop Chop Inc mission after accepting it? +
Yes. I cancel missions when the list becomes crowded and an older request is distracting me from the permanent unlock I am currently pursuing.