Tabletop Tavern Sanguine Court Build Guide
A practical Tabletop Tavern Sanguine Court build guide for Sister Morvayne, covering Outrider deployment, Raise Dead bodies, morale resistance, Necrotic Chimerae, target priority, shops, healing, and final battle planning.
Updated:
Quick Answer
The Sanguine Court build is an aggressive undead build centered on Sister Morvayne. Her key effect, Unbound by Chivalry, gives all units Outrider, so your army can deploy forward, collapse into ranged units, pressure artillery, and surround enemies before they stabilize. Use Raise Dead bodies to pin and screen, but do not rely on common units as your whole win condition. Your goal is to turn early pressure into gold, shops, healing, stronger units, and eventually Necrotic Chimerae as the late-run power spike.
Why Play Sanguine Court?
Sanguine Court is for players who want a hands-on build instead of a slow defensive army.
With Sister Morvayne, every unit gains Outrider. That changes the whole battle plan. You are not walking across the entire field while arrows and artillery hit you. You are starting close, spreading wide, and forcing the enemy to react immediately.
| Sanguine Court piece | Checked panel effect | Why it matters |
|---|---|---|
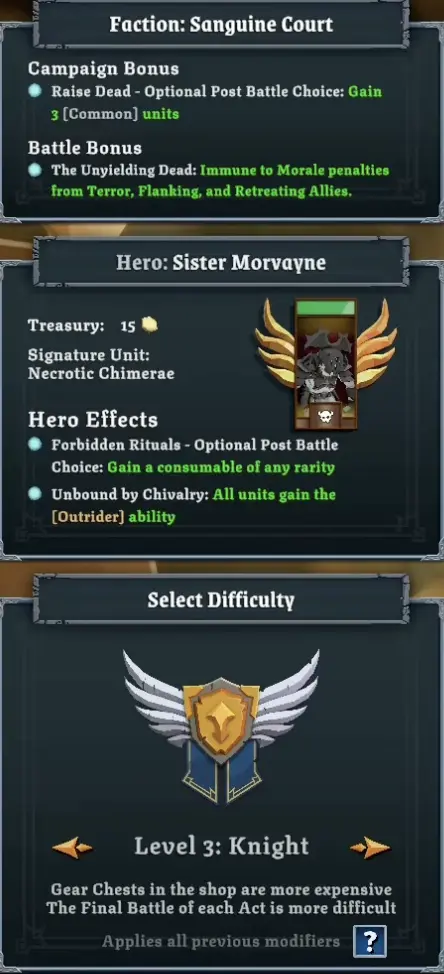
| Raise Dead | Optional post-battle choice to gain 3 common units | Gives bodies for pinning, screening, surrounding, and reserve rotation |
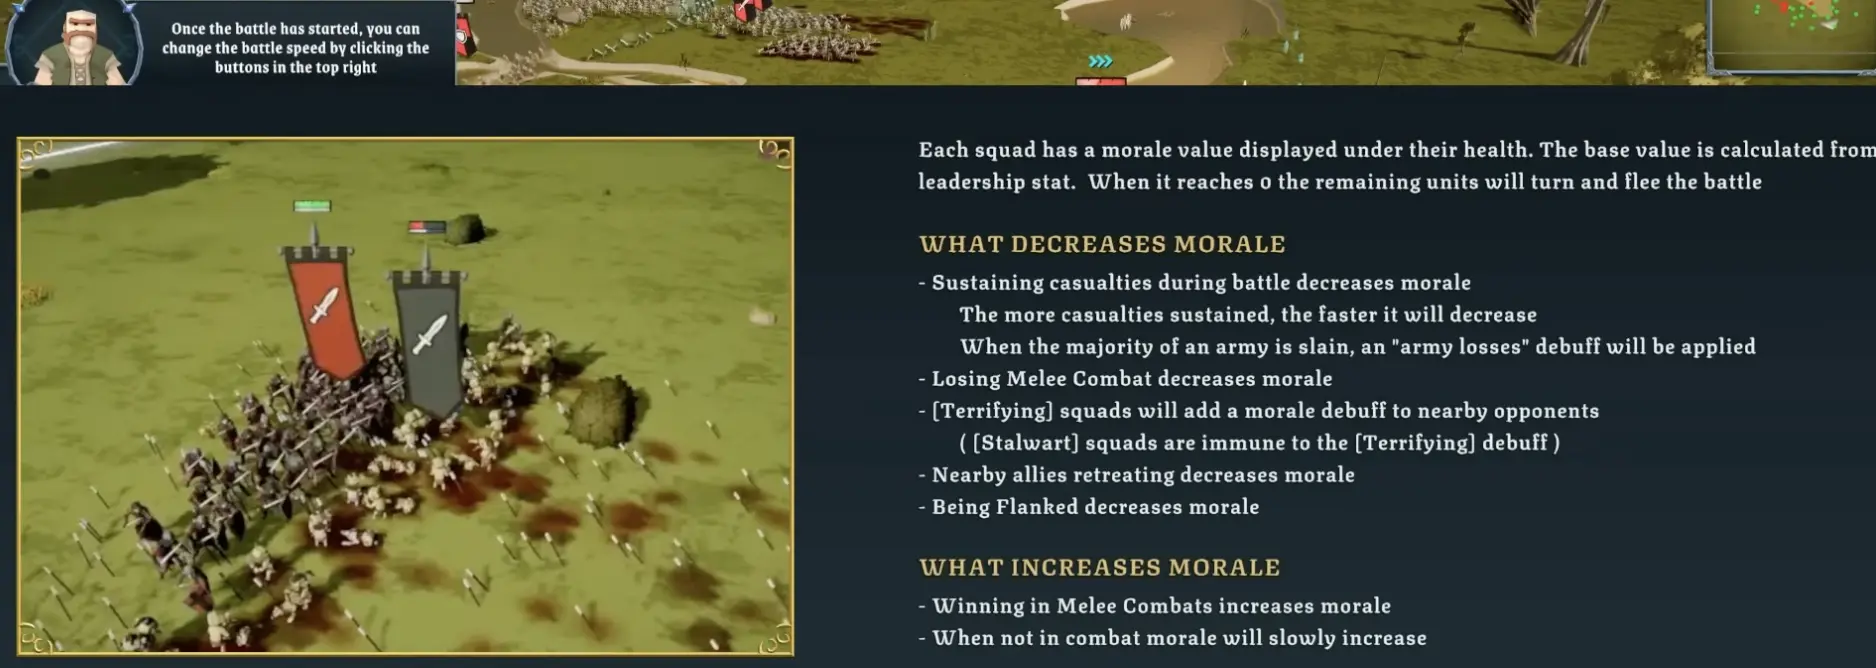
| The Unyielding Dead | Units are immune to morale penalties from Terror, Flanking, and Retreating Allies | Lets the army handle messy aggressive fights better |
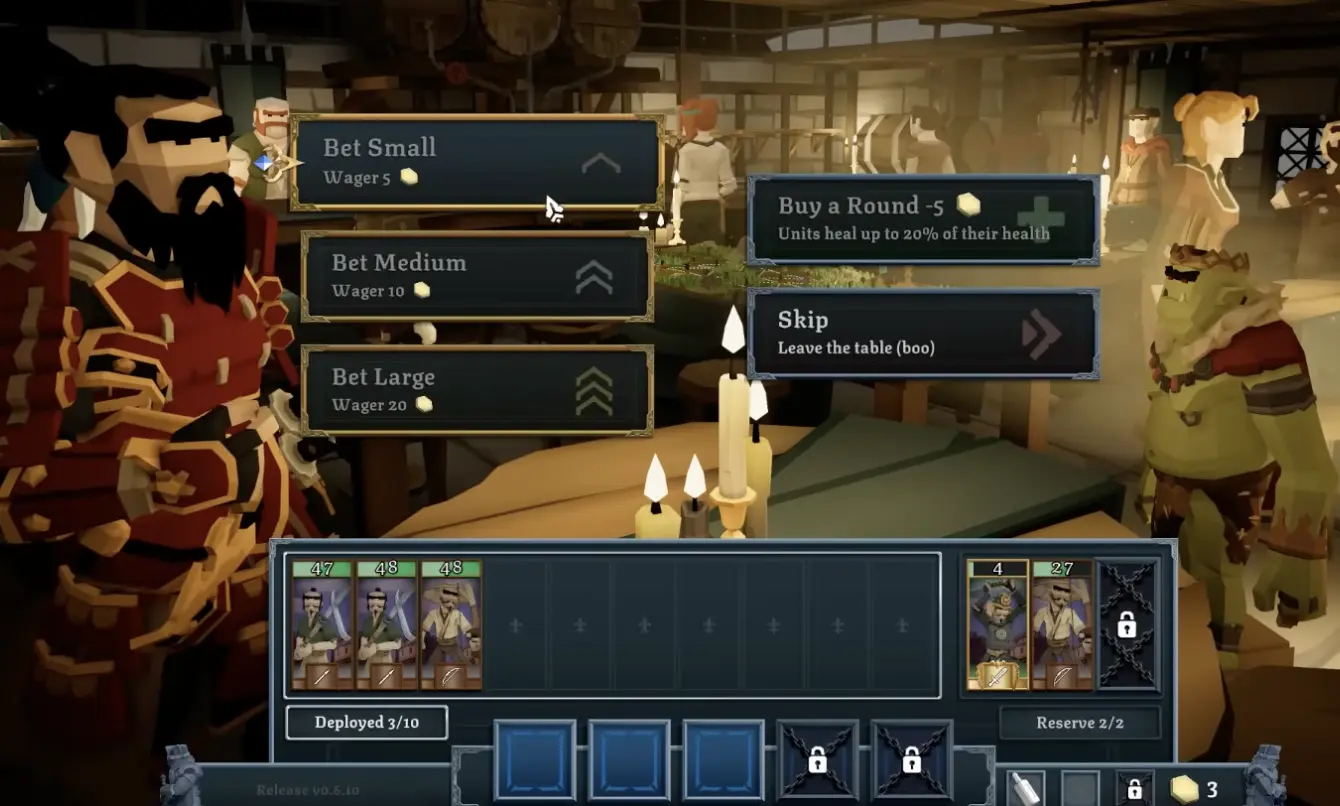
| Forbidden Rituals | Optional post-battle choice to gain a consumable of any rarity | Adds flexible recovery, roll, or fight-solving tools after battles |
| Unbound by Chivalry | All units gain Outrider | Defines the build by enabling forward deployment and fast pressure |
| Necrotic Chimerae | Sister Morvayne’s Signature Unit | Gives the build a clear late-run monster goal |
| Aggressive deployment | Build identity, not a separate tooltip | Lets you pressure enemy ranged units, artillery, and exposed flanks quickly |
Quick Build Plan
Use this table as the build’s short version.
| Stage | Main goal | What to avoid |
|---|---|---|
| Opening battles | Use Outrider to reach ranged units and artillery quickly | Sending every unit into one blob |
| Early rewards | Take bodies, gold, and role-filling units | Keeping only weak common units forever |
| Mid-run shops | Look for damage, anti-large, rare units, or signature-unit paths | Spending all gold on low-value bodies |
| Hard fights | Pin enemies, surround priority targets, and protect against flankers | Fair front-on trades with stronger infantry |
| Late run | Build around Necrotic Chimerae or another real carry | Charging monsters into anti-large counters |
| Final battle | Enter with bodies, damage, anti-large, healing, and a deployment plan | Relying on random swarm pressure alone |
Strengths and Weaknesses
Sanguine Court has a very clear identity: pressure, bodies, morale resistance, and a strong late-run monster goal.
It also has a clear weakness: many early bodies are not impressive by themselves.
| Strength | How to use it |
|---|---|
| All-army Outrider | Start close, wide, or behind angles to disrupt the enemy immediately |
| Raise Dead bodies | Fill space, pin targets, rotate reserves, and create surround pressure |
| Morale penalty immunity | The checked panel lists immunity to morale penalties from Terror, Flanking, and Retreating Allies |
| Post-battle consumable choice | Forbidden Rituals can offer a consumable of any rarity after battles |
| Aggressive tempo | Stop ranged units and artillery before they control the battle |
| Necrotic Chimerae goal | Gives the build a real late-run carry |
| Weakness | How to handle it |
|---|---|
| Weak common unit quality | Use bodies to pin and screen, not as the whole damage plan |
| Messy manual control | Split the army into simple jobs before starting |
| Limited safe ranged damage early | Win with deployment, flanks, and fast contact |
| High-tier infantry can punish you | Surround, isolate, or avoid fair front-on trades |
| Large threats still matter | Recruit anti-large, use bodies to delay, or save for stronger units |
| Gold pressure | Save for shops, healing, and signature-unit opportunities |
Sister Morvayne: Why She Defines the Build
Sister Morvayne is the reason this build deserves its own page.
Her most important effect is Unbound by Chivalry, which gives all units Outrider. That turns the army into a forward-deploying pressure build.
| Sister Morvayne detail | Build value |
|---|---|
| Treasury | Gives enough starting flexibility to plan early fights and shops |
| Signature Unit | Necrotic Chimerae |
| Forbidden Rituals | In the checked panel, this gives an optional post-battle choice to gain a consumable of any rarity |
| Unbound by Chivalry | Gives all units Outrider, which is the main reason this build works |
| Best playstyle | Aggressive manual battles, fast contact, and surround pressure |
| Main risk | Overcommitting weak units before the enemy is controlled |
Raise Dead: Use Bodies Correctly
Raise Dead is useful because it gives you bodies. Bodies matter in Tabletop Tavern because they can pin, surround, rotate, and protect stronger pieces.
But bodies are not the same as power.
| Raise Dead is good when… | Be careful when… |
|---|---|
| You need bodies after losses | Your army is full but still weak |
| You want more units for surrounds | You are skipping stronger shop or reward options |
| You need reserve rotation | Common bodies are replacing real damage |
| You want cheap deployment pieces | You still lack anti-large or elite pressure |
| You need screens for stronger units | You are letting important units die anyway |
Raise Dead should create flexibility. It should not trap you into keeping every common unit forever.
Three-Group Outrider Opener
The cleanest Sanguine Court opening is not “everyone rushes.”
Use three simple groups:
- Pin group: holds the enemy center.
- Pressure group: hits ranged units, artillery, or exposed flanks.
- Reaction group: protects against wolves, cavalry, enemy Outriders, or surprise angles.
| Opening job | What to use | What it does |
|---|---|---|
| Pin group | Common bodies, shielded units, cheap melee | Stops enemy infantry from freely turning |
| Pressure group | Fast units, Outriders, dogs, disposable bodies, stronger melee | Reaches archers, artillery, or exposed sides quickly |
| Reaction group | Spears, bodies, fast units, or spare melee | Intercepts cavalry, wolves, and enemy flankers |
| Carry follow-up | Necrotic Chimerae or stronger units later | Enters after enemies are pinned or distracted |
Opening Target Priority
Sanguine Court wins by choosing the first targets correctly.
You are not trying to touch every enemy at once. You are trying to remove the units that stop your rush from working.
| Priority | Target | Why |
|---|---|---|
| 1 | Enemy artillery | It punishes packed rushes and damages you before melee stabilizes |
| 2 | Enemy ranged units | They are weakest when pressured early |
| 3 | Enemy Outriders, wolves, or cavalry threatening your backline | They can punish your split deployment |
| 4 | High-tier infantry | Weak common bodies lose fair trades against them |
| 5 | Anti-large units | Important before committing Necrotic Chimerae |
| 6 | Isolated low-morale units | Breaking them can create a morale chain |
Surrounds, Flanks, and Morale
Sanguine Court benefits from chaotic fights because The Unyielding Dead changes specific morale penalties.
That does not mean your units are invincible. It means you can use more aggressive surround patterns without your army collapsing as quickly from Terror, Flanking, or Retreating Allies.
| Tool | How Sanguine Court uses it |
|---|---|
| Center pin | Common bodies hold enemies long enough for side pressure |
| Side collapse | Adds pressure without forcing a fair front-on trade |
| Backline dive | Stops archers or artillery from free-firing |
| Common body screen | Lets stronger units choose better targets |
| Fast reserve group | Reacts to cavalry, wolves, or enemy Outriders |
| Monster follow-up | Necrotic Chimerae enters after enemies are pinned or distracted |
Defending Against Enemy Counter-Rush
Sanguine Court is aggressive, but it still needs defense.
Enemy wolves, cavalry, Vanguard units, and Outriders can punish you if every unit moves forward. This is the main reason the three-group opener matters.
| Enemy counter | Response |
|---|---|
| Wolves | Keep cheap bodies or spears ready to intercept |
| Cavalry | Do not leave support units isolated |
| Enemy Outriders | Keep one group angled back or near your support units |
| Fast ranged units | Pressure them with fast melee or disposable bodies |
| Unknown deployment | Leave space to react instead of overcommitting forward |
| Anti-large near your monster | Delay Necrotic Chimerae until the target is safer |
Necrotic Chimerae: Late-Run Power Goal
Necrotic Chimerae is the clearest late-run goal for this build.
It gives Sanguine Court something common bodies do not provide: a real monster carry that can finish fights when supported correctly.
| Necrotic Chimerae trait or stat | Why it matters |
|---|---|
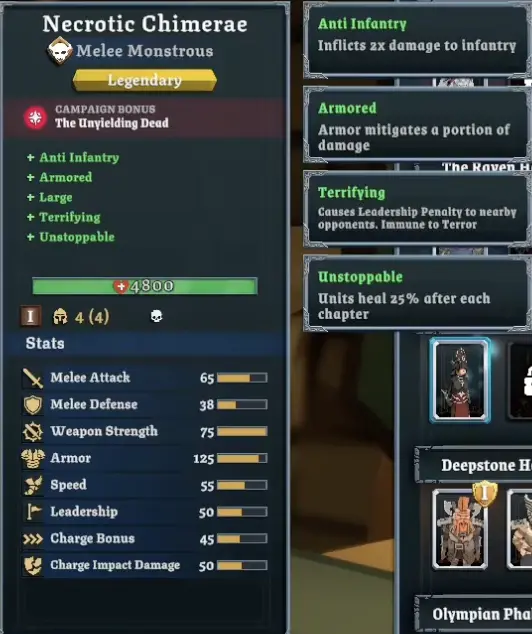
| Anti Infantry | Helps crush infantry targets |
| Armored | Improves durability against many attacks |
| Large | Gives strong monster presence, but creates anti-large risk |
| Terrifying | Adds leadership pressure |
| Unstoppable | Helps it recover between chapters |
| High melee stats | Lets it finish targets that common units cannot |
| Speed and charge value | Helps it reach the right fight quickly |
Do not throw Necrotic Chimerae into the first enemy it sees. Use bodies to pin enemies first, avoid anti-large counters, then send it into infantry, backline targets, or already-disrupted fights.
Economy, Shops, and Signature Unit Planning
Sanguine Court needs gold because the build wants to move beyond weak bodies.
Gold should usually go toward one of four things:
- healing damaged key units,
- buying a real damage piece,
- finding an anti-large answer,
- saving toward signature or rare unit opportunities.
| Gold use | When it helps |
|---|---|
| Healing | Several important units are damaged after aggressive fights |
| Shop units | A shop can add damage, anti-large, or a stronger carry |
| Signature Unit plan | You are building toward Necrotic Chimerae |
| Potions | A key unit needs emergency recovery before a hard fight |
| Event rolls | The reward is worth the cost and failure will not break the route |
| Deposits | The current run is stable and future upgrades matter more |
Route Priorities for Sanguine Court
Sanguine Court wants routes that convert early pressure into lasting power.
You can take fights aggressively when the army is healthy, but you should not chain hard fights while your best units are damaged.
| Route situation | Best choice |
|---|---|
| Early army is healthy | Take fights that give gold, bodies, or unit rewards |
| Army is full but weak | Look for shops, rare packs, or stronger unit rewards |
| Several key units are damaged | Choose village, tavern, campfire, or reserve-friendly routes |
| Shop is close | Save gold if you need a carry, anti-large, or signature-unit path |
| Final battle is close | Stop taking greedy garrisons or unknown routes |
| Necrotic Chimerae is available | Buy it only if you can still heal and support it |
Healing and Campfires
This build takes contact early, so healing matters.
You can replace common bodies, but you should protect the units that actually win fights: stronger melee pieces, anti-large answers, high-prestige units, and Necrotic Chimerae.
| Recovery tool | Sanguine Court use |
|---|---|
| Reserve slots | Rest damaged key units while common bodies handle safer fights |
| Tavern healing | Spend gold when the whole army is bruised |
| Village stay | Strong before a hard fight or final battle |
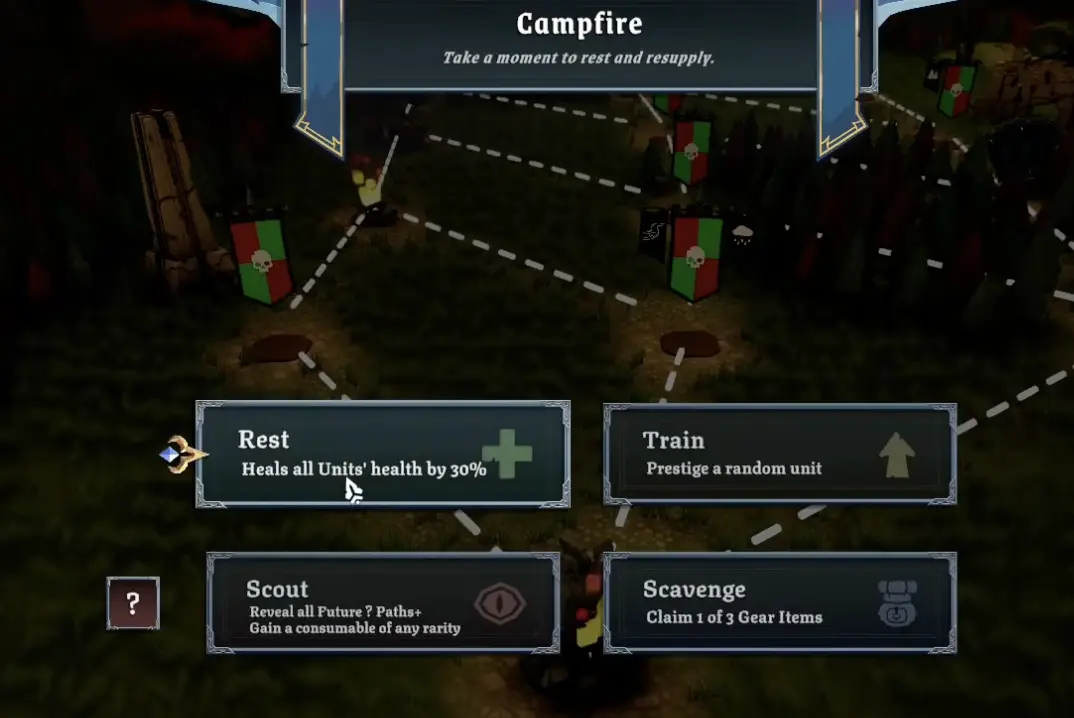
| Campfire Rest | Best when several core units are damaged |
| Potions | Save stronger units, monsters, or high-prestige pieces |
| Prestige | Use as an army-quality tool, not as your main healing plan |
Best Army Shape
A strong Sanguine Court army is not just a swarm. It has jobs.
| Army role | What you want |
|---|---|
| Bodies | Common units that pin, screen, surround, and rotate |
| Reliable melee damage | Units that can win trades after the enemy is pinned |
| Fast pressure | Units that reach archers, artillery, or exposed flanks |
| Anti-large answer | Protection against cavalry, monsters, and large threats |
| Monster carry | Necrotic Chimerae once available |
| Support damage | Ranged or special units if they fit the route |
| Reserve fillers | Extra units that let damaged core pieces heal |
Hard Fight Adjustments
Sanguine Court can make early battles look easy, but the build still needs adjustments when enemy quality rises.
| Hard fight problem | Adjustment |
|---|---|
| High-tier infantry | Surround, isolate, and avoid fair front-on trades |
| Large unit or giant | Bring anti-large, delay with bodies, or focus it before it reaches your carry |
| Ranged-heavy enemy | Use Outrider deployment to reach them immediately |
| Enemy cavalry / wolves | Keep one intercept group instead of sending everyone forward |
| Your army is damaged | Take healing, reserve key units, or avoid the fight |
| You lack a carry | Save gold and route toward shops, rare units, or signature-unit options |
Final Battle Setup for This Build
For general route and final battle planning, use the Tabletop Tavern Campaign Guide. This section focuses only on what Sanguine Court specifically needs.
| Build-specific check | Good sign |
|---|---|
| Opening targets | Artillery, ranged units, elite infantry, or large threats are already assigned |
| Bodies have jobs | Common units are pinning, screening, surrounding, or protecting stronger units |
| Real damage exists | Necrotic Chimerae, strong melee, ranged support, or elite units can finish fights |
| Anti-large answer | Cavalry, monsters, and large enemies are not unanswered |
| Monster safety | Necrotic Chimerae is not charging blindly into anti-large counters |
| Healing plan | Potions, reserves, village, tavern, or campfire choices kept key units alive |
Common Sanguine Court Mistakes
| Mistake | Why it hurts | Better move |
|---|---|---|
| Sending every unit into one blob | You lose the surround advantage | Split groups and collapse from angles |
| Overrating common undead units | Weak bodies still lose bad trades | Use them to support stronger pieces |
| Ignoring enemy artillery | It punishes packed rushes | Assign a fast pressure group before battle starts |
| Leaving no defense behind | Wolves, cavalry, or enemy Outriders can punish you | Keep one group ready to intercept |
| Buying random units with no role | The army becomes full but weak | Recruit damage, anti-large, or support pieces |
| Skipping healing because units feel replaceable | Key pieces die before power spikes | Heal important units and rotate reserves |
| Charging Necrotic Chimerae into anti-large | Large units can be countered | Pin first and choose safer targets |
| Taking every garrison fight | Aggressive armies still lose health | Heal or skip when a final battle is close |
| Using Outrider without target priority | Deployment advantage gets wasted | Choose artillery, ranged, elite, or large targets first |
| Treating morale resistance as invincibility | Units still take damage and die | Use morale resistance to support tactics, not replace them |
FAQ
Is Sanguine Court good in Tabletop Tavern? +
Yes. Sanguine Court is good if you like aggressive manual battles. Sister Morvayne gives all units Outrider, letting your army deploy forward, pressure ranged units and artillery, and surround enemies before they settle into a clean formation.
What does Sister Morvayne do in Tabletop Tavern? +
In the checked Sister Morvayne panel, Forbidden Rituals gives an optional post-battle choice to gain a consumable of any rarity, and Unbound by Chivalry gives all units the Outrider ability. For this build, Unbound by Chivalry is the defining effect.
What is the Sanguine Court faction bonus? +
In the checked Sanguine Court panel, Raise Dead is an optional post-battle choice to gain 3 common units. Its battle bonus, The Unyielding Dead, makes units immune to morale penalties from Terror, Flanking, and Retreating Allies.
How should I use Raise Dead in a Sanguine Court run? +
Use Raise Dead to fill army slots, replace losses, create surround pressure, and give damaged key units time to rest. Do not treat common bodies as the whole win condition; you still need real damage, anti-large answers, and stronger late-run units.
What is the best Sanguine Court opening? +
Use a three-group opener: one group pins the center, one group pressures ranged units or artillery, and one group stays ready to intercept wolves, cavalry, or enemy Outriders. Do not send every unit into the same blob.
Is Necrotic Chimerae worth recruiting? +
Yes. Necrotic Chimerae is the clearest late-run goal for Sister Morvayne. It gives the build a real monster carry, but it still needs support and should not be thrown into anti-large units blindly.
What is the biggest Sanguine Court mistake? +
The biggest mistake is confusing aggressive deployment with reckless rushing. Outrider lets you start closer, but you still need target priority, backline protection, healing, and a plan for large or elite enemies.