Pathogenic Builds
Featured
The Builds I Trust After the First Two Organs
I stopped judging builds by the biggest damage number. These are the combos, Pathogen starts, and upgrade decisions that kept my runs alive.
Read Guide →Game Guide Hub
Start here to choose a Pathogen, build a reliable firing lane, spend DNA and Cores wisely, survive each organ, and plan the longer progression route.
Recommended Order
Use these guides in order if you are starting a new casino.
Builds
I stopped judging builds by the biggest damage number. These are the combos, Pathogen starts, and upgrade decisions that kept my runs alive.
Guide
Nanobot needs eight Armor at the same time. This is the Pathogen, Armor route, shop logic, and 7/8 recovery plan that made the unlock repeatable.
Guide
The Stomach combines corrosive acid, a closing death zone, crowded rooms, and a two-form boss. This is how I decide when to fight, shop, or leave.
Bosses
The Heart boss ended my strongest run after its first form collapsed. This is how I clear space, handle each pattern, and prepare for phase two.
Guide Cluster
I stopped judging builds by the biggest damage number. These are the combos, Pathogen starts, and upgrade decisions that kept my runs alive.
Read Guide →Nanobot needs eight Armor at the same time. This is the Pathogen, Armor route, shop logic, and 7/8 recovery plan that made the unlock repeatable.
Read Guide →The Stomach combines corrosive acid, a closing death zone, crowded rooms, and a two-form boss. This is how I decide when to fight, shop, or leave.
Read Guide →The Heart boss ended my strongest run after its first form collapsed. This is how I clear space, handle each pattern, and prepare for phase two.
Read Guide →Pathogenic’s 100% route is less about one perfect run and more about stacking Heart clears, Experiments, loadouts, and difficulty goals efficiently.
Read Guide →My basic Pathogenic route is:
The normal organ route is:
Skin → Intestines → Stomach → Liver → Lungs → Heart
This Hub explains the overall progression. The linked guides handle complete Builds, the eight-Armor Nanobot unlock, Stomach survival, the Heart boss, and all 41 Steam achievements.

| Guide | Open it when | Main answer |
|---|---|---|
| Best Builds | The Build deals damage but collapses in later organs | Tested Organelles, named combos, movement checks, Pathogen directions, and Antibiotics adjustments |
| Nanobot Unlock | You keep reaching seven Armor and losing the last point | How to hold eight Armor at once, choose safer Armor sources, and protect the attempt |
| Stomach Guide | Acid, the closing zone, or the third boss ends the run | Stomach routing, Difficulty Customization, shops, Freeze, and Ossified Macrophage |
| Heart Boss Guide | Limbs, adds, lasers, or phase two trap the Build | Atrioventricular Node patterns, Pathogen advice, named Builds, and movement |
| Achievements Guide | You are planning full completion | All 41 achievements, seven Heart clears, Antibiotics, Experiments, loadouts, and Brain |
Pathogenic is not only a damage-stacking roguelite.
Every run asks me to solve four connected problems:
My weaker runs usually had one impressive number and one obvious structural problem.
Examples include:
The order that works better for me is:
movement → firing lane → close-range protection → synergy → more damage
I do not need every category perfected in the Skin.
I need each one to improve before the later organs begin combining environmental hazards, mixed enemies, and multi-form bosses.
Pathogenic has seven playable Pathogens:
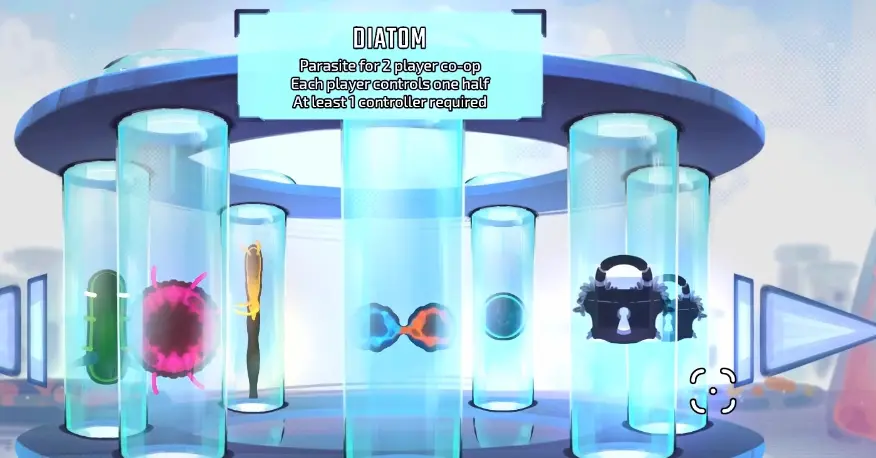
For a first normal clear, I prefer Bacterium.
Its front is easy to read, and its body works naturally with one forward ranged weapon, side protection, and a later projectile-bounce setup.
The other Pathogens change what I value:
I do not choose only by the starting weapon.
A strong opening attack is less useful when I cannot keep it pointed toward the escape route.
The Skin does not need to produce the final Build.
My opening target is:
DNA and Cores can fall while enemies are still active.
I use this order:
I do not cross an enemy firing lane merely because a resource is glowing.
I also do not leave loose DNA indefinitely after the room becomes safe, because dropped resources can disappear.
DNA advances the current run’s Evolution.
An Evolution may provide:
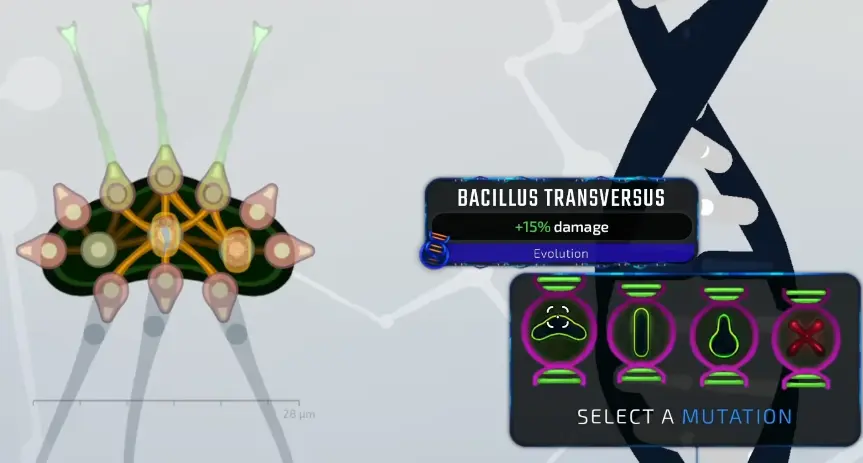
I take a larger form when:
I take Stamina or preserve the smaller body when:
Cores are used for shops, rerolls, rewards, and other run decisions.
I spend them when the purchase fixes something specific:
I save them when:
Unused Cores are not wasted when the alternative is a bad purchase.
Plasmid progression happens between runs.
Each Pathogen has its own longer-term progression and loadout objectives.
I prioritize the problem that repeatedly ends that Pathogen’s runs:
Plasmid progression does not replace learning the movement system, but it gives that movement more room to work.
The editor contains several connected roles.
Weapons include:
Direction matters as much as damage.
A powerful weapon in a side-facing slot may spend most of the room attacking empty space.
An Infuser does not automatically affect the whole body.
I follow the visible connection lines and check which weapon actually receives the effect.
One well-connected attack is usually better than several unsupported weapons.
Active Organelles may charge through:
The trigger must match the next encounter.
A kill trigger may work well while exploring but begin empty against a boss.
A successful-attack trigger is usually more dependable against one large target.
The full combinations and Tier List are in the Best Builds Guide.
For general planning, I use three recognizable structures.
I use:
This is my safest general ranged direction, especially on Bacterium and developed Fungal Spore runs.
I use:
This works well when mixed enemy groups or narrow Stomach rooms keep closing the firing lane.
I use:
The complete Armor timings and purchase conditions belong in the Nanobot Unlock Guide.
The important Hub-level rule is that an unfinished Armor engine should not replace Health, movement, or a weapon that already works.
The simplest shop mistake is buying another attack when the run is already one hit from ending.
I buy Health when:
I buy damage when:
The correct purchase addresses the reason the run is taking damage.
It is not automatically the safest-looking or highest-rarity reward.
Useful reasons include:
I do not reroll repeatedly in search of a theoretical perfect item.
I recycle it when:
I keep it when the next confirmed Evolution can realistically make it useful.
I stop changing the layout when:
A stable Build is allowed to remain imperfect.
The rooms are procedural, so I use a decision rule rather than a fixed path.
I explore when:
I turn back for known value:
I stop exploring when:
The rule I reuse across the game is:
Known value is worth backtracking for; hypothetical value is not.
The Skin is where I learn the current body.
I focus on:
I do not expect the final Build here.
I only need a foundation that reaches the Intestines without losing every defensive resource.
The Intestines begin punishing one-direction Builds.
Enemies can reach the side or rear while ranged attacks continue from ahead.
This is where I add:
A second frontal gun is not always the correct answer.
The Stomach is the first major route, environment, and boss check.
It introduces:
Difficulty Customization includes an option that disables the closing Stomach death zone while leaving the enemies, acid, and boss intact.
I use that setting when the timer prevents me from learning the organ itself.
Use the Stomach Guide for acid timing, procedural routing, shop-return decisions, Pathogen advice, and both boss forms.
The Liver tests whether the Build can keep scaling without becoming unreadable.
By this point, I stop adding unrelated weapons.
I improve:
The Build should become clearer as the run continues, not more complicated.
The Lungs make movement impossible to ignore.
Airflow can push the body, change the firing lane, and trap a wide form.
I watch the flow before spending all my Stamina fighting against it.
Before leaving, I collect known rewards that still matter.
The Heart circulation route becomes one-way.
The Heart ends with the Atrioventricular Node.
The fight combines:
I enter with:
Use the Heart Boss Guide for named pattern descriptions, limb priority, phase-two movement, Pathogen advice, and Antibiotics adjustments.
Nanobot requires:
At least 8 Armor held at the same time
Armor already lost to damage no longer counts toward the current total.
The unlock does not require defeating the Heart.
Use the Nanobot Unlock Guide for:
The first normal Heart victory is not the end of account progression.
It can open or advance:
I do not begin Antibiotics merely because one Heart clear succeeded.
I first want a repeatable normal clear where:
I then combine later Antibiotics clears with unfinished Pathogen-specific Heart achievements wherever possible.
Experiments are not simply stronger versions of a normal route.
They may change:
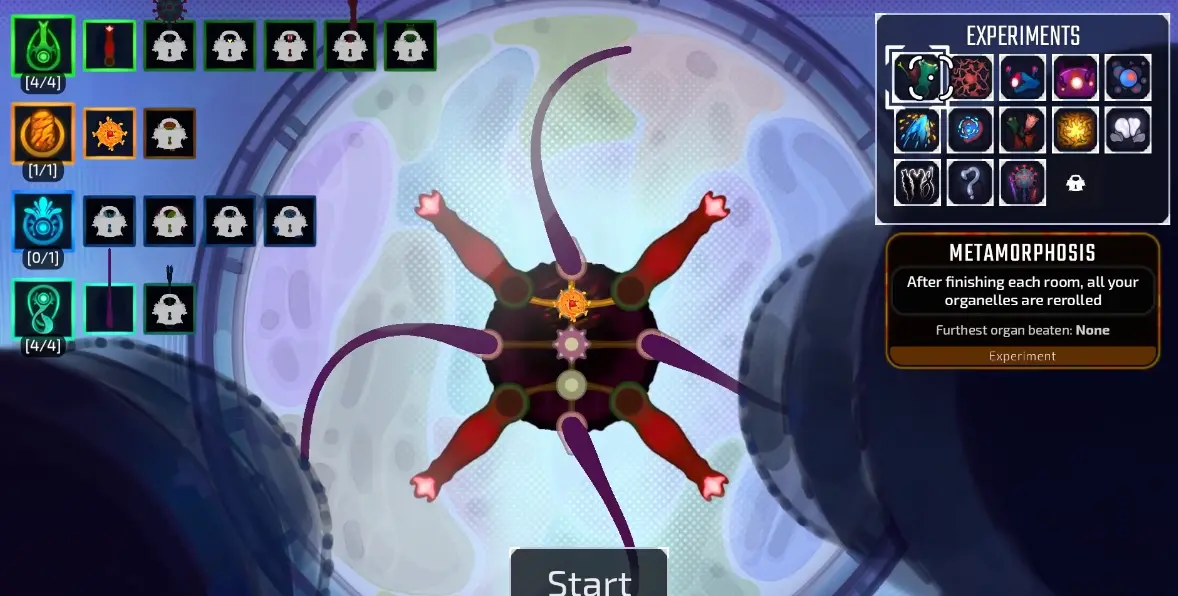
One visible Experiment setup added:
Other rules included Lights Out, Weapons Only, random starting Builds, and modified active-Organelle charging.
The Achievements Guide organizes all 15 Experiment achievements alongside organ bosses, loadouts, Antibiotics, and the Brain.
Before entering any major boss, I ask:
When one answer is no, I look for the nearest short route that can fix it.
When every answer is yes, I stop shopping and enter.
More Organelles made the layout harder to understand without fixing its weak direction.
The new slots were useful, but the wider form could not reverse quickly enough.
The Build already cleared rooms. It needed enough Health to survive another mistake.
Powerful active effects remained empty because the Build could not perform the required action.
A higher damage number did not compensate for unfamiliar controls and firing directions.
A short nearby branch often contained the Health, movement, or connection the Build still needed.
The final unknown room sometimes consumed more Health than its reward could replace.
For the first clear:
After the first clear:
No. The setting removes the closing-zone pressure, but corrosive acid, ordinary enemies, room hazards, and the Ossified Macrophage still remain.
No. Nanobot unlocks as soon as the current run holds at least eight Armor. Once the notification appears, the unlock remains saved even if the later Heart attempt fails.
No. A normal Heart clear can open Endless Mode and Antibiotics progression, but the route beyond the Heart remains closed until additional account progression is completed.